Table of Contents
Advertisement
Advertisement
Table of Contents

Related Manuals for Zanussi ZOB K 91


Summary of Contents for Zanussi ZOB K 91
- Page 1 Built-in ovens ZOB K 91 ZOB K 92 ZOB K 93 Instruction booklet...
-
Page 2: Table Of Contents
Contents Russian Guide to Use the instructions Description of the appliance Control Panel When the oven is first installed Programming the Oven Hints and tips for using the oven Cooking Tables Cleaning and Maintenance What happens if something goes wrong 21 Service and Spare Parts Technical Data Instructions for the installer... -
Page 3: Russian
Russian Warnings - Built-in ovens It is most important that the instruction book should be retained with the appliance for future reference. Should the appliance be sold or transferred to another owner, or should you move house and leave the appliance, always ensure that the book is supplied with the appliance in order that the new owner can be acquainted with the functioning of the appliance and the relevant warnings. -
Page 4: Guide To Use The Instructions
Technical assistance This appliance should be serviced by an authorized Network Service Centre, and only genuine spare parts should be used. Under no circumstances should you attempt to repair the appliance yourself. Repairs carried out by inexperienced persons may cause injury or serious malfunctioning. -
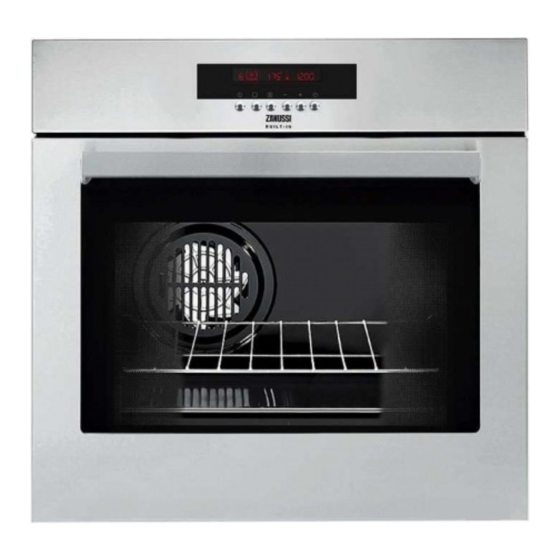
Page 5: Description Of The Appliance
Description of the appliance 1. Control Panel 2. Grill 3. Oven lamp 4. Rating plate... -
Page 6: Control Panel
Control Panel Cooking Temperature Time function display display Push buttons 1. ON / OFF 2. Oven Function Control 3. Fast Heat Up Function 4. Decreasing Control “ “ (Time or Temperature) 5. Increasing Control “ “ (Time or Temperature) 6. Minute minder / Cooking duration function / End of cooking function Special functions All the oven functions are controlled by an electronic programmer. -
Page 7: When The Oven Is First Installed
When the oven is first installed When the oven is first connected to the electrical supply, the display will automatically show 12:00 and the symbol will flash. IEnsure the correct time of day is set before using the oven. To set the correct time of day : Fig. - Page 8 "On/Off" Push Button The oven must be switched on before setting any cooking function or programme. When button is pressed, the oven symbol will come on the display, and the oven light will switch on. To switch off the oven, you can press button at any time.
- Page 9 Here below is a list of the function symbols and their meaning. Fan cooking - This setting allows Top heating element - The heat you to roast or roast and bake comes from the top of the oven only, simultaneously using any shelf, to allow you to finish your dishes.
-
Page 10: Programming The Oven
Programming the Oven How to set the minute minder 1) Press button to select the Minute Minder function (Fig. 8). The relevant symbol will flash and the control panel will display "0.00". 2) Press button “ “ to select the required Fig. - Page 11 To programme the Oven t o switch off 1) Place food in the oven, switch on the oven, select a cooking function and Fig. 11 adjust the cooking temperature, if required (Fig. 11). 2) Press button to select the "Cooking Duration"...
- Page 12 To programme the Oven to switch on and off 1) Carry out the "Cooking Duration" setting as described in the relevant chapter. 2) Press button until the "End of Cooking" function will be selected and the relevant symbol will flash. The control panel will display the end of cooking time (that is, the actual time + cooking duration time - Fig.
-
Page 13: Residual Heat Function
Residual Heat Function When a Cooking Duration time is set, the oven will automatically switch off a few minutes before the end of the programmed time, and use the residual heat to finish your dishes without energy consumption. All current settings will be displayed until the Cooking Duration time is over. -
Page 14: Demo Mode
Demo mode 3) Set the temperature by pressing button “ “ or “ “. The temperature will appear This mode is intended to be used at the on the display. shops to demonstrate the oven functionality without any power consumption except the 4) Press button . -
Page 15: Hints And Tips For Using The Oven
Hints and tips for using the oven Always cook with the oven door three tins of biscuits and mini pizzas to be closed. eaten immediately or subsequently deep frozen. The oven is supplied with an exclusive system Naturally the oven can also be used for which produces a natural circulation of air cooking on just one shelf. -
Page 16: Cooking Times
Defrosting whether meat is done or not is to press it with a spoon; if the meat does not yield under this The oven fan operates without heat and pressure it means that it is done to a turn. In circulates the air, at room temperature, the case of roast beef and fillet steaks, the inside the oven. -
Page 17: Cooking Tables
Cooking Tables Traditional cooking and fan ducted cooking Traditional Cooking Fan Oven Cooking time TYPE OF DISH NOTES Level Level temp. temp. °C °C minutes CAKES Whipped up kneading 2 (1 and 3)* 45 ~ 60 In cake mould Shortbread dough 2 (1 and 3)* 20 ~ 30 In cake mould... -
Page 18: Cooking Time
Grilling (**) Cooking time Grilling Quantity (minutes) TYPE OF DISH Lower Upper Pieces Weight °C temp. Level side side Fillet steaks 12 ~ 15 12 ~ 14 Beef-steaks 10 ~ 12 6 ~ 8 Sausages — 12 ~ 15 10 ~ 12 Pork chops 12 ~ 16 12 ~ 14... -
Page 19: Cleaning And Maintenance
Cleaning and Maintenance Oven door cleaning Before any cleaning switch the oven off and let it cool down. This For a better cleansing of the oven door, you appliance cannot be cleaned with are suggested to remove it from the steam or with a steam cleaning appliance with the following procedure: machine. -
Page 20: Replacing The Oven Light
Models in stainless steel or aluminium: We recommend to clean the oven door using only a wet sponge and dry it up after cleaning with a soft cloth. Never use steel wool, acids or abrasive products as they can damage the oven surface. -
Page 21: What Happens If Something Goes Wrong
What happens if something goes wrong If the appliance is not working correctly, please carry out the following checks, before contacting your local Service Centre. SYMPTOM SOLUTION The oven does not come on Check the oven is in manual operation and that both a cooking function and a temperatu- re have been selected Check the appliance is wired in properly, and... -
Page 22: Service And Spare Parts
Service and Spare Parts If after the checks listed in the previous chapter, the appliance still does not work correctly, contact your local Service Centre, specifying type malfunctioning, the appliance model (Mod.), the product number (Prod. No.) and the serial number (Ser. No.) marked on the identification plate. -
Page 23: Technical Data
Technical Data Heating elements ratings Dimension of the oven recess Bottom heating element 1000 W Height 593 mm Top heating element 800 W Width 560 mm Full Oven (Top+Bottom) 1800 W Depth 550 mm Grill heating elements simple 1650 W Dimensions of the oven double 2450 W cavity... -
Page 24: Instructions For The Installer
Instructions for the installer The instructions given below are by the switch and it should be 2-3 cm. longer designed specifically for a than the other cables. The supply cable must qualified installer and should aid in all cases be laid out in such a way as to him or her to perform all ensure that it does not reach at any given installation, adjustment, and... -
Page 25: Building-In
Building-in To ensure correct operation of the built-in assembly, the kitchen cabinet and the recess for the built-in appliance must have suitable dimensions. When the appliance is fitted-in, there must be no open spaces left and it must be closed on all sides by the kitchen furniture to prevent the possibility of inadvertently touching “live”... - Page 26 ZOBK91-ZOBK92 ZOBK93 0,79 kWh 0,78 kWh 53,0 43 min. 41 min. 1130 cm²...
- Page 28 From the Electrolux Group. The world’s No.1 choice. The Electrolux Group is the world’s largest producer of powered appliances for kitchen, cleaning and outdoor use. More than 55 million Electrolux Group products (such as refrigerators, cookers, washing machines, vacuum cleaners, chain saws and lawn mowers) are sold each year to a value of approx.
Need help?
Do you have a question about the ZOB K 91 and is the answer not in the manual?
Questions and answers