Table of Contents

Related Manuals for Sharp CD-DV650W


Summary of Contents for Sharp CD-DV650W
- Page 1 CD-DV650W DVD MINI SYSTEM MINI-CHAÎNE DVD CADENA MINI CON DVD MINI SISTEMA DVD MODEL CD-DV850W MODELE MODELO MODELO CD-DV650W CD-DV850W OPERATION MANUAL MODE D’EMPLOI MANUAL DE MANEJO MANUAL DE OPERAÇÃO NTSC/PAL SHARP CORPORATION...
-
Page 2: Special Notes
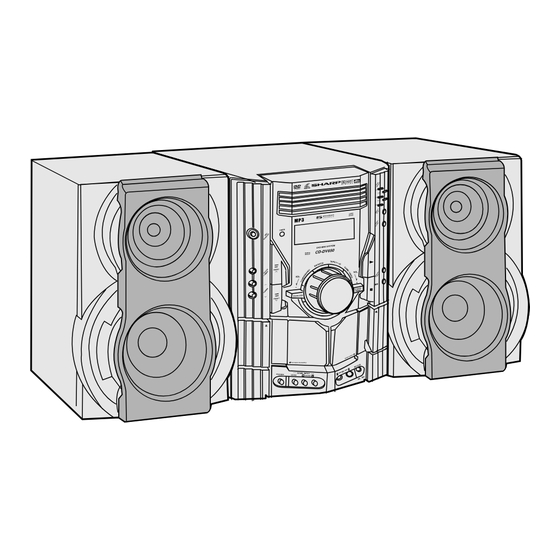
ENGLISH CD-DV650W CD-DV850W Special notes ENGLISH WARNINGS: Copyright Information: I When the ON/STAND-BY button is set at STAND-BY position, I Unauthorised copying, broadcast, public display, transmission, mains voltage is still present inside the unit. When the ON/STAND- public performance and rental (regardless of whether or not... - Page 3 Thank you for purchasing this SHARP product. Please confirm that the following accessories are included. To obtain the best performance from this product, please read this manual carefully. It will guide you in operating your SHARP product. CD-DV650W DVD Mini System consisting of CD-DV650W (Main Unit) and CP-DV650 (Speaker System).
-
Page 4: Table Of Contents
Contents CD-DV650W CD-DV850W ENGLISH General Information Disc Playback Page Page Precautions ................4 Video CD ................41 Controls and indicators ........... 5 - 9 Preparation for video CD playback ........41 Video CD playback ............42 - 43 Preparation for Use CD playback .............. -
Page 5: Precautions
SHARP will not be held responsible for any damage 10 cm (4") 10 cm (4") resulting from use of this unit with a voltage other than that which is 10 cm (4") -
Page 6: Controls And Indicators
Controls and indicators CD-DV650W CD-DV850W ENGLISH Front panel Reference page 1. Disc Trays ................20, 42, 44 2. Timer Set Indicator ................63 3. On/Stand-by Button ..............15, 16 4. DVD Chapter Skip/DVD/Video CD/CD/MP3/WMA Track Up or Fast Forward, Tape 2 Fast Forward, Tuner Preset Up, Time Up Button ............ - Page 7 CD-DV650W CD-DV850W ENGLISH Display 1. Disc Number Indicators 2. DVD/Video CD/CD/MP3/WMA Play Indicator 3. DVD/Video CD/CD/MP3/WMA Pause Indicator 4. DVD/Video CD/CD/MP3/WMA Repeat Indicator 5. DVD Indicator 6. VCD Indicator 7. CD Indicator 8. MP3 Indicator 9. Extra Bass Indicator 10. Memory Indicator 11.
-
Page 8: Speaker System
Controls and indicators (continued) CD-DV650W CD-DV850W ENGLISH Rear panel Reference page 1. Audio Digital Output Socket .............. 67 2. S-Video Output Socket ............... 12 3. Component Video Out Sockets ............13 4. AC Voltage Selector ................13 5. Cooling Fan 6. - Page 9 Controls and indicators (continued) CD-DV650W CD-DV850W ENGLISH Remote control Reference page 1. Remote Control Transmitter ..............15 2. Disc Number Select Buttons ............. 20, 31, 42 3. DVD Top Menu Button ................ 40 4. Clock/Timer Button ................. 17, 62 5. Direct Search Buttons ..............47, 48 6.
- Page 10 Controls and indicators (continued) CD-DV650W CD-DV850W ENGLISH Remote control with shift button Reference page 1. Karaoke Button ................50, 51 2. DVD Setup Button ................. 21, 24 3. DVD Sound Button ................35 4. DVD Picture Button ................37 5. DVD/Video CD/CD A-B Repeat Button ..........38...
-
Page 11: System Connections
System connections CD-DV650W CD-DV850W ENGLISH AM loop aerial FM aerial Right speaker Left speaker To a wall socket (See page 13) Black E-10... - Page 12 System connections (continued) CD-DV650W CD-DV850W ENGLISH Speaker connection Aerial connection Supplied FM aerial: FRONT SPEAKERS: Connect the black wire to the minus (-) terminal, and the red wire to Connect the FM aerial wire to the FM 75 OHMS terminal and position the FM aerial wire in the direction where the strongest signal can be the plus (+) terminal.
- Page 13 CD-DV650W CD-DV850W ENGLISH Placing the speaker system TV/monitor connection If the TV/monitor has a video input, connect it to the VIDEO OUT To left and right speakers have individual shapes. For best socket on the rear of the unit. performance, place the speakers according to the diagram below.
-
Page 14: Main Unit
System connections (continued) CD-DV650W CD-DV850W ENGLISH Connecting a TV with Component video cable To Component video input socket Main Unit BLUE Setting the AC voltage selector Check the setting of the AC voltage selector located on the rear panel GREEN Component before plugging the unit into a wall socket. - Page 15 System connections (continued) CD-DV650W CD-DV850W ENGLISH Setting the FM/AM span selector Demonstration mode The first time the unit is plugged in, the unit will enter the demonstration mode. You will see words scroll. X-BASS X-BASS /DEMO /DEMO To cancel the demonstration mode: When the unit is in the power stand-by mode (demonstration mode), press the X-BASS/DEMO button.
-
Page 16: Remote Control
Remote control CD-DV650W CD-DV850W ENGLISH Notes concerning use: Battery installation I Replace the batteries if the operating distance is reduced or if the 1 Open the battery cover. operation becomes erratic. Purchase 2 “AA” size batteries (UM/ 2 Insert the batteries according to the direction indicated in the SUM-3, R6, HP-7 or similar). -
Page 17: General Control
General control CD-DV650W CD-DV850W ENGLISH Bass Control (X-BASS) When the power is first turned on, the unit will enter the extra bass mode which emphasises the bass frequencies, and “X-BASS” will appear. To cancel the extra bass mode, press the X-BASS/DEMO (X-BASS) button. -
Page 18: Setting The Clock
Setting the clock CD-DV650W CD-DV850W ENGLISH Press the 5 3 or 2 4 button to adjust the hour and then press the MEMORY/SET button. Press the 5 3 or 2 4 button once to advance the time DVD MINI SYSTEM CD-DV650 by 1 hour. -
Page 19: Types Of Playable Discs
Types of playable discs CD-DV650W CD-DV850W ENGLISH The unit can play back discs bearing any of the following marks: Note 2: The specific playback functionality for some DVD discs is determined DVD Video DVD-R Audio CD CD-R/CD-RW DVD-RW by the disc manufacturer. Because this system plays disc data in accordance with the disc manufacturer’s guidelines, some functions... - Page 20 Types of playable discs (continued) CD-DV650W CD-DV850W ENGLISH MP3/WMA/JPEG format on CD-R/CD-RW Icons used on DVD discs An MP3 file is an audio data compressed in MPEG 1 audio layer 3 format. Sample Icons MP3 files have the extension “.mp3”. (Files with the extension “.mp3” may 1.
-
Page 21: Preparing To Watch A Dvd (Dvds)
Preparing to watch a DVD (DVDs) CD-DV650W CD-DV850W ENGLISH To watch DVD video images on the TV: 1 Turn on the TV. 2 Set the TV to “AV”, “VIDEO”, etc. 3 Turn on the unit and start play. See page 31 for playing disc. -
Page 22: Tv Output Setting
TV output setting CD-DV650W CD-DV850W ENGLISH Used to specify the colour system in accordance with the TV connected when playing back an NTSC disc. Whilst a disc is stopped, press the SET UP button whilst pressing down the SHIFT button to display the setup screen. - Page 23 CD-DV650W CD-DV850W ENGLISH The following describes how to select the DVD playback display Whilst a disc is stopped, press the SET UP button whilst format. pressing down the SHIFT button to display the setup screen. A. Viewing on a wide screen TV screen (16:9): Use the cursor 3 or 4 button to select the “Display”.
- Page 24 TV output setting (continued) CD-DV650W CD-DV850W ENGLISH Changing the TV scan mode Changing the video output setting Whilst a disc is stopped, press the SET UP button Whilst a disc is stopped, press the SET UP button whilst pressing down the SHIFT button to display the whilst pressing down the SHIFT button to display the setup screen.
-
Page 25: Parental Setting
Parental setting CD-DV650W CD-DV850W ENGLISH Parental level Certain discs come preset with country codes and parental level settings that are defined for particular countries. Discs equipped with the parental lock function are rated according to their content. The rated content allowed by a parental lock level and the way a DVD can be controlled may vary from disc to disc. -
Page 26: Audio Setting
Audio setting Parental setting (continued) CD-DV650W CD-DV850W ENGLISH Changing the parental level Whilst a disc is stopped, press the SET UP button whilst pressing down the SHIFT button to display the setup screen. Use the cursor 3 or 4 button to select the “... -
Page 27: Disc Language Setting
Disc language setting CD-DV650W CD-DV850W ENGLISH Use this setting for selecting languages of subtitle, audio and disc menu. Selecting a language from others I Note that the language you select is not displayed or does not sound if it is not recorded on the disc you are playing. -
Page 28: Disc Language Setting
Disc language setting (continued) CD-DV650W CD-DV850W ENGLISH Language code list for disc language Code Language name Code Code Language name Code Language name Code Code Language name Code Code 8377 Samoan 7165 Irish 7686 Latvian, Lettish 6565 Afar 8378 Shona... -
Page 29: Changing The Display Mode
Changing the display mode CD-DV650W CD-DV850W ENGLISH To change the display mode DVD mode operation indicators The following are examples of display indicators that appear during DVD Press the ON SCREEN button on the remote control. playback. Each press of the ON SCREEN button cycles through the display... -
Page 30: Changing The Initial Setting Of Dvd
Changing the initial setting of DVD CD-DV650W CD-DV850W ENGLISH 1. Whilst a disc is stopped, press the SET UP button whilst pressing down the SHIFT button to display the setup screen. 2. Use the cursor 3 or 4 button to select the following Menu. - Page 31 CD-DV650W CD-DV850W ENGLISH Selectable parameters Description Setting (* indicates initial settings) S-3D Sound A 3D sound can be set when playing a DVD recorded in Dolby Digital (multi channel) Off* only. S S S Adjust to a suitable level. High Note: This function invalid when playing a Video CD/MP3/WMA/CD-DA disc.
-
Page 32: Playing A Dvd (Dvds)
Playing a DVD (DVDs) CD-DV650W CD-DV850W ENGLISH To play a disc Press the ON/STAND-BY button to turn the power on. Press the DVD/CD button to display the startup screen shown. DVD MINI SYSTEM CD-DV650 Load the disc(s) you want to play. -
Page 33: Other Disc Play Features
Other disc play features CD-DV650W CD-DV850W ENGLISH This section explains how to use skip, resume, slow motion, and other To resume playback after stopping playback features. Whilst the disc is playing, press the H button at the point Chapter skip you want to stop. -
Page 34: Other Disc Play Features
Other disc play features (continued) CD-DV650W CD-DV850W ENGLISH Still (Pause) and frame advance Whilst a disc is playing, press the STILL 60 button. I This freezes the image on the screen. I Each press of the STILL 60 button advances the frame in the still mode. -
Page 35: Using The Function Control
Using the function control CD-DV650W CD-DV850W ENGLISH Direct title skip Example: Selecting title 5 Press the DIRECT button to TITLE SEARCH ___ select TITLE SEARCH. Use the 0 - 9 buttons to select TITLE SEARCH 05 the title number to which you want to skip. - Page 36 Using the function control (continued) CD-DV650W CD-DV850W ENGLISH Direct time skip STEP: 1) Angle setting can be changed by pressing ANGLE button on the remote control. Press the DIRECT button three TIME SEARCH __ : __ : __ - Function control will appear on screen.
- Page 37 CD-DV650W CD-DV850W ENGLISH Gamma setting Gamma is an image quality enhancement function that gives a richer image by brightening the darker and more obscure portions of the image without altering the brightness of the brighter portions, thereby making the entire image easier to see.
- Page 38 Using the function control (continued) CD-DV650W CD-DV850W ENGLISH Picture Mode setting To zoom an image Use the following procedure to change the picture mode to bright, Whilst a disc is playing, press the ZOOM button. mild, monochrome and standard. ZOOM indicator...
-
Page 39: Repeat Playback
Repeat playback CD-DV650W CD-DV850W ENGLISH Title repeat Example: To repeat the title you are currently viewing Play the title you want to repeat. Press the button twice to Title repeat the title. To cancel repeat play, press the button again. -
Page 40: Programme Playback
Programme playback CD-DV650W CD-DV850W ENGLISH Notes: Chapter programmed playback I Direct search button [1] to [0] can be used to select the title and You can choose up to 32 favourite chapters for playback in the order chapter. you like using this function. (Title cannot be programmed) I Disc without title or chapter registered cannot be programmed. -
Page 41: Selecting Titles From The Menu
Setting parameters using the Selecting titles from the menu CD-DV650W CD-DV850W disc menu ENGLISH Some DVDs have a title menu that you use to select the title you want to play. Some DVDs include a disc menu that you can use to select subtitle set, audio channel, and DTS or MPEG audio. -
Page 42: Video Cd
Video CD Preparation for video CD playback CD-DV650W CD-DV850W ENGLISH Any CD that contains motion pictures can be played. Selecting the video output format You can enjoy motion pictures with the sound quality of MDs and the Video CD is recorded in PAL or NTSC format. -
Page 43: Video Cd Playback
Video CD playback CD-DV650W CD-DV850W ENGLISH Playback control: Video CDs that support “Playback control” can display still pictures. This function can be used with video CD software (video CDs with playback control) that have a playback method recorded on them. You can select items you want to watch from the menu displayed on the TV screen, or you can show still pictures. - Page 44 Video CD playback (continued) CD-DV650W CD-DV850W ENGLISH To interrupt playback: Caution: Press the 6 / STILL 60 button on the remote control. I Do not place two discs in one disc tray. To resume playback from the same point, press the 0 button.
-
Page 45: Cd Playback
CD playback CD-DV650W CD-DV850W ENGLISH This system can also play audio CD-R and CD-RW discs, but cannot CD playback record. Some audio CD-R and CD-RW discs may not be playable due to the Press the ON/STAND-BY button to turn the power on. - Page 46 CD playback (continued)Playback (continued) CD-DV650W CD-DV850W ENGLISH To locate the beginning of a track I Playback will begin from track 1 on the DISC 1. After that disc finishes playing, the next disc will automatically play. To move to the beginning of the next track: I After the last track on the fifth disc is played, the CD player stops Press the 2 4 PRESET W button for less than 1.5 seconds...
- Page 47 CD Playback (continued) CD-DV650W CD-DV850W ENGLISH I In random play, the CD player will select and play tracks automatically. (You cannot select the order of the tracks.) I The DVD, MP3 and WMA disc will be skipped and random playback will be disabled.
-
Page 48: Cd Playback
CD playback (continued) CD-DV650W CD-DV850W ENGLISH Programmed play Repeat steps 2 - 3 for other tracks. Up to 32 tracks can be By specifying discs from 1 to 5, and tracks from 1 to 99, you can programmed. choose up to 32 selections for playback in the order you like. -
Page 49: Mp3/Wma And Jpeg Disc
MP3/WMA and JPEG disc CD-DV650W CD-DV850W ENGLISH Notes: Direct search of the track MP3/WMA and JPEG I Due to the structure of its disc information, it takes longer to read By using the direct search buttons, the desired tracks can be played. - Page 50 MP3/WMA and JPEG disc (continued) CD-DV650W CD-DV850W ENGLISH Notes: To skip during playback I Sometimes, the system does not follow the arrangement of the song as per recorded on that specific MP3/WMA, JPEG disc. During playback, press 5 button to go to previous file, I It can detect up to 8 layers of folder in an MP3 disc.
-
Page 51: Playing Karaoke
Playing karaoke CD-DV650W CD-DV850W ENGLISH You can enjoy karaoke to DVDs, video CDs, CDs, MP3 Discs, radio, Set the MIC LEVEL control to MIN to protect the speakers from cassettes, and other external devices by connecting a separately shock noise and to avoid disturbing noises. -
Page 52: Playing Karaoke
Playing karaoke (continued) CD-DV650W CD-DV850W ENGLISH Notes: To change the audio mode/Bi-LANGUAGE I Use discs recorded in stereo. The function will not work with mono setting sources. Sound of the playback source can be switched among the STEREO, I With some discs and tapes the original vocals may still be heard. -
Page 53: Listening To The Radio
Listening to the radio CD-DV650W CD-DV850W ENGLISH Tuning Press the ON/STAND-BY button to turn the power on. Press the TUNER (BAND) button repeatedly to select the desired frequency band (FM or AM). Press the TUNING (X or W) button to tune in to the desired station. -
Page 54: Radio
Listening to the radio (continued) CD-DV650W CD-DV850W ENGLISH Memorising a station To scan the preset stations The stations saved in memory can be scanned automatically. (Preset You can store 40 AM and FM stations in memory and recall them at memory scan) the push of a button. -
Page 55: Tape Playback
Listening to a cassette tape (TAPE 1) CD-DV650W CD-DV850W ENGLISH Before playback: Tape playback I For playback, use normal or low-noise tapes for the best sound. (Metal or CrO tapes are not Press the ON/STAND-BY button to turn the power on. -
Page 56: Listening To A Cassette Tape (Tape 2)
Listening to a cassette tape (TAPE 2) CD-DV650W CD-DV850W ENGLISH Load a cassette into the TAPE 2 cassette compartment with side A facing you. DVD MINI SYSTEM CD-DV650 TAPE 2 Press the 0 button to start playback. To stop playback: MIC LEVEL Press the H (H) button. -
Page 57: Recording To A Cassette Tape
Side A Press in the stop I SHARP is not liable for damage or loss of your recording arising playback mode. from malfunction of this unit. I The volume and sound controls can be adjusted with no effect on the recorded signal (Variable Sound Monitor). - Page 58 Recording to a cassette tape (continued) CD-DV650W CD-DV850W ENGLISH Recording from a DVD (DVDs) Press the ON/STAND-BY button to turn the power on. Load a cassette into the TAPE 2 cassette compartment with the side A facing you. Wind past the leader of the tape, on which recording cannot be performed.
- Page 59 CD-DV650W CD-DV850W ENGLISH Recording from MP3/WMA disc You can record 5 CDs continuously. Press the ON/STAND-BY button to turn the power on. Load a cassette into the TAPE 2 cassette compartment with the side A facing you. Wind past the leader of the tape, on which recording cannot be performed.
- Page 60 Recording to a cassette tape (continued) CD-DV650W CD-DV850W ENGLISH Recording from a CD (CDs) You can record the desired CD using the DIRECT PLAY button. Press the ON/STAND-BY button to turn the power on. Press the DVD/CD button. Load a cassette into the TAPE 2 cassette compartment with the side A facing you.
- Page 61 CD-DV650W CD-DV850W ENGLISH Recording from several CDs continuously: Recording from the radio 1. Perform steps 1 - 6 in “Recording from a CD (CDs)” on page 59. 2. Within 5 seconds, press the 0 button to start recording. Tune in to the desired station. (See page 52.)
- Page 62 Recording to a cassette tape (continued) CD-DV650W CD-DV850W ENGLISH Dubbing from tape to tape Erasing recorded tapes 1. Load the tape to be erased into the TAPE 2 cassette compartment You can record from TAPE 1 to TAPE 2. with the side to be erased facing towards you.
-
Page 63: Timer And Sleep Operation
Timer and sleep operation CD-DV650W CD-DV850W ENGLISH Timer playback: The unit turns on and plays the desired source (DVD, CD, tuner, tape) at the preset time. Timer recording: The unit turns on and starts recording from the tuner at the preset... - Page 64 Timer and sleep operation (continued) CD-DV650W CD-DV850W ENGLISH Within 10 seconds, press the 5 3 or 2 4 button to Set the time to finish as in steps 6 and 7 above. select “ONCE SET” or “DAILY SET”, and press the MEMORY/ Switch input with the 5 3 or 2 4 button, and then SET (MEMORY) button.
- Page 65 Timer and sleep operation (continued) CD-DV650W CD-DV850W ENGLISH Checking the timer setting in the timer stand-by mode: When the preset time is reached, playback or recording will 1. Press the CLOCK/TIMER button. start. 2. Within 10 seconds, press the 5 3 or 2 4 button to select In the timer playback mode, the volume will increase gradually “ONCE”...
- Page 66 Timer and sleep operation (continued) CD-DV650W CD-DV850W ENGLISH To cancel the sleep operation: Sleep operation Press the ON/STAND-BY button whilst “SLEEP” is indicated. The radio, compact disc and cassette tape can all be turned off To cancel the sleep operation without setting the system to the stand- automatically.
-
Page 67: Enhancing Your System
Enhancing your system CD-DV650W CD-DV850W ENGLISH Listening to playback sounds of Game, VCR, The connection lead is not included. Purchase a commercially available lead as shown below. DVD, etc. Connect a video game system, VCR, DVD, etc. to the front GAME INPUT (VIDEO, AUDIO L and R) sockets. - Page 68 Enhancing your system (continued) CD-DV650W CD-DV850W ENGLISH Leads required to connect external units When external units are connected, you need commercially available leads. MD recorder, DTS/MPEG audio Optical digital lead processor or amplifier (not supplied) To the digital input socket...
-
Page 69: Troubleshooting Chart
DVD/CD player a service technician. If something is wrong with this product, check the Symptom Possible cause following before calling your authorised SHARP dealer or service centre. ● Make sure the channel of the connected ● No image from the General TV is set to VIDEO or AV. - Page 70 Troubleshooting chart (continued) CD-DV650W CD-DV850W ENGLISH Cassette deck Before transporting the unit Remove all CDs from the unit. Make sure there is no CD in the disc Symptom Possible cause tray. Then, set the unit to the power stand-by mode. Carrying the unit ●...
-
Page 71: Maintenance
Specifications CD-DV650W CD-DV850W ENGLISH As part of our policy of continuous improvement, SHARP reserves Cleaning the tape-handling parts the right to make design and specification changes for product Dirty heads, capstans or pinch rollers can cause poor sound and improvement without prior notice. The performance specification tape jams. - Page 72 Specifications (continued) CD-DV650W CD-DV850W ENGLISH Amplifier (CD-DV850W) Cassette deck Frequency 50 - 14,000 Hz (normal tape) Output power Speakers: response MPO: 560 W (280 W + 280 W) (10 % T.H.D.) RMS: 300 W (150 W + 150 W) (10 % T.H.D.)
- Page 73 Specifications (continued) CD-DV650W CD-DV850W ENGLISH Speaker (CD-DV650W) Speaker (CD-DV850W) Type 2-way type speaker system Type 3-way type speaker system 5 cm (2") tweeter Supert Tweeter 13 cm (5-1/4") woofer 5 cm (2") tweeter 16 cm (6-5/16") woofer Maximum input 100 W...
- Page 74 DOWN...
Need help?
Do you have a question about the CD-DV650W and is the answer not in the manual?
Questions and answers