
Related Manuals for Siemens Gigaset SL910


Summary of Contents for Siemens Gigaset SL910
- Page 1 Congratulations By purchasing a Gigaset, you have chosen a brand that is fully committed to sustainability. This product’s packaging is eco-friendly! To learn more, visit www.gigaset.com.
-
Page 3: Table Of Contents
Contents Contents Safety precautions ............... . 2 Getting started . -
Page 4: Safety Precautions
Safety precautions Safety precautions Caution Read the safety precautions and the user guide before use. Explain their content and the potential hazards associated with using the device to your children. Use only the power adapter specified on the devices. Use only rechargeable batteries that correspond to the specification (see "Technical specifi- cations), as this could otherwise result in significant health risks and personal injury. -
Page 5: Getting Started
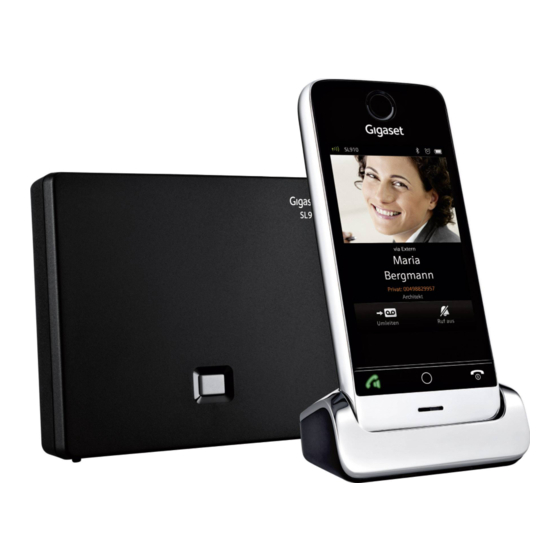
Getting started Getting started Checking the package contents One Gigaset SL910 base One power adapter for the base One phone cable (flattened) One Gigaset SL910H handset One battery cover (rear cover for the handset) One battery One charger One power adapter for the charger One poster, one user guide and one CD. -
Page 6: Power Supply
Getting started Connecting the base with the phone network and the mains power supply ¤ Insert the phone cable (cable slightly flattened) into the lower connection socket at the rear of the base. ¤ Insert the power cable for the power adapter into the upper connection socket at the rear of the base. -
Page 7: Connecting The Handset Charger
Getting started Connecting the handset charger ¤ Connect the flat plug to the power adapter ¤ Plug the power adapter into the plug socket If you have to remove the plug from the charger again: ¤ Disconnect the power adapter from the mains power supply. ¤... -
Page 8: Charging The Battery
Getting started ¤ First insert battery with the contact surface fac- ing down ¤ Then press the battery downwards until it clicks into place. ¤ First, align the protrusions on the side of the bat- tery cover with the notches on the inside of the casing. -
Page 9: Registering The Handset
Getting started Registering the handset Handsets contained in the package have already been registered to the base. If, however, a handset has not been registered (display "Handset not registered to any base"), please register it manually. You must initiate registration on the base and on the handset: ¤... - Page 10 Getting started ¤ Use the left-hand number wheel to select the cur- Time rent hour by touching the number wheel with a fin- Time ger and moving it upwards or downwards. The number wheel will follow your movements. ¤ Operate the right-hand number wheel in the same way to select the minutes.
- Page 11 Getting started ¤ ± Touch the icon next to the required Day Month Date Order Year/Month Day Year mode. ² ² The selected mode is marked with ¤ ‘ Day Month Year ± Keep touching the icon until the Welcome page Month Day Year appears.
- Page 12 Getting started A list of countries is displayed. Country ² The current country is marked with ¤ ± If necessary, as mentioned before, you must scroll China ± ± through the list to find your country. Touch the ² Costa Rica icon next to your country.
- Page 13 Getting started The Local Prefix is the country-specific local prefix that Area (Dial Code) precedes the Local Area Code, when the country code itself is not given. In England this is "0". The Local Area Code is then 20 for London, for example, or 161 for Manchester.
- Page 14 Getting started Once you have configured all the necessary settings, your handset switches to idle status. ¸ £ © 06:00 Ä Å Ä < > Thursday ˜ Â Call List Contacts Your phone is now ready for use. el en...
-
Page 15: What Would You Like To Do Next
Getting started What would you like to do next? After successfully setting up the phone, you can make calls straight away, customise your Gigaset according to your requirements or firstly familiarise yourself with the touch display £ Using the telephone, page 20). -
Page 16: Option Slider Icons
Option slider icons Option slider icons Many displays have an option slider at the bottom. This displaA31008-M2300-T101-1-8U43ys all the actions that you can apply in the current context. Icon Action Icon Action † Activate speaker mode Search † õ Skip settings (Speaker mode is activated) (orange) ü... -
Page 17: Setting Options
Setting options Setting options ¤ Briefly press the menu key v. ¤ Drag your finger horizontally across the display to switch to the Settings menu page. Main menu Submenu Additional setting options Settings Current setting â Date + Time Time Time Time Format 24 hrs... - Page 18 Setting options Main menu Submenu Additional setting options Settings Current setting Display + Screensaver Keypad Activation Selection Slideshow Analogue Clock Digital Clock 1 Digital Clock 2 (List of Screensavers images) Backlight In Charger Out of Charger Timeout 15 sec. / 30 sec. / 1 min. / 2 min. Indication of New Messages LED + Display Info Keypad...
- Page 19 Setting options Main menu Submenu Additional setting options Settings Current setting Ê System Eco Mode Eco Mode Eco Mode+ Repeater Mode Security Check System PIN Resets Handset Reset Base Reset Clean-up List Appointments All Past Appointments Calls Missed Calls Accepted Calls Outgoing Calls Messages Text Messages...
- Page 20 Setting options Main menu Submenu Additional setting options Settings Current setting ä Select Automatic Recall Services Withhold Number Call Waiting Call Divert When Busy All Calls No Answer Divert to Call Protection Unknown Call Rejection Ringback Cancel « Telephony Auto Answer Listening In Access Code Calls from Call Lists...
- Page 21 This quick user guide only describes a small proportion of your telephone's functions. You will find an extensive description of all functions contained in the menu overview in the detailed user guide for your Gigaset SL910 both on the enclosed CD and on the Internet atwww.gigaset.com.
-
Page 22: Using The Telephone
Using the telephone Using the telephone Activating/deactivating the handset ¤ Press and hold the end call key a to deactivate the handset. You will hear a melody. ¤ Press and hold the end call key a again to reactivate the handset. Returning to idle status ¤... -
Page 23: Operating The Touchscreen
Operating the touchscreen Operating the touchscreen You operate the Gigaset SL910H handset mainly via the display. Icons, list entries, buttons and selection areas shown on the display are sensitive areas. You can set up and activate functions, enter or dial phone numbers and navigate between the various display screens (pages) by touching these areas and dragging them across the display. -
Page 24: Changing The Settings
Operating the touchscreen With a two-row option slider, the icon below the option slider indicates that further options are available. ¤ Touch to display a further option slider that conceals the original option slider. ¿ À Ý ‹ Speaker Mute Volume Accept Wait.Call Reject Wait.Call... -
Page 25: Entering Numbers And Text
Operating the touchscreen Selection fields If two or three alternative settings are available for one parameter, these alternatives are displayed in the form Forward alarm to of selection fields. The current setting appears in orange. Internal External ¤ To change it, briefly touch the selection field you require. -
Page 26: Making Calls
Making calls ¤ ° (touch repeatedly if necessary): Change character set/keyboard layout. The options are: - Latin (default) character set with QWERTZ keyboard layout (central Europe), QUERTY (American default) and AZERTY (French-speaking area) - Greek character set - Cyrillic character set Making calls Making an external call ¤... -
Page 27: Making Internal Calls
Making calls Making internal calls Internal calls to other handsets registered to the same base are free of charge. ¤ Touch [ ‡ Internal]. ¤ ¤ Open the dial page. If necessary, select the handset from the list or touch All Handsets (group call). Accepting a call ¤... - Page 28 Making calls Using provider-specific functions (network services) You have to request these services from your network provider (there may be additional charges). Network services fall into two distinct groups Network services that are activated outside of a call for the next call or all subsequent calls (e.g., "Divert calls to a different phone connection", "Withhold number (no calling line identi- fication").
-
Page 29: Directory
Directory Directory Managing directory entries Opening the directory ¤ Menu key v. [ œ Contacts] or ¤ ¤ Touch [ œ Contacts] on the dial page or during a call. Creatinga new entry New Entry ¤ ¤ ¤ Open directory. Touch [d New Entry]. - Page 30 Directory Transferring an entry/directory to another handset. The sending and receiving handsets must both be registered to the same base. The other handset and the base can send and receive directory entries. Transferring individual entries ¤ Touch [ = Copy]. ¤...
-
Page 31: Sms (Text Messages)
SMS (text messages) ¤ ¤ ü Delete entries: Touch [ Delete]. Touch all the entries to be deleted in sequence and then ü Delete]. Please note If you edit/delete the number in the directory, the QuickDial shortcut number will also be edited/deleted on the configurable page or from the QuickDial shortcuts. -
Page 32: Room Monitor
Room monitor Entering SMS service centres, specifying Active Send Centre The number for at least one SMS service centre must be saved in the device. SMS messages are received from every entered SMS service centre as long as they are registered with their service provider. -
Page 33: Calendar
Calendar Calendar You can remind yourself of up to 100 appointments. Birthdays saved in the directory are trans- ferred to the calendar. The current day is highlighted in the calendar. Days with appointments are marked with a coloured bar. Saving appointments to the calendar Prerequisite: the date and time have already been set. -
Page 34: Bluetooth Devices
Bluetooth devices ECO DECT – Reducing transmission power (radiation) On delivery, the device is set to maximum range. This guarantees optimised wireless manage- ment. You can reduce the transmission power further as follows: Shorten range (Eco Mode) – Reduces the transmission power by up to 80% ¤... -
Page 35: Customer Service & Assistance
Customer Service & Assistance Customer Service & Assistance You have questions? As a Gigaset customer, you can take advantage of our comprehensive ser- vice offerings. You can find help quickly in this User Manual and in the service pages of our Gigaset online portal. -
Page 36: Guarantee Certificate
Customer Service & Assistance Authorisation This device is intended for analogue phone lines in the Greek telephone net. Country-specific requirements have been taken into consideration. We, Gigaset Communications GmbH, declare that this device meets the essential requirements and other relevant regulations laid down in Directive 1999/5/EC. A copy of the Declaration of Conformity is available at this Internet address: www.gigaset.com/docs Please note... - Page 37 Customer Service & Assistance according to product liability law or in the event of intentional misconduct, severe negli- gence, personal injury, damage to parts of the human body or to personal health, or in case of violations of conventional obligations. However, the claims for damages related to viola- tion of conventional obligations shall be limited to predictable damages, representative of such conventions, as long as there is no intention or severe negligence, personal injury, dam- age to parts of the human body or to personal health, according to the product liability law.)
-
Page 38: Index
Index ..Index Changing device name (Bluetooth) ....Changing the settings Character set ......changing Cyrillic . - Page 39 Index Display lock ......automatic Key lock ....switching on/off .
- Page 40 Index ........Option slider Setting the display language .
Need help?
Do you have a question about the Gigaset SL910 and is the answer not in the manual?
Questions and answers