Table of Contents
Advertisement
Quick Links
Advertisement
Table of Contents

Subscribe to Our Youtube Channel
Related Manuals for Transcend SSD18C3


Summary of Contents for Transcend SSD18C3
- Page 1 User’s Manual USB 3.0 Portable Solid State Drive SSD18C3 (Version 1.0)
-
Page 2: Table Of Contents
Table of Contents Introduction..................1 Package Contents................1 Features....................2 System Requirements .................2 Safety Precautions ................3 General Use........................3 Backing up Data......................3 Transporting........................3 Power ..........................3 Reminders ........................4 Product Overview ................5 Connecting to a Computer..............6 One Touch Backup ................9 Turbo Mode ..................9 Disconnecting from a Computer ............10 ... -
Page 3: Introduction
*The SSD18C3 comes bundled with Backup Manager, which enables the SSD’s One Touch backup function and also includes a USB device driver that enhances file transfer speeds by up to 30%. A free download of Transcend’s JetFlash Elite data-management software is also included (www.transcend.com.tw/downloads). -
Page 4: Features
Warranty Card Features SuperSpeed USB 3.0 and USB 2.0 connection options Faster and more durable than USB 2.0 portable hard drives Shock/slip-resistant silicone outer shell Connection bandwidth up to 5Gbits per second Up to 30% quicker file transfers with optional driver installation Extra-large storage capacity Sleek ultra portable design USB powered –... -
Page 5: Safety Precautions
• or below 0℃. Do not drop your SSD18C3. • Do not allow your SSD18C3 to come in contact with water or any other liquids. • Do not use a damp/wet cloth to wipe or clean the exterior case. •... -
Page 6: Reminders
SSD18C3 Use only the USB 3.0 Y-cable that came with the SSD18C3 to connect it to a computer, • and always ensure that the cable you are using is in good condition. NEVER use a cable that is frayed or damaged. -
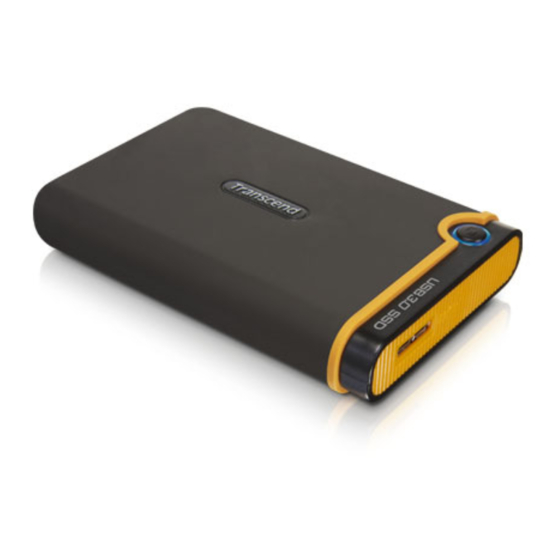
Page 7: Product Overview
Product Overview Micro USB 3.0 Port One Touch Auto-Backup Button... -
Page 8: Connecting To A Computer
Connecting to a Computer The SSD18C3 can be connected to your computer using either USB 2.0 or USB 3.0. To get the best performance results from your SSD, we recommend using the USB 3.0 interface (currently not supported on Mac computers). - Page 9 USB Cable into the correct port on your computer (USB 3.0 ports are usually color-coded to differentiate them from USB 2.0) Linux users may have to configure the SSD18C3 manually. To do this, first create a directory for the •...
- Page 10 Note: “New Volume” is an example drive. The drive name on your Mac computer may differ Once connected, you can use the SSD18C3 as an external hard drive to transfer data to and from your computer. Simply drag and drop files or folders onto the Local Disk, Volume, or...
-
Page 11: One Touch Backup
Manager software (To install, run the EXE file located in the root directory of your SSD). Once you have installed Backup Manager, you can use the SSD18C3’s One Touch auto-backup button to instantly backup and synchronize your data (see the Backup Manager Software User’s Manual for details). -
Page 12: Disconnecting From A Computer
WARNING! To prevent data loss, always use this procedure to remove the SSD ® from Windows ® Drag and drop the Disk icon that represents your SSD18C3 into the Trashcan. Then unplug your SSD18C3 from the USB port. -
Page 13: Linux
2. Unplug all other USB storage devices from your computer. This is to prevent accidental format of a different USB drive. 3. Open the “my computer” window, then right-click the drive that represents the SSD18C3 and choose “Format.” 4. Select “Quick Format” or change the volume label, if desired. -
Page 14: Mac ® Os
3. If a message windows like the one below appears, Click the “Initialize” button. If no message appears, open “Disk Utility” under “Applications > Utilities “ 4. In the Disk Utility window, choose your SSD18C3 from the list on the left. 5. Select the “Erase” tab. - Page 15 7. Input a name for your new drive (otherwise, your drive will be named “Untitled”) 8. Click the “Erase” button in the bottom right corner of the window 9. Click “Erase” again to confirm.
-
Page 16: Linux
10. Click the “Close” button to finish and exit. ® Linux 1. Plug the SSD18C3 into an available USB port on your Linux computer. 2. Unplug all other USB storage devices from your computer. This is to prevent accidental format of a different USB drive. -
Page 17: Troubleshooting
My operating system cannot detect the SSD18C3 Check the following: 1. Is your SSD18C3 properly connected to the USB port? If not, unplug it and plug it in again. If it is properly connected, try using another available USB port. - Page 18 2. Is the file larger than 4GB? If so, please see below: The SSD18C3 default file system is FAT32, which allows it to be recognized on most types of computers, game consoles and media playback devices. However, the FAT32 file system does not support large files that exceed 4GB in size.
-
Page 19: Specifications
Specifications Size (L x W x H) 98.7mm × 65.7mm × 17.45mm Weight Storage Media Nand Flash Power Supply 5V DC supplied from the USB port(s) USB 3.0: Up to 5Gb/s Connection Speed USB 2.0: Up to 480Mb/s 0℃ (32℉) to 70℃ (158℉) Operating Temperature Certificates CE, FCC, BSMI... -
Page 20: Three-Year Limited Warranty
Transcend Warranty Policy. Proof of the original purchase date is required for warranty service. Transcend will inspect the product and in its sole discretion repair or replace it with a refurbished product or functional equivalent. Under special circumstances, Transcend may refund or credit the current value of the product at the time the warranty claim is made.
Need help?
Do you have a question about the SSD18C3 and is the answer not in the manual?
Questions and answers