Table of Contents
Advertisement
Quick Links
Download this manual
See also:
User Manual
Advertisement
Table of Contents

Related Manuals for AirLive WH-9200AP


Summary of Contents for AirLive WH-9200AP
- Page 1 WH-9200AP Dual Radio Dual Band 108 Mbps Outdoor AP User’s Manual...
-
Page 2: Declaration Of Conformity
5F., NO.6, Lane 130, Min-Chuan Rd., Hsin-Tien City, Taipei County, Taiwan Declare that the product 802.11a/b/g Dual Radio Access Point AirLive WH-9200AP is in conformity with In accordance with 2004/108/ EEC-EMC Directive and 1999/5 EC-R & TTE Directive Clause Description Broadband Radio Access Network(BRAN);... - Page 3 Directiva 1999/5/CE. disposiciones aplicables o exigibles de la Directiva 1999/5/CE. ΜΕ ΤΗΝ ΠΑΡΟΥΣΑ OvisLink Corp. ΔΗΛΩΝΕΙ OvisLink Corp izjavlja, da je ta AirLive WH-9200AP v Ελληνική [Greek] ΟΤΙ AirLive WH-9200AP ΣΥΜΜΟΡΦΩΝΕΤΑΙ Slovensko skladu z bistvenimi zahtevami in ostalimi relevantnimi ΠΡΟΣ...
-
Page 4: Regulatory Information
OvisLink Corp. Windows ™ 95/98 and Windows ™ 2000 are trademarks of Microsoft ® Corp. Pentium is trademark of Intel. All copyright reserved. AirLive WH-9200AP User’s Manual... -
Page 5: Table Of Contents
Table of Contents 1. Introduction .......................... 5 1.1 Overview........................5 1.2 Installing WH-9200AP ....................6 1.2.1 Package Content ..................6 1.2.2 Hardware Presentation................7 1.2.3 Configuration Setups .................11 2. Operation Mode .........................13 2.0 Change Operation Mode ..................14 2.1 Dual AP Mode ......................15 2.3 Dual WDS Bridge Mode...................19... - Page 6 4.1 Change Password....................68 4.2 System Management Settings.................69 4.3 SNMP Settings ......................71 4.4 Firmware Upgrade ....................73 4.5 Configuration Save and Restore ................74 4.6 Factory Default .................錯誤! 尚未定義書籤。 4.7 Reboot System......................75 4.7 Reboot System......................75 4.8 WH-9200AP Emergency Recovery .................76 AirLive WH-9200AP User’s Manual...
-
Page 7: Introduction
The WH-9200AP is equipped with 2 high-powered Atheros radios. The radio 1 runs in the 11a 5GHz mode only while the radio 2 runs at the 11a/b/g dual band mode. AirLive adds high power amplifier to run the AP at 23dBm in 11a mode (200mW), that’s 4 times the output power of normal 11a radio (50mW). -
Page 8: Installing Wh-9200Ap
1.2 Installing WH-9200AP This section describes the installation procedure for the WH-9200AP. It starts with a summary of the content of the package you have purchased, followed by steps of how to power up and connect the WH-9200AP. Finally, this section explains how to configure a Windows PC to communicate with the WH-9200AP. -
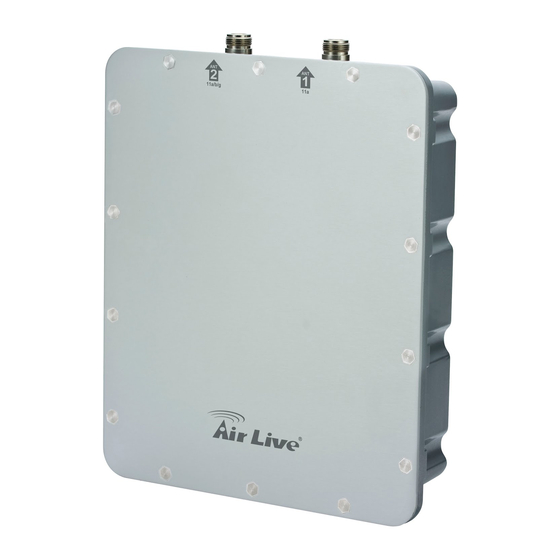
Page 9: Hardware Presentation
WLAN2 LED Green Best Signal: Steady On LAN port #1, compatible with 802.3af PoE. Become WLAN port POE/WAN when operate in Gateway mode Ground Pin Reference point for electric current Sluice Sluice out the water in device AirLive WH-9200AP User’s Manual... - Page 10 N-Type connector for outdoor antenna of Radio 1 N-Type connector for outdoor antenna of Radio 2 Antenna 2 Antenna 1 AirLive WH-9200AP User’s Manual...
- Page 11 Pole Mount/Wall mount Installation AirLive WH-9200AP User’s Manual...
- Page 12 Power Installation The following image shows the power installation of WH-9200AP. Note that WH-9200AP is IEEE802.3af compatible, you should use the packed POE kit or POE switch for power injection. AirLive WH-9200AP User’s Manual...
-
Page 13: Configuration Setups
1.2.3 Configuration Setups The factory default settings of WH-9200AP are as following: Settings Default Value Wireless1 Wireless2 Device Name WH-9200AP Radio 802.11a 802.11a SSID airlive1 airlive2 Channel 36 (auto in 802.11b/g) Disabled IP Address 192.168.1.1 DHCP Server Disabled. Available and default enabled when each of the wireless is configured as a gateway. - Page 14 Please make sure your computer IP is in the same subnet as the AP (i.e. 192.168.1.x). Please make sure your computer has wireless network adapter installed. Open the web browser and enter http://192.168.1.1/. 4. Connect Wireless Settings to start. AirLive WH-9200AP User’s Manual...
-
Page 15: Operation Mode
2. Operation Mode The WH-9200AP device provides all 14 modes of wireless operational applications with: AirLive WH-9200AP User’s Manual... -
Page 16: Change Operation Mode
2.0 Change Operation Mode WH-9200AP is default in Dual AP mode. If the mode had been changed, click the “Operation Mode” button to change back. To change operation Mode: 1. Click on “Operation Mode“ 2. Select Operation Mode in the main page 3. -
Page 17: Dual Ap Mode
2.1 Dual AP Mode In Dual AP mode, both wireless interface of WH-9200AP are set as AP and provide hotspot service on each interface. This Application provides wider coverage that difficult to be reached with a unique Omni antenna by using another adequate antenna such as sector antenna. It’s particularly suitable for WISP to provide stable and high performance link. - Page 18 Both Radios has its own setting interface. AP Mode AP Mode To configure AP mode, please refer to Section 3.1 Access Point Mode. AirLive WH-9200AP User’s Manual...
- Page 19 WH-9200AP. The image in Duplex mode UI helps to indicate data flow related to the Wireless and the Ethernet ports.
- Page 20 One WH-9200AP is configured as a Master where as the other WH-9200AP is configure to be a Slave. One set to Master, the other set to Slave WDS Mode WDS Mode To configure the WDS mode, Please refer to Section 3.2 WDS Bridge Mode ……...
-
Page 21: Dual Wds Bridge Mode
2.3 Dual WDS Bridge Mode In Dual WDS Bridge mode, both wireless interface of WH-9200AP are set as WDS Bridge and connect to remote network. When configured in the Dual WDS Bridge mode, a WH-9200AP allows solving discontinuous link due to geographical obstacles, shown as below and extension of distance between two WDS bridge nodes separated by a building. - Page 22 Both radios are using WDS mode for communication. WDS Mode WDS Mode To configure the WDS mode please refer to section 3.2 WDS Bridge Mode …… AirLive WH-9200AP User’s Manual...
-
Page 23: Separate Bridge Mode
IP segment. In this application, both Radio 1 and Radio 2 are in WDS Bridge Mode. The image in Separate WDS Bridge mode UI helps to indicate data flow related to the Wireless and the Ethernet ports. AirLive WH-9200AP User’s Manual... - Page 24 Both radios are using WDS mode for communication. WDS Mode LAN 1: WDS Mode LAN 2: To configure the WDS mode, Please refer to Section 3.2 WDS Bridge Mode…… AirLive WH-9200AP User’s Manual...
-
Page 25: Ap + Client / Client + Ap Mode
In this application, Either Radio 1 or Radio 2 is in AP Mode, the other Radio is in Client mode. The image in AP + Client / Client + AP mode UI helps to indicate data flow related to the Wireless and the Ethernet ports. AirLive WH-9200AP User’s Manual... -
Page 26: Access Point
The UI example of AP + Client is as following: Client Mode Access Point To configure the AP mode, please refer to Section 3.1 Access Point Mode…… To configure the Client mode, please refer to Section 3.3 Client Mode …… AirLive WH-9200AP User’s Manual... -
Page 27: Ap + Wds Bridge / Wds Bridge + Ap Mode
NLOS application. The image in AP + WDS Bridge / WDS Bridge + AP mode UI helps to indicate data flow related to the Wireless and the Ethernet ports. AirLive WH-9200AP User’s Manual... -
Page 28: Wds Mode
The UI example of AP + WDS Bridge is as following: WDS Mode Access Point To configure the AP mode, Please refer to Section 3.1 Access Point Mode …… To configure the WDS mode, Please refer to Section 3.2 WDS Bridge Mode …… AirLive WH-9200AP User’s Manual... -
Page 29: Wds + Gateway / Gateway + Wds Mode
The remote location can access the internet by way of this Access Point which acts as a gateway device of the network. The image in WDS + Gateway / Gateway + WDS mode UI helps to indicate data flow related to the Wireless and the Ethernet ports. AirLive WH-9200AP User’s Manual... - Page 30 To configure the AP mode, Please refer to Section 3.1 Access Point Mode …… To configure the WDS mode, Please refer to Section 3.2 WDS Bridge Mode …… To configure the Gateway (Router) mode. Please refer to Section 3.4 Gateway Mode …… AirLive WH-9200AP User’s Manual...
-
Page 31: Ap + Gateway / Gateway + Ap Mode
The remote location can access the internet by way of this Access Point which acts as a gateway device of the network. The image in AP + Gateway / Gateway + AP mode UI helps to indicate data flow related to the Wireless and the Ethernet ports. AirLive WH-9200AP User’s Manual... - Page 32 To configure the AP mode, Please refer to Section 3.1 Access Point Mode …… To configure the WDS mode, Please refer to Section 3.2 WDS Bridge Mode …… To configure the Gateway (Router) mode, Please refer to Section 3.4 Gateway Mode …… AirLive WH-9200AP User’s Manual...
-
Page 33: Ap + Wisp / Wisp + Ap Mode
The remote location can access the internet by way of this Access Point which acts as a gateway device of the network. The image in AP + Gateway / Gateway + AP mode UI helps to indicate data flow related to the Wireless and the Ethernet ports. AirLive WH-9200AP User’s Manual... - Page 34 To configure the AP mode, Please refer to Section 3.1 Access Point Mode …… To configure the Client mode, Please refer to Section 3.3 Client Mode …… To configure the Gateway (Router) mode, Please refer to Section 3.4 Gateway Mode …… AirLive WH-9200AP User’s Manual...
-
Page 35: Wireless Settings
SSID in the network. This prevent an un-welcomed client survey your radio. Mode: Connection modes on WH-9200AP and its wireless client. Note that the client must support the same mode as WH-9200AP to connect. - Page 36 To configure the security connection, please refer to Section 3.6 Wireless Security Settings ……To configure the Advanced Settings, please refer to Section 3.7 Advanced Wireless Settings …… To configure the access control, please refer to Section 3.8 Access Control Settings …… AirLive WH-9200AP User’s Manual...
-
Page 37: Wds Bridge Mode
MAC ID between each other. Enable Radio: Use this check box to turn on or turn off the radio. Mode: Connection modes on WH-9200AP and its wireless client. Note that the client must support the same mode as WH-9200AP to connect. - Page 38 WH-9200AP. Only WEP security allowed in WDS mode, note that the remote node must use same security configuration as your WH-9200AP to communicate. Click “ADD” button, the configured information of remote node shows. And the information shows in main configuration page as below: To configure the Advanced Settings, please refer to Section 3.7 Advanced Wireless...
-
Page 39: Client Mode
Client mode included in these operation modes: AP + Client, Client + AP, AP + WISP, and WISP + AP. To connect to an access point, use the “Site Survey” button to find the Access Point. The Site Survey pop up window then shows up and lists available access point with relative information. AirLive WH-9200AP User’s Manual... - Page 40 Select the access point you want to Click here to show the signal strength connect and click the of the selected access point. “ASSOCIATE” button. The Signal Survey pop up windows shows as following: AirLive WH-9200AP User’s Manual...
- Page 41 After the access point is selected, its SSID shows automatically in the Network ID (SSID) field. To configure the Security, please refer to Section 3.6 …… To configure the Advanced Settings, please refer to Section 3.8…… AirLive WH-9200AP User’s Manual...
-
Page 42: Gateway (Ap Router) Mode
Therefore, the ISP subscriber can share the ISP connection without need for extra router. Local Area Network Gateway Mode Internet Gateway mode acts both in AP and Router which included in these operation modes: AP + Gateway and Gateway + AP. AirLive WH-9200AP User’s Manual... -
Page 43: Wan Port Settings
Click the Setup button to configure the WAN interface. WH-9200AP provides 4 methods for client to access the internet. This depends on the location and the service which the ISP provides. You need to contact the ISP for detail information. -
Page 44: Dhcp Server Settings
DHCP Server Settings is to assign private IP address to the devices in your local area network (LAN). Note that WH-9200AP keep the IP address of 192.168.1.1 and act as the default gateway of the LAN. AirLive WH-9200AP User’s Manual... -
Page 45: Dmz & Virtual Server
You can use DMZ and Virtual Server Settings to provide connection on internet. For example, you can have your own web server at home and provide access on internet. This will need port 80 by default for Virtual Server Settings. AirLive WH-9200AP User’s Manual... -
Page 46: Ip Filter Settings
3.4.4 IP Filter Settings IP filtering is simply a mechanism that decides which types of IP datagrams will be processed normally and which will be discarded. AirLive WH-9200AP User’s Manual... - Page 47 This allows you to define rules for allowing / denying access from / to the Internet. Please do set both inbound/outbound in order to get complete connection. Only inbound or outbound will not allow to get response from the destination IP. AirLive WH-9200AP User’s Manual...
- Page 48 You can also define IP filtering rule, such as: Name; IP Protocol; Apply to either Outbound to the Internet or Inbound from the Internet; Source IP Address and Dest. (Destination) IP Address. To grant or deny IP address, select ADD or Delete Selected. AirLive WH-9200AP User’s Manual...
-
Page 49: Ip Routing Settings
3.4.5 IP Routing Settings The IP Routing Settings allows you to configure routing feature in the gateway, the settings is normally no need to change in gateway mode. AirLive WH-9200AP User’s Manual... -
Page 50: Dynamic Dns (Ddns) Settings
The Remote Management setting allows you to enable web server access from internet, note that this needs to configure a virtual server for your WH-9200AP. You can enable to the “Response to WAN Ping” to allow remotely ping your WH-9200AP. -
Page 51: Wisp Mode
WISP mode acts both in AP and Router which included in these operation modes: AP + WISP and WISP + AP In WISP + AP mode, the Radio 1 is actually a wireless client of the WISP wireless node and also the gateway of the local area network. AirLive WH-9200AP User’s Manual... - Page 52 To configure the AP mode, Please refer to Section 3.1 Access Point Mode …… To configure the WDS mode, Please refer to Section 3.3 Client Mode …… To configure the Gateway (Router) mode, Please refer to Section 3.4 Gateway Mode …… AirLive WH-9200AP User’s Manual...
-
Page 53: Wireless Security
Key Index: You have to specify which of the four keys will be active. Once you enable the WEP function, please make sure that both the WH-9200AP and the wireless client stations use the same key. AirLive WH-9200AP User’s Manual... - Page 54 After you have finished the configuration wizard, you have to configure the RADIUS Settings in Advanced Settings in order to make the 802.1x function work. Share secret is the key for AP to communicate with RADIUS server, check with your Authentication provider for more details. AirLive WH-9200AP User’s Manual...
- Page 55 Group Rekey Interval: A group key is used for multicast/broadcast data, and the re-key interval is time period that the system will change the group key periodically. The shorter the interval is, the better the security is. The default is 300 sec. AirLive WH-9200AP User’s Manual...
- Page 56 Pre-shared Key: This is an ASCII string with 8 to 63 characters. Please make sure that both the WH-9200AP and the wireless client stations use the same key. Encryption Type: There are two encryption types TKIP and CCMP (AES). While CCMP provides better security than TKIP, some wireless client stations may not be equipped with the hardware to support it.
- Page 57 Group Rekey Interval: A group key is used for multicast/broadcast data, and the re-key interval is time period that the system will change the group key periodically. The shorter the interval is, the better the security is. The default is 300 sec. AirLive WH-9200AP User’s Manual...
- Page 58 Pre-shared Key: This is an ASCII string with 8 to 63 characters. Please make sure that both the WH-9200AP and the wireless client stations use the same key. Encryption Type: There are two encryption types TKIP and CCMP (AES). While CCMP provides better security than TKIP, some wireless client stations may not be equipped with the hardware to support it.
- Page 59 Group Rekey Interval: A group key is used for multicast/broadcast data, and the re-key interval is time period that the system will change the group key periodically. The shorter the interval is, the better the security is. The default is 300 sec. AirLive WH-9200AP User’s Manual...
- Page 60 Pre-shared Key: This is an ASCII string with 8 to 63 characters. Please make sure that both the WH-9200AP and the wireless client stations use the same key. Encryption Type: There are two encryption types TKIP and CCMP (AES). While CCMP provides better security than TKIP, some wireless client stations may not be equipped with the hardware to support it.
-
Page 61: Advanced Wireless Settings
Fragmentation Threshold. DTIM Interval: The WH-9200AP buffers packets for stations that operate in the power-saving mode. The Delivery Traffic Indication Message (DTIM) informs such power-conserving stations that there are packets waiting to be received by them. - Page 62 In the field of “Distance”, input the distance in “meters”. After input the distance value, move the cursor to any place on the pop-up window out of three fields. The calculated value will display. AirLive WH-9200AP User’s Manual...
- Page 63 Enter the calculated value of “AckTimeOut” into the appropriate “Ack TimeOut” field (11a or 11g) in the “Advanced Wireless Settings” window. Change the value from 25 to 107, where 107 is calculated value of distanced 12500m. AirLive WH-9200AP User’s Manual...
-
Page 64: Access Control
3.8 Access Control The WH-9200AP allows you to define a list of MAC addresses that are allowed or denied to access the wireless network. Click on the setup button of “Access Control” of selected wireless interface. Disable MAC address control list: When selected, no MAC address filtering will be performed. -
Page 65: Bandwidth Control
WISP operators can offer different class of connection speeds for different subscription fees - just like the ADSL service! The AirLive advance firmware can control the bandwidth by Interface or IP/MAC. There are 2 types of Traffic Control it offers: Total bandwidth control and Per-use bandwidth control. -
Page 66: Total Bandwidth Control
Example1: 3 wireless clients share downlink and uplink bandwidth. 1024K 512K Internet ADSL / Cable Modem In this example, total uplink bandwidth of the 3 clients is limited to 512kbps and the total download bandwidth of the 3 clients is limited to 1024kbps. AirLive WH-9200AP User’s Manual... - Page 67 3 wired clients share downlink and uplink bandwidth. Internet 1024K 512K In this example, total uplink bandwidth of the 3 clients is limited to 512kbps and the total download bandwidth of the 3 clients is limited to 1024kbps. AirLive WH-9200AP User’s Manual...
-
Page 68: Per User Bandwidth Control
Description: You can preset your control type and named on the type. Type: Three types to be selected: IP Address, IP Segment and MAC Address. IP Segment allows you to set bandwidth limitation on an IP range. AirLive WH-9200AP User’s Manual... -
Page 69: Multiple Ssid + Vlan
VLAN 2 VLAN 2 VLAN 1 VLAN 2 In the above example, laptops in VALN 1 can only communicate with those in VLAN 1 and laptops in VALN 2 can only communicate with those in VLAN 2. AirLive WH-9200AP User’s Manual... -
Page 70: System Management
It’s recommended to set your own password instead of using default factory password. The default factory password is “airlive” all letters are in lower case. To change the password, press the Password Settings button to enter the Password Settings screen; then enter the Current Password followed by the New Password twice. -
Page 71: System Management Settings
(without having to find out its IP address). Syslog: If the Syslog is Enabled, WH-9200AP create a log in the system log table when encounters an error or warning condition. This apply to IETF (Internet Engineering Task Force - the Internet standards body)-conformant standard for logging system events (RFC-3164) Syslog server IP address: The Syslog can also send to the identified IP address. - Page 72 The system log shows in WH-9200AP: AirLive WH-9200AP User’s Manual...
-
Page 73: Snmp Settings
WH-9200AP can also be managed by remote software with SNMP (simple network management protocol) protocol. System Name: A name that you assign to your WH-9200AP for SNMP software. It is an alphanumeric string of up to 30 characters. System Location: Enter a system location. Information for SNMP software. - Page 74 To enable a trap manager, check the Enable box in the corresponding entry; to disable it, un-check the Enable box. Some extra feature of WH-9200AP does not show in the wizard because some higher knowledge of parameters of them is required. They are classified in the tab of “Advances Setting”, such as the Multi SSID for VLAN setting and 802.11e QoS configuration.
-
Page 75: Firmware Upgrade
Browse to locate the firmware file). Next, Click the Upgrade button to start. The new firmware will be loaded to your WH-9200AP. After a message appears telling you that the operation is completed, you need to reset the system to have the new firmware take effect. -
Page 76: Configuration Save And Restore
To save the configuration to your PC, click the “SAVE TO FILE” button and the system will lead you to save the configuration file to your PC. To restore configure file to WH-9200AP, click the “Browse” button, find the saved configuration fire, then click “RESTORE FROM FILE” button to restore. -
Page 77: Reboot System
4.6 Reboot System The following interface allows you to reboot your WH-9200AP. Click “Yes” button to reboot. You can also reboot WH-9200AP by power off and power on it. AirLive WH-9200AP User’s Manual... -
Page 78: Wh-9200Ap Emergency Recovery
7. Power on WH-9200AP, the “Status” LED will light on after 3 seconds. 8. Push the “Reset” button until the “Status” LED off and on again and release the “Reset” button. 9. If the above process success, the WH-9200AP LAN LED keep flashing and the tftp serve shows file download information.
Need help?
Do you have a question about the WH-9200AP and is the answer not in the manual?
Questions and answers