Table of Contents
Advertisement
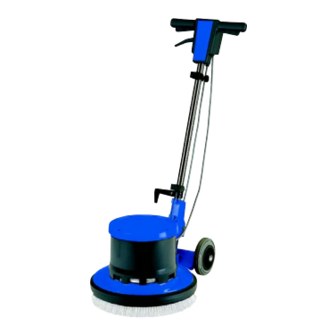
SPIN 43
SPIN 43 HS
SPIN 43 DS
Betriebsanleitung ...........................3
Operating Instructions .................. 16
Notice d'utilisation ....................... 29
Gebruiksaanwijzing ...................... 42
Istruzioni sull'uso ......................... 55
Driftsinstruks................................ 69
Bruksanvisning ............................. 81
Driftsvejledning ............................ 94
Käyttöohje ................................. 107
Navodilo za uporabo ................ 120
Uputstvo za rad ......................... 133
Prevádzkový návod .................. 146
Provozní návod ......................... 159
Instrukcja obsługi ..................... 172
Kezelési utasítás....................... 185
Instrucciones de manejo............. 198
Instruções de operação............... 211
Οδηγίε
Οδηγίε
ς λ
ς λ
ειτο ο ο ο ο υρ
ειτ
ειτ
Οδηγίες λ
Οδηγίε
Οδηγίε
ς λειτ
ς λ
ειτ
Ýþletme kýlavuzu..................... 237
υρ
υρ
γία
γίας ς ς ς ς ...................
γία
...................
................... 22 22 22 22 224 4 4 4 4
...................
υρ
υργία
γία
...................
Advertisement
Table of Contents

Related Manuals for Alto SPIN 43 DS


Summary of Contents for Alto SPIN 43 DS
- Page 1 SPIN 43 SPIN 43 HS SPIN 43 DS Betriebsanleitung ......3 Operating Instructions ....16 Notice d'utilisation ....... 29 Gebruiksaanwijzing ...... 42 Istruzioni sull'uso ......55 Driftsinstruks........ 69 Bruksanvisning ......81 Driftsvejledning ......94 Käyttöohje ......... 107 Navodilo za uporabo ....120 Uputstvo za rad ......
-
Page 3: Table Of Contents
Contents Explanation of symbols ....................17 1 Important safety instructions ....................17 2 Description 2.1 Purpose of the machine ............19 2.2 Product liability ..............19 2.3 Operating elements ............... 19 3 Before starting the cleaner 3.1 Assembly ................20 3.2 Transport ................ -
Page 4: Operating Instructions
Explanation of symbols Safety instructions marked with this symbol in these operating instructions must be observed to prevent danger to persons. This symbol is used to mark safety instructions that must be observed to prevent damage to the cleaner and its performance. - Page 5 Cleaning agents CAUTION! Only use cleaning agents Never push the cleaner over approved by Alto. power cords. Danger of electrocution! Maintenance Service and repair work should Do not damage the power cord...
-
Page 6: Purpose Of The Machine
5 Brush motor switch Tank bracket 6 Power cord Liquid tank 7 Power cord hook Waste hose 8 Shaft adjustment joint Brush 9 Wheels Drive plate for pad 10 Connector for waste hose 11 Speed switch (SPIN 43 DS) 12 Shaft... -
Page 7: Assembly
3 Before starting the cleaner Assembly For transport reasons, the motor head and the shaft are supplied not assembled. 1. Loosen the hexagon socket screws (1) in the shaft adjustment joint (2). 2. Insert the shaft gently as far as possible into the shaft adjustment joint. -
Page 8: Electrical Connections
(3). 5. Align the cleaner horizontally on the accessory. NOTE! When using the SPIN 43 DS, use low speed to fit the accessory. 6. Press the switch lock (4) and briefly press the brush motor switch (5). -
Page 9: Manoeuvring The Cleaner
Manoeuvring the 1. Pull the shaft adjustment cleaner lever (1) and lower the shaft into its cleaning position. NOTE! Extend both arms loosely downwards (2). Always guide the cleaner with both hands on the handle (3). 2. Switch on the motor: Press the switch lock (4) and operate the brush motor switch (5) (right and left). -
Page 10: Cleaning Techniques
5 Applications and cleaning techniques If used correctly, accessories Cleaning techniques Floors can be effectively and cleaning agents can cleaned by following a few rules enhance the cleaning effect. A in combination with your few basic rules are stated experience in special areas. below. -
Page 11: Typical Applications
Std. scrubbing brush Alto Quick fresh Spraying red pad Polishing blue pad These are just a few examples of applications. Every cleaning task is different. Please contact your Alto dealer for advice on the best solution for your cleaning task. -
Page 12: Putting The Shaft Upright
6 After cleaning 1. Pull the shaft adjustment Putting the shaft lever (1) and move the shaft upright (2) to the upright position. Removing accessories 1. Tip the cleaner on to its wheels and briefly operate the brush motor switch (1). The accessory (2) disengages. -
Page 13: Maintenance Plan
Maintenance work Do the work described in the Leave service and repair work, operating instructions only. in particular repairs concerning electrical faults, to Alto Before starting any work, customer service or authorized unplug the cleaner. persons. 8 Troubleshooting... -
Page 14: Recycling The Cleaner
Accessories Description Art.-No. SPIN 43 SPIN 43 HS SPIN 43 DS Standard scrubbing brush, 0.6 PP 63239 Shampooing brush, 0.3 PP 63242 Abrasive grain brush 63238 Low-speed drive plate for pad... -
Page 15: Technical Data
ALTO Deutschland GmbH Guido-Oberdorfer-Straße 2-8 D-89287 Bellenberg Product: Single-disc machine Model: SPIN 43, SPIN 43 HS, SPIN 43 DS Description: 220/240V, 1~, 50 Hz IP X4 (SPIN 43/SPIN 43 DS) IP X0 (SPIN 43 HS) The design of the machine... - Page 16 Tel.: +41 56 618 85 00 Representative Office Fax: +41 56 618 85 10 CROATIA Naruse-build 4F E-mail: info@alto-ch.com Wap ALTO Strojevi za čišćenje, d.o.o. 7-2 Shinbashi 1-Chome, Minato-Ku Siget 18a J-Tokyo 105-004 10020 Zagreb Tel.: +81 3 35 69 38 07 ALTO U.S.Inc...
Need help?
Do you have a question about the SPIN 43 DS and is the answer not in the manual?
Questions and answers