Table of Contents
Advertisement
Advertisement
Table of Contents

Related Manuals for Sanyo DC-HT818


Summary of Contents for Sanyo DC-HT818
- Page 1 DC-HT818 INSTRUCTION MANUAL DVD HOME THEATER...
-
Page 2: Table Of Contents
Contents For your Attention................2 Features & Package Contents .............3-4 Remote Control................5-6 Panel....................7 Connections................8-10 System Setup.................11-16 Basic Playback................17-22 Trouble shooting................23 Specifications................24... -
Page 3: For Your Attention
For Your Attention IMPORTANT NOTES Please read through this manual before making connections and operating this product. Retain this manual for future reference. Don't open the cabinet of this unit. No user-serviceable parts inside. Refer servicing to qualified personnel only. Switch off the unit when you don't use it. -
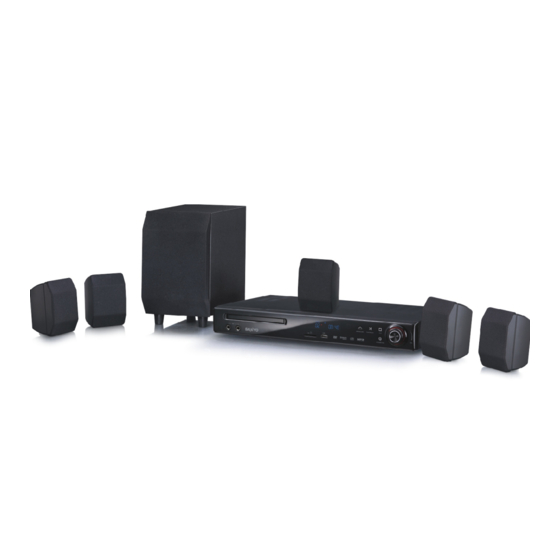
Page 4: Features &Package Contents
Features &Package Contents Thank you for purchasing our product. Please read this manual carefully before connection and operation and keep it for future reference. This DVD player is a new generation home player which can produce high quality video and audio for your continued enjoyment. Built in Dolby Digital, LPCM, MPEG etc. -
Page 5: Features & Package Contents
Features &Package Contents DVD REGION CODES: DVD discs and players are covered by a worldwide agreement which limits playback of DVD discs to specific regions as determined by the software manufacturer. Most DVDs come marked with a region coding. A disc specified as playable in one region may not play on a player designed for a different region. -
Page 6: Remote Control
Remote Control Remote Control Operation Insert the batteries into the remote control. Point the remote control at the remote sensor on the front panel. The remote control works within a distance of about metres from the sensor and within an angle of about 30 degrees from the left and right side. - Page 7 Remote Control 16 OPEN/CLOSE 1 STANDBY/ON 17 PLAY/ PAUSE 2 DIGIT KEYS 18 MUTE 3 GOTO 4 SETUP 19 V-MODE 5 A-MODE 20 ANGLE 6 PROGRAM FUNCTION 7 VOLUME+/- 22 OSD 8 FAST FORWARD/REWIND 23 NEXT/PREVIOUS 9 TITLE 24 SUBTITLE 10 DIRECTION KEYS 25 ENTER [ ]/[ ]/[ ]/[ ]...
-
Page 8: Panel
Panel FRONT PANEL: 1. MICROPHONE SOCKETS 6. PLAY/PAUSE ( 2. DISC TRAY 7. STANDBY/ON ( 3. MEMORY CARD SLOT 8. STOP ( 4. USB PORT 9. VOLUME ADJUSTING KNOB 5. OPEN/CLOSE ( ) 10. DISPLAY SCREEN REAR PANEL: 1. POWER SWITCH 6. -
Page 9: Connections
Connections Connections Connections Connections Connections Connections Connections Connections 1 VIDEO SYSTEM CONNECTION 1 VIDEO SYSTEM CONNECTION 1 VIDEO SYSTEM CONNECTION 1 VIDEO SYSTEM CONNECTION 1 VIDEO SYSTEM CONNECTION 1 VIDEO SYSTEM CONNECTION 1 VIDEO SYSTEM CONNECTION 1 VIDEO SYSTEM CONNECTION The following video outputs are available for this unit . - Page 10 Connections Connections Connections Connections 2 AUDIO 2 AUDIO 2 AUDIO 2 AUDIO SYSTEM CONNECTION SYSTEM CONNECTION SYSTEM CONNECTION SYSTEM CONNECTION The following audio outputs (2.1 2.3)are available for this unit . The following audio outputs (2.1 2.3)are available for this unit . The following audio outputs (2.1 2.3)are available for this unit .
-
Page 11: Connections
Connections 2.4 Line Input Audio Output of Extra Devices This unit has a group of stereo audio input terminals, i.e. LINE 2-CH AUDIO OUTPUT INPUT (on the rear panel). You can input the analogue stereo audio signals from extra device such as DVD, VCD, CD, VCR player, etc by connecting it via the input terminals. -
Page 12: System Setup
System Setup MENU OPERATION 1. Press [SETUP] on the remote control to display the setup menu. 2. Press [ ]/[ ] to select an item. The submenu of the selected item will be displayed below instantly. 3. Press [ ]/[ ] to select an item you desire to set in the submenu, then press [ENTER] /[ ]to enter. -
Page 13: Last Memory
System Setup 1.6 LAST MEMORY ON: During playback or in the paused/stopped status each time you open the disc tray or turn off the player, the unit will memorize the last playback time. Next time when you insert the same disc and close the disc tray to load the disc, the unit will play from the memorized point. -
Page 14: Lpcm Out
System Setup 2.2.2 LPCM OUT When DIGITAL OUTPUT is set to SPDIF/PCM, this item is available. Select a sample rating for the digital audio output. There are two options, 48KHz and 96KHz. NOTE: Some amplifiers don't support 96KHz sampling which will affect the coaxial output. - Page 15 System Setup 2.6 3D PROCESSING 3D processing provides a virtual surround sound experience using just two speakers. 2.6.1 PRO LOGIC II Pro Logic II: This unit allows you to configure Dolby Pro Logic II to expand 2-channel source audio into full 5.1-channel surround sound. NOTE: Pro Logic II functionality is effective only when DOWNMIX is set to 5.1CH .
-
Page 16: Video Output
System Setup 2.7 HDCD(High Definition Compatible Digital) HDCD (High Definition Compatible digital) is a patented encode/decode process for delivering the full richness and details of the sound from HDCD-encoded CDs. 2.7.1 FILTER You can set the digital filter to 2x, 1x or off. 2.8 KARAOKE SETUP 2.8.1 MIC SETUP 2.8.1.1 MIC... - Page 17 System Setup 4.1 TV TYPE This product supports both NTSC (National Television System Committee) and PAL (Phase Alternating Line) television broadcasting standards. PAL : If the connected TV is PAL system, select this mode.The video signal of a NTSC disc will be output in PAL format. AUTO: If the connected TV is multi system, select this mode.
-
Page 18: Basic Playback
Basic Playback STANDBY/ON Press to switch on the unit. Press it again to put the unit in standby mode. USB/SD Press repeatedly to switch to the available extra signal source USB or SD/CARD, or to return to the DVD mode. FUNCTION Press repeatedly to switch among TUNER mode, LINE mode and DVD mode. - Page 19 Basic Playback You can repeat a specific section of a disc with this button. During playback, press this button to mark down the starting point (A) and press it again to mark down the ending point (B). Then, the unit will playback this section over and over again.
- Page 20 Basic Playback USB DRIVE AND MEMORY CARD PLAYBACK Insert a USB drive in the USB port, then press [USB/SD] to enter the connected USB drive and you can playback the readable files in it. Press [USB/SD] again to switch back to DVD mode. Insert an SD card into the memory card slot, then press [USB/SD] to access the connected memory card and you can playback the readable files in it.
- Page 21 Basic Playback KARAOKE PLAYBACK Set MIC to ON to enable the connected microphone(s) and set the microphone volume at a low level in the karaoke setup menu. Insert two microphones or just one into the microphone socket(s) on th front pa nel.
- Page 22 Basic Playback [ZOOM]: During playback, press [ZOOM], then press [ ]/[ ] to zoom in/out the picture. When the picture is zoomed in, the direction keys can be used to move the picture. Press [ZOOM] again to exit the picture-zooming mode. ]: Press to skip to the previous/ next picture during playback.
- Page 23 Basic Playback Tuner Operation The following buttons are used in tuner mode. Press [ FUNCTION ] to select tuner mode. AM/FM Press to switch between AM mode and FM mode. MO/ST Press to switch between Mono and Stereo reception of the broadcast signal in FM mode.
-
Page 24: Troubleshooting
Troubleshooting Before resorting to maintenance service, please kindly check by yourself with the following chart. Symptom Cause(s) Remedy The AC power cord is not connected Please check that the AC power No Power to the power supply or is not cord is connected securely. -
Page 25: Specifications
Specification Power supply AC ~240V/50Hz Power consumption Temperature 5~35 Working environment Relative humidity 5%~90% TV System PAL/NTSC Frequency Response 20Hz~20KHz Audio output S/N(A weight) 80dB(1KHz) Output level 2.2V(rms) 522KHz~1620KHz AM band range Tuner FM band range 87.5MHz~108MHz Power output 15WX5+30W 1.2V(P-P),75 Component Video output (Cb) 1.2V(P-P),75... - Page 26 Printed in China...
Need help?
Do you have a question about the DC-HT818 and is the answer not in the manual?
Questions and answers