Polaroid Digital HD-Ready LCD TV User Manual
15”/ 19”/ 22” digital hd-ready lcd tv
Hide thumbs
Also See for Digital HD-Ready LCD TV:
- User manual (45 pages) ,
- User manual (26 pages) ,
- User manual (30 pages)

Related Manuals for Polaroid Digital HD-Ready LCD TV


Summary of Contents for Polaroid Digital HD-Ready LCD TV
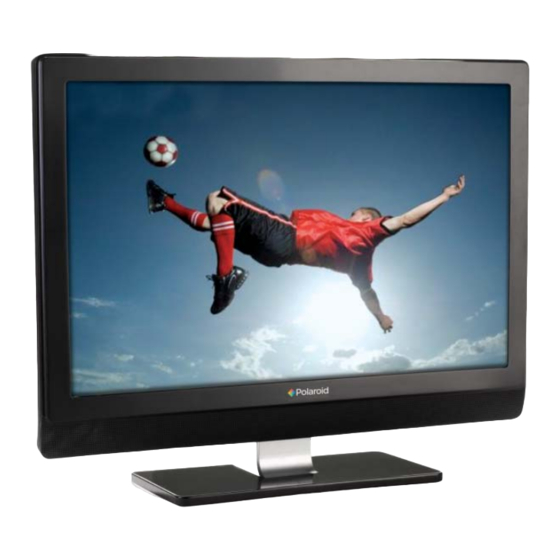
- Page 1 15”/ 19”/ 22” Digital HD-Ready LCD TV Your TV may look different from the one pictured above.
-
Page 2: Introduction To Your Lcd Tv
Polaroid. Add a little colour to your life. Since 1937, people have turned to Polaroid for their photography needs. Today, families look to Polaroid for consumer electronics that defi ne the digital age: plasma and LCD TVs, portable and standard DVD players, digital cameras, personal media players, and so much more. -
Page 3: Warnings And Precautions
Warnings and Precautions WARNINGS AND PRECAUTIONS To prevent any injuries, the following safety precautions should be observed in the installation, use, servicing and maintenance of this equipment. Before operating this equipment, please read this manual completely, and keep it nearby for future reference. - Page 4 Warnings and Precautions ▪ Use and handle the power cord with care. Do not place any heavy objects on the AC power cord. ▪ Do not pull the AC power cord. Do not handle the AC power cord with a wet hand. ▪...
-
Page 5: Antenna Safety Instructions
Warnings and Precautions Outdoor Outdoor Antenna Safety Instructions Antenna Safety Instructions If an outdoor antenna is connected, follow the precautions below: If an outdoor antenna is connected, follow the precautions below: ▪ An outdoor antenna should not be located in any area where it could come in contact with overhead power lines, or any other electric light or power circuits. -
Page 6: Table Of Contents
CONTENTS WARNINGS AND PRECAUTIONS Important Safety Instructions ..................1 Antenna Safety Instructions ..................3 INTRODUCING THE LCD TV Key Features ....................... 5 Package Contents ....................... 6 Setting Your LCD TV ....................7 Your LCD TV ........................ 9 Your Remote Control ....................11 INSTALLING THE LCD TV Connecting a TV Cable or an Antenna .............. -
Page 7: Introducing The Lcd Tv
Introducing the LCD TV INTRODUCING THE LCD TV Key Features Various Audio/Video terminals for external equipment connection ▪ 1 composite video input terminal ▪ 1 S-VIDEO terminal ▪ 1 SCART input terminal ▪ 1 set of component Video input terminals ▪... -
Page 8: Package Contents
Introducing the LCD TV Package Contents Make sure all of the following contents are included. LCD TV Remote Control/ AAA Batteries x 2 SCALE VOL. INPUT P.MODE S.MODE Power Cord Quick Guide User Guide Warranty Card The power cord type may be different depending on your country’s power type. -
Page 9: Setting Up Your Lcd Tv
Introducing the LCD TV Setting Up Your LCD TV How to install the TV Stand Follow the instructions below to install the TV stand: Open the box, and make sure all necessary parts are in the box. The package contains the LCD TV, screw(s) and stand. Cover an even stable surface with a soft cloth. - Page 10 Introducing the LCD TV How to setup the TV Use a supplied antenna cable to connect the VHF/UHF signal to the LCD TV’s ANT. terminal (refer to page 15-18). Connect the AC power cord at the back of the TV and connect the power cord to wall outlet. Insert the 2 batteries supplied in remote control.
-
Page 11: Your Lcd Tv
Introducing the LCD TV Your LCD TV Front/Left /Right Side View and Controls Right Side View Front View COMMON INTERFACE Left Side View HEADPHONES Infrared Receiver Connects to the external headphone for private listening. The LED light indicates when the LCD TV is activated. - Page 12 Introducing the LCD TV Rear View and Jacks COAXIAL Connects to the audio jack on the digital/standard 5.1 audio system. S-VIDEO/VIDEO/AUDIO(L/R) IN Connects to the S-Video/Composite VIDEO and AUDIO(L/R) output jacks on external video equipment. (S-VIDEO and Video have a common audio input.) HDMI IN Connects the all digital AV equipment with HDMI connector.
-
Page 13: Your Remote Control
Introducing the LCD TV Your Remote Control POWER Turns the LCD TV on and off. SUBTITLE Cycles through the TV subtitle options in DTV mode. FREEZE Pressing FREEZE to freeze the current picture, press again to restore the FREEZE SUBTITLE GUIDE picture. - Page 14 Installing the LCD TV INPUT Pressing INPUT displays the source list, use ▲▼ to select the video equipment connected to the video inputs of your LCD TV :DTV/TV/ FREEZE SUBTITLE GUIDE VIDEO1(AV)/VIDEO2(S- VIDEO)VIDEO3(YPbPr)/ VIDEO4(SCART)/VIDEO5(HDMI)/ COMPUTER(VGA) SLEEP P.SIZE EXIT Exits the OSD menu. MENU Displays the OSD menu on the screen.
-
Page 15: Installing The Lcd Tv
Installing the LCD TV Installing the LCD TV Refer to the owner’s manual of any external equipment to be connected. When connecting any external equipment, do not connect any AC power cords to wall outlets until all other connections are completed. Connecting a TV Cable or an Antenna Antenna Connection The antenna requirements for good colour TV reception are more important than those for a black &... - Page 16 Installing the LCD TV Use one of the following two diagrams when connecting an outdoor antenna. A: Shows how to use a VHF/UHF combination outdoor antenna. B: Shows how to use a separate VHF and/or UHF outdoor antenna. A. Combination VHF/UHF antenna VHF/UHF Antenna 300/75-ohm adapter...
- Page 17 Installing the LCD TV Cable TV (CATV) Connection ■ A 75-ohm coaxial cable connector is built into the set for easy hook-up. When connecting the 75-ohm coaxial cable to the set, connect the 75- ohm cable into the ANT. terminal. ■...
- Page 18 Installing the LCD TV Use a supplied antenna cable to connect the TV signal to the LCD TV’s TV CABLE terminal. VHF/UHF IN Connect the AC power cord at the back of the TV and connect the power cord to wall outlet.
- Page 19 Installing the LCD TV When you switch on the TV for fi rst time, the Initial Setup menu appears on the screen. Initial Setup Language English ◄► Country ◄► Auto Tuning ► Is the aerial plugged in? EXIT Press the ▼ button to select Language , and use the ◄► buttons to select the language displayed on the menu.
-
Page 20: Connecting Optional Av Equipment Connecting A Ci (Common Interface) Card
Installing the LCD TV How to Connect CI (Common Interface) Card Connects CI (Common Interface) card To view the scrambled (pay) services in digital TV mode. TO INSERT A CI CARD Insert the CI card into the slot in the direction of the arrow until it fi ts. TO REMOVE A CI CARD When removing the CI card, do not attempt to pull it from its slot. -
Page 21: Connecting An A/V Device With Composite Connector
Installing the LCD TV Connecting an A/V Device with Composite Connector Rear of TV YPbPr IN HDMI IN S-VIDEO VIDEO COAXIAL VHF/UHF IN VGA LINE IN VGA IN GAME CONSOLE VIDEO OUT AUDIO Cable DVD PLAYER AV Cable Use a composite cable to connect the external A/V device’s composite video/audio jacks to the LCD TV’s VIDEO IN jacks. -
Page 22: Connecting An A/V Device With S-Video Connector
Installing the LCD TV Connecting an A/V Device with S-Video Connector Rear of TV YPbPr IN HDMI IN S-VIDEO VIDEO COAXIAL VHF/UHF IN VGA LINE IN VGA IN SCART GAME CONSOLE S-VIDEO OUT AUDIO Cable DVD PLAYER S-VIDEO Cable Use an audio cable to connect the external A/V device’s audio output jacks to the LCD TV’s audio inputs. -
Page 23: Connecting An Av Equipment With Ypbpr Connector
Installing the LCD TV Connecting an A/V Device with Component(YPbPr) Connector Rear of TV YPbPr IN HDMI IN S-VIDEO VIDEO COAXIAL VHF/UHF IN VGA LINE IN VGA IN SCART GAME CONSOLE COMPONENT AUDIO Cable Pr/Cr COMPONENT Cable Pb/Pb DVD PLAYER Not all A/V device have the ability to connect to a TV. -
Page 24: Connecting An Av Equipment With Scart Connector
Installing the LCD TV Connecting an A/V Device with SCART Connector Rear of TV YPbPr IN HDMI IN S-VIDEO VIDEO COAXIAL VHF/UHF IN VGA LINE IN VGA IN SCART DVD PLAYER SCART Cable Use a SCART cable to connect the external A/V device ’s SCART socket to the LCD TV’s SCART IN jack. -
Page 25: Connecting An Av Equipment With Hdmi Connector
Installing the LCD TV Connecting an AV Equipment with HDMI Connector Rear of TV YPbPr IN HDMI IN S-VIDEO VIDEO COAXIAL VHF/UHF IN VGA LINE IN VGA IN SCART HDMI Cable AV EQUIPMENT Use a HDMI cable to connect the AV equipment’s HDMI output jack to the LCD TV’s HDMI IN jacks. -
Page 26: Connecting An Av Equipment With Dvi Connector
Installing the LCD TV Connecting an AV Equipment with DVI Connector Rear of TV YPbPr IN HDMI IN S-VIDEO VIDEO COAXIAL VHF/UHF IN VGA LINE IN VGA IN SCART AUDIO Cable AUDIO HDMI-to-DVI Cable DVI IN AV EQUIPMENT Use a HDMI-to-DVI cable to connect the AV equipment’s DVI output jack to the LCD TV’s HDMI IN jacks. -
Page 27: Connecting A Pc
Installing the LCD TV Connecting a PC Rear of TV YPbPr IN HDMI IN S-VIDEO VIDEO COAXIAL VHF/UHF IN VGA LINE IN VGA IN SCART AUDIO Cable VGA Cable Use a D-SUB cable to connect the PC’s D-SUB output jack to the LCD TV’s VGA input jack. -
Page 28: Connecting An Audio Receiver
Using the LCD TV Connecting an Audio Receiver or a Dolby Digital 5.1 Sound System For better sound quality, you may want to play the LCD monitor audio through your stereo system. Rear of TV YPbPr IN HDMI IN S-VIDEO VIDEO COAXIAL VHF/UHF IN... -
Page 29: Using The Features
Using the LCD TV USING THE FEATURES Operating the Menu Press the button to turn the LCD TV on. Press the MENU button on the remote control, the on-screen menu will appear on the screen. Use the ◄► buttons to select your main menu option. PICTURE MENU: Allows you to make adjustments to your picture settings. - Page 30 Using the LCD TV SOUND MENU: Allows you to customize the audio options and effects. TIME MENU: Allows you to set up a variety of timer. TIME Clock -- -- -- -- ► Off Time ► On Time ► Sleep Timer ◄►...
- Page 31 Using the LCD TV LOCK MENU: The Parental Control can be set up to the TV to block Channel, Video Source and to change password. LOCK Lock System Set Password ► Block Program ► Parental Guidance ◄► EXIT CHANNEL MENU: Allows you to edit and label channels.
-
Page 32: Customizing The Picture Settings
Using the LCD TV Customizing the PICTURE Settings Press the button to turn the LCD TV on. Press the MENU button on the remote control to display the Main menu, and use the ◄► buttons to select the Picture. Use the ▲▼ buttons to highlight an individual picture option, use the ◄► buttons to change the setting, and press the MENU to exit the menu. - Page 33 Using the LCD TV The PICTURE menu includes the following options: Picture Mode Cycles among display types: USER/ DYNAMIC/ STANDARD/ MILD: Allows to store your preferred settings. PICTURE Picture Mode Standard ◄► Contrast Brightness Saturation Sharpness Tint EXIT Contrast Controls the difference between the brightest and darkest regions of the picture.
- Page 34 Using the LCD TV Noise Reduction Select to reduce the noise level of connected equipment: Off/On Auto Press the OK button to automatically adjust the display settings to optimize performance based on the VGA mode. Screen Press the OK button to enter the VGA Setting: PICTURE Horizontal Pos.
-
Page 35: Customizing The Sound Settings
Using the LCD TV Customizing the SOUND Settings Press the button to turn the LCD TV on. Press the MENU button on the remote control to display the Main menu, and use the ◄► buttons to select the SOUND. Use the ▲▼ buttons to highlight an individual sound option, use the ◄► buttons to change the setting, and press the MENU to exit the menu. -
Page 36: Customizing The Time Settings
Using the LCD TV Customizing the TIME Settings Press the button to turn the LCD TV on. Press the MENU button on the remote control to display the Main menu, and use the ◄► buttons to select the TIME. Use the ▲▼ buttons to highlight an individual time option, use the ◄► buttons to change the setting, and press the MENU to exit the menu. -
Page 37: Customizing The Option Settings
Using the LCD TV Customizing the OPTION Settings Press the button to turn the LCD TV on. Press the MENU button on the remote control to display the Main menu, and use the ◄► buttons to select the OPTION. Use the ▲▼ buttons to highlight an individual option option, use the ◄► buttons to change the setting, and press the MENU to exit the menu. -
Page 38: Customizing The Channel Settings
Using the LCD TV Customizing the CHANNEL Settings Press the button to turn the LCD TV on. Press the MENU button on the remote control to display the Main menu. Use the ▲▼ buttons to highlight an individual channel Setup option, use the ◄► buttons to change the settings, and press the MENU exits the menu. - Page 39 Using the LCD TV Manual Tuning Allows adjustment for the fi ne tune level by hand if signal is too weak or picture is blurry. Programme Edit Allows DELETE/MOVE/SKIP/FAV. CH. on the channel list. Programme Edit Radio 21 BBC Asian Net Radio 22 BBC Radio 1 Radio...
-
Page 40: Customizing The Lock Settings
Parental Guidance Allows to setup the TV Program Lock options. Questions? Need some help? This manual should help you understand your new product. If you have questions, call our helpline number found on the insert with this icon: Or visit www.polaroid.com. -
Page 41: Troubleshooting
Audio noise Move any infrared equipment away from the TV. Questions? Need some help? This manual should help you understand your new product. If you have questions, call our helpline number found on the insert with this icon: Or visit www.polaroid.com. - Page 42 Specifications SPECIFICATIONS MODEL LCD Panel Panel Size 15.6” TFT LCD 19” TFT LCD Brightness Contrast Ratio 400:1 850:1 Max. Resolution 1366 x 768 1440x900 C-VIDEO/ S-VIDEO/ Input Connector AUDIO IN(L/R) YPbPr/ AUDIO IN(L/R) 1 SCART HDMI VGA LINE IN COAXIAL OUT HEADPHONE VHF/UHF IN Power Source...
Need help?
Do you have a question about the Digital HD-Ready LCD TV and is the answer not in the manual?
Questions and answers
How to run channel auto scañ
To run channel auto scan on a Polaroid Digital HD-Ready LCD TV:
1. Press the MENU button on the remote.
2. Go to the TV Setup menu.
3. Select "Auto Scan" and press the OK button.
4. Choose "Yes" to start scanning.
5. The TV will automatically search and store available channels from VHF/UHF antenna or Cable TV.
Alternatively, for digital channels:
1. Press the AV button on the remote.
2. Select the "DIGITAL TV" tab from the SOURCE menu using the Up/Down buttons.
3. Confirm with the OK button.
4. In the Channel Search menu, press OK to start auto programming.
This answer is automatically generated