Samsung HW-C500 User Manual
Av receiver system
Hide thumbs
Also See for HW-C500:
- User manual (69 pages) ,
- User manual (59 pages) ,
- User manual (60 pages)

Related Manuals for Samsung HW-C500


Summary of Contents for Samsung HW-C500
-
Page 1: User Manual
HW-C500 HW-C560S AV Receiver System user manual imagine the possibilities Thank you for purchasing this Samsung product. To receive more complete service, please register your product at www.samsung.com/register... -
Page 2: Safety Information
Safety information SAFETY WARNINGS TO REDUCE THE RISK OF ELECTRIC SHOCK, DO NOT REMOVE THE COVER(OR BACK). NO USER-SERVICEABLE PARTS ARE INSIDE. REFER SERVICING TO QUALIFIED SERVICE PERSONNEL. This symbol indicates “dangerous voltage” inside the product that presents a risk of CAUTION electric shock or personal injury. -
Page 3: Precautions
PRECAUTIONS 2.7 inches SETUP 3.9 inches INPUT SELECT ENTER TONE CONTROL SOUND EFFECT AUDIO MULTI CH TUNING ASC MIC S. DIRECT SELECT MEMORY ASSIGN INPUT SYNC MODE 3.9 inches 3.9 inches Ensure that the AC power supply in your house complies with the identification sticker located on the back of your player. Install your player horizontally, on a suitable base (furniture), with enough space around it for ventilation (3~4inches). -
Page 4: Features
24 bit/96kHz and applies it to a 5.1 CH sound track. Anynet+ is a function that can be used to operate this AV Receiver with a Samsung TV remote control, by DTS (Digital Theater Systems) connecting the receiver to a SAMSUNG TV using an HDMI Cable. -
Page 5: Table Of Contents
Contents SAFETY INFORMATION Safety Warnings Precautions FEATURES Accessories DESCRIPTION Front Panel Rear Panel Display Insert Remote Control Batteries Operation Range of the Remote Control Tour of the Remote Control CONNECTIONS Speaker Positioning Connecting the Speakers Connecting External Devices/Your TV via HDMI HDMI Function Connecting to your TV... - Page 6 Contents Setup Menu Tree SETUP Setting the Speaker Size Setting the Speaker Listening Distance Setting the Speaker Level Setting the Test Tone Setting Dolby Pro Logic II Mode Setting Dolby Pro Logic II Setting Tone Control AV SYNC MP3 Enhancer Smart Volume ASC (Auto Sound Calibration) Setup DRC Setup...
-
Page 7: Description
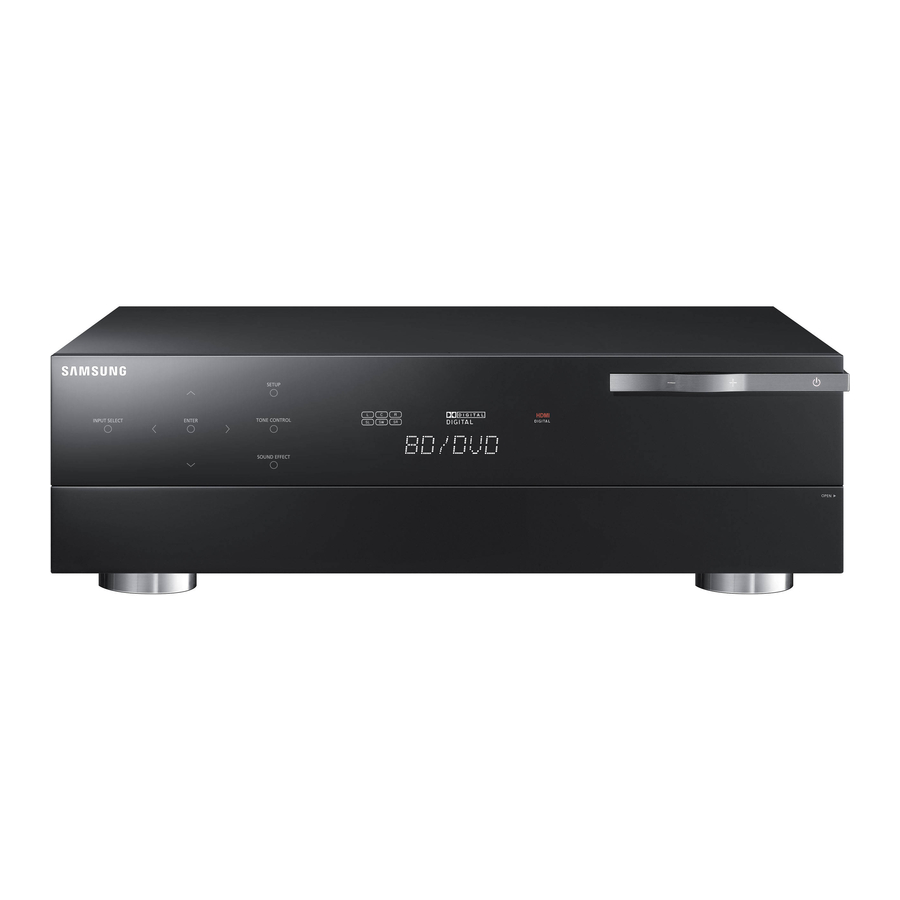
Description FRONT PANEL SETUP INPUT SELECT ENTER TONE CONTROL SOUND EFFECT AUDIO S. DIRECT MULTI CH TUNING ASC MIC SELECT MEMORY ASSIGN /STEREO INPUT SYNC MODE 10 11 12 13 14 15 Used to select a source. (FM BD/DVD 5.1 MULTI CH INPUT SELECT IPOD AUDIO IPOD VIDEO). -
Page 8: Rear Panel
Description REAR PANEL < HW-C500 > iPod 10 11 12 < HW-C560S > iPod 10 11 12 * All those pictures of the Rear panel are based on Model HW-C560S. - Page 9 FM ANTENNA JACK Connect the FM Antenna here. MULTI CH IN JACKS Receives the analog audio signal from an external player with a multi-channel port. VIDEO IN JACKS Receives the video signal from a video player (BD/DVD, SAT, TV). HDMI IN JACKS Receives digital video and audio signals simultaneously using an HDMI cable.
-
Page 10: Display
Description DISPLAY SPEAKER INDICATORS Displays the connected speakers. LISTENING MODE INDICATORS Displays the current listening mode. TUNING INDICATORS Displays the status of the current radio broadcast. AUDIO INPUT INDICATORS Displays the audio input signal type of the currently connected external audio source. SPEAKER LEVEL INDICATOR Displays the speaker level. -
Page 11: Insert Remote Control Batteries
INSERT REMOTE CONTROL BATTERIES * Battery size: AAA Follow these precautions to avoid leaking or cracking cells: Place batteries in the remote control so they match the polarity : (+) to (+) and (–) to (–). Assuming typical TV usage, the batteries last for about one year. ... -
Page 12: Tour Of The Remote Control
Description TOUR OF THE REMOTE CONTROL INPUT SELECT POWER TV SOURCE AMP/TV DIMMER BD/DVD SLEEP PROLOGIC AUDIO ASSIGN MUTE TUNING TUNER MEMORY SUBWOOFER MO/ST SETUP/MENU INFO RETURN EXIT BD/DVD iPod MULTI CH... - Page 13 POWER BUTTON Turns the receiver on/off. Used to select the AMP/TV mode. AMP/TV BUTTON - If you select the AMP mode, the button will fl ash orange. - If you select the TV mode, the button will fl ash green. NUMBER BUTTONS Used to select a TV channel.
-
Page 14: Connections
This section involves various methods of connecting the AV receiver to other external components. Before moving or installing the product, be sure to turn off the power and disconnect the power cord. SPEAKER POSITIONING * The HW-C500 model does not supply speakers (sold separately). 6.6~9.8 feet (2~3m) RECEIVER SETUP INPUT SELECT... -
Page 15: Center Speaker
Center speaker It is best to install it at the same height as the front speakers. You can also install it directly over or under the TV. Surround Speakers Place these speakers behind your listening position. If there isn't enough room, place these speakers so they face each other. Place them about 2 to 3 feet (60 to 90cm) above your ears, facing slightly downward. -
Page 16: Connecting The Speakers
Model HW-C500 AV Receiver HW-C500 The HW-C500 model does not supply speakers (sold separately). Contact a Samsung Electronics retailer for purchasing. Connecting Speaker Wire Loosen the knob by turning counterclockwise. Insert the bare part of the wire into the hole in the side of each terminal. - Page 17 SUBWOOFER PS-WC560S The Active Subwoofer is sold separately. Contact a Samsung Electronics retailer for purchasing. Connecting the Speakers Press down the terminal tab on the back of the speaker. Insert the black wire into the black terminal (–) and the red wire into the red (+) terminal, and then release the tab.
-
Page 18: Connecting External Devices/Your Tv Via Hdmi
Connections CONNECTING EXTERNAL DEVICES/YOUR TV VIA HDMI HDMI is a digital standard interface for connection to such devices as a TV, projector, DVD player, Blu-ray player, set-top box and more. HDMI removes any loss of signal from analog conversion, enabling you to enjoy video and audio sound quality as it was originally created in the digital source. -
Page 19: Hdmi Function
If you use an HDMI cable to connect a Samsung TV to your AV Receiver, you can operate the AV receiver using the TV’s remote control. This function is available only in connection with Samsung TV and DVD player supporting Anynet +(HDMI-CEC). -
Page 20: Connecting To Your Tv
Connections CONNECTING TO YOUR TV iPod COMPONENT VIDEO OPTICAL AUDIO Video Connection If your television is equipped with Component Video inputs, connect a Component video cable(not supplied) from the Component Video Output (P and Y) jacks on the back of your AV Receiver to the Component Video Input jacks on your TV. -
Page 21: Connecting A Dvd Or Bd(Blu-Ray) Player
CONNECTING A DVD OR BD(Blu-ray) PLAYER COMPONENT VIDEO iPod DVD or BD Player COMPONENT OPTICAL AUDIO VIDEO Video Connection Connect a Component video cable(not supplied) from the COMPONENT IN (BD/DVD) (P and Y) jacks on the back of your AV Receiver to the Component Video Output jacks on your DVD/BD player. Connect a Video cable from the VIDEO IN (BD/DVD) jack on the back of your AV Receiver to the Video Output jack on your DVD/BD player. -
Page 22: Connecting A Cable, Satellite Or Set-Top Box
Connections CONNECTING A CABLE, SATELLITE OR SET-TOP BOX COMPONENT VIDEO iPod (Cable/Satellite/Set-top box) COMPONENT OPTICAL AUDIO VIDEO Video Connection Connect a Component video cable(not supplied) from the COMPONENT IN (SAT) (P and Y) jacks on the back of your AV Receiver to the Component Video Output jacks on your SAT. Connect a Video cable from the VIDEO IN (SAT) jack on the back of your AV Receiver to the Video Output jack on your SAT. -
Page 23: Connecting A Cd Player
CONNECTING A CD PLAYER CD player AUDIO COAXIAL iPod Audio Connection Connect the Digital Input (COAXIAL) on your AV Receiver to the Digital Output of the CD Player. Connect AUDIO IN (CD) on your AV Receiver to the Audio Out of the CD player. ... -
Page 24: Connecting 5.1 Channel Devices
Connections CONNECTING 5.1 CHANNEL DEVICES You can connect the AV receiver to a DVD player, SUPER AUDIO CD player or other device with 5.1 channel output. iPod FRONT SURROUND CENTER WOOFER 5.1 CH 5.1 Channel device... -
Page 25: Connecting An Ipod
When the unit is powered on and you connect an iPod, the unit will charge your iPod's battery. Make sure to connect the dock connector so that the label “SAMSUNG” faces upward. “Made for iPod” means that an electronic accessory has been designed to connect specifi cally to an iPod and has been certifi... -
Page 26: Connecting The Fm Antenna
Connections CONNECTING AN iPod (Continued) iPod models that are compatible with HW-C500/HW-C560S "Made for iPod" means that the dock has been designed to connect specifi cally for the iPod and has been certified by the developer to meet Apple performance standards. -
Page 27: Before Using The Av Receiver
You can also turn the unit on/off by pressing the POWER button on the remote control. Remote control functions You can operate your AMP (this AV receiver)/ TV and BD(Samsung only)/ DVD player with this remote control. See pages 49 ~ 51 for more details. -
Page 28: Selecting Digital/Analog Input
Basic functions of your AV Receiver SELECTING DIGITAL/ANALOG INPUT You can listen to sound in 2 channel analog , Dolby Digital or DTS using this unit. INPUT SELECT POWER POWER TV SOURCE Press the INPUT SELECT button to select a desired function (BD/DVD, SAT,TV, CD). -
Page 29: Setup Menu Tree
For your convenience, you can set this AV receiver's features for the best use. SETUP MENU TREE Here’s a quick look at how the setup menus are organized on your AV Receiver. AUDIO SETUP BD/DVD OPT 1,2,3 COAX OPT 1,2,3 COAX OPT 1,2,3 COAX... - Page 30 Setup SETUP MENU TREE (Continued) AUDIO SETUP SPK SIZE FRONT LARGE SMALL CENTER LARGE SMALL NONE SURR LARGE SMALL NONE SUBW CROVR 60Hz, 80Hz, 100Hz, 120Hz, 150Hz, 180Hz, 200Hz SPK DISTANCE 1 ~ 30 FT (1 foot steps) , default : 10 FT SPK LEVEL -10 ~ +10dB (1dB step) , default : 00dB TEST TONE...
- Page 31 SETUP MENU TREE (Continued) AUDIO SETUP SPK SIZE SPK DISTANCE SPK LEVEL TEST TONE DPLII SETUP PANORAMA DIMENSION -7 ~ 0 ~ +7 C- WIDTH TONE CONTROL TONE BASS -6dB ~ +6dB (1dB Step) TREBLE -6dB ~ +6dB (1dB Step) A/V SYNC MP3 ENHANCER SMART VOLUME...
- Page 32 Setup SETUP MENU TREE (Continued) AUDIO SETUP SPK SIZE SPK DISTANCE SPK LEVEL TEST TONE DPLII SETUP TONE CONTROL A/V SYNC SYNC OFF ~ SYNC 240MS (10MS Step) MP3 ENHANCER SMART VOLUME ASC SETUP START EQ ON / EQ OFF DRC SETUP SYNC HDMI SETUP...
-
Page 33: Setting The Speaker Size
SETTING THE SPEAKER SIZE Signal outputs and frequency response from the speaker will be adjusted according to your speaker confi guration and whether certain speakers are used or not. Press the SETUP/MENU button. • Each time the button is pressed, the mode switches between SETUP ENTER and SETUP OFF. -
Page 34: Setting The Speaker Listening Distance
Setup SETTING THE SPEAKER LISTENING DISTANCE If the speakers cannot be placed at equal distances from the listening position, you can adjust the delay time of the audio signals from the center and surround speakers. Press the SETUP/MENU button. • Each time the button is pressed, the mode switches between SETUP ENTER and SETUP OFF. -
Page 35: Setting The Speaker Level
SETTING THE SPEAKER LEVEL You can set the balance and level of speakers. Press the SETUP/MENU button. • Each time the button is pressed, the mode switches between SETUP ENTER and SETUP OFF. Press the ENTER button to select SETUP ENTER. Press the ▲▼... -
Page 36: Setting The Test Tone
Setup SETTING THE TEST TONE Use the test tone to check the speaker connection status or level. Press the SETUP/MENU button. • Each time the button is pressed, the mode switches between SETUP ENTER and SETUP OFF. Press the ENTER button to select SETUP ENTER. Press the ▲▼... -
Page 37: Setting Dolby Pro Logic Ii Mode
SETTING DOLBY PRO LOGIC II MODE This mode provides 5.1 channel sound from 2 channel sources. Press the PROLOGIC button on the remote control. • MOVIE : Adds realism to the movie soundtrack. • MUSIC : Provides 5.1 channel surround sound for digital, analog or existing stereo sources. •... -
Page 38: Setting Tone Control
Setup SETTING TONE CONTROL This will enable you to adjust the bass and treble level. Press the SETUP/MENU button. • Each time the button is pressed, the mode switches between SETUP ENTER and SETUP OFF. Press the ENTER button to select SETUP ENTER. Press the ▲▼... -
Page 39: Av Sync
AV SYNC Video may look slower than the audio if it is connected to a digital TV. If this occurs, adjust the audio delay time to match the video. Press the SETUP/MENU button. • Each time the button is pressed, the mode switches between SETUP ENTER and SETUP OFF. -
Page 40: Asc (Auto Sound Calibration) Setup
Setup ASC (AUTO SOUND CALIBRATION) SETUP By setting the ASC function just once when you relocate or install the unit, you can have the unit automatically recognize the distance between speakers, levels between channels, and frequency characteristics to create a 5.1-channel sound fi... -
Page 41: Drc Setup
- TV : HDMI audio is output • HDMI ANYNET+ : ON, OFF Anynet+ is a function that enables you to control other Samsung Devices with your Samsung TV's remote control. - ON : Anynet+ is enabled. - OFF : Anynet+ is disabled. -
Page 42: Operation
Operation Operation USING THE SURROUND MODES Using the SOUND EFFECT button on the front of the main unit Selecting the SFE mode Press the SOUND EFFECT button to select SFE. • Each time you press this button, SFE DPLII will be selected in turn. Press the UP/DOWN ( ,,. -
Page 43: Using The Subwoofer Selection Button
USING THE SURROUND MODES (Continued) Surround Mode and Input Signal Chart o = active, – = inactive Output Channel Display Information Surround Mode Input Signal Decoding Display Signal SUBW Channel Status Format Dolby D (5.1ch) Dolby Digital 5.1 DIGITAL L, C, R, SL, SR, SW Dolby D (2ch) Pro Logic II DIGITAL... -
Page 44: Listening To The Radio
Operation LISTENING TO THE RADIO You can listen to the radio by using either automatic or manual tuning. Press the INPUT SELECT button to select FM. Select a frequency (radio broadcast). • Preset tuning : Press the #,$ buttons on the remote control to select the preset frequency. •... -
Page 45: Using An Ipod
USING AN iPod You can enjoy playback of your iPod using the supplied remote control. Listening to Music (iPod audio function) You can play music fi les stored in the iPod player by connecting it to the AV receiver. Connect the iPod dock connector to the iPod jack on the AV Receiver. - Page 46 Operation USING AN iPod (Continued) Watching a Movie (iPod Video function) You can play video fi les stored in the iPod player on a TV by connecting it to the AV receiver. Connect the iPod dock connector to the iPod jack on the AV receiver.
-
Page 47: Convenient Functions
CONVENIENT FUNCTIONS Sleep timer function You can set the time that this unit will shut itself off. Press the SLEEP button. SLEEP • SLEEP : OFF 120 M (MIN) will be selected in turn. PROLOGIC PROLOGIC AUDIO ASSIGN AUDIO ASSIGN To check sleep timer Press the SLEEP button. -
Page 48: Software Upgrade
Do not use this unless necessary. SOFTWARE UPGRADE Samsung may offer upgrades for AV Receiver's fi rmware in the future. Please visit Samsung.com or contact the Samsung call centre to receive information about downloading upgrades and using a USB drive. -
Page 49: Operating Your Tv With The Remote Control
You can use the TV POWER, VOLUME, CHANNEL, MENU and Numeric buttons (0~9). The remote control may not work on some brands of TVs. Also, some operations may not be possible depending on your brand of TV. The remote control will work with Samsung TVs by default. -
Page 50: Tv Brand Code List
078, 092, 093, 094 Realistic 003, 019 IMPERIAL Fisher 019, 065, 103 Sampo MIVAR Funai Samsung 000, 015, 016, 017, 040, SABA Futuretech BANG&OLUFSEN 043, 046, 047, 048, 049, General Electric (GE) 006, 040, 056, 059, 066, BRIONVEGA 054, 059, 060, 098... -
Page 51: Operating Your Dvd Or Bd Player With The
The remote control may not work on some brands of DVD. Also, some operations may not be possible depending on your brand of DVD. The remote control will work with Samsung DVD (BD) by default. DVD Brand Code List Brand... - Page 52 Troubleshooting Before requesting service, please check the following. Symptom Check Remedy The unit will not turn on. • Is the power cord plugged into the • Connect the power plug to the outlet? outlet. A function does not • Is there static electricity in the air? •...
- Page 53 Symptom Check Remedy Can't select Dolby Pro • Is the input signal selected properly? • Only 2 channel signal can select Logic ll mode. Dolby Pro Logic II mode. (ex:Dolby Digital, PCM, 2 channel analog input signal.) There is no sound when •...
-
Page 54: Specifications
* S/N Ratio, Distortion, Separation and Usable sensitivity are based on measurement using AES (Audio Engineering Society) guidelines. - Samsung Electronics Co., Ltd reserves the right to change the specifi cations without notice. - Weight and dimensions are approximate. - Design and specifi cations are subject to change without prior notice. - Page 55 All warranty repairs must be performed by a SECA Authorized Service Center. (The name and address of the location nearest you can be obtained by calling toll free: 1- 800- SAMSUNG) LABOR PARTS...
- Page 56 Contact SAMSUNG WORLD WIDE If you have any questions or comments relating to Samsung products, please contact the SAMSUNG customer care center. Area Contact Center Web Site Area Contact Center Web Site ` North America www.samsung.com/ch 0848 - SAMSUNG (7267864, Switzerland www.samsung.com/...
- Page 57 Code No. AH68-02301S...