Table of Contents

Subscribe to Our Youtube Channel
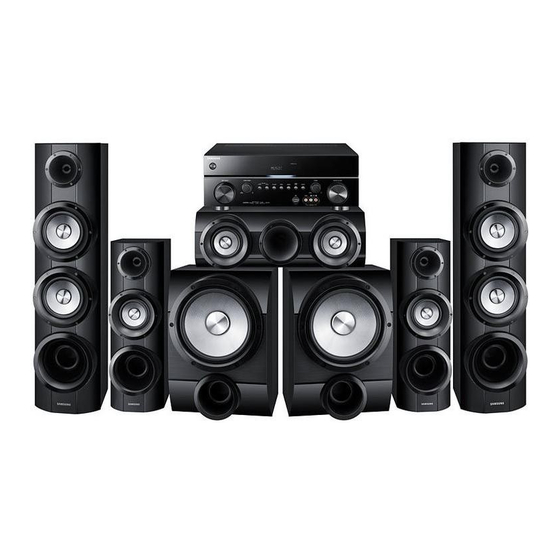
Related Manuals for Samsung HW-E6500


Summary of Contents for Samsung HW-E6500
-
Page 1: User Manual
HW-E6500 AV Receiver System user manual imagine the possibilities Thank you for purchasing this Samsung product. To receive more complete service, please register your product at www.samsung.com/register... -
Page 2: Safety Information
Safety Information Safety Warnings TO REDUCE THE RISK OF ELECTRIC SHOCK, DO NOT REMOVE THE COVER(OR BACK). NO USER-SERVICEABLE PARTS ARE INSIDE. REFER SERVICING TO QUALIFIED SERVICE PERSONNEL. CAUTION RISK OF ELECTRIC SHOCK DO NOT OPEN This symbol indicates “dangerous CAUTION : TO PREVENT ELECTRIC This symbol indicates important voltage”... -
Page 3: Precautions
Precautions • Ensure that the AC power supply in your house complies with the identification sticker located on the back of your product. • Install your product horizontally, on a suitable base (furniture), with enough space around it for ventilation (7.5~10cm). -
Page 4: Table Of Contents
SETUP 21 Home Menu 22 Selecting Digital/HDMI/Analog 23 Setting the Setup menu 23 Display 23 TV Aspect(USB Playback only) 24 BD Wise (Samsung products only) 24 Resolution 24 HDMI Format 24 Video Out Signal 25 Audio 25 Simple Setup 25 Speaker Setting... - Page 5 Contents 28 Using the Sound Modes OPERATION 28 3D SOUND 28 DSP (Digital Signal Processor)/EQ 28 Dolby Pro Logic II Mode 29 Other Settings 29 P.BASS 29 S/W LEVEL 29 V Surround 29 Audio USB (MP3/WMA) Playback 30 JPEG File Playback 30 Rotate Function 31 Listening to the Radio 31 To Listen in Mono/Stereo...
-
Page 6: Getting Started
Anynet+ (HDMI-CEC) Function Anynet+ is a function that can be used to operate this AV Receiver with a Samsung TV remote control, by connecting the receiver to a SAMSUNG TV using an HDMI Cable. (This function is available only in connection with Samsung TV and DVD player supporting Anynet+(HDMI-CEC).) -
Page 7: Description
Description Front Panel 9 10 Turns the receiver on/off. POWER BUTTON ( Used to select a source. INPUT SELECT CONTROL AUDIO ASSIGN CONTROL Toggles to select an input mode for the selected source. STOP/PLAY BUTTON Play, pause or stop playing the music in the USB connection. 3D SOUND BUTTON Press to apply 3D Sound effect. -
Page 8: Display
Getting Started Display SPEAKER INDICATORS Displays sound producing speakers. SPEAKER LEVEL INDICATOR Displays the speaker level. Displays the audio input signal type of the currently connected external audio AUDIO INPUT INDICATORS source. MESSAGE DISPLAY Informs you of the status of the receiver. RADIO FREQUENCY Displays the current radio frequency range. -
Page 9: Rear Panel
Rear Panel 4 5 6 SPEAKERS OUT TERMINALS Speaker connection terminals. ONLY FOR SERVICE JACK Used for the service repair. OPTICAL IN JACKS (DIGITAL AUDIO IN) Receives the digital optical audio signal. (BD/DVD, TV) COAXIAL IN JACK (DIGITAL AUDIO IN) Receives the digital coaxial audio signal. -
Page 10: Remote Control
Getting Started Remote Control Tour of the Remote Control INPUT SELECT POWER TV SOURCE V SURROUND DSP/EQ MUTE TUNING / CH REPEAT DISC MENU MENU TITLE MENU TOOLS INFO RETURN EXIT TUNER MO/ST DIMMER SLEEP MEMORY AUDIO P.BASS S/W LEVEL 3D SOUND ASSIGN English... - Page 11 POWER BUTTON Turns the receiver on/off. TV BUTTON To change to TV mode, press the TV button. AVR BUTTON To change to AVR(AV Receiver) mode, press the AVR button. NUMBER BUTTONS Used to select a TV channel. DOLBY PRO LOGIC II BUTTON Select the desired Dolby Pro Logic II audio mode.
-
Page 12: Installing Batteries In The Remote Control
Getting Started REPEAT BUTTON Allows you to repeat a title, chapter, track or disc. TITLE MENU BUTTON Use to enter the title menu. INFO BUTTON Display information on the connected device currently being used. ENTER BUTTON Used to select an item in the SETUP menu. EXIT BUTTON Exits the SETUP menu. -
Page 13: Connections
This section involves various methods of connecting the AV receiver to other external components. Before moving or installing the product, be sure to turn off the power and disconnect the power cord. Speaker Positioning * Speakers are provided with model HW-E6500 only. Normal speaker's position : Simple speaker's position : 6.6~9.8 feet (2~3m) -
Page 14: Connecting The Speakers
FRONT (L) FRONT (R) ✎ NOTE Speakers are provided with model HW-E6500 only. Keep the subwoofer speaker out of reach of children to prevent them from inserting their hands or objects into the duct (hole). Never touch speaker terminals while the power is on. Doing so could result in electric shock. -
Page 15: Connecting External Devices/Your Tv Via Hdmi
Connecting External Devices/your TV via HDMI HDMI is a digital standard interface for connection to such devices as a TV, projector, DVD player, Blu-ray player, set-top box and more. HDMI removes any loss of signal from analog conversion, enabling you to enjoy video and audio sound quality as it was originally created in the digital source. -
Page 16: Hdmi Function
NOTE If you use an HDMI cable to connect a Samsung TV to your AV Receiver, you can operate the AV receiver using the TV’s remote control. This function is available only in connection with Samsung TV and DVD player supporting Anynet + (HDMI-CEC). -
Page 17: Connecting To Your Tv
Connecting to your TV VIDEO OPTICAL AUDIO Video Connection Connect the Video cable (supplied) from the VIDEO OUT jack on the back of your AV Receiver to the Video Input jack on your TV. Audio Connection Connect the Digital Input (OPTICAL (TV)) on your AV Receiver to the Digital Output of the TV. Connect AUDIO IN (TV) on your AV Receiver to the Audio Out of the TV. -
Page 18: Connecting A Dvd Or Bd(Blu-Ray) Player
Connections Connecting a DVD or BD(Blu-ray) Player VIDEO OPTICAL COAXIAL AUDIO VIDEO DVD or BD Player Video Connection Connect a Video cable (supplied) from the VIDEO IN (BD/DVD) jack on the back of your AV Receiver to the Video Output jack on your DVD/BD player. Audio Connection Connect the Digital Input (OPTICAL (BD/DVD)) on your AV Receiver to the Digital Output of the DVD/BD player. -
Page 19: Connecting The Fm Antenna
Connecting the FM Antenna 1. Connect the FM antenna supplied to the FM ANTENNA terminal as a temporary measure. 2. Slowly move the antenna wire around until you find a location where reception is good, then fasten it to a wall or other rigid surface. -
Page 20: Connecting The Usb
Connections Connecting the USB You can use the USB connection to play multimedia files (MP3, JPEG, DivX, etc) downloaded from the USB storage device. 1. In Stop mode, connect the USB storage device to the USB port on the front panel of the product. 2. -
Page 21: Setup
• You can also turn the unit on/off by pressing the POWER button on the remote control. Remote Control Functions You can operate your AMP (this AV receiver)/ TV and BD(Samsung only)/DVD player with this remote control. See pages 35 ~ 36 for more details. -
Page 22: Selecting Digital/Hdmi/Analog
Setup Selecting Digital/HDMI/Analog You can listen to sound of analog, HDMI, optical input using this unit. TUNER TUNER DIMMER DIMMER SLEEP SLEEP MO/ST MO/ST MEMORY MEMORY 1. Press the INPUT SELECT button on the remote control to select a desired function (DVD, AUX, TV). See page 10. AUDIO P.BASS P.BASS... -
Page 23: Setting The Setup Menu
Setting the Setup menu The access step may differ depending on the selected menu. The GUI (Graphical User Interface) in this manual may differ, depending on the firmware version. DISC MENU DISC MENU MENU MENU TITLE MENU TITLE MENU MENU BUTTON : Display the home menu. RETURN BUTTON : Return to the previous setup menu. -
Page 24: Bd Wise (Samsung Products Only)
BD Wise (Samsung products only) BD Wise is Samsung's latest inter-connectivity feature. When you connect Samsung products with BD-Wise to each other via HDMI, the optimum resolution will be set automatically. • On : The original resolution of the DVD disc will be output to the TV direct. -
Page 25: Audio
Audio Simple Setup It is the Function for selecting the Speaker Layout suitable with the layout type of the connected Speaker. That is two path to select: 1. Settings AudioSimple Setup 2. Settings SystemInitial Setting Simple Speaker Setup • Normal Mode: Use this option when the surround speakers are located behind you. ... -
Page 26: Drc (Dynamic Range Compression)
Setup Setting up the Speaker Delay Time Settings Delay Time When 5.1CH Surround Sound is played, you can enjoy the Front best sound if the distance between you and each speaker is Center : 00ms the same. Surround : 00ms Since the sounds arrive at the listening position at different Subwoofer Test Tone... -
Page 27: User Eq
Settings User EQ User EQ · · You can configure the equalizer settings manually to · · · · your preference. · · · · · · 250Hz 600Hz 1kHz 3kHz 6kHz 10kHz 15kHz a Reset > Adjust < Move ' Return Audio Return Ch. -
Page 28: Operation
Operation Operation Using the Sound Modes 3D SOUND Press the 3D SOUND button. • Each time you press this button, 3D SOUND ON 3D SOUND OFF will be selected in turn. • You can also select the 3D SOUND mode by pressing the 3D SOUND button on the remote control. -
Page 29: Other Settings
Other Settings P.BASS Press the P.BASS button on the remote control. Each time you press this button, P.BASS ON P.BASS OFF will be selected in turn. ✎ NOTE The P.BASS function provides a bass boost to reinforce the low frequencies. ... -
Page 30: Jpeg File Playback
Operation JPEG File Playback Images captured with a digital camera or camcorder, or JPEG files on a PC can be stored on a USB and then played back with this product. ROOT 1. Connect the USB storage device to the USB port on JPEG 1 the front panel of the product. -
Page 31: Listening To The Radio
Listening to the Radio You can listen to the radio by using either automatic or manual tuning. 1. Press the INPUT SELECT button on the remote control to select FM. 2. If you want to switch the tuning mode between Preset and Manual, use the TUNING MODE button in the front panel, or the STOP button on the remote control. -
Page 32: Convenient Functions
Operation Convenient Functions Sleep Timer Function You can set the time that this unit will shut itself off. Press the SLEEP button. • SLEEP : OFF SLP 10 SLP 20 SLP 30 SLP 60 SLP 90 TUNER TUNER ... -
Page 33: Reset Function
Reset Function When the Power is on, No USB In "No USB" mode, press and hold the STOP button to Settings reset the system. • INIT appears on the display. • The unit will turn off after 5 seconds. ✎ NOTE ... -
Page 34: Software Upgrade
Samsung may offer upgrades for AV Receiver's firmware in the future. Please visit Samsung.com or contact the Samsung call center at to receive information about downloading upgrades and using a USB drive. Upgrades will be possible by connecting a USB drive to the USB port located on your AV Receiver. -
Page 35: Miscellaneous
The remote control may not work on some brands of TVs. Also, some operations may not be possible depending on your brand of TV. The remote control will work with Samsung TVs by default. TV Brand Code List Brand... -
Page 36: Operating Your Dvd Or Bd Player With The Remote Control
The remote control may not work on some brands of DVD. Also, some operations may not be possible depending on your brand of DVD. The remote control will work with Samsung DVD (BD) by default. DVD Brand Code List Brand... -
Page 37: Other Information
Other Information Troubleshooting Before requesting service, please check the following. Symptom Check Remedy The unit will not turn on. • Is the power cord plugged into the • Connect the power plug to the outlet? outlet. A function does not •... -
Page 38: Product Protection Function
Other Information Product Protection Function Heat protection • The protection function will come on if the main unit or power transformer overheats. " " will appear in the display . This function will come on : - If speaker terminal is shorted - If speaker cable is shorted If there is no problem when you turn the unit on again after turning it off, PROTECT mark will disappear on the display and the unit will work properly. -
Page 39: Specifications
* S/N Ratio, Distortion, Separation and Usable sensitivity are based on measurement using AES (Audio Engineering Society) guidelines. - Samsung Electronics Co., Ltd reserves the right to change the specifications without notice. - Weight and dimensions are approximate. - Design and specifications are subject to change without prior notice. - Page 40 Contact SAMSUNG WORLD WIDE If you have any questions or comments relating to Samsung products, please contact the SAMSUNG customer care center. Contact Center Contact Center Area Web Site Area Web Site ` North America 0700 Samsung (0700 726 Serbia www.samsung.com...
- Page 41 Code No. AH68-02625H...
- Page 42 HW-E6500 Sistema do receptor de AV manual do usuário Imagine as possibilidades Obrigado por adquirir este produto Samsung. Para receber um atendimento mais completo, registre seu produto no site www.samsung.com/register...
- Page 43 Informações de segurança Avisos de segurança PARA REDUZIR O RISCO DE CHOQUE ELÉTRICO, NÃO RETIRE A TAMPA (NEM A PARTE TRASEIRA). NO INTERIOR DO APARELHO, NÃO EXISTEM PEÇAS QUE POSSAM SER REPARADAS PELO USUÁRIO. CONSULTE A EQUIPE DE ASSISTÊNCIA TÉCNICA QUALIFICADA PARA ESSE TIPO DE SERVIÇO. CUIDADO RISCO DE CHOQUE ELÉTRICO NÃO ABRA...
- Page 44 Precauções • Certifique-se de que a fonte de alimentação CA em sua casa está em conformidade com o adesivo de identificação localizado atrás do seu produto. • Instale o produto horizontalmente, em uma base apropriada (mobília), com espaço suficiente ao redor para ventilação (7,5 a 10 cm).
- Page 45 CONFIGURAÇÃO 21 Menu inicial 22 Selecionando Digital/HDMI/Analógico 23 Menu de configuração 23 Visor 23 Aspecto da TV (Apenas reprodução USB) 24 BD Wise (Produtos Samsung apenas) 24 Resolução 24 Formato HDMI 24 Saída de Vídeo 25 Áudio Config. Simples 25 Configuração do alto-falante 26 DRC (Compactação de faixa dinâmica)
- Page 46 Índice 28 Usando os modos de Som OPERAÇÃO 28 SOM 3D 28 DSP (Processador de sinal digital)/EQ 28 Modo Dolby Pro Logic II 29 Outras configurações 29 P.BASS 29 S/W LEVEL V-SURROUND 29 Reprodução USB de áudio (MP3/WMA) 30 Reprodução de arquivo JPEG 30 Função Girar 31 Ouvindo o rádio 31 Para ouvir em mono/estéreo...
- Page 47 Anynet+ é uma função que pode ser usada para operar este receptor de AV com um controle remoto de TV Samsung, conectando o receptor a uma TV SAMSUNG usando um cabo HDMI. (Esta função fica disponível apenas em conjunto com a TV Samsung e o leitor de DVD com suporte para Anynet+(HDMI-CEC).) Acessórios...
-
Page 48: Painel Frontal
Descrição Painel frontal 9 10 Liga e desliga o receptor. BOTÃO LIGA/DESLIGA ( CONTROLE DE SELEÇÃO DE Usado para selecionar uma fonte. ENTRADA USB FM CONTROLE DE ATRIBUIÇÃO DE Alterna para selecionar um modo de entrada para a fonte selecionada. ÁUDIO BOTÃO PARAR/REPRODUZIR Reproduza, pause ou pare de reproduzir a música na conexão USB. - Page 49 Primeiros passos Visor INDICADORES DO Exibe os alto-falantes de produção de som. ALTO-FALANTE INDICADOR DO NÍVEL DO Exibe o nível do alto-falante. ALTO-FALANTE INDICADORES DE ENTRADA DE Exibe o tipo de sinal de entrada de áudio da fonte de áudio externa atualmente ÁUDIO conectada.
-
Page 50: Painel Traseiro
Painel traseiro 4 5 6 TERMINAIS DE SAÍDA DO Terminais de conexão do alto-falante. ALTO-FALANTE CONECTORES APENAS PARA Utilizado para serviço de assistência. ASSISTÊNCIA CONECTORES DE ENTRADA ÓPTICA Recebe o sinal de áudio óptico digital. (BD/DVD, TV) (ENTRADA DE ÁUDIO DIGITAL) CONECTOR DE ENTRADA COAXIAL Recebe o sinal de áudio coaxial digital. - Page 51 Primeiros passos Controle remoto Tour pelo controle remoto INPUT SELECT POWER TV SOURCE V SURROUND DSP/EQ MUTE TUNING / CH REPEAT DISC MENU MENU TITLE MENU TOOLS INFO RETURN EXIT TUNER MO/ST DIMMER SLEEP MEMORY AUDIO P.BASS S/W LEVEL 3D SOUND ASSIGN Português...
- Page 52 BOTÃO LIGA/DESLIGA Liga e desliga o receptor. BOTÃO TV Para alterar para o modo TV, pressione o botão TV. BOTÃO AVR Para alterar para o modo AVR (Receptor de AV), pressione o botão AVR. BOTÕES DE NÚMERO Usados para selecionar um canal de TV. BOTÃO DOLBY PRO LOGIC II Selecione o modo de áudio Dolby Pro Logic II desejado.
- Page 53 Primeiros passos BOTÃO DE REPETIÇÃO Permite repetir um título, capítulo, trilha ou disco. BOTÃO MENU DO TÍTULO Use para entrar no menu do título. BOTÃO INFO Exiba as informações no dispositivo conectado atualmente sendo usado. BOTÃO ENTER Usado para selecionar um item no menu SETUP (CONFIGURAÇÃO). BOTÃO EXIT Sai do menu SETUP (CONFIGURAÇÃO).
- Page 54 Antes de mover ou instalar o produto, certifique-se de desligar a energia e desconectar o cabo de alimentação. Posicionamento dos alto-falantes * Os alto-falantes são fornecidos apenas com o modelo HW-E6500. Posição normal das colunas : Posição simples das colunas : 6.6~9.8 feet (2~3m)
- Page 55 FRONTAL (L) SURROUND (R) ✎ NOTA Os alto-falantes são fornecidos apenas com o modelo HW-E6500. Mantenha o alto-falante do subwoofer fora do alcance de crianças para evitar que elas insiram suas mãos ou objetos no duto (orifício). ...
- Page 56 Conectando dispositivos externos/sua TV via HDMI HDMI é uma interface digital padrão para conexão a dispositivos como uma TV, projetor, leitor de DVD, leitor Blu-ray, decodificador Set-top box e muito mais. O HDMI remove qualquer perda de sinal a partir da conversão analógica, permitindo apreciar a qualidade do vídeo e do som de áudio porque ela foi criada originalmente na fonte digital.
- Page 57 Anynet+ é uma função que permite controlar outros dispositivos Samsung com o controle remoto de sua TV Samsung. Anynet + pode ser usada conectando este receptor de AV a uma TV SAMSUNG com um cabo HDMI. Disponível somente com TVs SAMSUNG e produtos de AV SAMSUNG que suportam Anynet+.
- Page 58 Conectando à TV VIDEO OPTICAL AUDIO Conexão de vídeo Conecte o cabo de vídeo (fornecido) do conector de SAÍDA DE VÍDEO atrás do receptor de AV no conector de entrada de vídeo em sua TV. Conexão de áudio Conecte a entrada digital ((TV) ÓTICA) no receptor de AV à saída digital da TV. Conecte a entrada de áudio (AUDIO IN - TV) no receptor de AV à...
- Page 59 Conexões Conectando um leitor de DVD ou BD (Blu-ray) VIDEO OPTICAL COAXIAL AUDIO VIDEO Leitor de DVD ou BD Conexão de vídeo Conecte um cabo de vídeo (fornecido) do conector de entrada de vídeo (VIDEO IN - BD/DVD) atrás do receptor de AV ao conector de saída de vídeo no leitor de DVD/BD.
- Page 60 Conectando a antena FM 1. Conecte a antena FM fornecida ao terminal FM ANTENNA como uma medida temporária. 2. Gire lentamente o fio da antena até encontrar um local onde a recepção seja boa e, em seguida, fixe-o em uma parede ou outra superfície rígida. Antena FM (fornecida) ✎...
- Page 61 Conexões Conectando o USB Você pode usar a conexão USB para reproduzir arquivos multimídia (MP3, JPEG, DivX, etc) baixados do dispositivo de armazenamento USB. 1. No modo Parar, conecte o dispositivo de armazenamento USB à porta USB no painel frontal do produto. 2.
- Page 62 • Você também pode ligar ou desligar a unidade, pressionando o botão POWER no controle remoto. Funções do controle remoto Você pode operar o seu AMP (este receptor de AV) / TV e BD (Samsung apenas) / leitor de DVD com este controle remoto. Consulte as páginas 35 a 36 para obter mais detalhes.
- Page 63 Configuração Selecionando Digital/HDMI/Analógico Você pode escutar o som da entrada analógica, HDMI, ótica usando esta unidade. TUNER TUNER DIMMER DIMMER SLEEP SLEEP MO/ST MO/ST MEMORY MEMORY 1. Pressione o botão de INPUT SELECT no controle remoto para AUDIO P.BASS S/W LEVEL S/W LEVEL 3D SOUND 3D SOUND...
- Page 64 Menu de configuração Dependendo do menu selecionado, a etapa de acesso pode ser diferente. A GUI (Interface gráfica do usuário) neste manual pode diferir, dependendo da versão do firmware. BOTÃO MENU: Exibe o menu inicial. DISC MENU DISC MENU MENU MENU TITLE MENU TITLE MENU...
- Page 65 BD Wise (Produtos Samsung apenas) BD Wise é o mais recente recurso de interconectividade da Samsung. Ao conectar os produtos Samsung com BD-Wise via HDMI, a melhor resolução será configurada automaticamente. • Lig : A resolução original do disco DVD será transmitida na TV diretamente.
- Page 66 Áudio Config. Simples Corresponde à função utilizada para seleccionar a disposição das colunas adequadas ao tipo de disposição da coluna ligada. Existem dois caminhos para efectuar a selecção: 1. Definições ÁudioConfiguração simples 2. Definições SistemaDefinição inicial Simples Configuração do alto-falante •...
- Page 67 Configuração Configurando o tempo de atraso do alto-falante Settings Quando o som Surround de 5.1CH for reproduzido, você Delay Time poderá apreciar o melhor som se a distância entre você e Front Center : 00ms cada alto-falante for a mesma. Surround : 00ms Uma vez que o som chega na posição de audição em...
- Page 68 Utilizador EQ Settings User EQ Pode definir as configurações do equalizador · · · manualmente, de acordo com as suas preferências. · · · · · · · · · 250Hz 600Hz 1kHz 3kHz 6kHz 10kHz 15kHz a Reset > Adjust < Move ' Return mMove "...
- Page 69 Operação Usando os modos de Som SOM 3D Pressione o botão de 3D SOUND. • Sempre que você pressionar o botão, 3D SOUND ON 3D SOUND OFF será selecionado também. • Também é possível selecionar o modo 3D SOUND pressionando o botão de 3D SOUND controle remoto.
- Page 70 Outras configurações P.BASS Pressione o botão P.BASS no controle remoto. • Sempre que pressionar este botão, P.BASS ON P.BASS OFF será selecionado também. ✎ NOTA A função P.BASS fornece uma intensidade grave para reforçar as baixas frequências. A função P.BASS está...
- Page 71 Operação Reprodução de arquivo JPEG As imagens capturadas com uma câmera digital ou filmadora, ou os arquivos JPEG em um PC podem ser armazenados em um USB e depois reproduzidos com este produto. 1. Conecte o dispositivo de armazenamento USB à porta ROOT USB no painel frontal do produto.
- Page 72 Ouvindo o rádio Você pode ouvir o rádio usando a sintonia automática ou manual. 1. Pressione o botão de INPUT SELECT do controle remoto para selecionar FM. 2. Se desejar alternar o modo de ajuste entre Pré-aj e Manual, use o botão TUNING MODE no painel frontal ou o botão STOP no controle remoto.
- Page 73 Operação Funções convenientes Função de temporizador para dormir Você pode configurar o tempo em que esta unidade será desligada sozinha. Pressione o botão SLEEP. • SLEEP : OFF SLP 10 SLP 20 SLP 30 SLP 60 SLP 90 ...
- Page 74 Função Redefinir Quando o aparelho estiver ligado, No USB No mo "No USB", mantenha pressionado o botão STOP Settings para redefinir o sistema. • INIT é exibido no visor. • A unidade será desligada após 5 segundos. ✎ NOTA Function USB Usar a função REDEFINIR apagará...
- Page 75 Operação Atualização do software A Samsung pode oferecer atualizações para o firmware do receptor de AV no futuro. Visite Samsung.com ou entre em contato com a central de atendimento da Samsung para receber informações sobre como baixar atualizações e usar uma unidade USB. As atualizações serão possíveis ao conectar uma unidade USB à...
- Page 76 O controle remoto talvez não funcione em algumas marcas de TVs. Além disso, algumas operações talvez não sejam possíveis dependendo da sua marca de TV. O controle remoto funcionará, por padrão, em uma TV Samsung. Lista de códigos de marcas de TV Marca Código...
- Page 77 015, 020 MITSUBISHI 005, 016 THETA DIGITAL Lista de códigos de marcas de leitor de BD Marca Número do código SAMSUNG 000, 001, 002, 003, 004 ✎ NOTA O controle remoto funcionará apenas em leitores de BD da Samsung. Português...
- Page 78 Outras informações Solução de problemas Antes de solicitar manutenção, verifique o seguinte. Sintoma Verificar Solução A unidade não liga. • O cabo de alimentação está • Conecte o plugue de conectado à tomada? alimentação à tomada. Uma função não é •...
- Page 79 Outras informações Função de proteção do produto Proteção contra aquecimento • A função de proteção aparecerá se houver superaquecimento na unidade principal ou no transformador de energia. " " aparecerá no visor. Esta função aparecerá: - Se o terminal do alto-falante entrar em curto-circuito - Se o cabo do alto-falante entrar em curto-circuito Se não houver problema ao ligar a unidade novamente após desligá-la, a marca PROTECT desaparecerá...
- Page 80 * A relação de S/R, a distorção, a separação e a sensibilidade utilizável são baseadas em medição usando as diretrizes da AES (Audio Engineering Society). - A Samsung Electronics Co., Ltd reserva-se o direito, sem aviso prévio, de fazer alterações nas especificações.
- Page 81 Contacte SAMSUNG GLOBAL Se tem algumas dúvidas ou comentários sobre os produtos Samsung, contacte por favor a nossa linha de apoio a clientes Samsung. Contact Center Contact Center Area Web Site Area Web Site ` North America 0700 Samsung (0700 726 Serbia www.samsung.com...
- Page 82 Code No. AH68-02625H...
Need help?
Do you have a question about the HW-E6500 and is the answer not in the manual?
Questions and answers