
Related Manuals for Philips GENIE 2000


Summary of Contents for Philips GENIE 2000
- Page 1 © 1999 Philips Consumer communications Dual band mobile phone Division of Philips France All rights reserved Printed in France...
- Page 2 Philips would like to thank you for having purchased our product and you can be assured that it has been specifically designed and fully tested with the highest quali- ty standards in mind, and we are confident that you it will give you full satisfaction.
- Page 3 Memory jogger card To make a call: enter the number on the keypad, then press press the key and select the option. Call To answer a call: press or press the key and select the Accept call option. To end a call: press or press the key and select the End call option.
-
Page 4: Overview Of Menus
Overview of menus Display Zoom Names Backlight Animation Messages Contrast Send SMS Security Keypad lock Read SMS Public names SMS settings Call barring SMS centre Change codes Signature PIN protection Validity period Reply path Time and date Delivery report Clock display Auto save SMS Set date Broadcast SMS... -
Page 5: Table Of Contents
Table of contents Before first use Activating/deactivating the vibrator Your very first call Reading your GSM phone Using the carousel number Example Glossary Using the menus Your phone Overview of the menus Names Description of the phone <New> Screen Emergency Initial start up procedure Own No. - Page 6 Quick settings Use of network services Additional GSM network services - GSM strings Checking a voice server, voice mailbox, messaging service, etc. via DTMF tones Making a second call Answering a second call Explicit Call Transfer Answering a third call Conference call In-call symbols Precautions...
-
Page 7: Before First Use
Before first use Your very first call Turn the phone face down Insert the micro SIM card. Clip on the battery. Detach the micro SIM card from the The battery should be carefully fitted full sized SIM card provided by your on the back of the phone, with the bat- network operator. - Page 8 Wait for the 2 beeps. To make a call, enter the phone number directly, and The connection with the network is press established, the green LED flashes and the screen looks like this: If you make a mistake, press the To set the date and time (see page 37).
-
Page 9: Using The Carousel
Using the carousel The carousel is a circular loop of icons displayed on the screen. These icons provide access to the different menus and sub menus used to operate your phone. SMS settings Voice keys Read SMS Names Hotkeys Network Send SMS Messages Broadcast SMS... -
Page 10: Using The Names And Other Lists
Use the navigation keys on the side of your phone and position the Settings above the cursor, giving you access the Settings sub menu. Then confirm by pressing the key. Once again use the navigation keys to move towards the icon and posi- Display tion it above the cursor. -
Page 11: Glossary
Glossary Conference call A multiparty call with up to five other parties in addition to yourself; a network dependent feature. DTMF Dual Tone Multi Frequency Tones that are transmitted by the phone to the network. They are used to listen to messages on answering machines, transmit codes, etc... DCS 1800 Digital Cellular System 1800, or PCN 1800 (Personal Communications Network). -
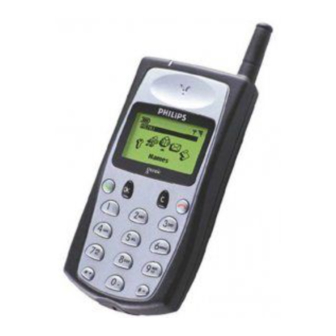
Page 12: Your Phone
Your phone Description of the phone 6. Scroll / Volume keys keys perform different functions in different situations: - During a call, they act as volume control keys. - When navigating in the carousel and its menus, phone book or other lists, they act as clockwise/ counter-clockwise or up/down scroll keys. -
Page 13: Screen
Screen Carousel The loop of icons on your display which provides access to the menu of your choice. Date and time Displayed when in the idle mode. To set the date and time, see «Settings» page 32. Indicators Alarm clock Indicates that the alarm clock function is activated. -
Page 14: Initial Start Up Procedure
Initial start up procedure The micro SIM card To use your phone, you must insert a valid SIM card that is supplied by your GSM service provider. Only micro SIM cards can be used in your phone. The SIM card contains your subscription number and other specific information about your subscription as well as your GSM phone number. -
Page 15: The Battery
will be blocked, and you will be obliged to enter the PUK2 code that as the PUK code, can only be provided to you by your network operator. In the case you would enter an incor- rect PUK2 code, up to ten times, your SIM card will be permanently blocked, requiring once again that you contact your service provider. -
Page 16: Charging The Battery
These measures have been designed with optimum performance and safe use of your phone in mind. For the best results and performances of your phone, only use Philips Authentic Accessories. For more information on safe use and precautions to be taken with your mobile phone, please refer to page 48 «Precautions». -
Page 17: Making An Emergency Call
Making an emergency call • Switch on the phone. The display shows the welcome screen. Even if your PIN code is requested, your phone will function without it. • Enter your PIN code, if requested. • Enter the emergency number, ex. 112. •... -
Page 18: Using Your Phone
Using your phone Switching on • Press the key on the side of the phone. • Enter your PIN code if required, and confirm by pressing on the key. NOTE: The PIN code requirement is an optional security minded feature that you can activate or deactivate via the «PIN protection»... -
Page 19: How To Enter A Text Or A Number
How to enter a text or a number Key Label Upper case alphanumeric Lower case alphanumeric space 1 @ # = < > ( ) & £ $ ¥ space 1 @ # = < > ( ) & £ $ ¥ 2ABC A B C 2 A Ä... -
Page 20: Answering A Call
Answering a call When receiving a call, the phone rings or vibrates and the animation and Incoming call appear on the display while the green LED flashes. In the case the silent mode has been selected both the ringing icon animation and incoming call appear. If the incoming caller is saved in the names list, the corresponding name will appear, and otherwise in the case your subscription permits, the incoming caller’s number may appear on the display. -
Page 21: Voice Dial
Voice dial You can automatically dial a number by simply saying your correspondent’s name if you have previously saved the name with a voice tag as explained on page 23. To dial a previously stored number associated with a voice tag, a long press on the , and say the voice tag of the number to be dialled. -
Page 22: Adjusting The Earpiece Volume
Adjusting the ear-piece volume During a call, press the to increase the volume, and the key to decrease it. Muting and removing the mute function of the microphone You can mute the microphone during a conversation so that your correspondent cannot hear you. -
Page 23: Locking And Unlocking The Keypad
Locking and unlocking the keypad You can lock the keypad to protect the keys from being accidentally pressed, and perhaps unnecessarily dialling a number; for example when your phone is in your pocket or handbag. From the standby screen, access the menu through the carousel, then select Settings and then... -
Page 24: Activating/Deactivating The Vibrator
Activating/deactivating the vibrator Your phone is equipped with an integrated vibrator enabling you to discreetly receive calls without the ringer being activated. To activate the vibra function, press , select Settings and then Sounds and finally Vibrator . Scroll through the Vibrator menu to select , and press... -
Page 25: Using The Menus
Using the menus Using the menus Easy to find, and simple to use in both the advanced or simple menu mode, the menus in your carousel contain all of the functions of your dual band phone. All of the menus have icons with scrollable lists, and they are all used in the same way. - Page 26 Call settings Time and date Call forward Clock display Autoredial* Set date Any key answer* Set time Call waiting Language Caller ID Quick settings Menu type Simple menu Normal Advanced menu Silence Accessories** Auto answer Autonomy Radio mute Auto volume Headset Auto pick up Auto hang up...
-
Page 27: Names
Names menu allows you to consult the list of your correspondents, add new names, write Names and send messages. The names are listed in alphabetical order, and you can scroll through the list using the keys or by entering the first letter of the name. In the list you can choose from the following: <New>... -
Page 28: Emergency
Flash Dial menu provides you with direct access to the phone numbers that you use most Flash Dial frequently, and this can be done by associating them with the keys from Delete menu allows you to delete the number and selected name. Delete Change menu allows you to modify the selected name, number and confirm if it is a fax,... - Page 29 Philips emotion icons, a Philips Savvy for example; otherwise the following codes will be displayed at the end of the receiver’s message.
-
Page 30: Read Sms
Read SMS menu allows you to consult the list of SMS you have sent, saved and or received. Read SMS In using different carousels, you may also delete, reply, re-send or forward these messages. Saved messages The messages you have saved are labelled with . -
Page 31: Broadcast Sms
Signature option allows you to send a signature together with your SMS, which consists of Signature a series of characters that correspond to your SMS «address» (phone number). You may edit a particular «signature» that will systematically be added to the end of your messages, enabling you to «sign»... -
Page 32: Call List
Call list menu provides you with the list of calls you have received and made, in addition of Call list the attempts to auto redial as well as the details of voice messages. The calls are displayed in chronological order with the most recent being the first on the list. To access the Call from the idle screen, either navigate through the carousel until you reach list... -
Page 33: Day View,Week View
Quick settings menu allows you to program the activation of a specific quick setting. Select a Quick Settings date and time and the quick setting to be activated (see page 43). Holiday menu allows you to enter events relating to your holidays, with start and end dates. Holiday Select an event By selecting an event you can be reminded of the details of an exis-... -
Page 34: Euros
Accumulated call timers menu allows you to check the length of both incoming Accum.call timer and outgoing calls and to set the counters to zero. Accumulated cost menu allows you to display the accumulated cost and to Acccum.cost set the counter to zero. It may be protected by the PIN or PIN 2 codes;... -
Page 35: Brick Game
Brick game consists of breaking a complete set of bricks with a ball and a racket; once you Brick game have broken all of the bricks, you move on to the next level of the game and therefore a new set of bricks. Principle and how to play the game: The ball moves through the screen, rebounding off of the «walls»... -
Page 36: Voice Memo
Voice memo menu allows you to record a memo of up to 20 seconds. Voice memo You can stop recording at any time by pressing on , and once your memo is recorded you can play it back or delete it. Settings menu allow you to customise your phone. - Page 37 Ringer option enables you to select the ringer type from 19 different melodies. Scroll Ringer through the list and wait for two seconds to hear the selected melody played. Confirm your choice of ringer by pressing on the key. You may also create your own melody via this menu.
-
Page 38: Display
Key tones This menu allows you to activate or deactivate the key tones. If you press an unvalid Key tones key, the phone beeps due to your error. If key tones are set off, DTMF tones are still acti- vated and can be used during calls. Minute beep menu enables you to activate or deactivate a beep every minute during a call;... -
Page 39: Security
Animation When in the advanced menu the menu enables you to activate or deactivate the ani- Annimation mation in different menus. Contrast menu allows you to choose from five levels of contrast. Contrast Security menu ensures the security of your phone by enabling you Security to lock your keypad, limiting calls to public numbers, barring specific incoming and outgoing calls, and or activating or changing PIN codes. -
Page 40: Time And Date
Outgoing menu allows you to select between International Outgoing calls, and icon, which allows you to call your home country Inter. except home when you are abroad. The various types of call barring can be applied to Voice calls Fax calls Data calls Status You can also... -
Page 41: Language
Set date option allows you to set the date by entering it with the Set date numbers on your keypad. You can also set the date by using the keys. Set time option allows you to set the time, by entering it in on the keypad or using the Set time keys to increase or decrease the time minute by minute. -
Page 42: Hotkeys
Radio mute When this function is activated , the car radio is muted when an incoming call is Radio mute received or when an outgoing call is made, if your car radio is compatible with this function. Auto volume If the function is activated the car kit automatically adjusts the speaker volume when Auto volume the surrounding noise level changes. - Page 43 Immediate access to the to the quick settings for the car, as per table on page 43. Activate Car Immediate access to the quick settings for the headset, as per table on page 43. Activ. Head set Immediate access to the quick settings for meetings, as per table on page 43. Activate meeting Immediate access to the quick settings for outdoors, as per table on page 43.
-
Page 44: Voice Keys
Voice keys Use of the allows you to establish direct access to several functions by saying an Voice keys associated word: using your hot keys as quick settings, you can activate or deactivate a cor- responding function. To program a voice key, select a function to be programmed, in a key from the list provided, and then follow the instructions provided on the screen. - Page 45 SIMPLE MODE ADVANCED MODE Simple menu Advanced menu CALL TYPE Voice calls Fax calls Data calls FORWARD Unconditional OPTION Conditional no reply or not reachable or busy If no reply If not reachable If busy In the simple menu mode, activating the option will divert incoming calls conditional if you do not reply, if you are not reachable or if you are busy.
-
Page 46: Any Key Answer
Any key answer menu allows you to accept a call by pressing on any key, except the ; this Any key answer key is used to reject a call when in the advanced menu mode. Call waiting When in the advanced mode, and in the menu you may activate Call waiting or deactivate an alert beep that will inform you that you have another... -
Page 47: Quick Settings
Quick settings menu enables you to access a number of predefined set- Quick settings tings, that can easily adapt you phone to your environment. You phone will have some quick settings defined when you switch it on for the first time; however, you may reset them as you wish, and you may even associate a quick setting with a hotkey, as per page 38 &... -
Page 48: Use Of Network Services
Use of network services Additional GSM network services - GSM strings Your mobile phone is compatible with standard GSM strings which are sent from the keypad to the network and can be used to activate supplementary services provided by the network. To activate call waiting, press then press To activate call forward if no reply, press... -
Page 49: Making A Second Call
Checking your answering machine: An example of checking your answering machine at a distance may be: To hear all messages, code 3 may be used on your answering machine, your password may be 8421, and your phone number 12345678; you may dial 12345678w8421p3 The phone first dials 12345678, and waits for the call to connect. -
Page 50: Explicit Call Transfer
NOTE: If you have activated call forwarding «If busy» (see pages 40 & 41), you will never receive second calls as they are always forwarded when the line is busy. Explicit call transfer When you have one ongoing call and one call on hold, you may connect the two and be disconnected from the call yourself by pressing on the in the call options... -
Page 51: In-Call Symbols
In call symbols During calls you may encounter the following symbols: Mute Call underway Active call placed on hold Incoming call Outgoing call Quick settings... -
Page 52: Precautions
Precautions Radio wave safety Your cellular phone is a radio transmitter / receiver, and when it is switched on, it transmits and receives radio waves in the frequency range of 880 MHz to 960 MHz and 1710 MHz to 1885 MHz. The GSM network controls the power level at which the phone transmits, and this can vary between 0.01 watt and 2 watts. - Page 53 In low reception areas the than the maximum of four bars reception. • You should only use genuine Philips accessories, as the use of any other accessories may damage your phone, and it makes all guarantees for your Philips phone null and void.
-
Page 54: Safety And Security
Safety and Security Responsibility You are responsible for your GSM mobile phone. To avoid careless handling of the phone that may result in damage to it, and prevent unauthorised use that could cause harm, please read, follow, and explain the following instructions presented here to anyone borrowing your phone. -
Page 55: Maintenance
Maintenance The mobile phone you have purchased has been designed and fully tested according to the highest quality standards to guarantee your security and ease of use. It will give you years of trouble free service if you give it a little care and attention;... -
Page 56: Efficient Use Of Your Phone
Efficient use of your phone Your phone has been developed to provide you with outstanding battery performance; with approximately 90-120 minutes of talk time and 110-130 hours of standby time with the standard battery.* Placing and receiving calls consumes the same amount of battery energy; however, your mobile consumes less energy in the idle screen when kept in the same place. - Page 57 Flashing of the backlight Unplug the charger and only use a Philips Authentic and the battery fixed Accessory. icon. A continuous alert...
- Page 58 Problem Solution Your phone does not A car contains some metallic parts that absorb electro work well in your car. magnetic waves that can affect the phone’s performan- ce. A car kit is available to provide you with an exter- nal antenna and enables you to phone without hand- ling the handset.
- Page 59 Problem Solution Your SIM card may be damaged. Please contact your The display shows network operator. FAILURE. This problem is related to your subscription. Please The display shows contact your network operator. IMSI FAILURE. Check that the SIM card has been inserted in the pro- The display shows per position.
-
Page 60: Accessories
Accessories L IMPORTANT NOTE: You should use only your phone manufacturer’s accessories. Use of any other accessories makes all guarantees null and void.Your phone manufacturer will not be held liable for any damage resulting from the use of accessories, other than your phone manufacturer’s accessories, with your telephone. Desktop charger (see page 64) Leather bag Part number: DTBB10/p... - Page 61 Travel charger Part number: ACxB10/p Europe (ACSB10/p) UK (ACUB10/p) USA/Taiwan (ACTB10/p) Australia (ACAB10/p) Standard charger Part number: ACxG10/p Europe (ACSG10/p) UK (ACUG10/p) USA/Taiwan (ACTG10/p) Australia (ACAG10/p) Spare batteries Type Battery Part number 550 mAh Li-Ion BIB105/p (Standard) 1100 mAh Li-Ion BIB101/p (Business) Accessories...
-
Page 62: Desktop Charger
Desktop charger Connecting the charger to the desktop charger Insert the charger plug into the connector. Push the flex into the connector at the back of the desktop charger. Charging the Charging an phone’s battery additional battery Press the release button to open the cradle.
Need help?
Do you have a question about the GENIE 2000 and is the answer not in the manual?
Questions and answers