Table of Contents
Advertisement
Advertisement
Table of Contents

Related Manuals for Pentax MZ-60


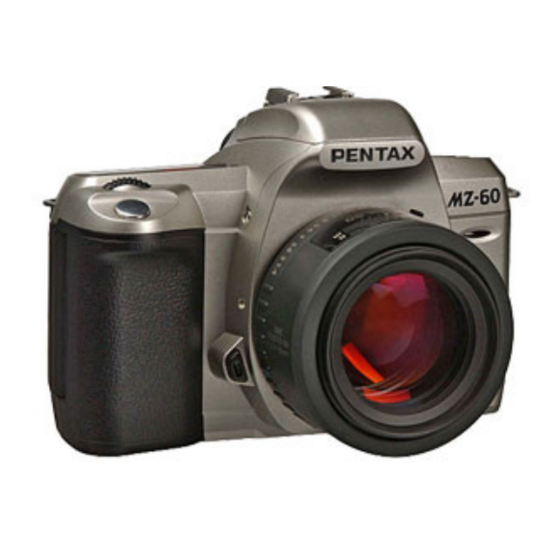
Summary of Contents for Pentax MZ-60
- Page 1 OPERATING MANUAL...
- Page 2 Lenses and accessories produced by other manufacturers are not made to meet our precise specifications and therefore may cause difficulties with, or actual damage to your Pentax camera. We do not assume any responsibility or liability for difficulties resulting from the use of lenses and accessories made by other...
-
Page 3: For Safe Use Of Your Camera
FOR SAFE USE OF YOUR CAMERA Although we have carefully designed this camera for safe operation, please be sure to follow precautions given on this page. This mark indicates precautions that, if not WARNING: followed, could result in serious injury to the person. -
Page 4: Precautions For Your Camera
• Do not drop the camera or allow it to hit solid objects. If the camera suffers a shock or impact, take it to a Pentax service center for inspection. • Be careful not to subject the camera to strong vibrations, shock or pressure. -
Page 5: Precautions For Battery Usage
Pentax warranty. • The PENTAX warranty provides only for the repair of defects in materials or workmanship. Damage of any kind cannot be repaired at any charge under the terms of the warranty. If the difficulty is caused as a direct result of the product being used in conditions as outlined in the "Precautions for Your Camera"... -
Page 6: Table Of Contents
TABLE OF CONTENTS FOR SAFE USE OF YOUR CAMERA ....1 PRECAUTIONS FOR YOUR CAMERA ... . .2 PRECAUTIONS FOR BATTERY USAGE . - Page 7 BASIC OPERATION (SHOOTING) Step 1. SET THE STANDARD PROGRAM MODE ..34 Step 2. SET THE AUTO POP UP FLASH ..35 Step 3. SET THE SINGLE FRAME DRIVE MODE ..36 Step 4.
- Page 8 TABLE OF CONTENTS USING ANOTHER EXPOSURE MODES ..62 1. APERTURE-PRIORITY AE MODE ...62 2. SHUTTER-PRIORITY AE MODE ... .64 3.
- Page 9 USING PENTAX DEDICATED AUTO FLASH UNITS . .92 USING BOTH THE BUILT-IN FLASH AND THE EXTERNAL FLASH ......93 RED-EYE REDUCTION FLASH FUNCTION .
-
Page 10: Names Of Working Parts
NAMES OF WORKING PARTS Main switch Built-in flash Select dial AV button Focus mode switch Shutter release button AF coupler Lens mount Lens information Mirror Lens unlock index contacts button Strap lug Back cover Film information window Battery chamber cover Battery cover screw Back cover... - Page 11 Hot shoe LCD panel Drive mode button AE lock button Flash mode Flash button pop up button Exposure mode button Date mode button...
-
Page 12: Lcd Panel Indications
LCD PANEL INDICATIONS : Flash status information : Date mode (p. 26) (p. 80, 83, 84) : Exposure mode/ : Flash-off information AV,TV select pointer (p. 83) (p. 53, 62, 64) : Red-eye reduction flash : Self-timer indication (p. 77) (p. -
Page 13: Viewfinder Indications
VIEWFINDER INDICATIONS : AF frame (p. 40) : Flash status information (p. 53, 76, 80) : AE lock (p. 71) : Focus indicator (p. 41) : Over exposure (p. 67) : Correct exposure (p. 67) : Under exposure (p. 67) -
Page 14: Quick And Easy Shooting
QUICK AND EASY SHOOTING Loading the batteries Open the battery cover and load two CR2 Lithium batteries. See page 19. Set the date and time You can skip this step if you do not imprint the data at this time, but the date and time should be adjusted after loading the batteries. - Page 15 Set the exposure mode to Standard program mode. Move the select lever to set the pointer while depressing the exposure mode button. See page 34. Loading the film. See page 30. Set to the Autofocus Set the focus mode switch to in down position.
-
Page 16: Camera Functions Available With Various Lenses
CAMERA FUNCTIONS AVAILABLE WITH VARIOUS LENSES Function Lens FA lens F lens [Mount type] [KAF2] *1 [KAF] *1 Autofocus (Lens only) Manual focus (with FI) *2 (with Matte field) Power zoom Image size tracking Zoom clip Auto zoom effect Picture Mode Aperture-Priority AE Shutter-Priority AE Metered Manual... - Page 17 MEMO • KAF2 and KAF mount lenses are designed to work with the Autofocus SLR camera. The camera will not operate when a lens with following condition. 1. When a lens, which does not have autofocus function is attached. 2. When an F or FA lens is attached with aperture ring set other than the position.
-
Page 18: How To Use This Operating Manual
HOW TO USE THIS OPERATING MANUAL This manual is organized into the following sections. If you like to begin taking Basic Operation (Preparation) pictures with this new camera as — >Page 17 soon as possible, read section 1and 2, "BASIC Basic Operation ( Shooting ) OPERATION(PREPARATION)"... -
Page 19: Basic Operation (Preparation)
BASIC OPERATION (PREPARATION) Step 1. ATTACHING THE CAMERA STRAP ..18 Step 2. LOADING THE BATTERIES ... . .19 Step 3. TURNING ON THE POWER ... .23 Step 4. -
Page 20: Step 1. Attaching The Camera Strap
Step 1 ATTACHING THE CAMERA STRAP Pass the end of the strap through the strap lug from underneath, and then pass the strap through the clasp from underneath as illustrated. Follow the same procedure to attach the other end of the strap to the other strap lug. MEMO •... -
Page 21: Step 2. Loading The Batteries
Step 2 LOADING THE BATTERIES Open the battery chamber cover by turning it to counterclockwise with a coin, etc. as shown in the illustration. Load two 3V lithium batteries (CR2) or equivalent into the battery chamber with positive (+) contacts of the batteries pointing up as shown in the illustration. -
Page 22: Loading The Batteries
LOADING THE BATTERIES MEMO • Be sure to use two Lithium batteries CR2 or equivalents. • Both the camera function and the data imprinting function to keep constant track of time use the batteries. • The optional "AA-Battery Pack FG" is also available for this camera instead of using the lithium batteries. -
Page 23: Battery Life
Flash photography (using flash 100% of the times) Approx. 5 rolls MEMO • CR2 batteries were used under Pentax testing conditions. • Actual battery life and performance may vary drastically depending on usage of autofocus, built-in flash and external conditions such as temperature and freshness of the battery. -
Page 24: Low Battery Warning
LOADING THE BATTERIES Low Battery Warning When the batteries are nearly exhausted, the battery symbol appears on the LCD panel to warn you. Replace the batteries as soon as possible. MEMO • See page 19 for loading the batteries. • Even if the low-battery symbol appears, exposure will be correct as long as the shutter can be released. -
Page 25: Step 3. Turning On The Power
Step 3 TURNING ON THE POWER Turn the power ON. Push the main switch button to turn ON. Turn the power OFF. Push the main switch button again to turn OFF. MEMO • Be sure to turn the main switch OFF to prevent accidental battery drain when not in used. -
Page 26: Step 4. Adjusting The Date And Time
Step 4 ADJUSTING THE DATE AND TIME Turn the power ON and depress the [DATE] button to display date mode on the LCD panel. Keep depressing the [DATE] button for 3 seconds on the date mode display, the "year" digits will start to blink. - Page 27 The digits increase by one each time the select dial is moved to right and the digits decreased by it’s moved to left. Holding the select dial for about one second will change the digits rapidly. After the data has been changed, depress the [DATE] button each time until blinking stops.
-
Page 28: Step 5. Imprinting The Date
Step 5 IMPRINTING THE DATE The DATE model records date information on your pictures clearly on each frame that you expose. Selecting the date mode At each depress of the [DATE] button, the display on the LCD panel changes as follows. - Page 29 (Year Month Day) (Day Hour Minute) (No data imprinted) (Month Day Year) (Day Month Year) MEMO • [ M ] on the LCD indicates "Month". • Year 2000 will imprint " 00 " on pictures. • [ -- -- -- ] indicates that no data will be imprinted. •...
-
Page 30: Step 6. Attaching The Lens
Step 6 ATTACHING THE LENS Remove the body mount cap and rear lens cap Align the red dots on the lens and camera while mounting the lens to the camera body, then turn the lens clockwise until it clicks in place. To remove the front lens cap, squeeze the tabs on both sides in the direction... - Page 31 MEMO • The body mount cap is designed to protect the camera against scratches and dust at the factory. For storage, the optional accessory "Body Mount Cap K" is available. • After mounting the lens, try to turn the lens counterclockwise to make sure it is locked in place.
-
Page 32: Step 7. Film Loading
Step 7 FILM LOADING We suggest that you first operate the camera with no film loaded to become familiar with its operations. MEMO Remove the protective card • Before loading film for the first time after purchase, open the back cover and remove the protective card. - Page 33 Align the film leader with film leader end mark shown as illustrated. Note • Automatic film speed setting When DX-coded film is used, the correct film speed is automatically set for the camera. If you use a non-DX coded film, you can set the film speed manually.
-
Page 34: Step 8. Operating The Shutter Release Button
Step 8 OPERATING THE SHUTTER RELEASE BUTTON The shutter release button has two positions. Depressing it down halfway (first position) turns on the exposure meter and autofocus system. Pressed halfway Pressed fully pressed down down (first position) (second position) Depressing it fully (second position) releases the shutter. When taking a picture, depress the shutter release button gently to prevent camera shake. -
Page 35: Basic Operation (Shooting)
BASIC OPERATION (SHOOTING) Step 1. SET THE STANDARD PROGRAM MODE . .34 Step 2. SET THE AUTO POP UP FLASH ..35 Step 3. SET THE SINGLE FRAME DRIVE MODE . .36 Step 4. SET THE AUTO FOCUS MODE TO AF ..37 Step 5. -
Page 36: Step 1. Set The Standard Program Mode
Step 1 SET THE STANDARD PROGRAM MODE For quick and easy shooting, set your camera for Standard program mode, autofocus, auto flash and single frame drive mode. This standard program mode allows you to take pictures by simply depressing the shutter release button. The camera selects the best combination of aperture and shutter speed setting. -
Page 37: Step 2. Set The Auto Pop Up Flash
Step 2 SET THE AUTO POP UP FLASH Depress the flash mode button until appears on the LCD panel. In this mode, the built-in flash automatically pops up when depressing the shutter button halfway down in the low light or backlight conditions. -
Page 38: Step 3. Set The Single Frame Drive Mode
Step 3 SET THE SINGLE FRAME DRIVE MODE One picture is taken each time the shutter release button is depressed. Depress the drive mode button until single frame appears on the LCD panel. MEMO The drive mode can also set to consecutive-frame mode , self-timer , 2 seconds self- timer or auto bracket shooting mode... -
Page 39: Step 4. Set The Auto Focus Mode To Af
Step 4 SET THE AUTO FOCUS MODE TO AF When the shutter release button is depressed halfway down, the lens adjusts focus automatically. Set the focus mode switch to in the down position. MEMO • The picture cannot be taken unless focus is achieved. The focus will remain locked as long as shutter release button is held in halfway down. -
Page 40: Step 5. Using The Zoom Lens
Step 5 USING THE ZOOM LENS Turning the zoom ring to the right makes the subject appear larger (telephoto) and turning it to the left makes the subject appear smaller (wide angle). MEMO • The smaller the number shown on the zoom scale ring , the wider the angle. -
Page 41: Step 6. Holding The Camera
Step 6 HOLDING THE CAMERA • Hold the camera firmly, with your left hand supporting the camera and lens as shown in the illustrations. • While taking a picture, gently depress the shutter release button. Sudden force on the shutter release button will cause camera shake, making the picture blurred. -
Page 42: Step 7. Taking A Picture
Step 7 TAKING A PICTURE Confirm that the focus mode switch has been set to and the lens aperture ring has been set to , and select the data mode to imprint or not. Look through the viewfinder and frame the subject with the autofocus frame When the shutter release button... -
Page 43: Take A Picture
When the subject is in focus, the focus indicator in the viewfinder lights up. The focus indicator blinks when the camera is not able to obtain proper focus for one of the following reasons. 1. The subject is too close. Adjust the camera-to-subject distance. 2. -
Page 44: Step 8. Unloading A Film
Step 8 UNLOADING A FILM The film automatically rewinds at the end of the roll. During rewinding, blinks on the LCD panel, indicating that the film is being rewound, the exposure counter counts frame numbers in reverse. When the film is fully rewound, blinks on the LCD panel. -
Page 45: Step 9. Rewinding A Film In Mid-Roll
Step 9 REWINDING A FILM IN MID-ROLL If you wish to unload the film before exposing all the frames, use this function. Set the main switch to the ON position, Depressing the Drive mode button for over 2seconds, Film status information will appear on the LCD. -
Page 47: Advanced Operations
OVERVIEW OF FLASH FUNCTION ......90 USING PENTAX DEDICATED AUTO FLASH UNITS ...92 USING BOTH THE BUILT-IN FLASH AND THE EXTERNAL FLASH . -
Page 48: Selecting A Drive Mode
SELECTING A DRIVE MODE This camera has a total of six drive modes as shown. Single-Frame Drive Mode One picture is taken each time the shutter release button is depressed. Consecutive-Frame Drive Mode Pictures can be taken consecutively while holding down the shutter release button. -
Page 49: Consecutive-Frame Drive Mode
Consecutive-Frame Drive Mode Pictures can be taken consecutively while holding down the shutter release button. Setting the consecutive frame drive mode. Depress the drive mode button until appears on the LCD panel. 1.Depress the shutter release button halfway down to focus on the subject. -
Page 50: Self-Timer Mode
SELECTING A DRIVE MODE Self-timer Mode The self-timer mode delays the shutter release, and is useful for taking group shots that include the photographer or when you wish to prevent camera shake for slow speed exposure as close- up or night- scene pictures. The shutter will be released about 2 seconds or 12 seconds after the shutter release button is depressed fully. - Page 51 MEMO • When the 2 seconds self-timer is used, depress the shutter release button to start, lock-up the reflex mirror to prevent camera shake and shutter will be released about 2 seconds later. Depress the shutter release button fully to start the self- timer.
-
Page 52: Auto Bracket Exposure Mode
SELECTING A DRIVE MODE Auto Bracket Exposure Mode When you depressed shutter release button, three consecutive frames will be taken at the different exposure times. The first frame is exposed with no compensation. The second frame is under exposed and the third frame is over exposed. The bracketing amount can be set to ±1/2 EV or ±1 EV. - Page 53 Focus on the subject by depressing the shutter button halfway down. The focus is locked at the first picture and remains locked until three pictures are taken. Take three consecutive pictures, depress and hold down the shutter release button. MEMO •...
-
Page 54: Selecting 6 Picture Modes
SELECTING 6 PICTURE MODES You can select your desired Picture mode by moving the select dial while depressing the exposure mode button. The picture mode has a total 6 modes as follows. See details for each mode on page 54 to 59. Standard program Mode Portrait Program Mode Landscape Program Mode... -
Page 55: Setting The One Of 6 Picture Modes
Setting the one of 6 picture modes Set the lens aperture ring to Set the pointer mark the desired exposure mode symbols by moving the select dial to left or right while depressing the exposure mode button. Exposure Warning • If the subject is too bright or too dark, the plus minus indicator in the viewfinder and... -
Page 56: Standard Program Mode
SELECTING 6 PICTURE MODES Standard program Mode For easy picture taking, use this Standard program Mode. You simply depress the shutter release button. The camera selects the best combination of aperture and shutter speed setting. Set the pointer mark by moving the select dial while depressing the exposure mode button. -
Page 57: Portrait Program Mode
Portrait Program Mode This mode is suitable for taking portrait photography. Set the pointer mark by moving the select dial while depressing the exposure mode button. • When the shutter release button is depressed halfway down,the shutter speed and aperture setting are displayed on the LCD panel. -
Page 58: Landscape Program Mode
SELECTING 6 PICTURE MODES Landscape Program Mode This mode is ideal for landscape photography and scenic snapshots. Set the pointer mark by moving the select dial while depressing the exposure mode button. • When the shutter release button is depressed halfway down, the shutter speed and aperture setting are displayed on the LCD panel. -
Page 59: Close-Up Program Mode
Close-up Program Mode This mode is convenient when taking close-up photos of flower and so forth. This mode favors smaller apertures to maximize the depth of field, ensuring sharp focus of a close-up subject. Set the pointer mark by moving the select dial while depressing the exposure mode button. -
Page 60: Action Program Mode
SELECTING 6 PICTURE MODES Action Program Mode This mode selects a faster shutter speed to capture a moving subject and prevents blurred images. This mode is especially convenient for active photography. It is also suitable for portraits with blurred background. Set the pointer mark by moving the select dial while depressing the exposure mode... -
Page 61: Night-Scene Program Mode
Night-scene Program Mode This mode is useful when taking a portrait photograph with a night scene in the background. Set the pointer mark by moving the select dial while depressing the exposure mode button. Press the flash pop up button to activate the flash if auto pop up flash is not selected. -
Page 62: Selecting Another Exposure Modes
SELECTING ANOTHER EXPOSURE MODES Effect of aperture and shutter speed A correct exposure is established by a combination of shutter speed and aperture setting according to the subject brightness. There are many correct combinations of shutter speed and aperture for a particular subject brightness. Different shutter speed and aperture settings produce different effects. - Page 63 Effect of aperture The aperture increases or reduces the amount of reflected light from an object which passes through the lens, controlling how much light strikes the film. If the aperture is opened up to increase the amount of light, subjects in front of and behind an in-focus subject will not be focused.
-
Page 64: Using Another Exposure Modes
USING ANOTHER EXPOSURE MODES Aperture-Priority AE Mode When the desired aperture is selected, the appropriate shutter speed is automatically set by the camera for a proper exposure according to the brightness of the subject. This mode is ideal for shooting landscapes with increased depth of field, or a portrait against a blurred background. - Page 65 Confirm the shutter speed and aperture value on the LCD panel. • When the power is on, the shutter speed and aperture value will be displayed on the LCD panel. Exposure Warning If the subject is too bright or too dark, the plus minus indicator in the viewfinder and the selected...
-
Page 66: Shutter-Priority Ae Mode
USING ANOTHER EXPOSURE MODES Shutter-Priority AE Mode When the desired shutter speed is selected, the appropriate aperture is automatically set by the camera for a proper exposure according to the brightness of the subject. This mode is suitable for freezing the action with a fast shutter speed or capturing a flowing dynamic image with a slow shutter speed. - Page 67 Confirm the shutter speed and aperture value on the LCD panel. • When the power is on, the shutter speed and aperture value will be displayed on the LCD panel. * Exposure Warning If the subject is too bright or too dark, the plus minus indicator in the...
-
Page 68: Metered Manual Mode
USING ANOTHER EXPOSURE MODES Metered Manual Mode The manual exposure mode is a convenient exposure mode for taking pictures using the same shutter speed and aperture setting combination, or taking creatively under or over exposed photographs. Set the lens aperture ring to Set the pointer mark by moving the select dial while depressing... - Page 69 Move the select dial to change the aperture value while holding the AV button. Confirm the shutter speed and aperture value on the LCD panel. in the center indicates the correct exposure. indicates over exposure. indicates under exposure. When under or over exposure is set beyond + 1 or - 1 step (1EV), indicator will light.
- Page 70 USING ANOTHER EXPOSURE MODES MEMO The AE lock does not operate in the Metered Manual Mode. Exposure Warning If both blink in the viewfinder and both shutter speed and aperture value blink on the LCD panel, it means that the exposure is out of metering range.
-
Page 71: Slow-Speed-Sync Mode
4. Slow-Speed-Sync Mode It is possible to balance the exposure of a foreground subject against a dimly light background by using the flash to properly expose the foreground subject and a slow-shutter-speed to expose the low light background. With the Night-scene Program Mode 1. -
Page 72: Bulb Timer Exposure Mode
USING ANOTHER EXPOSURE MODES 5. Bulb Timer Exposure Mode This mode is useful for the long exposures required for shooting night scenes and fireworks. The shutter speed can be set from 45seconds to 32minutes as follows. 45sec, 1min., 1.4min., 2min., 2.8min., 4min.,5.6min., 8min., 11min., 16min., 22min., 32min. -
Page 73: Ae Lock Function
AE LOCK FUNCTION The AE Lock function enables an exposure level lock before picture is taken. If the subject is too small for a proper exposure setting to be obtained, you can zoom in on the subject to obtain the proper exposure setting. -
Page 74: Manual Focusing
MANUAL FOCUSING When you adjust focus manually, you can either look at the focus indicator in the viewfinder or the viewfinder matte field to check if the subject is in focus. How to focus with aid of the in-focus indicator Set the focus mode switch Frame the subject, then turn the focusing ring to right or... - Page 75 How to focus with aid of the matte field When the autofocus mode or the focus indicator in the viewfinder cannot be used for focus confirmation for the following reasons, focus on the subject in the manual focus mode with the aid of the matte field in the viewfinder.
-
Page 76: Hard-To-Autofocus Subjects
MANUAL FOCUSING HARD-TO-AUTOFOCUS SUBJECTS The autofocus system is highly precise, but not perfect. Depending on the brightness, contrast, shape, and size of your subject, the autofocus system may not operate. In such a case, set the focus mode switch to and use the manual focus mode to focus the lens on the subject with the aid of the matte field in the viewfinder (see page 73). -
Page 77: Setting The Film Speed (Iso) Manually
SETTING THE FILM SPEED (ISO) MANUALLY This camera automatically reads the film speed from the film's DX code. However, the film speed setting can be changed. If you use a non-DX coded film, set the film speed manually. How to set Load the Non-DX coded film. -
Page 78: Using The Built-In Flash
USING THE BUILT-IN FLASH Auto-popup flash function In this mode, the built-in flash pops up and discharges automatically in low light and backlight condition. Depress the flash mode button until appears on the LCD panel. Depress the shutter release button halfway down, and the built-in flash automatically pops up when the flash is required. -
Page 79: Selecting The Various Built-In Flash Modes
Selecting the various built-in flash modes At each depress of the flash mode button, the flash mode on the LCD panel changes as shown in the chart. Auto-popup Auto-popup Manual-popup Manual-popup Flash off (See page 80) (See page 83) Red-eye reduction Red eye reduction (See page 78, 80) MEMO... -
Page 80: Red-Eye Reduction Flash Function
When using a Pentax dedicated flash unit off the camera, it may also help to position the flash as far away from the camera as possible. -
Page 81: Flash Effective Range For The Picture Mode
FLASH EFFECTIVE RANGE FOR THE PICTURE MODE As a rule of thumb the distance for using the built-in flash (which varies with the lens used) is within about four meters (using ISO 400 film). MEMO • The flash effective range does not come closer than 0.7m (2.6ft), even if the lens aperture is so small. -
Page 82: Manual Pop Up The Built-In Flash
MANUAL POP UP THE BUILT-IN FLASH Push the flash pop-up button to activate the flash. will disappear on the LCD panel. appears in the viewfinder and on the LCD panel when the flash is fully charged. Depress the shutter release button fully, and the flash unit discharges. - Page 83 MEMO • The built-in flash does not pop up even if the flash pop-up button is depressed with the flash mode is set to • This mode can be used with the red-eye reduction together. • When the flash pop up button is depressed, is disappeared from the LCD pane if auto flash mode was set, and the flash is always discharged even if the subject is not required flash light.
-
Page 84: Daylight-Sync Shooting
When taking a daylight-sync photograph with displayed on the LCD panel, the flash may not discharge. Without Daylight-Sync With Daylight-Sync Using other type of a flash Use of non-Pentax flash units may damage the camera. For the best results, use a Pentax dedicated flash unit. -
Page 85: Flash-Off Mode
FLASH-OFF MODE Use this mode if you don’t want the built-in flash to pop-up automatically. The flash will not pop-up automatically even when it is dark or when the flash is required. Depress the Flash mode button until appears on the LCD panel. MEMO •... -
Page 86: Inappropriate Lens Waring When The Built-In Flash Is Used
INAPPROPRIATE LENS WARING WHEN THE BUILT-IN FLASH IS USED When using an inappropriate F or FA lens, will blink rapidly in the viewfinder and on the LCD panel when the shutter release button is depressed halfway down. MEMO • See page 88 for more details on compatibility of F and FA lenses with the built-in flash. -
Page 87: Advanced Operation For The Built-In Flash
1/100 sec. to a slower shutter speed that does not cause camera shake. The slowest shutter speed depends on the focal length of the lens in use. The shutter speed of 1/100 sec. is set automatically with a Pentax A lens. - Page 88 ADVANCED OPERATION FOR THE BUILT-IN FLASH 4.Metered Manual Mode • When using the built-in flash in the Metered Manual Mode, any combination of aperture and shutter speed slower than 1/100 can be set. In this mode, the exposure of the background can be controlled by the manual exposure while the flash properly exposes the foreground subject.
- Page 89 Exp. If an ISO100 film is used at an aperture of f/3.5, the flash effective distance is obtained as follows: For maximum distance Guide Number (11) ÷ f/3.5 = 3.14m For minimum distance 3.14 ÷ 5 = 0.63m 0.7m * * Minimum distance of the built-in flash in this camera Thus, the flash effective distance is from approx.
-
Page 90: Compatibility Of F And Fa Lenses With The Built-In Flash
ADVANCED OPERATION FOR THE BUILT-IN FLASH COMPATIBILITY OF F AND FA LENSES WITH THE BUILT-IN FLASH If an F or FA lens incompatible with the built-in flash is used, depressing the shutter release button halfway down when the flash is ready, blink in the viewfinder and on the LCD panel as a warning. - Page 91 Lens Name Compatibility FA Zoom 70-200mm f/4-5.6 FA* Zoom 80-200mm f/2.8 Vignetting will occur at focal length is less than 90mm. F or FA Zoom 80-200mm f/4.7-5.6 FA Zoom 80-320mm f/4.5-5.6 F or FA Zoom 100-300mm f/4.5-5.6 FA Zoom 100-300mm f/4.7-5.6 FA*Zoom 250-600mmf/5.6ED(IF) FA20mmf/2.8 FA24mmf/2AL(IF)
-
Page 92: Overview Of Flash Function
OVERVIEW OF FLASH FUNCTION CAMERA FUNCTION Red-eye reduction flash function Smart flash function operates After the flash is charged, the camera automatically switches to the flash-sync speed. Automatic aperture setting in the Picture Mode or Shutter-Priority AE Mode Flash confirmation in the viewfinder TTL auto flash Slow-shutter sync flash AF illuminator... - Page 93 MEMO *1.When using the AF280T or AF400T with the flash confirmation OFF and TTL mode, the red-eye reduction function operates. *2.When using a type D flash (except AF200SA and AF201SA) in the MS (Manual Sync) or M (Manual) Mode or when using a Type E flash, set the camera exposure mode to the Aperture-Priority AE Mode, Metered Manual or Bulb timer Mode.
-
Page 94: Using Pentax Dedicated Auto Flash Units
If the built-in flash is not powerful enough, a Pentax dedicated auto flash should be used. A Pentax dedicated TTL Auto Flash like the PENTAX AF FTZ or AF FT series flash unit (i.e.: AF500FTZ, AF330, AF280T or AF220T) incorporate the TTL Flash Mode. -
Page 95: Using Both The Built-In Flash And The External Flash
Using both the built-in flash and the external flash An external flash cannot be used when the built-in flash is in its popped up position. When the built-in flash and the external flash are used simultaneously, use the following optional accessories. Off-Camera Shoe Hot Shoe Adapter F... -
Page 96: Red-Eye Reduction Flash Function
Multi-burst flash with the Pentax dedicated flash When discharging more than 2 Pentax dedicated flashes, make sure that they are of the same type, combine the type B with Type C or Type D with Type E. Refer to the overview of Flash Function on page 90. -
Page 97: Contrast-Control-Sync Flash
Contrast-Control-Sync Flash Using the dedicated external flash in combination with the built-in flash allows twin flash photography (contrast-control-synch flash photography). This is based on the difference between the amounts of light discharged from two units. Contrast control synch flash is possible with the combination of following flash units: AF360FGZ, AF330FTZ, AF500FTZ and the built-in flash 1. -
Page 99: Others
OTHERS ACCESSORIES (OPTIONAL) ....98 TROUBLESHOOTING ..... .102 PROGRAM LINES . -
Page 100: Accessories (Optional)
ACCESSORIES (OPTIONAL) A number of dedicated accessories are available for this camera. AA-BATTERY PACK FG Four size-AA batteries are used and dedicated to MZ-60/ZX-60. MEMO Battery life ( Using 24-Exposure film rolls) Size AA Alkaline batteries were used under Pentax testing conditions. -
Page 101: Flash Accessories
FLASH ACCESSORIES AF360FGZ A TTL auto zoom flash unit with guide no. 36(ISO 100). It features include AF spot beam, slave-sync flash, multiple-flash, contrast-control-sync flash and leading/trailing curtain-sync mode. AF500 FTZ A TTL Auto Zoom flash with a built-in AF spot beam and large guide no. -
Page 102: Viewfinder And Lens Accessories
ACCESSORIES (OPTIONAL) Hot Shoe Adapter F, Extension Cord F5F and Off-Camera shoe Adapter The adapters and cords, which allow the external flash to be used off the camera, while maintaining full electric coupling to the camera. VIEWFINDER AND LENS ACCESSORIES Magnifier FB A viewfinder accessory for magnifying the central area of the viewfinder. - Page 103 3. F or FA 85mm f/2.8 Soft lens and FA28mm f/2.8 Soft lens cannot be used because these lenses do not have the A position on the lens aperture ring. The camera does not operate with the following accessories used. Accessories for close-up photography Auto extension tube set K Auto extension tube K 50mm...
-
Page 104: Troubleshooting
TROUBLESHOOTING What appears troublesome may be easily remedied. Here are some problems that may occur and their remedies. Before contacting a Pentax service center, check the following items. Symptoms Causes Remedies Reference Non-Autofocus lens is Use F or FA Autofocus lens. - Page 105 Symptoms Causes Remedies Reference Set the exposure mode dial AE lock function do The Metered Manual Mode P.71 to the other position. not operate. or Bulb Timer Exposure Mode is being used. The subject is too close or Focus manually by using the Focus indicator P.73 difficult to autofocus.
-
Page 106: Program Lines
PROGRAM LINES Standard program Mode / Night Scene Program Mode without Flash At ISO 100 with FA35 - 80mm f/4 - 5.6 lens [EV] 80mm 35mm [sec.] 1/30 1/125 1/500 1/2000 1/8000 [ISO100] Portrait Program Mode At ISO with FA35 - 80mm f/4 - 5.6 lens [EV] 80mm 35mm... -
Page 107: Action Program Mode
Action Program Mode At ISO 100 with FA35 - 80mm f/4 - 5.6 lens [EV] 80mm 35mm [sec.] [ISO100] 1/30 1/125 1/500 1/2000 1/8000 Close-up Program Mode At ISO 100 with FA35 - 80mm f/4 - 5.6 lens [EV] 80mm 35mm [sec.] 1/30 1/125 1/500... -
Page 108: Specifications
(2) Manual 1/2000-30 sec. (3) Bulb timer 45sec.-32min. Shutter lock by setting Main switch in OFF position. Body Mount Pentax KAF bayonet mount (K-mount with AF coupler, lens information contacts) Compatible Lens Pentax KAF2-, KAF mount lenses. Autofocus System TTL phase-matching autofocus system, AF operational brightness range: EV 0 to 18 (at ISO 100 with f/1.4 lens), Focus lock available... - Page 109 = 25 – 800), Automatic flash function, Red-eye reduction flash function Flash sync Hot shoe with X-contact, which couples with Pentax dedicated auto flashes, ISO range = 25-800, Red-eye reduction flash function Power Source Two 3V lithium batteries (CR2 or equivalent)
-
Page 110: Warranty Policy
Shipping charges are to be borne by the owner. If your Pentax was purchased outside of the country where you wish to have it serviced during the warranty period, the manufacturer’s representatives in that country may charge regular... - Page 111 Therefore, we recommend that you review the warranty card supplied with your product at the time of purchase, or contact the PENTAX distributor in your country for more information and to receive a copy of the warranty policy.
-
Page 112: For Customers In Canada
For customers in U.S.A. STATEMENT OF FCC COMPLIANCE This device complies with Part 15 of the FCC Rules. Operation is subject to the following two conditions: (1) This device may not cause harmful interference, and (2) this device must accept any interference received, including interference that may cause undesired operation. - Page 116 Pentax GmbH (European Headquarters) Julius-Vosseler-Strasse, 104, 22527 Hamburg, GERMANY (HQ - http://www.pentaxeurope.com Germany - http://www.pentax.de) Pentax U.K. Limited Pentax House, Heron drive, Langley, Slough, Berks SL3 8PN, U.K. (http://www.pentax.co.uk) Pentax France S.A. 12/14, rue Jean Poulmarch, 95106 Argenteuil Cedex, FRANCE Pentax Benelux B.V.
Need help?
Do you have a question about the MZ-60 and is the answer not in the manual?
Questions and answers