Table of Contents
Advertisement
TCD200E(e-e).book Page 1 Wednesday, February 9, 2005 2:58 PM
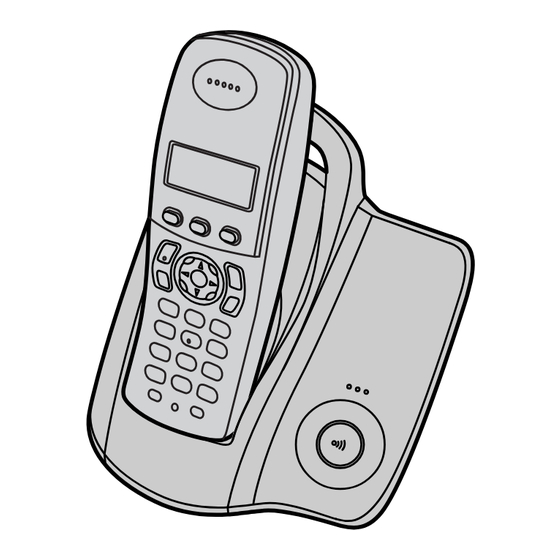
Operating Instructions
Digital Cordless Phone
KX-TCD200E
Model No.
This unit is Caller ID compatible. To display the caller's phone
number, you must subscribe to Caller ID service.
Charge the batteries for about 7 hours before initial use.
Please read these operating instructions before using the unit and save them for
future reference.
Advertisement
Table of Contents

Related Manuals for Panasonic KX-TCD200E


Summary of Contents for Panasonic KX-TCD200E
-
Page 1: Operating Instructions
TCD200E(e-e).book Page 1 Wednesday, February 9, 2005 2:58 PM Operating Instructions Digital Cordless Phone KX-TCD200E Model No. This unit is Caller ID compatible. To display the caller’s phone number, you must subscribe to Caller ID service. Charge the batteries for about 7 hours before initial use. - Page 2 L In the event of problems, you should contact your equipment supplier in the first instance. Declaration of Conformity: L Panasonic Communications Co., Ltd. declares that this equipment is in compliance with the essential requirements and other relevant provisions of Radio & Telecommunications Terminal Equipment (R&TTE) Directive 1999/5/EC.
-
Page 3: Table Of Contents
TCD200E(e-e).book Page 3 Wednesday, February 9, 2005 2:58 PM Table of Contents Preparation Useful Information Accessory information ....4 Wall mounting ....35 Important information . -
Page 4: Accessory Information
L Or go on line through our Internet Accessory ordering application at www.panasonic.co.uk L Most major credit and debit cards accepted. L All enquiries transactions and distribution facilities are provided directly by Panasonic UK Ltd. L It couldn’t be simpler! L Also available through our Internet is direct shopping for a wide range of finished products, take a browse on our website for further details. - Page 5 TCD200E(e-e).book Page 5 Wednesday, February 9, 2005 2:58 PM Preparation Included accessories AC adaptor Telephone line cord Rechargeable batteries Part No. PQLV19EZ Part No. PQJA87S (for UK) AAA (R03) size (PQLV19E) Part No. HHR-4EPT Handset cover Operating instructions Part No. PQYNTCD320E Helpline Tel.
-
Page 6: Important Information
TCD200E(e-e).book Page 6 Wednesday, February 9, 2005 2:58 PM Preparation L Unplug this unit from power outlets if it Important information emits smoke, an abnormal smell or makes unusual noise. These conditions can cause fire or electric shock. Confirm that General smoke has stopped and contact an L Use only the AC adaptor included with this... -
Page 7: Controls And Displays
TCD200E(e-e).book Page 7 Wednesday, February 9, 2005 2:58 PM Preparation O Microphone Controls and displays Note: L Up to 3 menu items can be displayed at a time. To select a menu item not shown on Controls the current page, scroll up or down by pressing the navigator key, {e} or {v}, Handset respectively. -
Page 8: Connections
TCD200E(e-e).book Page 8 Wednesday, February 9, 2005 2:58 PM Preparation Displays Connections Display icons When the AC adaptor is connected, a short Various icons appear on the handset display beep will be heard. If it is not heard, check to indicate the current status of the unit. the connections. -
Page 9: Battery Installation
We therefore recommend you also connect a standard telephone to the same telephone line using a T-adaptor. Your When the batteries are fully charged, 5 Panasonic sales shop can offer you more remains on the display. information about connection possibilities. Battery installation Insert the batteries negative (T) terminal first. -
Page 10: Battery Replacement
L Confirm that the AC adaptor is connected. batteries must be replaced. L Ensure that w is not flashing. Important: Press {j/OK}. L We recommend the use of Panasonic rechargeable batteries noted on page 4. If Select “Handset Setup”, then press you install non-rechargeable batteries and {>}. - Page 11 TCD200E(e-e).book Page 11 Wednesday, February 9, 2005 2:58 PM Preparation Enter the current day, month and year by selecting 2 digits for each. Example: 17 May, 2005 Press {1}{7} {0}{5} {0}{5}. Enter the current hour and minute by selecting 2 digits for each. L You can select “AM”, “PM”...
-
Page 12: Making/Answering Calls
TCD200E(e-e).book Page 12 Wednesday, February 9, 2005 2:58 PM Making/Answering Calls Note: Making calls L You can also press {C} or {s} before pressing {R}. Lift the handset and dial the phone number. To make a call using the redial list L To correct a digit, press {C/T}, then The last 10 phone numbers dialled are enter the correct number. -
Page 13: Other Features
TCD200E(e-e).book Page 13 Wednesday, February 9, 2005 2:58 PM Making/Answering Calls Select “Yes”, then press {>}. To return to the conversation, press {C/T} again. Press {ih}. Key lock To store a number from the redial list into The handset can be locked so that no calls the phonebook or settings can be made. -
Page 14: Answering Calls
TCD200E(e-e).book Page 14 Wednesday, February 9, 2005 2:58 PM Making/Answering Calls Press {R}. To stop paging, press {x} on the base unit or press {ih} on the handset. Dial the phone number, then press {C} or {s}. Note: L Pressing {R} 1 time creates 1 pause. Press {R} repeatedly to create longer pauses. -
Page 15: Phonebook
TCD200E(e-e).book Page 15 Wednesday, February 9, 2005 2:58 PM Phonebook names of categories assigned for Using the phonebook phonebook entries (“Friends”, “Family”, etc.) and then search for phonebook entries by category. Additional category features are The phonebook allows you to make calls available for Caller ID subscribers (page without having to dial manually. - Page 16 TCD200E(e-e).book Page 16 Wednesday, February 9, 2005 2:58 PM Phonebook Press the dial key ({0} to {9}) which Select “Save”, then press {>}. contains the character you are Press {ih}. searching for (page 36). L Press the same dial key repeatedly to Erasing entries from the display the first entry corresponding to phonebook...
-
Page 17: Copying Phonebook Entries To Other Handsets
Phonebook entries (page 15) can be copied from the handset to the phonebook of a Making a call using a one touch dial key compatible Panasonic handset. Press and hold the desired one touch dial key ({1} to {9}). Copying one entry L You can view other one touch dial assignments by pressing {e} or {v}. -
Page 18: Handset Settings
TCD200E(e-e).book Page 18 Wednesday, February 9, 2005 2:58 PM Handset Settings Guide to handset settings For your reference, a chart of all items which can be customised for the handset is printed below. L When customising the handset, the current item or setting is indicated by >. Handset settings Sub-menu Sub-menu 2... -
Page 19: Time Settings
TCD200E(e-e).book Page 19 Wednesday, February 9, 2005 2:58 PM Handset Settings Time settings Ringer setup Alarm Ringer volume An alarm will sound for 3 minutes at the set Press {j/OK}. time once or daily. Set the date and time Select “Handset Setup”, then press beforehand (page 10). -
Page 20: Night Mode
TCD200E(e-e).book Page 20 Wednesday, February 9, 2005 2:58 PM Handset Settings before you answer. You may hear a dial L If you use 12-hour time entry, select tone or no one on the line when you “AM” or “PM” by pressing {*} answer a call. -
Page 21: Display Setup
TCD200E(e-e).book Page 21 Wednesday, February 9, 2005 2:58 PM Handset Settings Select “Standby Display”, then Selecting categories to bypass night press {>}. mode Select the desired setting, then press Press {j/OK}. {>}. Select “Handset Setup”, then press Press {ih}. {>}. Note: Select “Ringer Setup”, then press L If “Base Number”... -
Page 22: Call Options
PIN. The unit will not reveal calls and calls to emergency numbers (page the PIN to you. If you forget your PIN, 26) can be made. consult your nearest Panasonic service Press {j/OK}. centre. Select “Handset Setup”, then press Press {j/OK}. -
Page 23: Default Settings
TCD200E(e-e).book Page 23 Wednesday, February 9, 2005 2:58 PM Handset Settings Note: L If keytones are turned off, error tones will not sound when you enter the wrong PIN or when memory is full. Resetting the handset to its default settings Press {j/OK}. -
Page 24: Base Unit Settings
TCD200E(e-e).book Page 24 Wednesday, February 9, 2005 2:58 PM Base Unit Settings Guide to base unit settings For your reference, a chart of all items which can be customised for the base unit is printed below. L When customising the base unit, the current item or setting is indicated by >. Base unit Sub-menu Sub-menu 2... -
Page 25: Ringer Setup
TCD200E(e-e).book Page 25 Wednesday, February 9, 2005 2:58 PM Base Unit Settings Select “Start/End”, then press {>}. Ringer setup Enter the desired hour and minute you wish to start this feature by selecting 2 digits for each. Ringer volume L If you use 12-hour time entry, select Press {j/OK}. -
Page 26: Call Options
TCD200E(e-e).book Page 26 Wednesday, February 9, 2005 2:58 PM Base Unit Settings Enter “0000” (default base unit PIN). L If you changed the PIN, enter it (page 27). L If you changed the PIN, enter it (page 27). Select “Call Options”, then press Select “Ringer Setup”, then press {>}. -
Page 27: Other Options
L If you changed the PIN, enter it (page of your new PIN. The unit will not reveal 27). the PIN to you. If you forget your PIN, Select “Call Options”, then press consult your nearest Panasonic service centre. {>}. Select “Call Restrict”, then press Press {j/OK}. - Page 28 TCD200E(e-e).book Page 28 Wednesday, February 9, 2005 2:58 PM Base Unit Settings Press {ih}. Note: L The following items will be deleted or reset to their default settings: – Settings listed on page 24 – Caller list L The following items will be retained: –...
-
Page 29: Caller Id Service
TCD200E(e-e).book Page 29 Wednesday, February 9, 2005 2:58 PM Caller ID Service call on hold. Consult your service provider Using Caller ID service for details of this service. Important: Category features for Caller ID L This unit is Caller ID compatible. To use subscribers Caller ID features (such as displaying Categories can help you identify who is... -
Page 30: Erasing Caller Information
TCD200E(e-e).book Page 30 Wednesday, February 9, 2005 2:58 PM Caller ID Service Select “Caller List”, then press Select “Yes”, then press {>}. {>}. Press {ih}. L The most recent call is displayed. Storing caller information into the Press {v} repeatedly to search from the most recent call, or press {e} phonebook repeatedly to search from the oldest call. -
Page 31: Multi-Unit Operation
TCD200E(e-e).book Page 31 Wednesday, February 9, 2005 2:58 PM Multi-unit Operation Operating additional units Registering a handset to a base unit Additional handsets Up to 6 handsets can be registered to a To register an additional handset to a single base unit. Additional handsets will base unit (easy registration) give you the freedom to, for example, have The included handset and base unit are... -
Page 32: Cancelling A Handset
TCD200E(e-e).book Page 32 Wednesday, February 9, 2005 2:58 PM Multi-unit Operation Select “Handset Setup”, then press To register a handset to an additional {>}. base unit (manual registration) Select “Select Base”, then press You can register a handset to a base unit {>}. -
Page 33: Intercom Between Handsets
You can increase the range of the base unit by using a DECT repeater. Please use only When finished talking, press {ih}. the Panasonic DECT repeater noted on page 4. Consult your Panasonic dealer for details. Helpline Tel. No.: U.K. 08700 100 076 R.O.I. 01289 8333... -
Page 34: Transferring Calls Between Handsets
TCD200E(e-e).book Page 34 Wednesday, February 9, 2005 2:58 PM Multi-unit Operation Transferring calls between handsets Outside calls can be transferred between 2 handsets in the same radio cell. Example: When handset 1 transfers a call to handset 2 Handset 1: During an outside call, press {INT} and {2} (desired handset number). -
Page 35: Useful Information
TCD200E(e-e).book Page 35 Wednesday, February 9, 2005 2:58 PM Useful Information Wall mounting 60 mm Screws Hooks Note: L Make sure the screws are securely fastened to the wall. L Do not pinch the telephone line cord and AC adaptor cord between the base unit and the wall. -
Page 36: Available Character Entries
TCD200E(e-e).book Page 36 Wednesday, February 9, 2005 2:58 PM Useful Information Available character entries The dial keys are used to enter characters and numbers. Each dial key has multiple characters assigned to it. The available character entry modes are, Alphabet, Numeric, Greek, Extended 1, Extended 2, and Cyrillic. - Page 37 TCD200E(e-e).book Page 37 Wednesday, February 9, 2005 2:58 PM Useful Information Extended 1 character table (N) L The following are used for both uppercase and lowercase: Extended 2 character table (O) L The following are used for both uppercase and lowercase: Cyrillic character table (P) Helpline Tel.
-
Page 38: Troubleshooting
TCD200E(e-e).book Page 38 Wednesday, February 9, 2005 2:58 PM Useful Information Troubleshooting If you still have difficulties after following the instructions in this section, disconnect the AC adaptor and turn off the handset, then reconnect the AC adaptor and turn on the handset. Initial settings Problem Cause &... - Page 39 TCD200E(e-e).book Page 39 Wednesday, February 9, 2005 2:58 PM Useful Information Telephone Problem Cause & solution I cannot make or receive calls. L The AC adaptor or telephone line cord is not connected. Check the connections. L If you are using a splitter to connect the unit, remove the splitter and connect the unit to the wall socket directly.
- Page 40 Cancel unused handset registrations from the base unit (page 32). L You entered the wrong PIN number. If you forget your PIN, consult your nearest Panasonic service centre. L Locate the handset and the base unit away from other electrical appliances.
-
Page 41: Specifications
TCD200E(e-e).book Page 41 Wednesday, February 9, 2005 2:58 PM Useful Information Specifications I Standard: DECT (Digital Enhanced Cordless Telecommunications), GAP (Generic Access Profile) I Number of channels: 120 Duplex Channels I Frequency range: 1.88 GHz to 1.9 GHz I Duplex procedure: TDMA (Time Division Multiple Access) I Channel spacing: 1,728 kHz... -
Page 42: Conditions Of Guarantee
8. The guarantee period applicable to this product shall be 12 months. Please keep these operating instructions with your receipt. Panasonic Business Systems U.K. Receipt No. Date of purchase Model No. -
Page 43: Index
TCD200E(e-e).book Page 43 Wednesday, February 9, 2005 2:58 PM Index K Key lock: 13 Index Keytones: 22 M Making calls: 12 A Alarm: 19 Missed calls: 29 Answering calls: 14 Mute: 13 Auto talk: 14, 22 N Night mode B Base unit Base unit: 25 Additional base units: 31 Handset: 20... - Page 44 3 Ping Xi 8 Lu, Nanping Keji Gongye Yuan, Zhuhai, Guangdong, China 519060 Copyright: This material is copyrighted by Panasonic Communications Co., Ltd., and may be reproduced for internal use only. All other reproduction, in whole or in part, is prohibited without the written consent of Panasonic Communications Co., Ltd.
Need help?
Do you have a question about the KX-TCD200E and is the answer not in the manual?
Questions and answers