Sign In
Upload
Download
Table of Contents
Contents
Add to my manuals
Delete from my manuals
Share
URL of this page:
HTML Link:
Bookmark this page
Add
Manual will be automatically added to "My Manuals"
Print this page
×
Bookmark added
×
Added to my manuals
Manuals
Brands
KETRON Manuals
Electronic Keyboard
XD3
Instructions manual
KETRON XD3 Instructions Manual
Hide thumbs
Also See for XD3
:
Installation manual
(12 pages)
1
2
3
4
5
6
7
8
9
10
11
12
13
14
15
16
17
18
19
20
21
22
23
24
25
26
27
28
29
30
31
32
33
34
35
36
37
38
39
40
41
42
43
44
45
46
47
48
49
50
51
52
53
54
55
56
57
58
59
60
61
62
63
64
65
66
67
68
69
70
71
72
73
74
75
76
77
78
79
80
81
82
83
84
85
86
87
88
89
90
91
92
93
94
95
96
97
98
99
100
101
102
103
104
105
106
107
108
109
110
111
112
113
114
115
116
117
118
119
120
Table Of Contents
121
page
of
121
Go
/
121
Contents
Table of Contents
Bookmarks
Table of Contents
Index
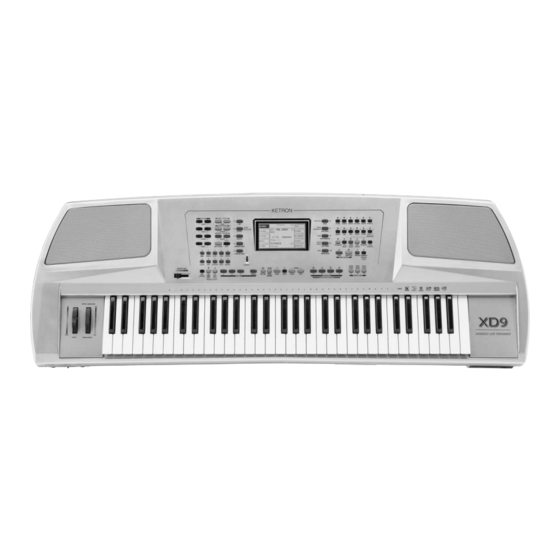
Product View
Welcome to the XD9
How to Connect a MIDI Accordion
How to Connect a Keyboard
Connections on the Rear
Front Connections
Further Elements
Accessories
Control Panel and Push Button Functions
The Display, the Main Page and the Function Push Buttons
The Push Buttons Related to the Selection of Styles
The Push Buttons Related to the Selection of Voices
Push Buttons on the Right-Hand Side of the Control Panel
The Push Buttons Required to Control the Arranger
Intro 1,2,3
Parameter Management
Conventions
Calling up the Menus
Data Entry
A Guide on How to Start Playing
How to Use a MIDI File
Reproducing from Floppy Disk
Reproducing a MIDI File from the Hard Disk
Transposition
Controlling Playback
How to Record a MIDI File with the XD9
How to Use the Arranger
How to Select a Style
How to Control the Arranger
How to Load a Style from Disk
How to Use the Voices
How to Use the Microphone and the Vocalizer
How to Use a MIDI Accordion
The Registrations
Voices and User Voice
Calling up the Voices
Second Voice
User Voices
The Elements Used for Voice Programming
Amplitude and Filter Parameters
The Effects
Control with Modulation Wheel
LFO and Velocity
Saving a User Voice
Saving All the User Voices on Disk
Flash Memory Card
Program and One Touch
Modifying a Program
A Guide to the Parameters
Saving and Loading a Program
One Touch
Drawbars
Programming the Organ Timbre
Playing a Drum Set
Live Drum Sets
Drum Mixer
How to Create or Modify a Drum Set
Arranger
Panel Commands
Menu Left Control
Play Control Menu
Arrange Mode Menu
Arrange View Menu
Modifying the Sounds
Lower Transposition 1 and 2
Storing and Saving the Custom Styles
Saving All Custom Styles on a Disk
Reloading Original Custom Styles
Using a MIDI Pedal for the Bass
Using a MIDI Pedal for the Chords
Dynamics
Pattern Edit
The First Page of the Edit Pattern Menu
F1 Record
Assigning Voices to the Arranger Tracks
Description of the Parameters
F2 Parameters
How to Record a Pattern Part
F3 Part Clear
F4 Copy
F5 Remap
F6 Delete
F7 Disk Save
F9 MIDI Record
F10 Format
Power on Set up
Song Play, MIDI Files and Karaoke
Loading a MIDI File from Floppy Disk
Loading a MIDI File from Hard Disk
How to Convert a Kar MIDI File to a MID MIDI File
Balancing and Playing the Sounds Assigned to the Keyboard
Locating a MIDI File Rapidly
The Song Play Functions
Modifying a Single Part of a MIDI File
Modifying a Parameter for the Sixteen Parts
Saving the Parameters Modified
Creating a Permanent Chain of MIDI Files on Disk
Using the Chain of MIDI Files
Switching from a MIDI File to a Style While Playing
Drum Remix
Remix with One Style
Drum and Bass
Video out and Karaoke
Writing a Message to be Sent to the Video Output
Changing the Background and Text Colour
Modifying the Screen Lay-Out
Recording a MIDI File
KAR, MID (MIDI Files) and TXT (Text) Files
Using KAR MIDI Files
Using TXT Files
Using TXT Files with the Arranger
Using TXT Files with Song Play
Synchronizing the Changes to the Lyrics/Text Page with a MIDI File
Using the Microphone
Micro Edit
Vocalizer
How to Activate Vocalizer
The Vocalizer Modes
The Vocalizer Parameters
Harmonisation Modes and Description of the Algorithms
Automatic Chord 1
Automatic Chord 2
Fixed Interval
Vocal Effects
Saving a Vocal Set in Ram/On Disk
Loading a Vocal Set from the Disk
Automatic Vocal Set Loading Using the Xd9'S Power on Setup
Vocal Set and Registration Association
Editing an Effect
Parameters for Chorus Algorithms
Parameters for Delay Algorithm
Parameters for Distorsor Algorithms
Registrations
Calling up and Saving a Register of the Block Registration Group
Calling up and Saving a Register of the Single Registration Group
Automatically Loading the Text/MIDI File Using Registrations
Defining Which Parameters will be Controlled by the Registration
Utility
MIDI Accordions
Connecting a MIDI Accordion
Enabling the Accordion and Its Parameters
Saving the Parameters for the MIDI Accordion
The MIDI Parameters for the Accordion
Tips to Quick Connection of a MIDI Accordion
MIDI
Using the XD9 as a General MIDI Module
Modifying a Single GM Part
The MIDI Parameters of the XD9 Sections
Modifying a Parameter for the Sixteen GM Parts
The MIDI Set-Ups
The Parameters of the MIDI Menu
Calling up Programs/One Touch Memories/Registrations Via MIDI
Disk
General Rules
How to Move Around Among Files
The Disk Functions for the Hard Disk
Copying from Floppy to Hard Disk
Copying from Hard Disk to Floppy
The Disk Functions for the Floppy Disk
Setting the Password for Protected Folders
Managing the Contents of the HD Using an External Computer
How to Convert a KAR Midifile
Technical Tables
Specifications
Preset Program Changes
Presets
GM Voices
Drum Sets
Live Drums
MIDI Banks and Prog. Change
Styles
MIDI Implementation
Vocalizer Control List
System Exclusive Ketron XD9-XD3
Vocalizer System Exclusive List
Advertisement
Quick Links
Download this manual
Welcome To The Xd9
-XD3
Control Panel And Push Button Functions
Parameter Management
A
guide on how to start playing
Voices And User Voice
Program And One Touch
Using A Midi Pedal For The Bass
Song Play, Midi file and Karaoke
Video Out And Karaoke
Recording A Midi File
.KAR, .MID (Midi files) & .TXT (test) files
Using The Microphone
Technical Tables
INDEX
PAGE
3
Connections
4
6
11
12
18
22
Drawbars
27
Drum Set
28
Arranger
30
41
Pattern Edit
42
Power On Set Up
48
49
Drum Remix
55
56
57
58
60
Vocalizer
62
Effects
68
Registrations
70
Utility
73
Midi Accordions
77
Midi
79
Disk
85
93
1
XD9-XD3
Table of
Contents
Previous
Page
Next
Page
1
2
3
4
5
Advertisement
Table of Contents
Need help?
Do you have a question about the XD3 and is the answer not in the manual?
Ask a question
Questions and answers
Related Manuals for KETRON XD3
Recording Equipment KETRON X4 Installation Manual
(12 pages)
Electronic Keyboard KETRON X1 Owner's Manual
X series keyboard with buttons, expander module (121 pages)
Electronic Keyboard KETRON X8 Owner's Manual
X series keyboard with buttons, expander module (121 pages)
Electronic Keyboard KETRON XD9 Instructions Manual
(121 pages)
Electronic Keyboard KETRON Ketron User Manual - Quick Manual
Advanced music station (74 pages)
Electronic Keyboard KETRON KETRON User Manual
Advanced music station (162 pages)
Electronic Keyboard KETRON SD5 Owner's Manual
(122 pages)
Electronic Keyboard KETRON Audya User Manual
Advanced music station (162 pages)
Electronic Keyboard KETRON SD1 Plus Quick Manual
(43 pages)
Electronic Keyboard KETRON SD5 Installation Manual
(8 pages)
Electronic Keyboard Ketron SX3000 Quick Manual
(8 pages)
Electronic Keyboard KETRON SD9 Manual
(187 pages)
Electronic Keyboard KETRON SD5 Installation Manual
Sd series accessories installation guide 9vo004; 9hd004; 9hd0043; 9ac134; 9ac116 (16 pages)
Electronic Keyboard KETRON EVENT61 Quick Manual
(32 pages)
Electronic Keyboard KETRON SD7 Manual
Update 1.3.0 (8 pages)
Electronic Keyboard KETRON SD9 Update Manual
(11 pages)
This manual is also suitable for:
Xd9
Table of Contents
Save PDF
Print
Rename the bookmark
Delete bookmark?
Delete from my manuals?
Login
Sign In
OR
Sign in with Facebook
Sign in with Google
Upload manual
Upload from disk
Upload from URL


Need help?
Do you have a question about the XD3 and is the answer not in the manual?
Questions and answers