Table of Contents
Advertisement
Advertisement
Table of Contents

Related Manuals for Panasonic CS-A182KR


Summary of Contents for Panasonic CS-A182KR
-
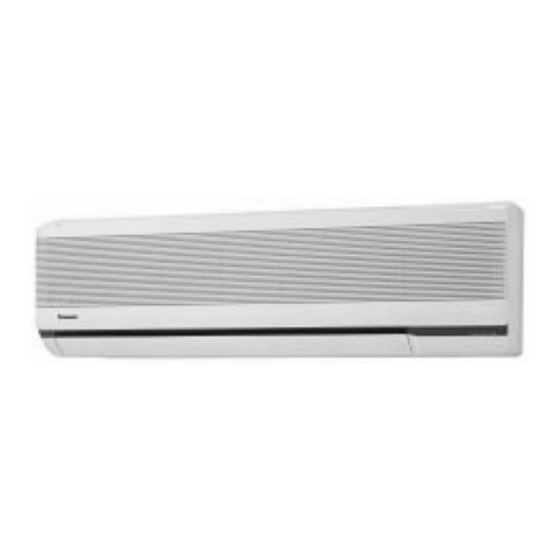
Page 1: Room Air Conditioner
Room Air Conditioner Operating Instructions Indoor Outdoor CS-A182KR CU-A182KR Model Model CS-A242KR CU-A242KR ENGLISH ..... P. 1 – P. 22 Before using your air-conditioner, please read this operating instructions carefully and keep it for future reference. F563264... -
Page 2: Table Of Contents
Contents Safety Precautions ..........2 – 4 – Installation precautions – Operation precautions Name of Each Part ..........5 – 6 – Indoor unit – Outdoor unit – Accessories – Remote control Preparation Before Operation ....... 7 – 8 – Before operating the unit –... -
Page 3: Safety Precautions
Safety Precautions Before operating, please read the following “Safety Precautions” carefully. To prevent personal injury, injury to others and property damage, the following instructions must be followed. Incorrect operation due to ignoring of instructions will cause harm or damage, the seriousness of which is classified as follows : Warning : This sign warns of death or serious injury. -
Page 4: Operation Precautions
Operation precautions Warning Do not operate or stop the Insert power plug Do not damage or use an properly. unit by inserting or pulling unspecified power cord. out the power plug. Heat generated by a loose power It will cause electrical shock or plug could cause electric shock It could cause electric shock or fire. - Page 5 Caution Do not remove the power When cleaning the unit, re- Switch off the power supply if plug by pulling the cord. move the plug. the unit is not going to be Hold the plug when disconnect- used for a long period of time. This is to prevent injury due to the ing the plug from the wall outlet.
-
Page 6: Name Of Each Part
Name of Each Part Indoor unit Test Run Button Panel Opener Front Panel Air Intake Vent Auto Operation Button Power Supply Air Outlet Vent Cord Vertical Airflow Direction Louver Signal Power Switch Receptor Horizontal Operation Indication Airflow Direction Louver Lamps (LED) (Manually adjusted) POWER : Red SLEEP : Orange... -
Page 7: Accessories
Accessories Remote Control Two R03 (AAA) dry-cell Remote control batteries or equivalent Air Purifying Filters (Catechin Air Purifying Filters and Deodorizing Filters) Signal Transmitter Operation Display OFF/ON Button Sleep Mode Airflow Volume Operation Button Selection Button Airflow Direction Manual Control Button Room Temperature Setting Button Operation Mode... -
Page 8: Preparation Before Operation
Preparation Before Operation Airflow Direction Adjustment Before operating the unit Connect the power supply cord to an independent power supply. Open the front panel. Remove air filter. Switch on the power switch and close the front panel. filter Hold the panel openers at both Hold the tab to raise up sides and pull up the front panel. -
Page 9: How To Insert Batteries
How to insert batteries Gently press the OPEN Fix the cover to the back of the remote place marked [OPEN] and slide control (“PM 12:00” will flash in the opera- the cover toward tion display.) you. e r Be sure that the (+) and (–) directions are correct. -
Page 10: How To Operate
How to Operate Auto Restart Control. If there is a power failure, operation will be automatically restarted after 3 minutes when the power is resumed with previous operation mode and airflow direction. (When the operation is not stopped by remote control.) If you do not intend to continue the operation when the power is resumed, switch off the power... - Page 11 Press to select operation mode. MODE The display changes in the order each time the button is pressed. Press to start the operation. OFF/ON I Operation indication lamp (RED) will light up. Press once more, to stop the operation. Press to select airflow volume. FAN SPEED The display changes in the order.
-
Page 12: Setting The Timer
Setting the Timer If there is a power failure. To reset the Timer. (Example) If the OFF Timer has been set. OFF-TIMER Even if there is a power failure, the setting time is still stored in the memory because the remote control is a battery operated type. -
Page 13: To Set The Timer
To set the current time. Set hours and minutes TIME ..to advance the time ..to reverse the time To set the Timer. OFF Timer Set hours and minutes OFF-TIMER TIME ..to increase 10 minutes each step..to decrease 10 minutes each step. -
Page 14: Convenient Operation
Convenient Operation Sleep Mode This is to gain a comfortable room temperature while sleeping. To set Sleep Mode. Press SLEEP (The sleep indication lamp on the main unit will light up.) To cancel Sleep Mode. Press once more SLEEP (The sleep indication lamp on the main unit will switch off.) Sleep Mode Operation. -
Page 15: When Remote Control Cannot Be Used
When the remote control cannot be used Test Run Button. (Use when installing and moving) Auto Operation Button. When the remote control cannot be used, press Auto Operation Button to run Automatic Operation. (Airflow direction setting will be automatic.) To set Auto Operation. Press Auto Operation Button. -
Page 16: Operation Hints
Operation Hints Adjust room temperature properly. Set the Clean the air filter regularly. Blockage in the air temperature 1°C higher (Cooling Operation) or filter reduces the airflow and lowers the cooling 2°C lower (Heating Operation) than actually de- or heating. Clean at least once every 2 weeks. sired. - Page 17 Make sure that the doors and windows are shut. Keep blinds or curtains closed. Do not let sun- Otherwise, cooling and heating performance shine enter the room directly. About 5% of elec- will be reduced and electricity cost is wasted. tricity cost can be saved.
-
Page 18: Better Care And Maintenance
Better Care and Maintenance Regular care and maintenance will extend the life of the air conditioner and prevent wastage of electricity. Before performing any maintenance procedure, be sure to switch off the main power supply. Do not use water or volatile liquids. Caution Do not make air conditioner wet, as there is the danger that it could cause electric shocks. -
Page 19: Replacement Of Air Purifying Filters
Replacement of air purifying filters Recommended about once every 3 months. Remove the air filters. Remove the filters from Remove the air purifying the filter frame. filters. ! Caution Be careful not to hurt your hands on Filters metal parts. Air purifying filter Air filter <Note>... -
Page 20: Troubleshooting
Troubleshooting Normal operation Is it okay? This is the answer. Sight Air conditioner has been re- This is to protect the air conditioner. Wait until the started, does air conditioner begins operating. operate for 3 minutes. Soft Dry Mode Operation is a very gentle cooling operation consisting primarily of dehumidifying. -
Page 21: Abnormal Operation
Abnormal operation Has the circuit breaker been tripped? Has the power plug been removed from the wall outlet? The air conditioner Is the power switch at “t” (OFF)? does not operate. Is the Timer being used correctly? Has the REMOTE CONTROLLER B switch been set to “B”? Has the temperature been set incorrectly? Are the filters dirty? - Page 22 Warning 1) If the supply cord is damaged or need to be replaced, it must be replaced by the manufacturer or its service agent or a similarly qualified person in order to avoid a hazard. 2) Remove power plug or disconnect from the mains before servicing this appliance. 3) Do not repair by yourself.
- Page 23 Note Please remember to record the following : Model Number Serial Number Dealer's Name Date Purchased...
- Page 24 Matsushita Electric Industrial Co., Ltd. Printed in Malaysia Osaka 542-8588, Japan. P0103-0 F563264...