Advertisement
Advertisement
Table of Contents

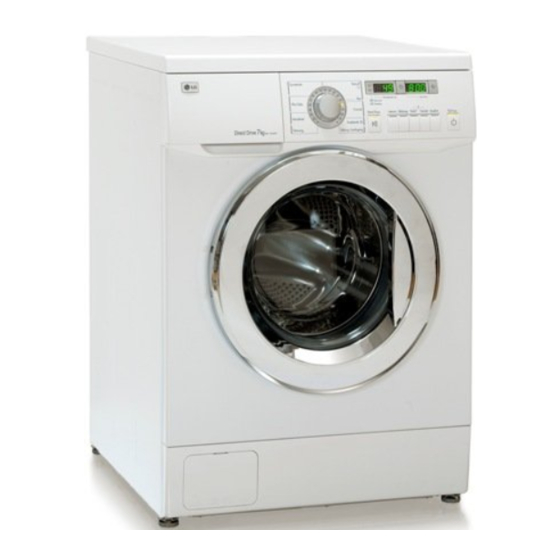
Summary of Contents for LG WD-16330FD
-
Page 2: Washing Machine
Washing Machine OWNER’S MANUAL WD(M)-16330(5)FD WD(M)-16331(6)FD WD(M)-14330(5)FD WD(M)-14331(6)FD WD(M)-12330(5)FD WD(M)-12331(6)FD... - Page 3 roduct Features I Jumbo drum I More economical by Intelligent Wash System I Child-Lock I Low noise speed control system I Auto Restart I Direct Drive System I Safety device (Aqua lock) [WD(M)-16330(5)FD/14330(5)FD/12330(5)FD] I Water circulation ontents...
- Page 4 arnings READ ALL INSTRUCTIONS AND EXPLANATION OF THE INSTALLATION BEFORE USE For your safety, the information in this manual must be followed to minimize WARNING! the risk of fire or explosion, electric shock, or to prevent property damage, personal injury, or loss of life. IMPORTANT SAFETY INSTRUCTIONS WARNING ❊...
- Page 5 pecifications ❋ I Accessories...
-
Page 6: Removing Transit Bolts
nstallation Install or store where it will not be exposed to temperatures below freezing or exposed to the weather. Properly ground washer to conform with all governing codes and ordinances. The base opening must not be obstructed by carpeting when the washing machine is installed on a carpeted floor. -
Page 7: Installation Place Requirement
nstallation Installation place requirement Level floor : Drain Hose Washer Power outlet : Laundry Additional Clearance : approx. Positioning... -
Page 8: Electrical Connection
nstallation Electrical connection CAUTION CAUTION concerning the Power Cord Washing Machine is to be connected to the water mains using new hose-sets and that old hose-sets should not be used. Connecting water supply hose Water supply pressure must be between 30kPa and 1000kPa (0.3~10kgf/cm Don’t strip or crossthread when connecting Inlet hose to the valve. - Page 9 nstallation Normal Tap without thread & screw type inlet hose Normal Tap without thread & one touch type inlet hose Used the horizontal tap...
- Page 10 nstallation Installation of drain hose...
-
Page 11: Level Adjustment
nstallation Level adjustment Timber or suspended type flooring may contribute to NOTE excessive vibration or load balance errors. In the case that the washing machine is installed on a raised NOTE platform, it must be securely fastened in order to eliminate the risk that it might fall off. ❊... - Page 12 are before washing Before the first washing Select a cycle (COTTON 60°C, add a half load of detergent) allow the unit to wash without clothing. This will remove residues from the drum that may have been left during manufacturing. Caring before washing 1.
-
Page 13: Adding Detergent And Fabric Softener
dding detergent I Adding detergent and fabric softener 1. The Dispenser Drawer 3. Detergent dosage • The detergent should be used according to the instruction of the detergent manufacture. • If too much detergent is used more than the recommended amount, too many suds can occur and this will decrease the washing result or cause heavy load to the motor. - Page 14 unction Recommended courses according to the laundry types Fabric Proper Maximum Energy Time Program Option Type Temp. Load Minutes ❋ ❋ ❋ ❋ ❋...
- Page 15 ow to use washer 1. Cotton automatically 2. Manual Selecting selected upon power on. Power( ) Power( ) Start/Pause( ) Start/Pause( )
- Page 16 ow to use washer Option 3. Rinse+ 1. Intensive 4. Pre Wash 5. Crease Care 2. Rinse Hold...
- Page 17 ow to use washer Spin Spin Power Spin Start/Pause 1. Spin selection WD(M)-16330(5)FD / WD(M)-16331(6)FD WD(M)-12330(5)FD / WD(M)-12331(6)FD WD(M)-14330(5)FD / WD(M)-14331(6)FD 2. No spin...
-
Page 18: Water Temp
ow to use washer Water Temp. Child Lock 1. Child Lock Rinse + Pre Wash When child lock is set, all buttons are locked except for power button. Rinse + Pre Wash Rinse + Pre Wash Start/Pause Start/Pause... -
Page 19: Time Delay
ow to use washer Program Time Delay 1. Time Delay Preparing washing before starting “Time Delay” Power Program Start/Pause Time Delay Start/Pause Time Delay Regarding to the laundry type for each program Please refer to the page13. Power Time Delay •... -
Page 20: Door Lock
ow to use washer Start/Pause Power 1. Start 1. Power • This Start/Pause button is used to start • Press the Power button to turn power on wash cycle or pause the wash cycle. and off 2. Pause • To cancel the Time Delay function, the power button should be pressed. - Page 21 ow to use washer Display 3. Completion of washing Multi display 1. Special function display 4. Time left 2. Self diagnosis display If these error letters are displayed, please refer to the troubleshooting page26 and follow the guide.
- Page 22 aintenance ❋ Before cleaning the washer interior, unplug the electrical power cord to avoid electrical shock to avoid electrical shock hazards. ❋ When disposing of the appliance, cut off the mains cable, and destroy the plug Disable the door lock to prevent young children being trapped inside. The water inlet filter The drain pump filter ❋...
- Page 23 aintenance I Dispenser drawer ❋ I The drawer recess ❋ I The washing drum ❋ ❋ ❋...
- Page 24 aintenance I The water circulation nozzle I Cleaning your washer 1. Exterior ❋ 2. Interior NOTE Remove hard water deposits using only cleaners labeled as washer safe. I Cold condition...
- Page 25 roubleshooting guide ❋ This washing machine is equipped with automatic safety functions which detect and diagnose faults at an early stage and react appropriately When the machine does not function properly or does not function at all, check the following points before you contact your service provider.
- Page 26 roubleshooting guide Symptom Possible Cause Solution ❋...
- Page 27 roubleshooting guide Symptom Possible Cause Solution <Fig 1> ❋...
- Page 28 erms of Warranty Disposal of your old appliance What Is Not Covered:...


Need help?
Do you have a question about the WD-16330FD and is the answer not in the manual?
Questions and answers