Table of Contents
Advertisement
It is of vital importance, before attempting to
operate your engine, to read the general
'SAFETY INSTRUCTIONS AND WARNINGS'
section on pages 2-6 of this booklet and to strictly
adhere to the advice contained therein.
Also, please study the entire contents of this
instruction manual, so as to familiarize yourself
with the controls and other features of the
engine.
Keep these instructions in a safe place so that
you may readily refer to them whenever
necessary.
It is suggested that any instructions supplied
with the aircraft, radio control equipment, etc.,
are accessible for checking at the same time.
FUEL, PROPELLERS
CONTENTS
2-6
IDLING ADJUSTMENT CHART
7
8
VALVE
9-10
10
11
12
ENGINE EXPLODED VIEWS &
ENGINE PARTS LISTS
13
CARBURETOR EXPLODED VIEWS
14-15
& PARTS LISTS
15
16-17
ENGINE THREE VIEW DRAWINGS
1
17-18
19-21
22
23
24
25
26-27
28
29-30
31
32
Advertisement
Table of Contents

Related Manuals for O.S. engine MAX-46AX


Summary of Contents for O.S. engine MAX-46AX
-
Page 1: Table Of Contents
It is of vital importance, before attempting to operate your engine, to read the general 'SAFETY INSTRUCTIONS AND WARNINGS' section on pages 2-6 of this booklet and to strictly adhere to the advice contained therein. Also, please study the entire contents of this instruction manual, so as to familiarize yourself with the controls and other features of the engine. -
Page 2: Safety Instructions And Warnings About Your O.s. Engine
SAFETY INSTRUCTIONS AND WARNINGS ABOUT YOUR O.S. ENGINE Remember that your engine is not a "toy", but a highly efficient internal- combustion machine whose power is capable of harming you, or others, if it is misused. As owner, you, alone, are responsible for the safe operation of your engine, so act with discretion and care at all times. - Page 3 NOTES This engine was designed for model If you remove the glowplug from the engine aircraft. Do not attempt to use it for any and check its condition by connecting the other purpose. battery leads to it, do not hold the plug with bare fingers.Use an appropriate tool or a Mount the engine in your model securely, folded piece of cloth.
-
Page 4: Introduction
NOTES Adjust the throttle linkage so that the engine For their safety, keep all onlookers stops when the throttle stick and trim lever (especially small children) well back (at on the transmitter are fully retarded. least 20 feet or 6 meters) when preparing Alternatively, the engine may be stopped by your model for flight. -
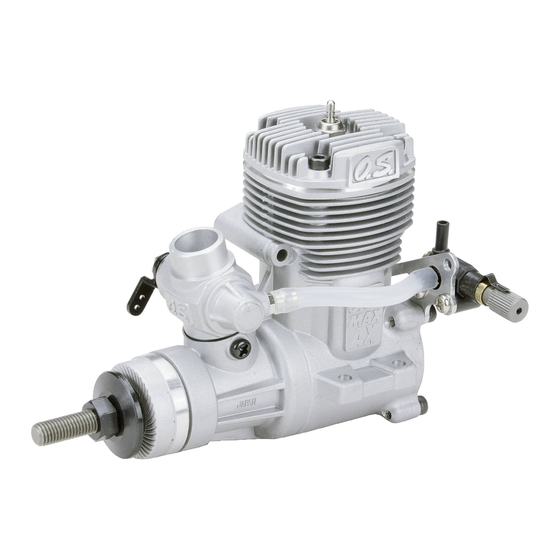
Page 5: Basic Engine Parts
NEEDLE-VALVE LOCATION BASIC ENGINE PARTS The procedure for relocating the needle-valve is as Glowplug Cylinder head follows: Remove the two cover-plate screws which secure the needle-valve assembly bracket, then carefully remove the two screws by which the needle-valve Fuel inlet unit is attached to the bracket. -
Page 6: Throttle Linkage
How to fasten the mounting screws. Set the throttle lever linkage so that the throttle ro- tor is (a) fully open when the transmitter throttle Hardwood mounting beams stick is fully advanced and (b) fully closed when Tighten second nut firmly down 3mm steel nuts onto first nut. -
Page 7: Fuel Tank Location
FUEL TANK LOCATION • Be sure to use a pressurized fuel system by Suggested fuel tank capacity is approx 300cc. connecting the muffler pressure nipple to the vent- These will allow 12-13 minute flights. pipe of the fuel tank. Locate the fuel tank so that the top of the tank is 5- 10mm (1/4-3/8") above the level of the needle-valve. -
Page 8: Mixture Controls
Reminder! FUEL Model engine fuel is poisonous. Do not allow it to come into contact with Select, by practical tests, the most suitable fuel from the eyes or mouth. Always store it in a among the best quality fuels available in your country clearly marked container and out of for model use. -
Page 9: Before Starting
BEFORE STARTING Warning (Very hot) Tools, accessories, etc. Never touch the nichrome wire while the battery is The following items are necessary for operating the connected. engine. Resistance coil (nichrome wire) 1 Fuel Model glowplug engine fuel of good quality, preferably containing a small percentage of nitromethane. -
Page 10: Running-In (Breaking-In)
Fill the fuel tank. Do not allow fuel to overflow into 6. Connect battery leads to glowplug. the silencer, otherwise the engine may become Bring electric starter into contact with spinner-nut flooded and difficult to start. or spinner and depress starter switch for one or Check that the needle-valve is closed. - Page 11 Optimum needle setting(1) Slowly advance the throttle to its fully open position, then gradually close the needle-valve until the exhaust note begins to change. (4-cycle to 2-cycle) At this point, disconnect the battery from the glowplug, taking care that the battery leads or glowplug clip do not come into contact with the rotating propeller.
-
Page 12: Realignment Of Mixture Control
Note: Mixture Control Valve adjustments should MIXTURE CONTROL VALVE ADJUSTMENT be made in steps of 15-30˚ initially, carefully checking the effect, on throttle With the engine running, close the throttle and allow it response, of each small adjustment. to idle for about five seconds, then open the throttle fully. -
Page 13: Subsequent Starting Procedure
SUBSEQUENT STARTING PROCEDURE SUBSEQUENT READJUSTMENT Once the optimum needle-valve setting has been es- Once the engine has been run-in and the controls tablished (see page 21, Needle-valve adjustment dia- properly set up, it should be unnecessary to alter the gram) the procedure for starting may be simplified as mixture settings;... - Page 14 ENGINEN PARTS LIST ENGINE EXPLODED VIEW Code No. Description 24604000 Cylinder Head C.M3x15 24603000 Cylinder & Piston Assembly 24806301 Piston Pin 24817100 Piston Pin Retainer 25305002 Connecting Rod 24681000 Carburetor Complete (Type 40G) 23210007 Propeller Nut 23209003 Propeller Washer 24608000 Drive Hub 46120000 Thrust Washer...
-
Page 15: O.s. Genuine Parts & Accessories
CARBURETOR EXPLODED VIEW & PARTS LIST Code No. Description 24681410 Throttle Lever Assembly 22681419 Throttle Lever 22781420 Throttle Lever Fixing Screw 24681610 Mixture Control Valve 22781800 "O"Ring 24681200 Carburetor Rotor 24681100 Carburetor Body N.+M3.5x6 45581820 Rotor Guide Screw 22681953 Fuel Inlet (No.1) 46215000 Carburetor Gasket 25081700... - Page 16 SUPER FI LTER SILENCER EXTENSION ADAPTORS NON-BUBBLE WEIGHT (71531000) (72403050) (25425600) LONG SOCKET WRENCH BLIND NUTS (10pcs. /Sets) LOCK WASHER WITH PLUG GRIP (10Sets) (79870040) (71521000) (55500003) The specifications are subject to alteration for improvement without notice. THREE VIEW DRAWING 100.5 SPECIFICATIONS Displacement...
-
Page 17: Memo
MEMO 6-15 3-Chome Imagawa Higashisumiyoshi-ku Osaka 546-0003, Japan TEL. (06) 6702-0225 FAX. (06) 6704-2722 URL : http://www.os-engines.co.jp Copyright 2003 by O.S.Engines Mfg. Co., Ltd. All rights reserved. Printed in Japan. 090300...
Need help?
Do you have a question about the MAX-46AX and is the answer not in the manual?
Questions and answers
Can I use a regular carburator on a max 46 ax
No, a regular carburetor cannot be used. The O.S. Engine MAX-46AX requires a specific carburetor, the #40G model (part number 24681000), which is designed to fit its specifications such as dimensions and mounting.
This answer is automatically generated