Table of Contents
Advertisement
Quick Links
Energy Star Copiers have a feature that allows them to automatically turn off or "go to sleep" after a
period of inactivity, ensuring night and weekend shut off. This auto-feature can reduce a copier's
annual electricity costs by over 60 percent. In addition, high speed copiers will be set to
automatically make double sided copies. An organization's paper costs can be reduce by $60 a month
and the volume of paper sent into the waste stream will decline. It takes 10 times more energy to
produce a piece of paper than it does to make a single copy on a copier. Therefore, using less paper
also means decreased national energy consumption.
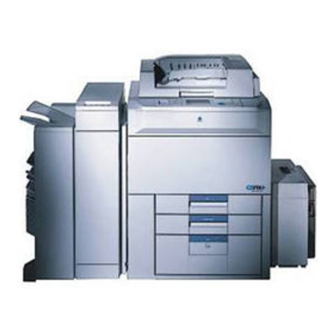
Your Minolta Copier has been designed to use the following Recycled Paper
As an Energy Star Partner, Minolta has determined that
this copier meets the Energy Star Guidelines for Energy
Efficiency.
What is an Energy Star Copier ?
Recycled Paper (USA market only)
Minolta Recycled Bond
20% Post Consumer Waste
1075O312AA
Item No. 8925 701
Advertisement
Table of Contents

Subscribe to Our Youtube Channel
Related Manuals for Minolta EP6000


Summary of Contents for Minolta EP6000
-
Page 1: What Is An Energy Star Copier
Therefore, using less paper also means decreased national energy consumption. Recycled Paper (USA market only) Your Minolta Copier has been designed to use the following Recycled Paper Minolta Recycled Bond Item No. 8925 701... - Page 2 EP6000 Thank you for choosing Minolta. This operator’s manual explains how to operate the copier and replenish its supplies. It also gives some troubleshooting tips as well as general precautions to be observed when operating the copier. To ensure the best performance and effective use of your copier, read this manual carefully until you familiarize yourself thoroughly with its operation and features.
-
Page 3: Table Of Contents
Contents Chapters 1 through 3 contain the basic information for making copies. Be sure to read these chapters before attempting to use your copier. Using This Manual Organization viii Page Organization ix Terms and Symbols for the Type of Originals and Copy Paper x Chapter 1 Safety Notes 1. - Page 4 Chapter 2 First Things to Know about Chapter 2 your Copier Chapter 1 1. System Overview 8 Safety Notes 2. Copier Parts and Accessories Copier 10 Options 13 Chapter 2 3. Control Panel Keys and Touch Panel 14 4. Touch Panel First Things to Know about What’s a Touch Panel? 16...
- Page 5 Chapter 3 Making Copies 1. Basic Copying Overview 28 2. Placing Originals 30 3. Number of Copies 34 4. Starting the Copy Cycle 35 5. Interrupt Mode 36 6. Manual Bypass Copying 37 7. Basic Functions • Copy Paper Size 40 •...
- Page 6 Contents Chapter 4 Using the User Mode 1. Job Memory Input and Job Recall Chapter 1 Job Memory Input 108 Account Job Input 110 Safety Notes Recalling a Job from Memory 112 2. Zoom Memory Input 114 3. Meter Count 116 Chapter 2 4.
- Page 7 Contents Chapter 6 Troubleshooting 1. When this Type of Copy is Produced • The Image is too Light 154 • The Image is too Dark 154 • The Copy is Blurry 154 • The Copy has dark specks or spots 155 •...
- Page 8 Contents Chapter 8 Miscellaneous 1. Care of the Copier Chapter 1 • Daily Checks 168 • Cleaning 169 Safety Notes 2. Function Combination Matrix 172 3. Description of Copy Paper Size 175 4. Zoom Ratio Table Chapter 2 (Original Size to Copy Paper Size) 176 First Things to 5.
-
Page 9: Using This Manual
viii Using This Manual Organization This manual consists of eight chapters. Chapters 1 through 3 give the basic information for making copies. Be sure to read these chapters before attempting to use your copier. Chapter 1 Safety Notes About the operating environment, conditions, and precautions for use. Chapter 2 First Things to Know About your Copier A brief description of the system and preliminary information about the different parts... -
Page 10: Page Organization
Using This Manual Page Organization Useful Tip: Gives you a useful piece of advice Index: Used to locate your chapter quickly. on using a particular convenient function or device. Section title Page number Chapter title Indicates that this is the end of the steps. -
Page 11: Terms And Symbols For The Type Of Originals And Copy Paper
Using This Manual Terms and Symbols for the Type of Originals and Copy Paper A few special terms and symbols are used in this manual to designate types of originals and copy paper. These two pages explain about these terms and symbols. Feeding Direction (copy paper path) In this copier system, copy paper is taken up from the right-hand side of the copier and fed through the copier toward the left-hand side, out face up onto the Exit Tray. - Page 12 Using This Manual "Width" and "Length" When we talk about the size of the original or copy, we call side A "width" and side B "length." A: Width B: Length Terms and Symbols Used <Lengthwise > When the original or copy has a "length" longer than its "width,"...
-
Page 14: Chapter 1 Safety Notes
Chapter 1 Safety Notes This chapter explains about the operating environment, conditions, and precautions for use. 1. Installing the Copier Installation Site 2 Power Source 2 Grounding 2 Space Requirements 3 2. Precautions for Use Operating Environment 4 Using the Copier Properly 4 Care of Copier Supplies 5 Moving 5... -
Page 15: Installing The Copier
1. Installing the Copier Installation Site To ensure utmost safety and prevent possible malfunctions of the copier, install it in a location which meets the following requirements. A place away from a curtain or the like that may catch fire and burn easily. An area where there is no possibility of being splashed with water or other types of liquid. -
Page 16: Space Requirements
1. Installing the Copier Space Requirements To ensure easy copier operation, supply replacements and service maintenance, adhere to the recommended space requirements detailed below. NOTE Be sure to allow a clearance of 150 mm or more at the back of the copier as there is a ventilation duct. -
Page 17: Precautions For Use
2. Precautions for Use Operating Environment The operating environmental requirements of the copier are as follows. Temperature : 10°C to 35°C (50°F to 86°F) with a fluctuation of 10°C (50°F) per hour. Humidity : 15% to 85% with a fluctuation of 20% per hour. Using the Copier Properly To ensure the optimum performance of the copier, follow the precautions listed below. -
Page 18: Care Of Copier Supplies
2. Precautions for Use Care of Copier Supplies Use the following precautions when handling the copier supplies (toner, paper, etc.). Store the paper, toner, and other supplies in a place free from direct sunlight and away from any heating apparatus. Keep them in a dry, clean environment. Store paper, which has been removed from its wrapper but not loaded into the Drawer, in a sealed plastic bag in a cool, dark place. - Page 19 2. Precautions for Use...
-
Page 20: Chapter 2 Your Copier
Chapter 2 First Things to Know about your Copier This chapter gives you a brief description of the system and preliminary information about the different parts of the system. 1. System Overview 8 2. Copier Parts and Accessories Copier 10 Options 13 3. -
Page 21: System Overview
1. System Overview The EP6000 system can be configured with the following components. 20-Bin Sorter S-206 <Option> Permits automatic sorting or grouping of copies into 20 copy sets or stacks. 1134O088AA Staple Sorter ST-207 <Option> Automatically staples, and/or punches holes in, the copy sets or stacks that are sorted or grouped, in addition to the functions provided by the S-206. - Page 22 1. System Overview 1138O525A 1139O0010A Data Controller D-102 <Option> Duplexing Document Feeder AFR-9 Capable of controlling various In addition to being capable of feeding in sheet types of data including the number originals one at a time, it can automatically turn of copies made, copy cost, and user over the original for the making of copies from departments by means of specific...
-
Page 23: Copier Parts And Accessories
2. Copier Parts and Accessories Outside the Copier 1075O095DA : Slide this Extender out when making copies on large-size paper. Exit Tray Extender Exit Tray : Holds copies fed out of the copier. ➭ Upper Front Door : Open to replace the Toner Bottle. p. - Page 24 2. Copier Parts and Accessories Inside the Copier 1075O111EA ➭ Display Contrast : Use to adjust the contrast of the Touch Panel. p. 17 Control Knob Toner Bottle : Contains Toner. Replace it with a new one when the warning ➭...
- Page 25 2. Copier Parts and Accessories 1075O097DA Document Exit Tray : Receives originals automatically ejected from the AFR-9. Document Feed Tray : Load the originals face up on this tray. Document Guide Plate : Slide the plate as necessary to the size of the originals. ➭...
-
Page 26: Options
2. Copier Parts and Accessories Options 1075O098DA 20-Bin Sorter S-206/Staple Sorter ST-207 Sort Bins (1st to 20th : Hold sorted or grouped copies, each capable of holding up to 50. Bin) Non-Sort Bin : Holds up to 50 copies fed out in the Non-Sort mode. ➭... -
Page 27: Control Panel Keys And Touch Panel
3. Control Panel Keys and Touch Panel User Mode Auxiliary Finishing Orig. Copy Basic Ready to Copy Auto Exp. x1.000 Auto Paper Job Recall Exposure Zoom Paper Mode Check Touch Panel Interrupt Key • • Shows various screens and messages. Press to interrupt a current job with a ➭... - Page 28 3. Control Panel Keys and Touch Panel Access Basic Energy Saver uto Paper Interrupt Start Paper Stop Panel Reset 1075O269EA 1075O269EA 10 User Mode Key User Mode Exit • Press to select the User Mode setting Select a function by pressing the screen.
-
Page 29: Touch Panel
4. Touch Panel What’s a Touch Panel? When you turn the copier ON, the Basic screen as shown below appears on the Touch Panel. ➭ See Initial Mode and Panel Resetting p.22 The Touch Panel is the major source of information, showing in messages and graphics the currently set functions, available functions to choose from, and the copier status. -
Page 30: Adjusting The Display Contrast
4. Touch Panel Adjusting the Display Contrast When you need to adjust the brightness of the Touch Panel, swing down the Upper Front Door and turn the Display Control Knob as necessary. Turn the Knob clockwise to make the Panel brighter. 1138O666CA Turn it counterclockwise to make the Panel darker. -
Page 31: Using It Properly
4. Touch Panel Using It Properly When you operate a key on the Touch Panel, press it only lightly. Actually, it’s just to "touch" the key with your finger, and not to "press," as the name indicates. There’s no need of your touching it hard. - Page 32 4. Touch Panel Press the Start Key to start the file Let’s Set up a Job! margin copy cycle. This time, touch Auxiliary You now have the Auxiliary functions menu screen. Let’s Cancel a Setting! Finishing Orig. Copy Basics Auxiliary Okay, now let’s see how we can Ready to copy.
- Page 33 4. Touch Panel Alternative Methods for Canceling • Press the Mode Check Key on the control panel to show the Mode Check screen. Touch the key corresponding to the function to be canceled to show the setting screen, then touch Cancel Mode Check Exit...
-
Page 34: Turning On And Off, And Resetting The Copier
5. Turning ON and OFF, and Resetting the Copier Turning ON and OFF • Turning Copier ON Press the Power Switch to the I (ON) position. • Turning Copier OFF Press the Power Switch to the (OFF) position. 1075O099DA When Copier is Turned ON When the Power Switch is turned ON, the message "Welcome!"... -
Page 35: Initial Mode And Panel Resetting
5. Turning ON and OFF, and Resetting the Copier Initial Mode and Panel Resetting Initial Mode When the Power Switch is turned ON, the Basic screen appears on the Touch Panel. The settings on this screen are called the initial mode. Note: The Basic screen serves as the reference for all panel settings to be later made. -
Page 36: Auto Copy Start Function
5. Turning ON and OFF, and Resetting the Copier Auto Copy Start Function The auto copy start function allows a copy process to be started as soon as the copier completes warming up. Check that the Start Key is lit up green. Start Stop Load the originals onto the AFR-9 or... -
Page 37: Energy Saver Mode
5. Turning ON and OFF, and Resetting the Copier Energy Saver Mode If the copier is shut down when it is not in use, it takes the copier a maximum of 2 minutes and 30 seconds to complete the warm-up cycle. Instead of turning the copier OFF, it’s a good idea to use the Energy Saver mode. -
Page 38: Entering The Access Number
5. Turning ON and OFF, and Resetting the Copier Entering the Access Number If an access number has been set, the number assigned for your own department must be Please input your 4-digit Access entered before you can make a copy. Code #, then press the ACCESS Key. - Page 40 Chapter 3 Making Copies This chapter shows you how to make copies. The "Basic Copying Overview" offers quick, at-a-glance instructions for making copies. Each step is keyed to a page number with a more detailed description. 1. Basic Copying Overview 28 2.
-
Page 41: Basic Copying Overview
1. Basic Copying Overview • Place the original in position (step 1), set the number of copies to be made (step 8), and press the Start Key (step 9). This will allow you to make a full-size copy or copies on paper of the same size as the original. - Page 42 1. Basic Copying Overview Selecting the finishing type • To sort copies • To staple copies 6. Touch Finishing • To punch holes in copies ➭ p. 64 Auxiliary Finishing Orig. Copy Basics Ready to copy. Auto Expo. x1.000 Auto Paper Exposure Zoom Paper...
-
Page 43: Placing Originals
2. Placing Originals Using Duplexing Document Feeder AFR-9 Duplexing Document Feeder AFR-9 automatically feeds in sheet originals placed on the Document Feed Tray one by one. After the copy cycle has been completed, it automatically ejects the original out onto the Document Exit Tray. Some originals may not be suitable for reliable operation of the AFR-9. - Page 44 2. Placing Originals Swing the Document Exit Tray back Loading the Originals again. Swing the Document Exit Tray to the left as shown. Place a neat stack of originals face up on the Document Feed Tray and then slide the Document Guide Plate to the size of the originals.
- Page 45 2. Placing Originals Not Using the AFR-9 Different methods are used to place the original depending on its type. Use the appropriate procedure. Sheet Originals Highly Transparent Originals (Using transparencies and translucent paper for Raise the Original Cover and place the the original) original face down on the Original Glass.
- Page 46 2. Placing Originals Instructions for Original Placement Making Copies from Book Original Using Book Copy Mode • Be sure to raise the Original Cover 15° or more before placing the original. If ("Book original" refers to an open bound ➭ the Original Cover is raised to an original.
-
Page 47: Number Of Copies
3. Number of Copies Set the number of copies to be made. You set the number of copy sets you want to have in the Sort mode and the number of copies in a group in the Group mode. Setting the Number of Copies Using the 10-Key Pad, enter the number of copies to be made. -
Page 48: Starting The Copy Cycle
4. Starting the Copy Cycle Starting the Copy Cycle Checking that the message "Ready to copy." is Ready to copy. on the Touch Panel, press the Start Key. 1134P305CA 1134P305CA Start Stop 1134P337CA The message now changes to "Now copying." and the copier starts the copy cycle. -
Page 49: Interrupt Mode
5. Interrupt Mode The Interrupt mode allows you to interrupt a current job and run a different one. The copier ensures that the old job will be resumed as soon as the Interrupt mode is canceled. Interrupting a Copy Cycle Press the Interrupt Key. -
Page 50: Manual Bypass Copying
6. Manual Bypass Copying Use the Manual Bypass to make copies on paper not loaded in any Drawer, or to copy onto transparencies, translucent paper, or any other special paper. You can also use the Cover mode when the Multi Bypass Table is used with Duplexing ➭... - Page 51 6. Manual Bypass Copying Using the 10-Key Pad, set the number of copies to be made. 1136P141AA 1136P141AA Press the Start Key to start the copy cycle. Start Stop 1134P337CA...
- Page 52 6. Manual Bypass Copying...
-
Page 53: Basic Functions
7. Basic Functions We here explain how to make the basic settings (copy paper, zoom ratio, and exposure level) to make copies. key: Zoom Basic Screen Touch this key to Auxiliary Finishing Orig. Copy Basics show a screen which allows you to select Ready to copy. - Page 54 7. Basic Functions Touch the desired paper size key. Special Paper Setting If the symbol "S1," "S2," etc. appears on the Paper loaded in Selects the Auto Paper loaded on the 1st Drawer Paper mode in which the Multi Bypass paper select key shown on the Touch Panel, it the copier selects the Table...
-
Page 55: Zoom Ratio
7. Basic Functions Zoom Ratio When you touch on the Touch Panel, a screen appears that allows you to set the zoom Zoom ratio. You have five different ways to choose from to set the zoom ratio. Select one according to your need. - Page 56 7. Basic Functions Full size (×1.000) is selected when you Using the 10-Key Pad touch Full Size You can use the 10-Key Pad to directly enter the zoom ratio. Auto Size User Set x0.5 Touch on the Touch Panel. User Set duce Full Then, the following screen appears.
- Page 57 7. Basic Functions Using the 10-Key Pad, enter the Using the Zoom Memory desired zoom ratio. You may have one or two ratios that are frequently used, but not available from the fixed ones. These can be stored in memory and recalled later as necessary.
-
Page 58: Image Density
7. Basic Functions Image Density When you touch on the Touch Panel, a screen appears that allows you to set the Exposure exposure level or image density. There are two ways to adjust the exposure level. Select one according to your need. Auxiliary Finishing Orig. -
Page 59: Original Copy Types
8. Selecting the Original Copy Type In the following pages, let’s look at how we should make the settings for the type of copy we want to make from the type of original we have. When you touch on the Touch Panel, a screen appears that allows you to set the Orig. - Page 60 8. Selecting the Original Copy Type • Select 2 1 to make 1-sided copies from 2-sided originals. Original Copies Note: You need twice as many sheets of copy ➭ paper as originals. p. 51 1134P207AA 1134P207AA • Select 2 2 to make 2-sided copies from ➭...
- Page 61 8. Selecting the Original Copy Type 2[2in1] = 2-sided 2-in-1 copy • Select 1 2[2in1] to make a 2-sided copy, Originals Copy through reduction, from four 1-sided originals. Each 2-original pair will be placed side-by-side on either side of the copy. Note: You need 1/4 as many sheets of copy paper as required otherwise.
- Page 62 8. Selecting the Original Copy Type Touch Touch 1/2 2 2in1 2in1 1/2 2 2in1 2in1 Mixed Orig Mixed Orig 1134P252CA 1134P252CA 1134P250CA 1134P250CA Useful Tip 1 is selected in the initial mode. The copier offers the following three original count functions: Select Mixed Orig if you are using...
- Page 63 8. Selecting the Original Copy Type Select the appropriate original count Select the width of margin on the function, either original. AutoCount Auxiliary Finishing Basics Orig. Copy Cancel Enter Ready to copy. O r i g . M a r g i n W i d t h 10mm 15mm Auto Expo.
- Page 64 8. Selecting the Original Copy Type Select the width of margin on the original. Touch 1 / 2 Cancel Enter O r i g . M a r g i n W i d t h 10mm 15mm 2in1 1/2 2 20mm 2in1 1134P321DA...
-
Page 65: Selecting The Original Copy Type
8. Selecting the Original Copy Type [2in1] Touch 1 / 2 Touch 2in1 1/2 2 2in1 1/2 2 2in1 2in1 2in1 Mixed Orig Mixed Orig 1134P253CA 1134P254CA 1134P253CA 1134P254CA Touch Touch 2in1 Auxiliary Finishing Basics Orig. Copy Auxiliary Finishing Basics Orig. - Page 66 8. Selecting the Original Copy Type Touch NOTES # of Origs • When the 2-in-1 copy function is selected, the copier automatically selects a reduction ratio. You can 2in1 Cancel Enter nonetheless make a full-size copy. Select the desired zoom ratio and paper 2in1 size.
-
Page 67: 2[2In1]
8. Selecting the Original Copy Type Select the appropriate original count 2[2in1] function from among the following two. Touch 2in1 Auxiliary Finishing Basics Orig. Copy Ready to copy. 2in1 1/2 2 Auto Expo. x1.000 Auto Paper 2in1 Mixed Orig 2in1 Cancel Enter # o f O r i g i n a l s... - Page 68 8. Selecting the Original Copy Type Enter the number of originals using the 1[2in1] 10-Key Pad. Touch 2in1 1/2 2 2in1 2in1 Mixed Orig 1136P141AA 1136P141AA 1134P255CA 1134P255CA NOTES • The maximum number of originals that Touch 2in1 can be entered is 50. •...
- Page 69 8. Selecting the Original Copy Type 2[2in1] Touch 2in1 2in1 1/2 2 2in1 Mixed Orig 1134P255CA 1134P255CA Touch 2in1 Auxiliary Finishing Basics Orig. Copy Ready to copy. Auto Expo. x1.000 Auto Paper 2in1 Cancel Enter 2in1 1134P265CA 1134P265CA Touch Enter NOTES •...
- Page 70 8. Selecting the Original Copy Type...
-
Page 71: Mixed Original Detection Mode
8. Selecting the Original Copy Type Mixed Original Detection Mode Use the Mixed Original Detection mode to make copies automatically from originals of assorted sizes loaded in the AFR-9. If Auto Size is selected, you can make copies of the same size from originals of different sizes. Originals Copies Auto Paper Mode... - Page 72 8. Selecting the Original Copy Type Touch Orig. Copy Auxiliary Finishing Basics Orig. Copy Ready to copy. Auto Expo. x1.000 Auto Paper 1/2 2 2in1 2in1 Mixed Orig 1134P226CA 1134P226CA Touch to set the copier Mixed Orig into the Mixed Original Detection mode.
-
Page 73: Auto Original Count Mode
8. Selecting the Original Copy Type Auto Original Count Mode is selected, the copier automatically counts the number of originals. AutoCount Auxiliary Finishing Basics Orig. Copy Ready to copy. Auto Expo. x1.000 Auto Paper Cancel Enter # o f O r i g i n a l s A u t o C o u n t E v e n O d d... - Page 74 8. Selecting the Original Copy Type Unload the originals ejected onto the Document Exit Tray and reload them onto the Document Feed Tray. Then, press the Start Key. 1139O0210A...
-
Page 75: Instructions For Loading Originals
8. Selecting the Original Copy Type Instructions for Loading Originals Use the following procedure for loading originals to make 1-sided copies from 2-sided originals. Procedure Load the originals crosswise. If the originals are loaded lengthwise, the directions of the copy images will be mixed up. Correct: 2-Sided Originals Loaded Crosswise... - Page 76 8. Selecting the Original Copy Type...
-
Page 77: Finishing Mode
9. Finishing Mode We will explain how to set up the finishing function in the following. When you touch on the Touch Panel, a screen appears that allows you to select the Finishing finishing type. Auxiliary Finishing Orig. Copy Auxiliary Orig. - Page 78 9. Finishing Mode (Only when the Staple Sorter is mounted) Sort-and-Staple Copies In the Sort-and-Staple mode, copies are sorted into complete sets of the originals and Originals each set is stapled together. ➭ p. 67 1136O100A (Only when the Sorter or Staple Sorter is mounted) Group Copies In the Group mode, the copies made from...
-
Page 79: Non-Sort
9. Finishing Mode Sort Non-Sort Using the 10-Key Pad, enter the Touch NonSort number of copy sets you want to have. NonSort Sort Sort & Group Staple Hole- punch 1134P267CA 1134P267CA 1136P141AA 1136P141AA NonSort is selected in the initial mode. NOTE NOTE The number of copy sets that can be... -
Page 80: Sort-And-Staple
9. Finishing Mode Sort-and-Staple Group Using the 10-Key Pad, enter the Using the 10-Key Pad, enter the number of copy sets you want to have. number per copy stack you want to have. 1136P141AA 1136P141AA 1136P141AA 1136P141AA NOTE The number of copy sets that can be Touch Group sorted is as follows. -
Page 81: Hole Punch
9. Finishing Mode Hole Punch Manual Staple To staple copies after they have been made: Using the 10-Key Pad, enter the Check that each copy set or stack has number of copy sets or number stack been fed into the Bin. you want to have. - Page 82 9. Finishing Mode Manual Staple Mode To use as a stapler: ST-207 Align the sheets of paper neatly. Stapling Position 1134O096AA NOTES • Make sure of the stapling position and press the paper stack against the bracket. • Never attempt to reach for the stapling position.
- Page 83 9. Finishing Mode Instructions for Loading Originals for Stapled Copies Note the correct direction of the originals loaded in the AFR-9 to make copies in the Staple or Hole Punch mode. Original Direction for Stapling If the copies are to be stapled either in the Sort-and-Staple or Manual Staple mode, load the originals crosswise in the AFR-9.
- Page 84 9. Finishing Mode...
-
Page 85: Auto Dual Function
9. Finishing Mode Auto Dual Function Each of the Sort Bins holds up to 50 sheets of paper. The Auto Dual Function, however, allows sorting of copies of up to 100 originals under certain conditions. Auto Dual Function in the Sort Mode When 10 or less copies are made from an original set consisting of more than 50 originals in the Sort Mode, the Sorter or Staple Sorter is automatically switched into the Auto Dual Function Mode using the 11th to 20th Bins. - Page 86 9. Finishing Mode When the Number of Copies Selected Exceeds 50 in the Group Mode When more than 51 copies are to be grouped together into one group, the Sorter or Staple Sorter uses the subsequent Bin to continue grouping the copies. Original Copies Bins Used...
- Page 87 9. Finishing Mode Finishing Examples Finishing Mode Manual Stapling Examples Originals Copies Non-Sort Impossible 1136O108AA Example: Sorting copies into 2 copy sets and having them stapled manually Sorting Manual Original Set Stapling Sort Possible 1136O109AA Example: Separating copies into 3 groups, each group containing 2 copies, and having each stapled manually Manual...
- Page 88 9. Finishing Mode Finishing Mode Manual Stapling Examples Example: Sorting and stapling copies into 2 copy sets Original Set Stapled Copy Sets Sort-and-Staple Impossible 1140O077 Example: Sorting or separating copies into 2 sets/stacks, punching holes in them, and then having each stapled manually Punched Manual Copies...
-
Page 89: Auxiliary Functions
10. Auxiliary Functions These pages explain about convenient functions offered as the Auxiliary functions and how to set these features. When the key on the Touch Panel is touched, the Auxiliary Auxiliary function menu screen appears. Finishing Orig. Copy Basics Auxiliary Finishing Orig. - Page 90 10. Auxiliary Functions OHP Interleaving Copies are made on transparencies with Copies are made on transparencies with a copied interleaves between each of them. blank sheet of copy paper between each of ➭ p. 90 them. ➭ p. 90 Copy Set Copy Set Original Set Original Set...
- Page 91 10. Auxiliary Functions Edge/Frame Erase The image along four edges of the original is The image at the center of the original is erased on the copy. ➭ p. 102 erased on the copy. ➭ p. 102 Original Copy Original Copy (Fax Output) (Book)
-
Page 92: Cover
10. Auxiliary Functions Cover The Cover mode lets you make a front cover or a front and back cover for a copy set by copying the first page or the first and last page of an original set on different paper from the normal copy paper, such as colored paper, or by inserting that special paper before and after the original set. - Page 93 10. Auxiliary Functions Touch if you know the Input # Using the Cover Mode number of originals you have. Touch Cover Cover Cancel Enter Cover Mode # of Origs. AutoCount Cover File OHP Inter- leaving Margin I n p u t # : Book Edge/Frame Page...
- Page 94 10. Auxiliary Functions Place the paper for covers on the Multi Bypass Table. 1075O025AB NOTE No cover mode copy can be made unless the Multi Bypass Table is loaded with paper for covers. Load the originals onto the AFR-9 and press the Start Key.
-
Page 95: Page Insertion
10. Auxiliary Functions Page Insertion Page Insertion allows you to insert a blank sheet of paper (e.g., colored paper) between the copy stacks. Two different functions are available. Select the appropriate one according to your need. Functions Page Insertion <Copied Inserts> The copier copies the page, which is Original Set Copy Set... - Page 96 10. Auxiliary Functions Specifying the Place for Insert In the Page Insertion mode, you must specify where to place an insert. Two ways are available to specify the insert places, either ADF Detection or 10-Key Pad Input. ADF Detection (automatic detection) Put a sheet of paper of a different size from the originals at your desired places in the original set (for convenience, let us call this paper the insert setting paper), load the original set onto the AFR-9, and let the copier start the original count sequence.
- Page 97 10. Auxiliary Functions Touch Sheet Placement Using Page Insertion <ADF Detection> Page Insertion Cancel Enter Touch Page Insertion Sheet Copy onto Insert Placement Inserts Paper User set OHP Inter- Cover File leaving Margin 1134P414DA 1134P414DA Page Book Edge/Frame Insertion Copy Erase Touch ADF Detection...
- Page 98 10. Auxiliary Functions Select the paper source from which to Example 2: To place a non-copied insert feed the paper for inserts. between pages 1 and 2 Copy Set Original Insert Paper Enter Non-Copied Insert Manual 1136O133AA NOTE 1075O213DA 1075O213DA For the insert setting paper, use one NOTE that is a size, or loaded in a direction,...
- Page 99 10. Auxiliary Functions Unload the original set and reload it onto the Document Feed Tray. 1075O036AA Press the Start Key. The copy cycle is run for page insertion.
- Page 100 10. Auxiliary Functions Touch Sheet Placement Using Page Insertion <10-Key Pad Input> Page Insertion Cancel Enter Touch Page Insertion Sheet Copy onto Insert Placement Inserts Paper User set OHP Inter- Cover File leaving Margin 1134P414DA 1134P414DA Page Book Edge/Frame Insertion Copy Erase Touch...
- Page 101 10. Auxiliary Functions Touch to move the cursor to NOTES position no. 1 of "Sheet Placement." • To correct a number entry, press the Clear Key and then enter the new Sheet Placement Cancel Enter number. Sheet # of origs Placement •...
- Page 102 10. Auxiliary Functions Touch Enter Make doubly sure that you have selected the functions correctly. Then, touch again. Enter Load the original set onto the AFR-9. "Placing Originals" ➭ p. 31 1075O037AA Press the Start Key. The copy cycle is run for page insertion.
-
Page 103: Ohp Interleaving
10. Auxiliary Functions OHP Interleaving When you make copies on transparencies, the OHP Interleaving function inserts copied or non-copied interleaves after each transparency. Four different functions are available. Select the appropriate one according to your need. Functions OHP Interleaving <Copied Interleaves> Single Copy: The copier copies on OHP transparencies and, after each transparency, inserts a copied... - Page 104 10. Auxiliary Functions NOTES • OHP Interleaving can be used only when the copier is loaded with A4 or A4 paper. • Follow the instructions given on the Message Display for the direction of placement of the OHP transparencies and originals. OHP Interleaving <Non-Copied Interleaves>...
- Page 105 10. Auxiliary Functions Load the transparencies onto the Multi Using OHP Interleaving Bypass Table. <Single Copy> "Manual Bypass Copying" ➭ p. 37 Touch OHP Interleaving OHP Inter- Cover File leaving Margin Page Book Edge/Frame Insertion Copy Erase 1075O311AA 1134P275CB 1134P275CB Press the Start Key.
- Page 106 10. Auxiliary Functions Using the 10-Key Pad, enter the Using OHP Interleaving number of copy sets you want. <Multiple Copy> Touch OHP Interleaving OHP Inter- Cover File leaving Margin Book Edge/Frame Page Copy Erase Insertion 1134P293CA 1134P293CA NOTE 1134P275CB To correct a number entry, press the 1134P275CB Clear Key, then enter the new number.
- Page 107 10. Auxiliary Functions Load the transparencies onto the Multi Bypass Table. "Manual Bypass Copying" ➭ p. 37 1075O311AA Press the Start Key. The copy cycle is run for OHP interleaving.
- Page 108 10. Auxiliary Functions...
-
Page 109: File Margin
10. Auxiliary Functions File Margin The copier provides a file margin along the leading edge on the copy for your easy filing. There are five different ways available for making a file margin. Use the one that is most suited to your need. - Page 110 10. Auxiliary Functions Selecting a Particular Margin Function Touch Select the "Width" of the margin. File Margin File Cover OHP Inter- Cancel Enter File Margin leaving Margin Position Mode Width 10mm 15mm Page Book Edge/Frame Copy Erase Insertion 20mm 1134P276CB 1134P276CA 1075O223DA 1075O223DA...
- Page 111 10. Auxiliary Functions Loading the Originals in Margin Mode <Using the AFR-9> <On the Original Glass> Margin Position Original Placement Margin Position Original Placement Margin side on the left. Left Left Margin side on the right. 1134P181AA 1134P179AA 1134P181AA 1136O127AA 1134P179AA 1075O040AA Right...
- Page 112 10. Auxiliary Functions...
-
Page 113: Book Copy
10. Auxiliary Functions Book Copy You may want to fit each page of an open book onto a separate sheet. The copier provides two different Book Copy functions to choose from. Select one that best suits your need. Functions 1-Sided Book Each of the two pages of an open book is Book Original 1-Sided Copies... - Page 114 10. Auxiliary Functions Select the type of finished copy you want, either "1-Sided" or "2-Sided." Cancel Enter Book Copy Original Copy 1-Sided Std. Book R Bound 2-Sided 1134P299CA 1134P299CA Touch Enter NOTES • If the pages to be copied extend three or more, start copying with the higher-numbered pair.
-
Page 115: Edge/Frame Erase
10. Auxiliary Functions Edge/Frame Erase The copier provides a margin of a set width along the four edges, one edge, or at the center to erase shadows or other unwanted images. The feature is also effective in erasing the communications record on a document received by fax. One of the five different functions can be selected. - Page 116 10. Auxiliary Functions Selecting a Particular Edge/Frame Erase Function NOTE Touch Edge/Frame Erase Only 10 mm is available for Frame Erase and Top Edge Erase. OHP Inter- Cover File leaving Margin Touch Enter Edge/Frame Book Page Erase Insertion Copy To cancel the Erase settings, touch Cancel 1134P272CB 1134P272CA...
- Page 117 10. Auxiliary Functions Loading the Originals in Edge/Frame Erase Mode <Using the AFR-9> <On the Original Glass> Erase Mode Original Placement Erase Mode Original Placement Erase edge on the left. Left Edge Erase Left Edge Erase Erase edge on the right. 1134P183AA 1134P189AA 1136O120AA...
-
Page 118: Mode Check
11. Mode Check When the Mode Check Key on the control panel is pressed, the currently set functions are shown on the Touch Panel. The key can be used to change or check for the current settings. Using the Mode Check Key To Change Functions To Check for Current Settings Press the Mode Check Key. - Page 119 11. Mode Check...
- Page 120 Chapter 4 Using the User Mode This chapter explains about the functions that are made available by using the User Mode Key, i.e., Job Memory Input, Zoom Memory Input, Meter Count, Toner Replenisher, Drum Dehumidifier, and User’s Choice. It also shows how to recall a job program from the memory using the Job Recall Key.
-
Page 121: Job Memory Input And Job Recall Job Memory Input
1. Job Memory Input and Job Recall Job Memory Input Up to 10 different, frequently used copying-job programs can be stored in memory and recalled later as necessary. Storing a Job Then, the following screen appears. Set up the job you want to store in Job Memory Input memory. - Page 122 1. Job Memory Input and Job Recall Check that the job has been set up correctly. Then, touch Input Pre-Input Check Cancel Input Auto Expo. X1.000 Auto Paper Orig. Copy Finishing Cover Mixed Orig 1134P412CA 1134P412CA The Basic screen reappears. NOTE If you select a key in which an old job is stored and then...
-
Page 123: Account Job Input
1. Job Memory Input and Job Recall Account Job Input If "CopyTrack" has been turned "ON" in the "Administrator Mode" of User’s Choice, five more jobs can be stored in memory for each account (department), in addition to the ordinary jobs. Storing an Account Job Set up the job you want to store in Touch... - Page 124 1. Job Memory Input and Job Recall Check that the job has been set up correctly. Then, touch Input Pre-Input Check Cancel Input Auto Expo. X1.000 Auto Paper Orig. Copy Finishing Cover Mixed Orig 1134P412CA 1134P412CA The Basic screen reappears. NOTE If you select a key in which an old job is stored and then...
-
Page 125: Recalling A Job From Memory
1. Job Memory Input and Job Recall Check the settings made on the Job Recalling a Job from Memory Check screen, then touch Recall Press the Job Recall Key. Job Check Cancel Recall Auto Expo. X1.000 Auto Paper Job Recall Orig. - Page 126 1. Job Memory Input and Job Recall...
-
Page 127: Zoom Memory Input
2. Zoom Memory Input Up to three different, frequently used zoom ratios can be stored in memory so you can use them later whenever necessary. Storing a Zoom Ratio Press the User Mode Key. Using the 10-Key Pad, enter the desired zoom ratio (which can range from ×0.500 to ×2.000). - Page 128 2. Zoom Memory Input The zoom ratio is now stored in memory and shown on the number key touched. Zoom Memory Input Input the zoom ratio using the 10- Key Pad and assign to a number key. BackUp Exit x1.243 Zoom x1.234 x1.000...
-
Page 129: Meter Count
3. Meter Count This function allows you to check the total count of each of the four different counters. Counters Accessing the Meter Count Press the User Mode Key. Total Shows the total number of copies made since the installation of the copier. User Mode Size Shows the number of copies made on... -
Page 130: Toner Replenisher
4. Toner Replenisher The copier tends to exhaust the supply of toner rapidly when making a number of copies from an original with dark solid areas such as a photo. As a result, the image density of the copy will become lighter. -
Page 131: Drum Dehumidifier
5. Drum Dehumidifier During high humidity periods or when there are sudden rapid changes in humidity (especially when you are using a heater in winter), condensation could form on the surface of the PC Drum , resulting in blotchy copies. In such instances, use the Drum Dehumidifier function to dry the surface of the PC Drum. -
Page 132: User's Choice
6. User’s Choice The copier has been set so that the most frequently used settings are automatically selected in the initial mode. The User’s Choice allows you to select the default settings which are automatically selected in the initial mode according to your own needs. By setting defaults for the paper size, zoom ratio, and other settings that are most frequently used, time and effort to make extra settings will be eliminated when the copier is turned ON or when the auto reset function is activated. - Page 133 Mixed Orig. Detection Expo. Mode Priority Selects whether to enable ("ON") the Mixed Determines the default exposure mode, Original Detection mode or not ("OFF") either Auto or Manual, selected when power when power is turned ON or panel reset. is turned ON or panel reset. The initial setting is "OFF."...
- Page 134 Auto Panel Reset Intelligent Sort Selects the time it takes the auto panel reset Specifies whether to turn "ON" or "OFF" the function to be activated from among "1 function that automatically switches min.," "2 min.," "3 min.," or "5 min.," or not between the Sort and Non-Sort mode, activate the function at all ("No Reset").
- Page 135 Custom 2in1 • When a "Margin" setting is made, that It is possible to store in memory various setting is automatically selected when the settings that are automatically recalled when 2-in-1 separation copy is set. the 2-in-1 copy is selected. Functions that The initial setting is no margin.
- Page 136 This page is used only by the administrator of your copier. When p. 6/6 is selected, the copier prompts you to enter your "Admin. #" (administrator number). The following functions can be set only when the correct administrator number is entered. The administrator number is set by the Technical Representative.
-
Page 137: Making The User's Choice Settings
Touch the key of the page number on Making the User’s Choice Settings which the desired User’s Choice Press the User Mode Key. function is listed. For example, to change Finishing Priority from Non-Sort to Sort, touch User Mode User's Choice 1/6 Exit Select a key to change settings, or press Pg.# key for additional menu. - Page 138 Touch . This highlights Sort Sort User's Choice Select the default setting of your choice Finishing Priority Enter Sort NonSort Sort & Group Staple 1134P371CA 1134P371CA Touch Enter User's Choice 2/6 Exit Select a key to change settings, or press Pg.# key for additional menu. Auto Expo.
-
Page 139: Data Send
The copier provides a function that allows the user to tell his/her service shop the operating status of the copier by means of preset codes when the DT-103 is mounted. For more details, consult your Technical Representative. User Mode Exit Select a function by pressing the key. -
Page 140: Chapter 5 When A Message Appears
Chapter 5 When a Message Appears This chapter explains about the various warning messages given on the Touch Panel and steps to take to correct these faulty conditions. It also covers the procedures to be used for replenishing supplies. 1. When the Message "The current Paper Drawer is empty." Appears 128 2. -
Page 141: When The Message "The Current Paper Drawer Is Empty." Appears
1. When the Message "The current Paper Drawer is empty." Appears When the Drawer currently selected for use runs Auxiliary Finishing Orig. Copy Basics out of paper, the message shown on the left appears. The current copy cycle is interrupted The current Paper Drawer is empty. - Page 142 1. When the Message "The current Paper Drawer is empty." Appears Load the paper stack into the right half 3rd Drawer of the Drawer, facing its front side Press the Paper Descent Key and then down. Press the leading edge of the slide the Drawer out.
- Page 143 1. When the Message "The current Paper Drawer is empty." Appears NOTE The paper should be loaded no higher than the M (Max. Level Indicator). 1134O020AA Slide the Drawer back in. 1075O052BA...
- Page 144 1. When the Message "The current Paper Drawer is empty." Appears Place the paper stack onto the Paper Large Capacity Cassette C-302 Plate so that its front side faces up. Holding the Door Lock Release Lever, open the Cassette Door. 1134O054AA NOTES 1134O055AA...
-
Page 145: When The Message "Replenish Toner." Appears
2. When the Message "Replenish Toner." Appears The message shown on the left appears when Auxiliary Finishing Orig. Copy Basics toner is soon running out. You can still make copies, but the image density will become Ready to copy Replenish Toner. lighter and lighter. - Page 146 1075O059AA NOTES 1075O266AA • Use ONLY MT Toner 601B for the EP6000 copier. Using any other toner With the "UP" marking upward, insert could result in trouble. • the Bottle into position. Be careful not to drop the Toner Bottle...
-
Page 147: When The Message "The Staple Cartrige Is Empty," Appears
3. When the Message "The Staple Cartridge is empty." Appears The message shown on the left appears when the Auxiliary Orig. Copy Basics Finishing staples are running out. The Staple Cartridge is empty. Please replace. Replace the Staple Cartridge with a new one by following the procedure given below. - Page 148 3. When the Message "The Staple Cartridge is empty." Appears Insert the new Staple Cartridge until a Touch on the Touch Panel. Staple click is heard. Then, the Staple Sorter test-staples the paper several times automatically. Staple 1134P418CA 1136O013AA 1134P418CA Close the Staple Cover and slide the Remove the sheet of paper from the 1st Staple Sorter back against the copier.
-
Page 149: When The Message "Misfeed Detected." Appears
4. When the Message "Misfeed detected." Appears If a paper misfeed occurs during a copy cycle, the message shown on the left appears and that particular copy cycle is stopped in the middle of operation. Clear the misfed sheet of paper according to the procedure given below. - Page 150 4. When the Message "Misfeed detected." Appears Duplexing Document Feeder AFR-9 ➭ p. 142 1075O172CA 1075O173CA 1075O172CA 1075O174CA 1075O173CA 1075O174CA Large Capacity Cassette C-302 ➭ p. 143 1075O176CA 1075O176CA 20-Bin Sorter S-206 / Staple Sorter ST-207 ➭ p. 144 1075O175CA 1075O175CA...
-
Page 151: Misfeed Clearing Procedures
4. When the Message "Misfeed detected." Appears Turning Misfeed Removal Knob M2 , Misfeed Clearing Procedures pull out the sheet of paper. Copier NOTE Be careful not to touch the areas marked with High Voltage with bare hands. Caution Swing down the Front Door, turn the Lock Release Lever counterclockwise 1075O064AA and swing up the Upper Half of copier. - Page 152 4. When the Message "Misfeed detected." Appears Fan the paper thoroughly and reload it Open the Right Door and pull out the in the Drawer. sheet of paper from the Paper Take-Up Section. 1075O069AA 1075O074AB Slide the Drawer back in. Close the Right Door.
- Page 153 4. When the Message "Misfeed detected." Appears Swing down the Front Door and then Multi Bypass Table swing it closed to reset the misfeed Unload the paper stack from the Multi indication/message on the Touch Panel. Bypass Table. Then open the Right Door.
- Page 154 4. When the Message "Misfeed detected." Appears Swing down the Front Door, slide out Duplex Unit the Duplex Unit and open Misfeed Open the Left Door. Pull out the sheet Removal Guide Plate of paper from the Transport Section. 1075O079AA 1075O075AB Pull out the sheet of paper from the Close the Left Door.
- Page 155 4. When the Message "Misfeed detected." Appears Duplexing Document Feeder AFR-9 Unload the originals from the Raise the AFR-9. Document Feed Tray. Opening Document Turnover/Feed Unit Guide Plate , gently pull out the original from the Document Feed Unit. 1075O130AA Swing open Document Feed Unit Door and gently pull out the original.
- Page 156 4. When the Message "Misfeed detected." Appears Large Capacity Cassette C-302 Press the Lock Release Lever and slide the C-302 away from the copier. Press the Paper Descent Key. 1134O028AA 1134O031AA Remove the sheet of paper. Holding the Door Lock Release Lever, open the Cassette Door and then remove the sheet of paper.
- Page 157 4. When the Message "Misfeed detected." Appears 20-Bin Sorter S-206 / Staple Sorter ST-207 Holding the Lock Release Lever, slide Close S . the Sorter away from the copier. Slide the Sorter back against the copier. 1136O166AA 1136O166AA Swing down Misfeed Removal Guide Plate S with care not to touch the 1136O167AA 1136O167AA...
- Page 158 4. When the Message "Misfeed detected." Appears...
-
Page 159: When The Message "The Section Indicated By Is Open." Appears
5. When the Message "The section indicated by ➡ is open." Appears The message shown on the left appears if a copier door is left open or an option is not attached properly. Correct the closure failure by following the procedure given below. 1075O188CA 1075O188CA Monitor Display... - Page 160 5. When the Message "The section indicated by ➡ is open." Appears Monitor Display Check Location Check that the Duplex Unit is closed. 1075O193CA 1075O081AA Check that the Duplexing Document Feeder is lowered. 1075O195CA 1075O132AA Check that the Document Exit Tray is swung down in position. 1075O083AA 1075O136CA Check that Document Feed Unit Door...
- Page 161 5. When the Message "The section indicated by ➡ is open." Appears Monitor Display Check Location Check that the Large Capacity Cassette is attached to the copier properly. 1075O197CA 1134O030AA...
-
Page 162: When Appears
6. When Appears • When appears in the lower left corner of Auxiliary Finishing Orig. Copy Basics the Touch Panel, it means that part of the Ready to copy. copier mechanism is malfunctioning. Call your Technical Representative immediately. Auto Expo. x1.000 Auto Paper •... -
Page 163: What Does Each Message Mean
7. What Does Each Message Mean? Message Cause Action Amalfunction was detected. Call The copier malfunctioned and is Call and inform your Technical your Technical Rep. and provide unable to make copies. Representative of the code being the code. shown on the Touch Panel. Please input your 4-digit Access An access number has been set and Enter the 4-digit access number. - Page 164 7. What Does Each Message Mean? Message Cause Action Originals have been left on the You try to use the AFR-9 when First remove the original from the glass. Please lift the cover and there is an original left on the Glass, then load the originals in the remove the originals: Original Glass.
- Page 165 7. What Does Each Message Mean? Message Cause Action Use only RIGHT or LEFT Margin You have selected Cancel Margin-by-Reduction or with Manual Feed. Cancel either Margin-by-Reduction with paper select another paper source. one. loaded in the Multi Bypass Table. XXX and OOO cannot be You have set two functions that Cancel either one of the two...
-
Page 166: Chapter 6 Troubleshooting
Chapter 6 Troubleshooting This chapter gives you instructions on how to troubleshoot copier malfunctions. 1. When this Type of Copy is Produced • The Image is too light 154 • The Image is too dark 154 • The Copy is blurry 154 •... -
Page 167: When This Type Of Copy Is Produced
1. When This Type of Copy is Produced Symptom Possible Cause Action The Image is too light. The exposure level for the Auto Change the setting of the User’s Exposure Mode is set at one of the Choice (Exposure Priority). ➭... -
Page 168: The Copy Has Dark Specks Or Spots
1. When This Type of Copy is Produced Symptom Possible Cause Action The Copy has dark specks or spots. The Original Glass is dirty. Wipe the Original Glass clean with ➭ a soft dry cloth. p. 169 The Original Pad or Document Wipe the Original Pad or Feed Belt is dirty. -
Page 169: The Copier Is Not Functioning As Designed
2. The Copier is not functioning as designed Symptom check for: Action The Touch Panel shows nothing. Is only the Start Key lit up green? The copier is in the Energy Saver Mode. Press any key on the Control Panel to cancel the Energy Saver Mode. -
Page 170: Chapter 7 Specifications
Chapter 7 Specifications This chapter gives complete specifications of the copier system and options. 1. Copier 158 2. Duplexing Document Feeder 160 3. Large Capacity Cassette 161 4. 20 Bin Staple Sorter 162 5. 20 Bin Sorter 163 6. Data Controller 164 7. -
Page 171: Copier
1. Copier Name EP 6000 Type Console Copier Platen Type Stationary Photoconductor Copying System Electrostatic Dry Powdered Image Transfer to Plain Paper Developing System Micro-Toning System Fusing System Lamp-Heated Roller Types of Original Sheets, Books, and other three-dimensional objects Maximum Original Size A3 Lengthwise Maximum Original Weight 3 kg... - Page 172 1. Copier Magnification Ratios Fixed ratios Full size: 1 : 1 ±0.005 Reduction ratios: ×0.500, ×0.707, ×0.816 Enlargement ratios: ×1.154, ×1.414, ×2.000 Zoom ratios: From ×0.500 to ×2.000 In ×0.001 increments Zoom ratios: Paper Feeding System Automatic feeding from three drawers and manual feeding by means of Multi Bypass Table Drawer Capacity: Total 3,500 sheets 1st Drawer: 500 sheets of 80 g/m...
-
Page 173: Duplexing Document Feeder
2. Duplexing Document Feeder Name Duplexing Document Feeder AFR-9 Type Take-up from bottom of stack and U-turn feeding to Glass, loop turnover, U-turn ejection Installation On top of copier, with two Hinges at the back Document Feeding Single Belt transport Document Stop Left side Reference... -
Page 174: Large Capacity Casette
3. Large Capacity Cassette Name Large Capacity Cassette C-302 Type Automatic paper supply and take-up from a 3,000-sheet capacity Cassette Installation Fixed to copier by means of dedicated Stand with Slide Rails Types of Paper Plain paper, Recycled paper: Weighing 60 g/m to 90 g/m Paper Size Capacity... -
Page 175: Bin Staple Sorter
4. 20 Bin Staple Sorter Name Staple Sorter ST-207 Type 20-Moving-Bin Sorter with Automatic Stapler Installation Freestanding Registration Front edge Non-Sort Bin + 20 Sort Bins No. of Bins Modes Non-Sort Mode, Sort Mode, Group Mode, Sort Staple Mode, Manual Staple Mode, Hole Punch Mode Kinds of Paper Non-Sort Mode, Hole Punch Mode:... -
Page 176: Bin Sorter
5. 20 Bin Sorter Name 20 Bin Sorter S-206 Type 20-Moving-Bin Sorter Installation Freestanding Registration Front edge Non-Sort Bin + 20 Sort Bins No. of Bins Modes Non-Sort Mode, Sort Mode, Group Mode Kinds of Paper Non-Sort Mode: Plain paper, Recycled paper (Weighing 60 g/m to 90 g/m Thick paper (Weighing 90 g/m to 157 g/m... -
Page 177: Data Controller
DC24V (supplied from copier) Power Consumption 5W or less Dimensions Width : 180 mm Depth : 64 mm Height : 111 mm Weight Approx. 550 g Others A printer (option) recommended by Minolta can be hooked up, sourced from another power supply. -
Page 178: Copier Outline Dimensions
7. Copier Outline Dimensions EP6000 1192 1565 1471 1075O086BB 1075O103DA (Scale: mm) EP6000 With a Complete Lineup of Options 2344 1439 1075O126CB (Scale: mm) - Page 180 Chapter 8 Miscellaneous This chapter explains about care of the copier and the various possible combinations of functions 1. Care of the Copier • Daily Checks 168 • Cleaning 169 2. Function Combination Matrix 172 3. Description of Copy Paper Size 175 4.
-
Page 181: Care Of The Copier
1. Care of the Copier To keep your copier in good shape at all times, make the following daily checks and cleaning. Daily Checks Power Cord, Communications Cable, Ground Cable Item Action Is the copier placed on its power cord or other cables? It could result in the copier or other electrical equipment malfunctioning. -
Page 182: Cleaning
1. Care of the Copier Cleaning Housing Cover Original Glass Wipe the surface of the Housing Cover Raise the Original Cover. clean with a soft cloth dampened with neutral home detergent. Wipe the surface of the Original Glass clean with a soft, dry cloth. 1075O087AA Control Panel 1075O089AA... - Page 183 1. Care of the Copier Document Transport Belt Front Door Raise the AFR-9. Swing down the Front Door. Wipe the surface of the Document Wipe the inside of the Front Door Transport Belt clean with a soft cloth clean with a soft cloth. dampened with neutral home detergent.
- Page 184 1. Care of the Copier...
-
Page 185: Function Combination Matrix
2. Function Combination Matrix Basic Orig. Copy Functions Set Last Paper Zoom Exposure Functions Set First Auto Paper Paper Manual Paper Auto Size Zoom Fixed Ratio Zoom Memory Auto Expo. Exposure Manual Expo. 1[2in1] 1 2[2in1] 1 1 [2in1] 1 2[2in1] Non-Sort Sort Group... - Page 186 Finishing Auxiliary Functions Set Last Inter- File Margin leaving Functions Set First O O O L L O O O O O L O Auto Paper Paper O O O L O Manual Paper O O O O O L O Auto Size O O O O O O O O...
- Page 187 Conditions for Combined Functions A : The functions cannot be combined. (One of the functions must be canceled before a copy cycle can be initiated. Acceptable, however, is a combination with Cover, Page Insertion, or OHP Interleaving.) B : The combination is possible if Auto Paper or Auto Size has been set, but not if Manual is set. (One of the functions must be canceled before a copy cycle can be initiated.) C : When OHP Interleaving is selected, the copier automatically selects A4 crosswise paper and therefore you cannot select paper of any other size.
-
Page 188: Description Of Copy Paper Size
3. Description of Paper Size Name Size (Metric) Size (Inch) 297 mm × 420 mm 11-3/4" × 16-1/2" 257 mm × 364 mm 10" × 14-1/4" 210 mm × 297 mm 8-1/4" × 11-3/4" 182 mm × 257 mm 7-1/4" × 10" 148 mm ×... -
Page 189: Zoom Ratio Table
4. Zoom Ratio Table (Original Size to Copy Paper Size) Metric Areas Inch Areas Copy Paper Copy Paper Original Size Zoom Ratio Original Size Zoom Ratio Size Size ×0.707 11" × 14" ×0.823 11" × 17" ×0.500 ×0.772 297 × 420 mm Legal 11-3/4"... -
Page 190: Index
5. Index Access No. 25 Account Job Input 110 Activating the Toner Replenisher 117 Add Paper 128 Add Toner 132 Administrator Number 123 Auto Copy Start Function 23 Auto Drawer Switching 41 Auto Dual Function 72 Auto Exposure 45 Auto Original Count Mode 60 Auto Panel Reset (User’s Choice) 119, 121 Auto Paper 40 Auto Reset Function 22... - Page 191 5. Index Edge/Frame Erase 102 Energy Saver (User’s Choice) 119, 121 Energy Saver Mode 24 Entering the Access Number 25 Erase (Left Edge Erase) 102 Erase (Right Edge Erase) 102 Erase (Frame Erase) 102 Erase (Top Edge Erase) 102 Erase (Center Erase) 102 Expo.
- Page 192 5. Index Manual Bypass Copying 37 Manual Exposure 45 Manual Expo. Adjust (User’s Choice) 119, 120 Manual Mode (Manual Paper Select Mode) 40 Manual Staple 65, 68, 69 Margin (Shift for Margin) 96 Margin (Margin-by-Reduction) 96 Margin (2-in-1 Margin) 96 Max.
- Page 193 5. Index Selecting the Original Copy Type 46 Setting the Number of Copies 34 Shift for Margin 96 Size Counter 116 Small Size Original (User’s Choice) 119, 121 Sort 64, 66 Sort-and -Staple 65, 67 Special Paper (User’s Choice) 119, 122 Special Paper Setting 41 Staple Cartridge 134 Starting the Copy Cycle 35...
Need help?
Do you have a question about the EP6000 and is the answer not in the manual?
Questions and answers