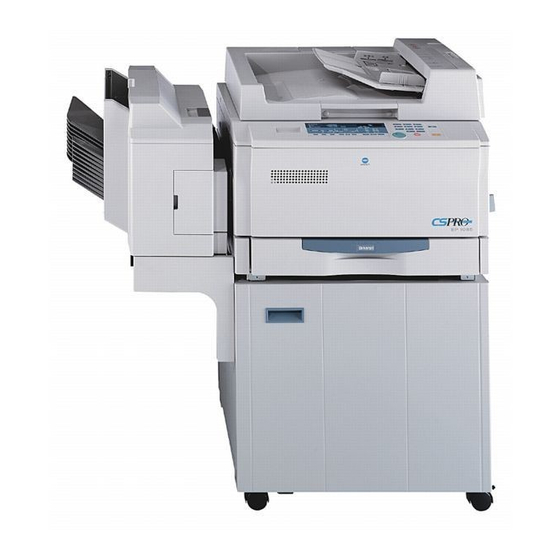
Minolta EP1085 Manual
Hide thumbs
Also See for EP1085:
- Service manual (193 pages) ,
- User manual (339 pages) ,
- General instructions manual (280 pages)
Table of Contents
Advertisement
Quick Links
Table of Contents
Using the Copier Properly .............................................................. X-1
What is an Energy Star Copier ?.................................................... X-3
EP1085 .......................................................................................... X-4
CE Marking (Declaration of Conformity) ........................................ X-4
Feeding Direction (copy paper path).............................................. X-5
Terms and Symbols Used.............................................................. X-6
1
1.1
Installing the Copier......................................................................1-1
Installation Site................................................................................1-1
Power Source..................................................................................1-1
Grounding .......................................................................................1-2
Space Requirements.......................................................................1-3
1.2
Precautions for Use ......................................................................1-4
Operating Environment ...................................................................1-4
Using the Copier Properly ...............................................................1-4
Care of Copier Supplies ..................................................................1-5
Moving.............................................................................................1-5
Legal Restrictions on Copying ........................................................1-6
Financial Instruments ......................................................................1-6
Legal Documents ............................................................................1-6
General ...........................................................................................1-6
2
2.1
System Overview ..........................................................................2-1
EP1085 ...........................................................................................2-1
2.2
Copier Parts and Accessories .....................................................2-2
Outside Copier ................................................................................2-2
Inside Copier ...................................................................................2-3
Automatic Document Feeder AF-5..................................................2-5
10-Bin Sorter S-106 ........................................................................2-6
Multi Bypass Tray MB-4 ..................................................................2-6
EP1085
Advertisement
Table of Contents

Subscribe to Our Youtube Channel
Related Manuals for Minolta EP1085


Summary of Contents for Minolta EP1085
-
Page 1: Table Of Contents
Table of Contents Using the Copier Properly .............. X-1 What is an Energy Star Copier ?............ X-3 EP1085 ..................X-4 CE Marking (Declaration of Conformity) ........X-4 Terms and Symbols for the Type of Originals and Copy Paper..X-5 Feeding Direction (copy paper path)..........X-5 “Width”... - Page 2 Setting a Zoom Ratio..............3-13 Auto Size Mode ................3-14 Selecting the Auto Size Mode ............3-14 Image Density ................3-15 Types of Exposure Modes............3-15 Selecting the Auto Exposure Mode ..........3-16 Selecting the Manual Exposure Mode.......... 3-16 EP1085...
- Page 3 Replacing the Toner Bottle..............5-2 Add Paper Indicator ................5-4 Adding Paper (Drawer) ..............5-4 Adding Paper (Multi Bypass Tray) ..........5-5 Closure Failure Indicator ..............5-6 Misfeed Indicator................5-7 Misfeed Indicator and Monitor Display ..........5-7 Misfeed Clearing Procedure............5-8 Automatic Document Feeder ............5-12 Sorter ....................5-14 Call-Tech.-Rep. Indicator ..............5-15 EP1085...
- Page 4 When this Type of Copy is Produced ......... 6-1 The Copier is not functioning as designed........ 6-3 Specifications Copier EP1085 ................7-1 Automatic Document Feeder AF-5 ..........7-2 10 Bin Sorter S-106 ................ 7-3 Multi Bypass Tray MB-4 ..............7-3 Miscellaneous Care of the Copier ................
-
Page 5: Using The Copier Properly
Never unplug the power cord with a wet hand, as it could cause an electrical shock. Always unplug the power cord before moving the copier. Moving the copier with the power cord plugged in can damage the cord resulting in a fire or causing an electrical shock. EP1085... - Page 6 Pour avoir la certitude de travailler dans un environnment réunissant des conditions de confort, santé et de sécurité, il est préférable de bien aérer la pièce ou se trouve le copieur. EP1085...
-
Page 7: What Is An Energy Star Copier
It takes 10 times more energy to produce a piece of paper than it does to make a single copy on a copier. Therefore, using less paper also means decreased national energy consumption. EP1085... -
Page 8: Ce Marking (Declaration Of Conformity
EP1085 Thank you for choosing Minolta. This operator’s manual explains how to operate the copier and replenish its supplies. It also gives some troubleshooting tips as well as general precautions to be observed when operating the copier. To ensure the best performance and effective use of your copier, read this manual carefully until you familiarize yourself thoroughly with its operation and features. -
Page 9: Terms And Symbols For The Type Of Originals And Copy Paper
“feeding direction.” “Width” and “Length” When we talk about the size of the original or copy, we call side A “width” and side B “length.” A: Width B: Length EP1085... -
Page 10: Terms And Symbols Used
“width,” we call it “lengthwise” and use symbol “L” or “ “. Crosswise When the original or copy has a “length” shorter than its “width,” we call it “crosswise” and use symbol “C” or “ ” EP1085... -
Page 11: Safety Notes
If an extension cord is needed, use one with a capacity more than the power consumption of the copier. Make sure that no unusual, excessive force is being applied to the power cord or extension cord. EP1085... -
Page 12: Grounding
Connect the grounding wire to: The ground terminal of the outlet. A grounding contact which complies with the local electrical standards. NOTE è Never connect the grounding wire to a gas pipe, a grounding wire for a telephone or a water pipe. EP1085... -
Page 13: Space Requirements
NOTE è Be sure to allow a clearance of 150mm. or more at the back of the copier as there is a ventilation duct. 1,085 Copier 1,250 Copier + Option 1,123 1,632 1,359 Scale: mm EP1085... -
Page 14: Precautions For Use
ALWAYS provide good ventilation when making a large number of continuous copies. NEVER keep the copier running when it becomes inordinately hot or produces abnormal noise. If that happens, immediately turn OFF the copier, unplug it, and then call your Technical Representative. EP1085... -
Page 15: Care Of Copier Supplies
Toner Bottle. Keep supplies out of the reach of children. If your hands become soiled with toner, wash them with soap and water immediately. Moving If you need to transport the copier over a long distance, consult your Technical Representative. EP1085... -
Page 16: Legal Restrictions On Copying
Copyrighted Works without permission of the copyright owner In addition, it is prohibited under any circumstances to copy domestic or foreign currencies or Works of Art without permission of the copyright owner. When in doubt about the nature of a document, consult with legal counsel. EP1085... -
Page 17: Getting To Know Your Copier
System Overview Automatic Document Feeder AF-5 <Option> Permits automatic feeding of multiple originals, see page 3-6. EP1085 10-Bin Sorter S-106 <Option> Permits sorting copies into up to 10 copy sets or stacks, see page 3-19. EP1085 Multi Bypass Tray MB-4 <Option>... -
Page 18: Copier Parts And Accessories
Holds up to 250 sheets of paper. The Edge Guide and Trailing Edge Stop are movable, allowing you to load paper of different sizes, see page 5-4. Exit Tray Holds copies fed out of the copier. Copy Tray Extender Slide this out when making copies on large-size paper. EP1085... -
Page 19: Inside Copier
5-8. Toner Bottle Contains toner. Replace it with a new one when the Add Toner Indicator lights up, see page 5-2. Toner Bottle Holder Swing open to replace the Toner Bottle, see page 5-2. EP1085... - Page 20 Turn ON to prevent condensation from forming on the PC Drum when power is turned OFF. (For Technical Representative only) Fusing Unit Handle Hold onto this Handle when lifting the Upper Half of the Fusing Unit, see page 5-8. Fusing Unit Fuses the toner image onto the paper. EP1085...
-
Page 21: Automatic Document Feeder Af-5
Load the originals face up on this tray, see page 3-7. Document Guide Plate Slide the plate as necessary to the size of the originals, see page 3-7. Document Exit Tray Receives originals that are automatically ejected from the Automatic Document Feeder. EP1085... -
Page 22: Multi Bypass Tray Mb-4
Multi Bypass Tray Load your paper on this Tray. It allows you to make copies continuously on paper fed from this Tray, see page 3-23. Multi Bypass Tray Slide this out to use large-size copy paper, see page 3-23. Extender EP1085... -
Page 23: Control Panel Keys And Indicators
Press as necessary to select the Book Copying Mode, see page 3-17. Finishing Mode Select Press as necessary to select the Sort or Non-Sort Mode, when the sorter(option) ismounted to the copier, see page 3-20. Auto Size Mode Key Feeder(option) is mounted to the copier, see page 3-14. EP1085... - Page 24 Press to start a copy cycle. Enlargement Key Press to select a desired fixed enlargement ratio, see page 3-12. Full Size Key Press to select full size (100%), see page 3-12. Reduction Key Press to select a desired fixed reduction ratio, see page 3-12. EP1085...
-
Page 25: Display
Example: Shows that a misfeed has occurred inside the copier. Call-Tech.-Rep. Indicator Indicates that the copier has developed a malfunction. When a malfunction occurs, the corresponding malfunction code is 1142O020AA shown across the Zoom Ratio Indicator and Multi-Copy Display, see page 5-15. EP1085... -
Page 26: Paper Information Display
Each shows the following data. Example Zoom ratio: 100% No. of copies: 1 Count of the Total Counter Example: 93,930 (copies) User’s Choice code and setting value Example: Choice code: 14, Setting: 1 Malfunction code Example: Malfunction code C0F30 1142O025AA 2-10 EP1085... -
Page 27: Exposure Information Display
Photo the Manual Exposure Mode, see page 3-16. The center LED is Lighter Darker normally lit. Auto/Photo Photo Mode Indicator Indicates that the copier is now in Auto Photo the Photo Mode, see page 3-16. Lighter Darker Auto/Photo EP1085 2-11... -
Page 28: Turning On And Off, And Resetting The Copier
When the Copier is Turned ON Blinking Orange Turns Green The Start Key blinks orange, indicating that the copier is now warming In about 30 sec., the Start key turns green. Now the copier is ready to make copies. 2-12 EP1085... -
Page 29: Auto Copy Start Function (Only When Automatic Document Feeder Is Used)
Document Feeder starts feeding the first original onto the Original Glass. As soon as the copier completes warming up, the Start Key turns green and the copy cycle is started. Energy Saver Start Stop Panel Reset 1142O092EA Turns Green EP1085 2-13... -
Page 30: Minimizing The Warm-Up Time
1142O093CA Leaving the Energy Saver Mode Press any Key on the control panel, for instance, the Start Key. This cancels the Energy Saver Mode, and the copier will be ready to make copies in about 20 seconds. 1139O2360A 2-14 EP1085... -
Page 31: Initial Mode And Panel Resetting
Original Glass will be ejected out of the unit. 1139O4782A Useful Tip The Panel Reset Key enables you to cancel all previous settings efficiently. To avoid miscopy, try to press the Panel Reset Key before attempting to make any setting for your own job. EP1085 2-15... -
Page 32: Auto Reset Function
Auto Reset Function is activated to cause the copier to return to the initial mode automatically. Useful Tip The Auto Reset Function can be enabled or disabled by User’s Choice. For more details, see page 4-6. 2-16 EP1085... -
Page 33: Making Copies
3-10. YES: 1142O138DA Go step 3 or step 7. Load the desired paper size or make a copy using a Manual Bypass Tray. è Add Paper Indicator, see page 5-5. è Manual Bypass Copying, see page 3-22. EP1085... - Page 34 To change the Exposure Level Auto Setting the Image Densitry Photo Set the image density in the Lighter Darker Manual Exposure Mode, see Auto/Photo page 3-16. Select the Auto Exposure Mode or Photo Mode, see page 3-16. Auto Photo Lighter Darker Auto/Photo EP1085...
- Page 35 If you enter a wrong number, press the Clear key and enter the correct number. Starting the Copy Cycle Press the Start Key to start the copy cycle. Press the Stop Key to stop the copy cycle. 1139O2360A EP1085...
-
Page 36: Copying Procedure
Place a blank sheet of paper of the same size as the original over the original. Then, lower the Original Cover. NOTE è If this is not done, the copy produced may be of very poor quality. Gently lower the Original Cover. EP1085... -
Page 37: Book Original
Original Width Scale end. NOTE è Not positioning an open book properly will result in copies with pages in incorrect order. è Do not place an original weighing more than 3kg on the Original Glass, as an image problem could result. EP1085... -
Page 38: Using The Automatic Document Feeder
Typing paper, paraffin paper, and other thin paper Continous forms Stapled originals Thick paper Wrinkled or dog-eared original For any of these types of originals, place the priginal manually on the Original Glass to make a copy, see page 3-8. EP1085... -
Page 39: Loading Standard Size Originals
Make sure that the top level of the original stack does not exceed the Ä marking. è Make sure that the Document Guide Plate is in touch with the edges of the original stack. If it’s not prreseed snugly against the original stack, skewed feeding could result. EP1085... -
Page 40: For Originals Not Suitable For Reliable Operation Of The Automatic Document Feeder
Original Width Scale. Then press the rear edge of the original up against the Original Positioning Plate. Original Width Scale Gently lower the Automatic Document Feeder and start the copy cycle. EP1085... -
Page 41: Single Automatic Document Feeding Mode (Sadf Mode)
Be sure to place one original at a time. è Be sure to correct any fold or curl in the original. The original is automatically taken up and the copy cycleis started. Making sure that the Start Key lights up green again, insert the next original. EP1085... -
Page 42: Checking The Copy Paper Size And Selecting The Paper Source
Each time the Paper Select Key is pressed, the Paper Source Indicators, Drawer Indicator or Multi Bypass Indicator, light up alternately. Also, the Paper Size Indicator corresponding to that of the Drawer lights up. Paper Paper 1142O139DA 1142O100CA 3-10 EP1085... -
Page 43: Zoom Ratio
50%, 70%, 81%) 100% Full Size B4 A4 A3 A4 Three enlargement ratios (115%, 141%, 200%) 100% 1142O142DC And Full Size (100%). Zoom Ratios Any ratio from 50% to 200% (in 1% increments) can be selected. 50%~200% 1139O3590A EP1085 3-11... -
Page 44: Selecting The Fixed Zoom Ratios
The Zoom Ratio Indicator displays the 1142O141DC actual percentage of the selected ratio. Full Size Press the Full Size Key to select full 141% A4 A3 115% B4 A3 size (100%). 100% Full Size B4 A4 A3 A4 100% 1142O142DC 3-12 EP1085... -
Page 45: Setting A Zoom Ratio
Zoom Down Key makes the ratio Zoom range: smaller 50% to 200% Zoom Up Key makes the ratio greater Useful Tip To save time, first select the fixed ratio nearest to the target zoom ratio before using the Zoom Up or Down Key. EP1085 3-13... -
Page 46: Auto Size Mode
This mode is very helpful for neat filing when you need to make copies from originals of assorted sozes. NOTE è The copier has been factory-set to automatically select the Manual Mode. This default setting can be changed to the Auto Size Mode by using the User’s Choice, see page 4-7. 3-14 EP1085... -
Page 47: Image Density
Auto/Photo 1152O021CA Photo Mode The copier can make a faithful reproduction of an original having Auto halftone images such as photos. Photo The image density of the photo may be varied in nine steps. Lighter Darker Auto/Photo 1152O020CA EP1085 3-15... -
Page 48: Selecting The Auto Exposure Mode
The exposure level in the Auto Exposure Mode can be varied by using the User’s Choice, see page 4-7. The copier has been factory-set to automatically select the Auto Exposure Mode. The User’s Choice can be used to change this default setting to the Manual Exposure Mode, see page 4-8. 3-16 EP1085... -
Page 49: Book Copying
Not positioning an open book properly will result in copies with pages in incorrect order. è Do not look directly at the Original Glass surface, as a very intense beam of light can be emitted. Press the Book Key. The Book Indicator lights up. Book 1142O097CC EP1085 3-17... - Page 50 Paper Size Indicator blink on the Control Panel. 1152O032DA è In such a case, load paper of the same size and in the same direction of each page of a book into the Drawer. A4 Crosswise 3-18 EP1085...
-
Page 51: Finishing Mode
In the Non-Sort Mode, all copies are fed out onto the 1st Bin without being sorted. Sort Originals Copies In the Sort Mode, copies are sorted into complete sets of the originals. Copies are fed out into Sorter Bins. 1st Bin 2nd Bin 3rd Bin EP1085 3-19... -
Page 52: Selecting The Finishing Mode
Also, the copier automatically switches between the Sort and Non-Sort mode depending on the number of originals loaded in the Automatic Document Feeder. The User’s Choice can, however, be used to change this default setting using the User’s Choice, see page 4-9 and see page 4-11. 3-20 EP1085... -
Page 53: Auto Dual Function
To have a complete set from the originals, place the copies from the 6th Bin on top of those from the Top Bin. In the same way, place copies from the 7th Bin on top of those from the 2nd Bin, and so on. EP1085 3-21... -
Page 54: Manual Bypass Copying
Thick paper, translucent paper: Approx. 20 sheets OHP transparencies: Up to 5 sheets IMPORTANT è When making multiple copies using OHP transparencies, set the Copy Tray into the upper position if there is no Sorter or Staple Sorter mounted. 3-22 EP1085... -
Page 55: Using The Manual Bypass Tray
Place the original on the Original Glass and make the control panel settings. Swing down the Multi Bypass Tray and slide the Paper Guide Plate to the size of the copy paper. NOTE è Pull out the Multi Bypass Tray Extender if you are using larger paper. EP1085 3-23... - Page 56 Press the Start Key to start the copy cycle. 1139O2360A NOTES è Do not insert the paper while the copier is in the warm-up cycle or a multi-copy cycle. è The Auto Size and Book Copying Mode cannot be selected for manual bypass copying. 3-24 EP1085...
-
Page 57: Auxiliary Functions
Shows the number of copies made on paper of a size preset by the Technical Representative. Counter Display Example: The count is 12,345 (copies). The Zoom Ratio Indicator shows The Multi-Copy Display shows the upper 3 digits of the count the lower 2 digits of the count 50%~200% EP1085... -
Page 58: Using The Meter Count Function
The count of the Size Counter is Meter Count shown across the Zoom Ratio Indicator and Multi-Copy Display. Toner Drum Dehumidify Press the Meter Count Key once again. Meter Count This returns the copier to the normal state. Toner Drum Dehumidify EP1085... -
Page 59: Toner Replenisher Function (Increasing The Image Density)4-3
90 seconds at maximum. Drum Dehumidify 1142O118CA NOTES è Do not turn the Power Switch OFF or open the Front or Right Door while the copier is replenishing toner. è Toner is not replenished if the image density is sufficiently high. EP1085... -
Page 60: Drum Dehumidifier Function
Make a copy to check that the copy 1142O119CA image is clear. Run the Drum Dehumidifier cycle once again if the copy image is not yet clear. Useful Tip A copy cycle can be initiated even while the copier is in the Drum Dehumidifier Mode. EP1085... - Page 61 Auxiliary Functions NOTE è The copier cannot be set into the Drum Dehumidifier Mode while it is warming up. EP1085...
-
Page 62: User's Choice
Mode). If “1” is selected: You can make copies from lightweight originals (40g/m to 50g/m ), as well as originals of the standard weight (Lightweight Original Mode). Setting Description Initial Setting Lightweight Original Mode OFF Lightweight Original Mode ON EP1085... - Page 63 When the exposure level is “Low,” the greater the level number is, the lower the exposure level. When the exposure level is “High,” the greater the level number is, the higher the exposure level. è Lower Higher Level 4 Standard EP1085...
- Page 64 Exposure Setting in Manual Mode Auto Manual EXP1 Auto Manual EXP2 Auto Manual EXP3 Auto Manual EXP4 Auto Manual EXP5 Auto Manual EXP6 Auto Manual EXP7 Auto Manual EXP8 Auto Manual EXP9 Refer to the next page for the Manual Exposure Mode. EP1085...
- Page 65 1 2 3 4 5 6 7 8 9 Lighter Darker Auto/Photo U-15 Default Finishing mode Determines the default finishing mode when the copier is equipped with the Sorter. Setting Description Initial Setting Non-Sort Sort EP1085...
- Page 66 The period of time can fall within the range of 1 to 98 min., or be set to 240 min. The initial setting is 15 min. Setting Description Initial Setting Enabled : 1 min. Enabled : 2 min. Enabled : 3 min. Enabled : 98 min. Enabled : 240 min. 4-10 EP1085...
- Page 67 Enabled : 3 min. Enabled : 98 min. Enabled : 240 min. If you want to disable the Auto Shut OFF function, first select “1” in the Non-Auto Shut OFF Mode then select “0” in this Mode, see page 4-7. EP1085 4-11...
-
Page 68: Making The User's Choice Mode Settings
1142O056AA Zoom Ratio Multi-Copy Indicator Display 1152O050AA 1139O3860A Press the Start Key. This causes the current setting of that particular choice code to be shown on the Multi-Copy Display . Zoom Ratio Multi-Copy 1139O2360A Indicator Display 1152O050AA 1139O3880A 4-12 EP1085... - Page 69 Zoom Ratio Multi-Copy 1142O171AA Indicator Display 1152O050AA 1139O3890A Press the Start Key. This enters the new setting. Repeat steps 2 to 6 to make new settings for other User’s Choices. Zoom Ratio Multi-Copy 1139O2360A Indicator Display 1139O3850A 1139O3860A EP1085 4-13...
- Page 70 If the Choice Code number on the Zoom Ratio Indicator or codes on the Multi-Copy Display start blinking when the Start Key is pressed following step 2 or 5, that entry is invalid. Check the correct number. Press the Clear Key and enter the correct one. 4-14 EP1085...
-
Page 71: When An Indicator Lights Up
Technical Representative, see page 5-15. I.U. Service Indicates that the Toner Bottle is Replace the Toner Bottle as soon as Life Indicator running out of toner. possible, see page 5-16. EP1085... -
Page 72: Detailed Instructions For Indicator Lights
Shake the new Toner Bottle well. With the Seal on the Toner Bottle facing up, slowly peel off the Seal as illustrated. NOTE è Be careful, some toner may puff out from the bottle. EP1085... - Page 73 Use ONLY the specified toner for this copier. Using any other toner could result in image trouble. Toner Replenisher Function Use the Toner Replenisher Function if the image is light immediately after replacing the Toner Bottle with a new one, see page 4-3. EP1085...
-
Page 74: Add Paper Indicator
Drawer so that its front side faces down. Make sure that the paper stack rests under the two catches of the Drawer. NOTE è The paper should be loaded no higher than the Ä (Max. Level Indicator) on the Edge Guide. EP1085... -
Page 75: Adding Paper (Multi Bypass Tray)
è The paper should be loaded no higher than Ä (Max. Level Indicator). è Before inserting, fan the paper stack well if you are using transparencies or translucent paper. è Correct any curl if you are using thick paper. EP1085... -
Page 76: Closure Failure Indicator
Check Location 1142O063AA Check that the Sorter is in position Monitor Display Check Location 1142O063AA Check that the Automatic Document Feeder is lowered. Check that the Document Turnover/Exit Unit Guide Plate is in position. Monitor Display Check Location 1142O063AA EP1085... -
Page 77: Misfeed Indicator
Misfeed in the copier see page 5-8. Monitor Display Misfeed Location 1142O019AB Misfeed in the Automatic Document Feeder see page 5-12. Monitor Display Misfeed Location 1142O068AC Misfeed in the Sorter see page 5-14. Monitor Display Misfeed Location 1142O069AC EP1085... -
Page 78: Misfeed Clearing Procedure
Lock Release Lever counterclockwise to unlock and swing up the Upper Half of the copier. è If the copier is equipped with an Automatic Document Feeder Unlock and swing up the Upper Half of the copier. Then, lock Stopper EP1085... - Page 79 Remove any sheet of paper from the Transport Section. Open the Right Door. Then pull out the sheet of paper from the Manual Bypass Port. Pull out the sheet of paper from the Paper Take-Up Section. Close the Right Door. EP1085...
- Page 80 Drawer. Next, push down the Paper Lifting Plate until it is locked into position. Fan the paper and reload it. NOTE è Make sure that the paper stack rests under the two catches of the Drawer. 5-10 EP1085...
- Page 81 When an Indicator Lights Up Slide the Drawer back in. è When the copier is equipped with a Multi Bypass Tray> Fan the paper stack and place it back on the Tray. EP1085 5-11...
-
Page 82: Automatic Document Feeder
There is a misfeed original in the Automatic Document Feeder. 1142O019AB Remove the original stack from the Document Feed Tray. Swing open Document Feed Unit Door and gently pull out the original. Close Carefully pull out the original from the Document Exit Unit. 5-12 EP1085... - Page 83 Automatic Document Feeder. Return the number of originals indicated on the Display to the bottom of the original stack removed in step 1 and reload it onto the Document Feed Tray. Example: ADF -02 = Return two originals. EP1085 5-13...
-
Page 84: Sorter
There is a misfeed sheet of paper in the 10-Bin Sorter. 1142O069AC Hold the Lock Release Lever of the Sorter and slide the Sorter away from the copier. Pull out the copy from the Transport Section. Slide the Sorter back to the copier. 5-14 EP1085... -
Page 85: Call-Tech.-Rep. Indicator
NOTE Example: è When calling your Technical Malfunction code 50%~200% C0010 Representative, give him or her the malfunction code shown across the 1139O4960A Zoom Ratio Indicator and Multi- Copy Display. Example: This is the 1139O4970A malfunction code C0010 EP1085 5-15... -
Page 86: I.u. Service Life Indicator Lights Up
Add Toner No new copy indicator lights cycle can be 1139O5330A Blinking initiated Which occurs first 5.000 copies made Useful Tip Replace the Imaging Unit as soon as possible once the I.U. Service Life Indicator has started blinking. 5-16 EP1085... -
Page 87: Precautions For Handling
40°C (104°F) or more. Do not store the I. U. in a humid place or subject to water splash. Do not store the I. U. upside down or titled. Do not subject the I. U. to vibration. EP1085 5-17... -
Page 88: Removing The I. U. From The Copier
Turn the I. U. Lock Release Lever and, while holding it down, pull the I. U. halfway out of the copier. Firmly grasp the I. U. with both hands and pull it all the way out of the copier. 5-18 EP1085... -
Page 89: Unpacking The I. U
Take the Starter Bottle and the I. U. Starter Bottle in its bag out of the Box. I. U. Setting up the I. U. Take the I. U. out of the bag. Peel off the three pieces of tape and packing materials. EP1085 5-19... - Page 90 Slide the I. U. all the way into the copier. Be sure to push the I. U. into the locked position until a click is heard. Then, check the position of the Lock Release Lever, as shown in the illustration. 5-20 EP1085...
-
Page 91: Charging The Copier With Starter And Toner
Upper Half of the copier. Then, close the Front Door. Charging the Copier with Starter and Toner Swing out the Bottle Holder. Holding the Starter Bottle so that its tab is on the upper side, shake it well. EP1085 5-21... - Page 92 Then, swing in the Bottle Holder until it locks into position. Close the Front Door. Plug the Power Cord into the wall outlet and turn ON the Power Switch. This will cause the wait indicator to be shown on the control panel. 5-22 EP1085...
- Page 93 Bottle Holder and remove the Starter Bottle. Tap the new Toner Bottle on a hard surface, such as a desk, several times. Then, turn the Toner Bottle over and tap it several times again in the same manner. EP1085 5-23...
- Page 94 Insert the Bottle all the way into the copier until the marking on the Bottle is aligned with the marking on the Bottle Holder. Then, swing in the Bottle Holder until it locks into position and close the Front Door. 5-24 EP1085...
-
Page 95: Troubleshooting
Glass is dirty. with a soft dry cloth, see page 8-3. The original is not held tightly on Place the original in position so the Original Glass. that it is held tightly against the Original Glass, see page 3-4. EP1085... - Page 96 Select the zoom ratio according not in accordance with the copy to the copy paper size, see page paper size. (When doing manual 3-11. reduction copying.) Or, use the Auto Size Mode to reduce the copy to the appropriate size, see page 3-14. EP1085...
-
Page 97: The Copier Is Not Functioning As Designed
Plug the power cord into the when the Power Switch is into the power outlet? power outlet. turned ON. Is the room circuit breaker Close the room circuit open? breaker. Turn the copier OFF immediately, unplug the power cord, and call your Technical Representative. EP1085... - Page 98 Troubleshooting EP1085...
-
Page 99: Specifications
Specifications Specifications Copier EP1085 Specification Type Desk Top Copier Platen Type Stationary Photoconductor Copying System Electrostatic Dry Powdered Image Transfer to Plain Paper Developing System Micro-Toning System Fusing System Lamp-Heated Roller Types of Original Sheets, Books, and other three-dimensional objects Maximum Original Size: A3 Lengthwise Maximum Original Weight: 3kg. -
Page 100: Automatic Document Feeder Af-5
A3 or B4: 30 sheets (80g/m Copy Productivity 100% First Copy with ADF A4C = 11 seconds or less Power Source DC24V supplied from copier Power Consumption 48W or less Dimensions Width: 587mm Depth: 505mm Height: 125mm Weight 12 kg EP1085... -
Page 101: Multi Bypass Tray Mb-4
Thick paper: weighing 90g/m to 157g/m OHP Transparencies Translucent paper Paper Size Standard: A3L to A6L Non-standard: Crosswise: 100mm to 297mm Lengthwise: 140mm to 432mm Power Source DC24V supplied from copier Power Consumption 30W or less Weight 2.7 kg EP1085... - Page 102 Specifications EP1085...
-
Page 103: Miscellaneous
Original Cover, Automatic Document Feeder Item Action Is the Original Pad or Document Transport Clean the Pad or Belt using the procedure Belt dirty? given in “Cleaning”, see page 8-2. Is the Original Pad or Document Transport Call your Technical Representative. Belt scratched? EP1085... -
Page 104: Copy Paper
Wipe the surface of the Housing clean with a soft cloth dampened with mild home detergent. Original Pad Raise the Original Cover. Wipe the surface of the Original Pad clean with a soft cloth dampened with mild home detergent. EP1085... -
Page 105: Original Glass
è NEVER use a glass cleaner or any other detergent to avoid damage to the control panel keys and display. Front Door Swing down the Front Door. Wipe the inside of the Front Door clean with a soft cloth. EP1085... -
Page 106: Corona Units
Gently slide the Cleaning Lever back into the original position. Gently slide out the Lower Corona Unit Cleaning Lever as far as it will Gently slide the Cleaning Lever back into the original position. Repeat steps 1 to 4 two to three times. EP1085... -
Page 107: Document Transport Belt
Wipe the fresh surface clean with a soft cloth dampened with mild home detergent. Repeat these steps until the entire surface of the Belt is wiped clean. EP1085... -
Page 108: Paper Size And Zoom Ratio Table
8-1/4” x 11-3/4” 8-1/4” x 11-3/4” 210mm x 301mm LETTER 8-1/2” x 11” 216mm x 279mm GOVERNMENT 8” x 10-1/2” 203mm x 267mm LETTER QUARTO 8” x 10” 203mm x 254mm STATEMENT INVOICE 5-1/2” x 8-1/2” 140mm x 216mm EP1085... -
Page 109: Zoom Ratio Table (Original Size To Copy Paper Size)
5-3/4” x 8-1/4” x 1.414 x 2.000 x 1.733 x 1.224 x 2.000 105 x 148mm x 1.414 4-1/4” x 5-3/4” x 1.733 x 1.224 x 0.816 257 x 364mm x 0.577 10” x 14-1/4” x 0.707 x 0.500 x 1.154 EP1085... - Page 110 0.500 11” x 14” Legal x 0.772 279.4 x 355.6mm Foolscap x 0.772 Letter x 0.772 Invoice x 0.500 Legal Legal x 0.928 8-1/2” x 14” Foolscap x 0.785 215.9 x 355.6mm Letter x 0.607 Invoice x 1.214 EP1085...
- Page 111 11” x 17” x 1.294 215.9 x 279.4mm 11” x 14” x 1.272 Invoice 11” x 17” x 2.000 5-1/2” x 8-1/2” 11” x 14” x 1.647 139.7 x 215.9mm Legal x 1.545 Foolscap x 1.529 Letter x 1.294 EP1085...
- Page 112 Miscellaneous 8-10 EP1085...
- Page 113 Description of Copy Paper Size .................8-6 Display ........................2-9 Drum Dehumidifier Function ................4-4 Energy Saver Mode ..................2-14 Energy Saver ON Timing .................4-10 Enlargement .....................3-12 Enlargement Ratios ..................3-12 Finishing Modes ....................3-19 Fixed Zoom Ratios ...................3-11 Full Size ......................3-12 Full Size Copy ....................3-12 EP1085 IX-1...
- Page 114 Remove Copies Indicator ................3-20 Replacing the Toner Bottle ................5-2 Single Automatic Document Feeding Mode ............3-9 Size Counter ...................... 4-1 Sort ........................3-19 Sort Mode ......................3-19 Sort/Non-Sort Auto Switching ON/OFF ............4-11 Toner Replenisher Function ................4-3 IX-2 EP1085...
- Page 115 Toner, Add ......................5-2 Total Counter ......................4-1 Total Number of Copies Mode ................4-1 User’s Choice .....................4-6 Zoom Ratio Table ....................8-7 EP1085 IX-3...
Need help?
Do you have a question about the EP1085 and is the answer not in the manual?
Questions and answers