SMART fortwo coupe Operator's Manual
Smart
Hide thumbs
Also See for fortwo coupe:
- Operator's manual (226 pages) ,
- Owner's manual (212 pages) ,
- Maintenance booklet (30 pages)

Subscribe to Our Youtube Channel
Related Manuals for SMART fortwo coupe


Summary of Contents for SMART fortwo coupe
- Page 1 Sommer\ Corporate\ Me dia\ AG Operator’s Manual smart fortwo coupé and smart fortwo cabrio Insert picture of size 202x31 mm www.smart.com smart a brand of DaimlerChrysler...
- Page 2 Take a moment to familiarize yourself with DaimlerChrysler, distributed in the United this manual is important to your decision to your smart fortwo coupé or smart fortwo ca States by the Penske Automotive Group, and purchase the vehicle, we recommend that you brio and read through the Operator’s Manual...
- Page 3 >> Table of contents. >> Keywords ..... . 3 >> Introduction....15 >>...
-
Page 4: Table Of Contents
Air conditioning with automatic climate Automatic transmission >> A control* Accelerator position ....131 Air distribution ....152 Driving . - Page 5 Battery (key) Cockpit clock* ..... 140 Replacing the transmitter battery ..252 Changer ......144 Cold tire inflation pressure .
- Page 6 Display message Exterior lamp switch ....101 >> E Data bus ......236 Exterior lighting Electronic immobilizer .
- Page 7 Fuel Gross Axle Weight Rating, see GAWR Horn ......33 Additives, see Gasoline additives Gross Vehicle Weight Rating, see GVWR Hydraulic brake assistant .
- Page 8 Lamps, indicator and warning Lighting >> K ABS ......237 Automatic headlamp mode ... 102 Air bags, SRS indicator lamp .
- Page 9 Multifunction display On board Diagnostics Socket (OBD) ..292 >> M Digital clock ..... 138 Operating safety ..... 22 Illumination .
- Page 10 Poly V belt ......296 smart radio 9* ....143 RON .
- Page 11 Self test Soft top system Sun visors ......164 OCS ......64 Cleaning .
- Page 12 Temperature Tires Transporting the vehicle ....78 Setting (air conditioning with Cleaning ......184 Tread .
- Page 13 Windshield wipers >> V >> W Adjusting the washer jet nozzles ..264 Intermitted wiping ....109 Rear window wiper ....111 Vehicle Warning sounds Replacing wiper blades .
- Page 14 >> Keywords...
-
Page 16: Introduction
>> Introduction. Product information ......16 Operator’s Manual ......17 Symbols . -
Page 17: Product Information
Product information We recommend using Genuine smart Parts as We are unable to make an assessment for Genuine smart Parts as well as conversion well as conversion parts and accessories other products and therefore cannot be held parts and accessories approved by us are... -
Page 18: Operator's Manual
Operator’s Manual, Vermont Emission Control System Warranty fore, you may find explanations for optional your authorized smart center will be glad to (California, Maine, Massachusetts, and equipment not installed in your vehicle. If you inform you of correct care and operating... -
Page 19: Important Notice For California
USA Distributor, LLC in writing of the need dealer, it should be addressed to: purchase price or lease price, if smart USA for its repair, smart USA Distributor, LLC Distributor, LLC and/or its authorized repair... -
Page 20: Roadside Assistance
Customer Always have the Service Booklet with you when Assistance Representatives 24 hours a day, you take the vehicle to your authorized smart 365 days a year. center for service. The service advisor will record each service in the booklet for you. -
Page 21: Change Of Address Or Ownership
Service and Warranty Information Booklet, or countries, please be aware that: simply call the smart Customer Assistance Center (in the USA) at 1 800 FOR SMART, or • service facilities or replacement parts may Customer Service (in Canada) at not be readily available, 1 800 387 0100. - Page 22 Symbols Trademarks: > This symbol points to instructions Warning! for you to follow. ® • Bluetooth is a registered trademark of Bluetooth SIG Inc. > A number of these symbols Warning notices draw your attention to appearing in succession indicates a hazards that may endanger your health or ®...
-
Page 23: Operating Safety
Warning! nearest authorized smart center or other Electronic malfunctions could seriously qualified maintenance or repair facility impair the operating safety of your for further inspection or repairs. -
Page 24: Proper Use Of
Operating safety Proper use of the vehicle Warning! Proper use of the vehicle requires that you are familiar with the following information and Various warning labels are attached to rules: your vehicle. These warning labels are • the safety precautions in this manual intended to make you and others aware of •... -
Page 25: Problems With Your Vehicle
Do not drive the vehicle if you be lieve it may not be safely operated. If the mat ter is not handled to your satisfaction, please discuss the problem with the smart center management, or if necessary contact us at one of the following addresses:... -
Page 26: Reporting Safety Defects
If NHTSA receives similar complaints, it may open an investigation, and if it finds that a safety defect exists in a group of vehicles, it may order a recall and remedy campaign. However, NHTSA cannot become involved in individual problems between you, your dealer, or smart USA Distrib utor, LLC. -
Page 27: Vehicle Data Recording
• with the consent of the vehicle owner or lessee • in response to an official request by law enforcement or other government agency • for use in dispute resolution involving smart, its affiliates or sales/service organization and/or • as otherwise required or permitted by law. - Page 28 >> Introduction.
-
Page 30: At A Glance.
>> At a glance. Exterior view....... . 30 Cockpit ........32 Instrument cluster (miles) . -
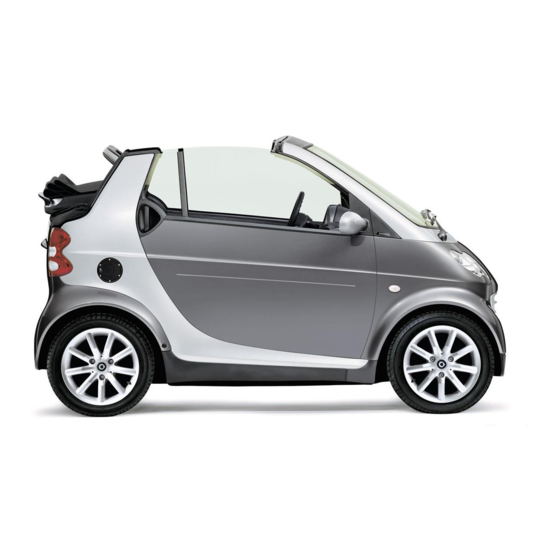
Page 31: Exterior View
Exterior view >> At a glance. - Page 32 Exterior view Function Page Function Page Function Page Rear soft top Doors Front lamps Locking and unlocking Retractable soft top Opening Opening service flap Locking and unlocking manu Coolant 178, Cargo compartment ally Locking and unlocking Windshield washer fluid 179, Opening and closing Exterior rear view mirrors •...
-
Page 33: Cockpit
Cockpit P68.10 3779 31 >> At a glance. -
Page 34: Horn
Glove box lock Adjusting exterior rear view Wiper switch mirrors Windshield wipers Glove box Rear window wiper smart MP3 interface* Inside door handle (AUX socket*) Tachometer* 1 Model passion only. Gear selector lever Cockpit clock* Starter switch Model pure only:... - Page 35 Instrument cluster (miles) >> At a glance.
-
Page 36: Engine
Instrument cluster (miles) Function Page Function Page Function Page K Right turn signal Selecting display for status Multifunction display with: indicator indicator lamp • Fuel level display Setting digital clock • Transmission position Speedometer indicator Left indicator lamp display • Main odometer display, or with: Right indicator lamp display when active, distance to... - Page 37 Instrument cluster (kilometers) >> At a glance.
- Page 38 Instrument cluster (kilometers) Function Page Function Page Function Page K Right turn signal Selecting display for status Multifunction display with: indicator indicator lamp • Fuel level display Setting digital clock • Transmission position Speedometer indicator Left indicator lamp display • Main odometer display or, with: Right indicator lamp display when active, distance to...
-
Page 39: Upper
Upper center console Function Page Function Page Tachometer* Switching seat heating* on/off, passenger side Cockpit clock* P68.20 3742 31 Restarting TPMS button Control panel • Heating Central unlocking switch • Climate control* Central locking switch Audio system* Switching front fog lamps* Hazard warning flasher on/off switch... -
Page 40: Lower
Lower center console Function Page Auxiliary power outlet Gear selector lever Starter switch Parking brake lever P68.20 3743 31 Coin holder Retractable soft top switch 1 cabrio only. >> At a glance. - Page 41 Storage compartments P68.00 4792 31 >> At a glance.
-
Page 42: Coinholder
Storage compartments Function Page Glove box Door pocket, passenger side Storage compartment in tailgate Parcel net bag Door pocket, driver’s side Storage tray left to steering wheel Storage tray right to steer ing wheel Cup holder Coin holder 1 coupé only. 2 Vehicles with cargo compartment cover blind only. -
Page 43: Steering Wheel Gearshift Control
Steering wheel gearshift control Function Page Left shift paddle : Downshift Multifunction display Right shift paddle : Upshift 1 Model passion only. P46.10 2894 31 Model pure only: The steering wheel in this vehicle varies from steering wheel illustrated. >> At a glance. -
Page 44: Overhead Control Panel
Overhead control panel Function Page Passenger front air bag off indicator lamp Switching interior lighting on/off Interior rear view mirror P82.00 2490 31 >> At a glance. -
Page 45: Door Control Panel
Door control panel Function Page Inside door handle Adjusting exterior rear view mirrors • Manually • Electrically P72.10 3349 31 Opening and closing right side window • Manually • Electrically Opening and closing left side window • Manually • Electrically 1 Model passion only. - Page 46 >> At a glance.
-
Page 48: Safety
>> Safety. Occupant safety ......48 Panic alarm ....... . . 71 Driving safety systems . -
Page 49: Occupant Safety
• Air bag control unit (with crash sensors) ed below about when and if you may restrain a • Emergency Tensioning Devices and seat child in the passenger seat of the smart vehi belt force limiters ( page 53) cle. Under certain circumstances,... -
Page 50: Occupant Safety
Contact an au when the engine is running. tems no longer functioning as intended. thorized smart center immediately to Air bags or Emergency Tensioning Devic have the system checked; otherwise the A malfunction in the system has been detected... -
Page 51: Seat Belts
50 states, the District of Columbia, the ing. Always make sure all of your passen U.S. territories and all Canadian provinces. technicians. Contact an authorized smart gers are properly restrained. center. If it is necessary to modify an air Failure to wear and properly fasten and... - Page 52 Seat belts of a vehicle involved in an ac seat backrest in an excessively reclined than there are seat belts available. Make cident must be inspected by smart. Only position as this can be dangerous. You sure everyone riding in the vehicle is...
- Page 53 Occupant safety The system is designed to enhance the • Never wear seat belts over rigid or Warning! protection provided by secured seat breakable objects in or on your cloth belts in certain frontal and side im ing, such as eyeglasses, pens, keys, pacts.
-
Page 54: Seat Belt Force Limiter
Occupant safety Emergency Tensioning Devices • Pregnant women should also always use When activated, Emergency Tensioning Devic (ETDs) and seat belt force limiters es remove slack from the seat belts in such a a lap shoulder belt. The lap belt portion should be positioned as low as way that the seat belts fit more snugly against The seat belts are equipped with Emergency... -
Page 55: Air Bags
(front air bags), or side impacts fied workshop to have this done. In par (head thorax air bags) which may cause ticular, work relevant to safety or on significant injuries. - Page 56 • Do not lean your head or chest close to the steering wheel or dashboard.
-
Page 57: Safety Guidelines
The driver and passenger will authorized smart center. then be protected to the extent possible by a toddler restraint, or booster seat • Air bags and Emergency Tensioning recommended for the size and weight properly fastened seat belt. - Page 58 These instructions are avail • No modifications of any kind may be after an air bag has inflated. Do not able from any authorized smart center. made to any components or wiring of touch. the SRS. This includes changing or...
- Page 59 Only use seat covers which have been head thorax air bags. This reduces the load (1) Occupants, especially children, tested and approved by smart for your on the occupant’s head and upper body. These should never place their bodies or vehicle model.
-
Page 60: Front
Occupant safety If activated, the head thorax air bags are The head thorax air bags are integrated into Driver front air bag/passenger front air bag intended to increase the potential protection the driver and passenger seat backrests. The front air bags are designed to reduce the for the head and thorax (but not arms) of the potential of injury in certain frontal impacts. -
Page 61: Occupant Classification System (Ocs)
Occupant safety Occupant Classification System The front air bags in this vehicle have The passenger air bag will only be deployed if been designed to inflate in two stages. This • the system, based on OCS weight sensor allows the air bag to have different rates of readings, senses that the passenger seat is The Occupant Classification System (OCS) occupied and the 57 indicator... - Page 62 OCS classi heavier than the weight of a typical...
- Page 63 Occupant safety When the OCS senses that the passenger If the passenger front air bag is de Warning! seat occupant is classified as an adult or ployed, the rate of inflation will be someone larger than a small individual, influenced by: the 57 indicator lamp will •...
- Page 64 Occupant safety • A child in a rear facing child restraint A child in a rear facing child restraint Deployment of the driver front air bag does not mean that the passenger front air on the passenger seat will be seriously on the passenger seat may be seriously injured or even killed if the passenger injured or even killed if the passenger...
-
Page 65: Lamp
Passenger front air bag off indicator lamp • Only have the seat repaired or The indicator lamp is located on the overhead Warning! replaced by an authorized smart cen control panel. ter. • Read and observe all warnings in this When the SRS indicator lamp = and chapter. -
Page 66: Children In The Vehicle
You must contact an autho Occupant Classification System. The > Make sure the infant or child is properly rized smart center before seating any bottom of the child seat must make full secured at all times while the vehicle is in child on the passenger seat. - Page 67 Occupant safety Do not expose the child restraint system Infant and child restraint system* We recommend all infants and children be Warning! to direct sunlight. The child restraint system’s metal parts, for example, could properly restrained at all times while the vehicle is in operation.
- Page 68 Occupant safety A statement by the child restraint manufac Children can be killed or seriously turer of compliance with these standards can Warning! injured by an inflating air bag. Note the be found on the instruction label on the following important information when restraint and in the instruction manual circumstances require you to place a Children 12 years old and under must be...
- Page 69 Occupant safety Should the 57 indicator • If you place a child in a forward facing Warning! lamp not illuminate or go out while the child restraint on the passenger seat, restraint is installed, please check move the seat as far back as possible, installation.
-
Page 70: Top Tether
Occupant safety Position shoulder belt across chest and Top tether Top tether permits an additional connection shoulder, not face or neck. A booster seat may be necessary to achieve proper seat between a child restraint system and the pas senger seat. Proper usage of the top tether, belt positioning for children over 41 lbs until they reach a height where a in accordance with instructions provided by... - Page 71 Occupant safety If you are using divider plus*, the hooks of the top tether and the divider plus* are at tached to the same anchorage. > Fit the restraint system with top tether. Always follow the manufacturer's assembly instructions! Warning! After installing top tether straps, make sure that the seat backrests are in an upright position and are properly locked.
-
Page 72: Panic Alarm
Panic alarm Panic alarm Activating USA only: > Press and hold button for at least This device complies with Part 15 of the 1 second. FCC Rules. Operation is subject to the follow An audible alarm and flashing exterior ing two conditions: lamps will operate briefly. -
Page 73: Driving Safety Systems
Driving safety systems Antilock brake system (ABS) Braking Warning! At the instant one of the wheels is about to lock up, a slight pulsation can be felt in the brake pedal, indicating that the ABS is regu Warning! The following factors increase the risk of lating the brake pressure. -
Page 74: Electronic Stability Program
Driving safety systems Electronic Stability Program Emergency brake maneuver (ESP) > Keep continuous full pressure on the brake Warning! pedal. Your vehicle is equipped with the Electronic The ABS cannot prevent the natural laws ® ® Stability Program (ESP ). The ESP is opera of physics from acting on the vehicle, nor Warning! -
Page 75: Driving Safety Systems
Driving safety systems ® warning lamp v in the instrument The ESP cluster comes on when you switch on the igni Warning! Warning! tion. It goes out when the engine is running. ® ® warning lamp v in the If the ESP The ESP cannot prevent the natural laws ®... -
Page 76: Hydraulic Brake Assistant
Driving safety systems ® Hydraulic brake assistant Because the ESP operates automatically, When you release the brake pedal, the brakes the engine must be turned off (key in starter function again as normal. The hydraulic brake switch position 0) when The hydraulic brake assistant operates in assistant is then deactivated. -
Page 77: Activating The Hazard Warning Flasher
Driving safety systems Activating the hazard warning flasher after an emergency Warning! braking maneuver The hydraulic brake assistant cannot If you bring the vehicle to a complete stop by prevent the natural laws of physics from hard braking at a speed of more than 43 mph acting on the vehicle, nor can it increase (70 km/h), the hazard warning flasher auto braking efficiency beyond that afforded... -
Page 78: Anti Theft Warning System
Anti theft systems Electronic immobilizer Anti theft warning system* Close the windows and the tailgate before arming the alarm system. Make sure that there The electronic immobilizer prevents unautho Once the anti theft warning system has been are no moving objects inside the vehicle. rized persons from starting your vehicle. -
Page 79: Tow Away Protection* And Interior Motion Sensor
Anti theft systems Tow away alarm* and interior mo > Arming: Lock the vehicle using the remote Canceling the alarm tion sensor* control. > Insert the key in the starter switch. Warning system indicator lamp flashes > Turn Starter switch in Position 1 rapidly. - Page 80 Anti theft systems The switch is located in the upper center The tow away protection and the interior console. motion sensor remain switched off until you lock your vehicle again. P54.25 5456 31 Tow away protection/interior motion sen sor switch Indicator lamp >...
-
Page 82: Controls
>> Controls. Opening and closing ......82 Starter switch positions ..... . . 91 Seats . -
Page 83: Opening And Closing
If the remote control is malfunctioning, Opening the retractable soft top is possible for children to open a locked contact an authorized smart center. unlocking the upper tailgate door from the inside, which could result  Panic button ( page 71) in an accident and/or serious personal ©... -
Page 84: Unlocking
Opening and closing Locking and unlocking from the USA only: The remote control has an operating range outside This device complies with Part 15 of the of approximately 50 ft (15 meters). FCC Rules. Operation is subject to the follow This can fluctuate greatly as a consequence of ©... -
Page 85: Automatic
Opening and closing Automatic locking Locking and unlocking from the > Switching on: Switch off the ignition. inside > Press the central locking switch ª Auto relock function ( page 85) and button on the key The vehicle will lock again automatically within simultaneously. -
Page 86: Door Handle
Opening and closing > Unlocking: Press central unlocking > Pull on inside door handle switch With the driver’s door open a warning signal P54.25 5339 31 The vehicle unlocks and the indicator lamp sounds if the exterior lamps are switched on central locking switch goes off. -
Page 87: Coupé
Opening and closing © Opening the upper tailgate on the Opening the lower tailgate on the > Press button on the key twice. » coupé coupé > Press and hold button on the key for ap proximately two seconds. > Pull the release handle in handle recess Warning! Warning! of the lower tailgate. -
Page 88: Opening And Closing
Opening and closing Closing the tailgate(s) on the > Open the upper tailgate ( page 86). > Swivel the lower tailgate downwards to coupé open. The lower tailgate is held in the horizontal position by means of the two retaining straps. - Page 89 Opening and closing » Opening and closing the retract > Swivel the lower tailgate upwards to close. > Opening: Press button on the key for able soft top Allow the two release levers to engage approximately two seconds. audibly. The retractable soft top opens. >...
-
Page 90: Cabrio
Opening and closing Opening the tailgate on the cabrio Opening and closing the rear soft You can open the rear soft top to ease loading Warning! and unloading. Make sure the tailgate is closed when the engine is running and while driving. Among other dangers, deadly carbon monoxide (CO) gases may enter vehicle interior resulting in unconsciousness... - Page 91 Opening and closing Closing the tailgate on the cabrio > Opening: Push release levers to the left > Swivel the tailgate upwards to close. and right of the retaining clip upwards. Let the tailgate lock into place. > Swivel the rear soft top upwards to open. Warning! Warning! Warning!
-
Page 92: Starter Switch Positions
Starter switch positions 0 For removing key When you switch on the ignition, the indi 1 Ignition (power supply for all electrical cator and warning lamps (except low beam P82.00 2491 31 consumers) and driving position headlamp indicator lamp, high beam headlamp All lamps (except low beam headlamp indicator lamp, and turn signal indicator indicator lamp, high beam headlamp... -
Page 93: Seats
Seats Never ride in a moving vehicle with the • Never place hands under the seat or Warning! seat backrest in an excessively reclined near any moving parts while a seat is position as this can be dangerous. You being adjusted. could slide under the seat belt in a colli Failure to do so could result in an acci All seat adjustments, as well as fastening... -
Page 94: Fore And Aft Adjustment
Warning! P91.10 2993 31 > Adjusting: Pull adjustment handle upwards and slide the seat to a seating Contact an authorized smart center if the position that still allows you to reach the seats have become damaged. accelerator/brake pedal safely. The seat is an integral part of the vehi >... -
Page 95: Belt Guide
Seats Passenger seat > Check for proper engagement before driving. P91.10 2994 31 You can expand the cargo compartment by > Place the seat belt back in seat belt folding down the passenger seat. guide Observe the loading guidelines Warning! ( page 161). -
Page 96: Seat Heating
If the seat heating is malfunctioning, the One indicator lamp on indicator lamp(s) on the switch come(s) on briefly when you press the switch and then Two indicator lamps on go(es) out again. Contact an authorized smart center. Seat heating switch >> Controls. -
Page 97: Mirrors
Mirrors Adjust the interior and exterior rear view Manually adjustable exterior rear view Power exterior rear view mirrors mirrors before driving so that you have a mirrors The operating control is on the door control good view of the road and traffic conditions. panel. -
Page 98: Interior
Mirrors Interior rear view mirror > Make sure that the key in the starter switch Exterior rear view mirror heating is turned to position 1. The exterior rear view mirrors will be heated automatically at low ambient temperatures. > Selecting the mirror Turn knob to the This prevents icing up the exterior rear view... -
Page 99: Seat Belts
Seat belts Fastening the seat belts In the same crash, the possibility of Warning! injury or death is lessened if you are wearing your seat belt. The air bags can only provide the protection they where Warning! Never let more people ride in the vehicle designed to afford if the occupants are than there are seat belts available. -
Page 100: Release Button
Seat belts > Fastening the seat belt: With a smooth Warning! motion, pull the seat belt out of seat belt outlet > Place the shoulder portion of the seat belt Never ride in a moving vehicle with the across the top of your shoulder and the lap seat backrest in an excessively reclined portion across your hips. -
Page 101: Proper Use Of
In a crash person at a time. they may not be able to provide adequate protection. Damaged seat belts or seat belts that were highly stressed in an accident must be replaced. Contact an authorized smart center. >> Controls. -
Page 102: Lighting
Exterior lamp switch (USA only) must have the headlamps modified for symmetrical low beams. Relevant information M Lamps off M Lamps off can be obtained at any authorized smart cen C Parking lamps Daytime running lamp mode ter. C Parking lamps... -
Page 103: Automatic Headlamp Mode
Lighting Parking lamps > Switching on: Turn the exterior lamp switch to position B. You can switch on and off the parking lamps Warning! with exterior lamp switch using the manual The low beam headlamps come on. The low beam headlamp indicator lamp ¡ headlamp mode. -
Page 104: Daytime Running Lamp Mode
Lighting > Turn the exterior lamp switch to Daytime running lamp mode When the engine is running, and you position U. In Canada the daytime running lamp mode is • turn the exterior lamp switch to position C, the low beam headlamps, the mandatory and therefore in a constant mode. -
Page 105: Flasher
Lighting Combination switch (high beam, High beam headlamps High beam flasher high beam flasher, and turn sig > Make sure that the low beam headlamps are > Pull the combination switch briefly in the nals) switched on ( page 102). direction of arrow >... -
Page 106: Coming Home Function
Lighting Coming home function > Switching on: Push the combination switch The vehicle is either selectively or globally in the direction of arrow unlocked. The corresponding turn signals flash. Vehicles without rain light sensor: The interior and exterior lamps come on The corresponding turn signal indicator The interior lamps come on and then go out and then go out again after 12 seconds. - Page 107 Lighting Fog lamps will operate with the parking Vehicle with rain light sensor*: > Make sure that the parking lamps or the low lamps and/or the low beam headlamps on. Fog Fog lamps cannot be switched on manually with beam headlamps are switched on. the exterior lamp switch in position U.
-
Page 108: Hazard Warning Flasher
Lighting Hazard warning flasher Interior lighting The rocker switch can be set to three differ ent positions. The hazard warning flasher can be switched The interior lamp comes on for a period of on at all times, even with the key removed from time when you open the doors, or lock or the starter switch. - Page 109 Lighting Automatic control > Set the rocker switch to position The interior lamp comes on for a period of time. Switching off > Set the rocker switch to position The interior lamp is permanently switched off. Continuous operation > Set the rocker switch to position The interior lamp is permanently switched When leaving the vehicle, make sure that •...
-
Page 110: Windshield Wipers
Windshield wipers Switching windshield wipers on Intermittent wiping > Switching on: Turn the wiper switch to and off position depending on the intensity of the rain. Only switch on intermittent wiping under wet weather conditions or in the presence of Do not operate the windshield wipers when precipitation. -
Page 111: Windshield Wipers
Windshield wipers Wiping with windshield washer Vehicles with rain light sensor*: > Pull the wiper switch in the direction of fluid If you have set intermittent wiping, dirt on the arrow and hold in position. surface of the sensor or optical effects may The windshield wipers operate with wind cause the windshield wipers to wipe in an shield washer fluid. -
Page 112: Rear Window Wiper
Windshield wipers Rear window wiper/washer > Activating intermittent wiping: Push the wiper switch in the direction of arrow the resistance point. P54.25 5362 31 > Wiping with windshield washer fluid: Push the wiper switch in the direction of arrow past the resistance point and hold in position until the rear window is clean. -
Page 113: Soft Top System (Cabrio Only)
Soft top system (cabrio only) Notes on the soft top system The soft top system of the smart cabrio Do not sit on the folded down rear soft consists of a: top. • Retractable soft top When transporting long objects inside the Do not fold down the rear soft top at temper •... - Page 114 Do not open the retractable soft top if there is snow or ice on the roof, as this could result in malfunctions. If you cannot open or close the retractable soft top due to a malfunction contact Roadside Assistance or an authorized smart center. >> Controls.
- Page 115 Soft top system (cabrio only) > Press symbol Ö on the retractable soft Opening from outside Opening from the inside You can open the retractable soft top com top switch briefly. pletely with the key. The retractable soft top opens completely. P54.25 6093 31 Pressing symbol Ö...
- Page 116 Soft top system (cabrio only) Opening and closing the rear soft When the rear soft top is folded down, the Opening the rear soft top > Press symbol Ö on the retractable soft side rails are accessible. To prevent theft, »...
-
Page 117: Removing
Soft top system (cabrio only) Removing the side rails P77.30 2381 31 > Open the retractable soft top. > Open the rear soft top. > Open the driver’s and passenger door when conditions are safe to do so. > Open the tailgate. Release lever Lifting Side rail... - Page 118 Soft top system (cabrio only) P77.30 2384 31 Handle Front left Front left Rear left Rear left > Pull handle on the inside of the tailgate Front right Front right backward. Rear right Rear right > Lift up the storage compartment cover. >...
-
Page 119: Mounting
Soft top system (cabrio only) Mounting the side rails Warning! > Open the driver’s and passenger door when conditions are safe to do so. Always close the storage compartment > Open the tailgate. cover properly when storing the side rails. Otherwise occupants could be injured by the side rails moving about during •... - Page 120 Soft top system (cabrio only) > Take one side rail and start by attaching it Warning! to front end P77.30 2385 31 > Make sure that the seal of the side rail is facing up at position and is not pinched. Make sure that the side rails are properly >...
-
Page 121: Opening And Closing
Side windows Opening and closing the side Side window on the passenger door windows > Opening: Turn crank clockwise. Warning! Opening and closing the side windows > Closing: Turn crank counterclockwise. When closing the windows, make sure that manually there is no danger of anyone being Opening and closing the power windows harmed by the closing procedure. - Page 122 Side windows The switches for both power windows are on > Opening: Press the top of the respective the driver’s door. In addition, there is a switch to the resistance point. switch for the passenger side on the passen The corresponding side window moves ger door.
-
Page 123: Driving And Parking
Driving and parking Starting Warning! Warning! Inhalation of exhaust gas is hazardous to your health. All exhaust gas contains carbon monoxide (CO), and inhaling it can Make sure that absolutely no objects are cause unconsciousness and possible obstructing the pedals’ range of move death. -
Page 124: Driving
Driving and parking Driving Starting the engine For information on turning off the engine, see Warning! ( page 127). > Depress the brake pedal. > Press the release button ( page 122) to It is dangerous to shift the transmission Shift the transmission into park position P disengage the gear selector lever lock. -
Page 125: Parking
Driving and parking Reversing the vehicle > Move the gear selector lever to reverse • Keep right foot on the brake pedal. gear R. • Pull the parking brake lever up as many Shift the transmission into reverse gear R appears in the transmission position notches as possible. -
Page 126: Parking Brake
Driving and parking > Properly stop and park the vehicle. > Push parking brake lever down as far as > Depress the brake pedal. it will go. P42.20 2346 31 > Pull up the parking brake lever as many When the ignition is switched on or the notches as possible ( page 125). -
Page 127: Brake Pedal
If there are any floormats* brake system repaired at an authorized or carpets in the footwell, make sure that smart center, if there is a fault in the the pedals still have sufficient clearance. brake system. During sudden driving or braking maneu... -
Page 128: Turning Off
Driving and parking Turning off the engine If a brake circuit has failed ( page 238), • you must depress the brake pedal further P42.10 2591 31 down to achieve the same effect > Depress the brake pedal. • the braking distance is increased >... -
Page 129: Transmission
Transmission Gear selector lever Your vehicle is equipped with a a 5 speed au The current gear selector lever position ap tomated transmission with manual or auto pears in the transmission position indicator. matic mode. For information on driving with When M is selected the currently selected the transmission see also gear appears ( page 137). -
Page 130: Shifting Procedure
( page 131) surfaces. Otherwise, the the drivetrain could the vehicle is parked. Place the • the vehicle speed be damaged, which is not covered by the smart gear selector lever in park • uphill or downhill grades Limited Warranty. - Page 131 Transmission Effect Effect Warning! í ê Reverse gear Drive position Getting out of your vehicle with the gear Shift into reverse gear R only when The transmission shifts auto selector lever not fully engaged in park vehicle is stopped. matically. position P is dangerous.
-
Page 132: Accelerator Position
Transmission Driving tips Stopping Warning! When you stop briefly, e.g. at traffic lights: Accelerator position > Leave the transmission in gear. Your driving style influences the > Hold the vehicle with the brake. When leaving the vehicle, always remove transmission’s shifting behavior: the key from the starter switch, take it When you stop for a longer period with the with you, and lock the vehicle. -
Page 133: Hill Start Assist System
Otherwise, the the drivetrain could released the brake pedal. Therefore, you can be damaged, which is not covered by the smart start off smoothly without the vehicle moving Limited Warranty. immediately after releasing the brake pedal. - Page 134 Transmission Activating manual gearshifting Downshifting > Move the gear selector lever to manual gearshifting M ( page 128). System controlled automatic gearshifting Warning! is switched off. You can upshift or downshift through the On slippery road surfaces, never down gears in succession. shift in order to obtain braking action.
-
Page 135: Limp Home Mode
¬ symbol appears in the mul The transmission shifts to the next higher shop or at an authorized smart center. gear. tifunction display ( page 136). Teaching in the transmission system:... - Page 136 When teaching in was successful: vehicle. • appears in the multifunction display > Contact Roadside Assistance or an autho ( page 136) again. rized smart center. • Normal transmission operating is re stored. > Continue to drive. >> Controls.
-
Page 137: Instrument Cluster
If you must continue to drive, please do so with added caution. Visit an authorized Fuel level display smart center as soon as possible. The fuel level display shows the tank's fuel level with the aid of eight segments. The num... -
Page 138: Reserve Fuel Indicator
Instrument cluster Reserve fuel indicator When manual gearshifting is selected: You are driving on reserve fuel if there are no more than 1.0 US gal (3.78 l) of fuel in the Display Function tank. If this occurs, First gear engaged •... -
Page 139: Adjusting
Instrument cluster Selecting display for status Digital clock > Setting the time quickly: Press left indicator button or right button ( page 138) for longer than one second. You can select the information to be displayed The setting speed accelerates. P54.32 5178 31 in the status indicator: •... -
Page 140: Maintenance Service Interval Display
Instrument cluster Trip odometer display Maintenance service interval display > Start the engine. > Selecting maintenance service interval display: Press left button ( page 138) P54.32 5177 31 P54.32 5179 31 repeatedly until the maintenance service interval display appears in the status indicator. -
Page 141: Cockpit Clock
Instrument cluster Auxiliary instruments* Reserve fuel indicator Do not hang any objects on the tachometer. > Selecting reserve fuel indicator: Press left This could cause the tachometer to be torn button ( page 138) repeatedly until the from its mountings and damage it. P68.10 3616 31 reserve fuel indicator appears in the status indicator. -
Page 142: Instrument Cluster
Instrument cluster Adjusting instrument cluster The buttons for setting the time are on the top > Setting the time forward in 1 minute illumination of the cockpit clock. increments Press button repeatedly until the desired time is set. You can adjust the illumination of the >... -
Page 143: Audio System
If you wish to have a radio other than an lead to an accident, the driver should still hear ambient sound in your immedi original smart radio fitted in your vehi enter system settings with the vehicle at ate vicinity (e.g.horns, emergency res... -
Page 144: Player
• AUX socket ( page 144) Please refer to the separate operating instructions for detailed functions. Please be sure to read the operating in structions for the smart radio 9 before using On/off switch the unit. Familiarize yourself with the various Random button... -
Page 145: Aux Socket
The AUX socket is located in the glove box on Please be sure to read the operating in the passenger side. On/off switch structions for the smart radio 10 before using CD load button the unit. Familiarize yourself with the various Station buttons... -
Page 146: Air Vents
Air vents Overview P83.00 2257 31 Left side defroster air vent, fixed Control panel Right side defroster air vent, fixed Left side air vent, adjustable Right center air vent, adjustable Left center air vent, adjustable Right side air vent, adjustable >>... -
Page 147: Heating
Air vents Opening and closing air vents To make sure that the Warning! • heating • climate control* > Opening: Turn slider , or works properly, please observe the following: inwards towards the center console. When operating the • Keep the air intake grill free from deposits, •... - Page 148 Heating Control panel P83.20 2350 31 Air volume control Rear window defroster switch ( page 154) Air distribution control Temperature control >> Controls.
-
Page 149: Air Distribution
Heating Setting the temperature Adjusting air distribution Warning! You should raise or lower the temperature You can adjust the air distribution using air setting in small increments. distribution control Follow the recommended settings for heating and cooling given on the following >... -
Page 150: Defrosting
Heating Defrosting > Turn air distribution control to the desired symbol. The air distribution is controlled depending on the position of the air distribution con Warning! trol. You can also turn the air distribution Never drive with iced up or fogged control to a position between two symbols. - Page 151 Air conditioning with climate control* Control panel Air volume control, blower Air conditioning on/off Rear window defroster switch ( page 154) Air recirculation switch Air distribution control Temperature control >> Controls.
- Page 152 Air conditioning with climate control* Switching air conditioning on/off Nearly all dust particles, pollutants, are Warning! filtered out by an integrated particle filter before outside air enters the passenger com > Make sure that the engine is running. partment through the air distribution system. Follow the recommended settings for It also operates when the air conditioning is >...
-
Page 153: Temperature
Air conditioning with climate control* Setting the temperature Adjusting air distribution > Turn air distribution control to the desired symbol. You should raise or lower the temperature You can adjust the air distribution using air The air distribution is controlled depending setting in small increments, preferably distribution control on the position of the air distribution con... -
Page 154: Air Recirculation Mode
Air conditioning with climate control* Adjusting air volume Defrosting Warning! You can adjust the air volume using air volume control . Five blower speeds are available. Warning! When the recirculation mode is switched The air volume is controlled depending on the on, windows can fog on the inside immedi blower speed selected. -
Page 155: Rear Window
Rear window defroster The rear window defroster serves to de ice > Make sure that the key in the starter switch the rear window quickly and clear the view if is turned to position 1. the rear window is fogged. >... -
Page 156: Cup Holder
Otherwise it could be damaged. spilled on vehicle occupants may cause serious personal injury. Liquids spilled on vehicle equipment may cause damage not covered by the smart Limited Warranty. Cup holder insert Clean the cup holder with a damp cloth. -
Page 157: Cargo Compartment Cover Blind
Loading and storing Cargo compartment cover blind with parcel net bag Warning! Warning! Do not place any objects on the mounted Only place light loads in the parcel net Warning! cargo compartment cover blind. Vehicle bag. Do not transport heavy, sharp occupants could be injured by objects edged or fragile objects in the parcel net being thrown around in the vehicle in the... -
Page 158: Loading And Storing
Loading and storing The cargo compartment cover blind Fitting If you wish to use the cargo compartment • serves to protect objects that are stored in cover blind as normal, assemble it in the vehicle's cargo compartment from mounts . If you do not need the cargo prying eyes. - Page 159 Loading and storing Controls Cargo compartment cover blind Parcel net bag Top left mounting Cargo compartment cover blind Bottom left mounting > Pull parcel net bag down slightly and Rear mountings Handle secure with the hook and loop fastener. > Remove in reverse order. >...
-
Page 160: Coat Hooks
Loading and storing Storage compartments > Opening: Take hold of cargo compartment Do not store objects under the driver’s cover blind in the middle, pull seat. Objects stored under the driver’s backwards, and remove from rear An overview of the storage compartments can seat can slide forward into driver’s foot mountings be found on ( page 40). - Page 161 Loading and storing Door pockets Storage trays next to the steering wheel Glove box The door pockets are located in the driver’s The storage trays are located to the left and The glove box is located in front of the and passenger door.
-
Page 162: Loading Instructions
Loading and storing Loading instructions > Opening: Pull on glove box lid release Storage compartment in the tailgate and fold down the glove box lid. You can store small objects in the storage compartment in the tailgate. > Closing: Lift up the glove box lid with a bit Warning! of force until it engages. - Page 163 Loading and storing Warning! Warning! Warning! To help avoid personal injury during a No racks or loads may be secured to the Make sure the tailgate is closed when the collision or sudden maneuver, exercise roof of the vehicle, as: engine is running and while driving.
- Page 164 Loading and storing The gross vehicle weight which is the weight Please pay attention to and comply with the Warning! of the vehicle including fuel, tools, installed following instructions when loading the accessories, passengers, and luggage/cargo vehicle and transporting cargo: must never exceed the load limit and the •...
-
Page 165: Auxiliary Power Outlet
Useful features Sun visors Sun screen* Auxiliary power outlet The sun visors protect you from sun glare The sun screen provides protection from sun The auxiliary power outlet supplies power to while driving. rays and from heat generated by the the following electrical accessories when the panorama roof*. -
Page 166: Wheel Trim Cap
Useful features The auxiliary power outlet is located in the Please note that: > Mounting: Position wheel trim cap aperture lower center console. • if using the auxiliary power outlet the max so the valve fits through. imum current drawn does not exceed 5 A, >... -
Page 168: Operation
>> Operation The first 1 000 miles (1500 km) ....168 At the gas station ......169 Engine compartment . - Page 169 The first 1000 miles (1500 km) In the Operation section you will find detailed All of the above instructions also apply when information on operating, maintaining and driving the first 1000 miles (1500 km) after caring for your vehicle. the engine has been replaced. The more cautiously you treat your vehicle Always obey applicable speed limits.
-
Page 170: Refueling
Roadside As jection system. Damage caused by adding die sistance or an authorized smart center. Warning! sel will not be covered by the smart Limited Warranty. Gasoline is highly flammable and poison If diesel has mixed with gasoline, do not start the engine. -
Page 171: At The Gas Station
"Fuel requirements" ( page 306), and injury. The fuel filler cap is tethered to the fuel the, or contact an authorized smart center. filler flap. Do not drop the fuel filler cap. It > Replace the fuel filler cap. -
Page 172: Compartment
Engine compartment Engine compartment cover > Turn off the engine. > Set the parking brake. Warning! > Open the tailgate. Warning! Exercise extreme caution if you see flames or smoke coming from the engine compartment. Move away from the vehicle High outside temperature, stop and go and call the fire department. -
Page 173: Engine Oil
Using special additives not > Push the right hand and left hand cargo approved by smart may cause damage not compartment floor edges under the edges covered by the smart Limited Warranty. of the side panels. -
Page 174: Engine Compartment
Engine compartment Checking engine oil level The oil dipstick is located in the engine > Pull out oil dipstick compartment on the passenger side. > Wipe oil dipstick clean with a clean cloth. Check the engine oil level at regular >... -
Page 175: Adding
Maintenance System will result in engine or emission control sys tem damage not covered by the smart Limited Filler cap Warranty. > Unscrew filler cap from filler neck. - Page 176 Excess engine oil must be siphoned or drained off. It could cause damage to the engine or emission control system not covered by the smart Limited Warranty. > Screw filler cap back on filler neck. > Close the engine compartment cover.
-
Page 177: Service Flap
Front compartment Service flap > Park the vehicle on level ground. Warning! > Turn off the engine. You can remove the service flap and hang it on > Set the parking brake. the front of the vehicle so that it does not get Make sure that the service flap is locked damaged or dirty. -
Page 178: Front Compartment
Front compartment P88.40 2634 31 P88.40 2635 31 Opening above front bumper Opening in front of windshield Lever Service flap Service flap Service flap > Threading: Thread service flap with the > Inserting: Insert service flap into both > Closing: Close service flap hooks on the back into both openings openings in front of the windshield. - Page 179 Front compartment Coolant • Using a rag, slowly open the cap ap Checking coolant level The coolant reservoir is located in the front proximately turn to relieve excess pressure. If opened immediately, compartment on the driver’s side. scalding hot fluid and steam will be Warning! blown out under pressure.
- Page 180 Front compartment Windshield/rear window washer > Allow the radiator to cool down for at least system 30 minutes. Warning! > Using a rag, turn pressure cap slowly approximately one half turn counterclock Both the windshield and the rear window Windshield washer concentrate is highly wise to release any excess pressure.
-
Page 181: Brake Fluid
Warning! reservoir. Contact an authorized smart center immedi ately. Do not add brake fluid as this will not > Premix the windshield washer fluid in a During vehicle operation, the boiling solve the problem. - Page 182 • If the brake fluid level has fallen slightly below the minimum mark, drive to an authorized smart center. • If the brake fluid level has fallen significantly below the minimum mark, call Roadside Assistance or an authorized smart center.
-
Page 183: Important Guidelines
Tires and wheels Important guidelines Contact an authorized smart center for infor mation on tested and recommended rims and Warning! tires for summer and winter operation. They • Only use sets of tires and rims of the same can also offer advice concerning tire service type and make. -
Page 184: Tire Care And Maintenance
Tires and wheels Tire care and maintenance Tire inspection Tread depth Every time you check the tire inflation pres Do not allow your tires to wear down too far. sure, you should also inspect your tires for Adhesion properties on wet roads are sharply the following: reduced at tread depths of less than Warning! -
Page 185: Storing Tires
Tires and wheels Cleaning tires Warning! Never use a round nozzle to power wash tires. The intense jet of water can result in Although the applicable federal motor damage to the tire. safety laws consider a tire to be worn Always replace a damaged tire. -
Page 186: Loading The Vehicle
Tires and wheels 2) The certification label, also found on the Loading the vehicle driver’s door B pillar, tells you about the gross weight capacity of your vehicle, Two labels on your vehicle show how much called the Gross Vehicle Weight Rating weight it may properly carry. -
Page 187: Seating Capacity
Tires and wheels Tire and Loading Information Tire and Loading Information placard The Tire and Loading Information placard showing the load limit information is located Data shown on Tire and Loading Informa on the driver’s door B pillar ( page 185). Warning! tion placard example are for illustration pur poses only. -
Page 188: Tires And Wheels
Tires and wheels Data shown on Tire and Loading Informa Steps for determining correct load limit Step 4 tion placard example are for illustration pur The following steps have been developed as > The resulting figure equals the available poses only. Seating capacity data are specific required of all manufacturers under Title 49, amount of cargo and luggage load capacity. - Page 189 Tires and wheels The following table shows examples on how to calculate total and cargo load capacities with varying seating configurations and number and size of occupants. The following examples use a load limit of 540 lbs. This is for illustration purposes only. Make sure you are using the actual load limit for your vehicle stated on the vehicle’s Tire and Loading Information placard ( page 186).
-
Page 190: Recommended Tire Inflation Pressure
Tires and wheels Certification label To assure that your vehicle does not exceed Do not overinflate tires. Overinflated Even after careful determination of the the maximum permissible weight limits (GVWR tires can adversely affect handling and combined weight of all occupants and cargo as and GAWR for front and rear axle), have the ride comfort, wear unevenly, increase to not exceed the permissible load limit, you... - Page 191 Tires and wheels Follow recommended cold tire inflation pres Important notes on tire inflation pressure sures listed on Tire and Loading Information placard on the driver’s door B pillar. Warning! Keeping the tires properly inflated provides the best handling, tread life and riding com If the tire inflation pressure drops fort.
-
Page 192: Checking Tire Inflation Pressure
Tires and wheels Checking tire inflation pressure Checking tire inflation pressure manually Warning! Follow the steps below to achieve correct tire Regularly check your tire inflation pressure inflation pressure: at least once a month. Follow recommended tire inflation Check and adjust the tire inflation pressure >... -
Page 193: Pressure Monitoring System (Tpms)
Tires and wheels Checking tire inflation pressure electroni USA only: The TPMS only functions on wheels that are cally with the Tire Pressure Monitoring This device complies with Part 15 of the equipped with the proper electronic sensors. System (TPMS) FCC Rules. - Page 194 Tires and wheels Accordingly, when the low tire pressure This sequence will continue upon subse Warning! telltale illuminates, you should stop and quent vehicle start ups as long as the check your tires as soon as possible, and malfunction exists. When the malfunction inflate them to the proper pressure.
- Page 195 Tires and wheels Operating radio transmission equipment The TPMS must be restarted when you have (e.g. wireless headsets, two way radios) in or adjusted the tire inflation pressure to a new near the vehicle could cause the TPMS to mal level (e.g.
-
Page 196: Potential Problems Associated With Underin Flated And Overinflated Tires
Tires and wheels > Press Restarting TPMS button 1. Potential problems associated with Overinflated tires > The combination low tire pressure/TPMS underinflated and overinflated tires Overinflated tires can: malfunction telltale in the instrument • adversely affect handling characteristics cluster ( page 34) flashes for approxi Underinflated tires •... -
Page 197: Tire Labeling
Tires and wheels Uniform Quality Grading Standards Tire labeling Tire size designation, load and speed rating ( page 202) DOT, Tire Identification Number (TIN) Besides tire name (sales designation) and ( page 200) manufacturer name, a number of markings can Maximum tire load ( page 201) be found on a tire. - Page 198 Tires and wheels General: Aspect ratio Tire load rating Aspect ratio 2 ( page 196) is the dimen Tire load rating 5 ( page 196) is a numeri Depending on the design standards used, the tire size molded into the sidewall may have no sional relationship between tire section cal code associated with the maximum load a letter or a letter preceding the tire size des...
- Page 199 Tires and wheels Tire speed rating Summer tires Tire speed rating 6 ( page 196) indicates Warning! the approved maximum speed for the tire. Index Speed rating Do not overload the tires by exceeding up to 100 mph (160 km/h) the specified load limit as indicated on Warning! the Tire and Loading Information placard...
- Page 200 Tires and wheels • At the tire manufacturer’s option, any tire • Any tire with a speed capability above All season and winter tires with a speed capability above 149 mph 186 mph (300 km/h) must include a "ZR" in (240 km/h) can include a "ZR"...
- Page 201 Tires and wheels Load identification No specification given: absence of any text (like in above example) indicates a standard load (SL) tire. XL (Extra Load): designates an extra load (or reinforced) tire. Light Load: designates a light load tire. C, D, E: designates load range associated with the maximum load a tire can carry at a speci fied pressure.
- Page 202 Tires and wheels DOT (Department of Transportation) The first two figures identify the week, start The maximum tire load is the maximum weight Tire branding symbol 1 ( page 200) which ing with "01" to represent the first full week of the tires are designed to support.
-
Page 203: Uniform Tire Quality Grading Standards
Tires and wheels Maximum tire inflation pressure Always follow the recommended tire inflation Uniform Tire Quality Grading Standards pressure ( page 189) for proper tire infla (U.S. vehicles) tion. Tire manufacturers are required to grade tires based on three performance factors: treadwear, traction and temperature resis Warning! tance. -
Page 204: Traction
Tires and wheels Quality grades can be found, where applica Traction Sustained high temperature can cause the ble, on the tire sidewall between tread shoul The traction grades, from highest to lowest, material of the tire to degenerate and reduce der and maximum section width. -
Page 205: Accessory Weight
Tires and wheels Tire and loading terminology Tire ply material Another metric unit for air pressure. There Accessory weight are 14.5038 pounds per square inch (psi) The combined weight (in excess of those stan to 1 bar; there are 100 kilopascals (kPa) dard items which may be replaced) of auto to 1 bar. -
Page 206: Gawr
Tires and wheels DOT (Department of Transportation) GVWR (Gross Vehicle Weight Rating) Maximum permissible tire inflation pressure A tire branding symbol which denotes the tire This is the maximum permissible vehicle This number is the greatest amount of air meets requirements of the U.S. Department of weight of the fully loaded vehicle (weight of pressure that should ever be put in the tire. -
Page 207: Recommended Tire Inflation Pressure
Tires and wheels PSI (Pounds per square inch) TIN (Tire Identification Number) Tire speed rating A standard unit of measure for air pressure Unique identifier which facilitates efforts by Part of tire designation; indicates the speed > bar, kilopascal (kPa). tire manufacturers to notify purchasers in range for which a tire is approved. -
Page 208: Rotating Tires
Do not rotate front and rear wheels as 81 lb ft (110 Nm). they have different dimensions, e.g. rim Only use genuine smart wheel bolts size, wheel offset etc. Otherwise, the specified for your vehicle’s rims. Vehicle maximum load on the tire... -
Page 209: Winter
Such notices are available ® engine can be started, even at low ambient ABS and ESP in winter operation. at your tire dealer or any authorized smart temperatures. For safe handling, make sure that all mounted center. • Tire change. -
Page 210: Snow Chains
• Using snow chains is not permissible with all When mounting or removing snow chains, Snow chains that are approved by smart are wheel/tire combinations ( page 299). always park your vehicle on level ground, only permitted for the following tire size: •... -
Page 211: Winter Driving
Winter driving Warning! The vehicle’s handling changes when driving with snow chains on any kind of road surface. This means that you should always adapt your driving style to suit the current road and weather conditions. If snow chains that do not meet require ments are mounted, they may scrape against the body or axle components when the vehicle is in motion. -
Page 212: Driving Instructions
Driving instructions Drinking and driving Pedals Power assistance Warning! Warning! Warning! Do not drink alcohol or take drugs and Make sure that absolutely no objects are Without the engine running, there is no drive or allow anyone to drive who has obstructing the pedals’... - Page 213 This may cause serious damage to the drive Refer to the description of the hydraulic Contact an authorized smart center. train which is not covered by the smart brake assistant ( page 75). Limited Warranty. All checks and service work on the brake ®...
- Page 214 Driving instructions To help prevent brake disk corrosion after High and low stresses driving on wet road surfaces (particularly Warning! salted roads), it is advisable to brake the vehicle with considerable force prior to park Warning! ing. The heat generated serves to dry the Make sure not to endanger any other brakes.
- Page 215 Driving instructions New brake pads Warning! Warning! Only install brake pads recommended by smart. The accumulation of salt on break disks New brake pads will not achieve their and brake pads reduces braking effec optimal braking effect until after several tiveness and increases the distance nec hundred miles (kilometers).
-
Page 216: Catalytic Converter
Drive sensibly save fuel Catalytic converter Warning Fuel consumption, to a great extent, depends Your smart is equipped with monolithic type on driving habits and operating conditions. catalytic converter, an important element in The catalytic converter can become very conjunction with the oxygen sensors to hot. - Page 217 • Make sure you adhere to the prescribed or tires appear unsafe, have the vehicle Depending upon the weather and/or road service intervals. towed to the nearest smart center or tire surface (conditions), the tire traction • Never run the fuel tank empty. dealer for repairs.
-
Page 218: Hydroplaning
Driving instructions Tire traction smart recommends winter tires ( page 208) Warning! with a minimum tread depth of approximately The safe speed on a wet, snow covered or icy in (4 mm) on all four wheels for the winter road is always lower than on a dry road. -
Page 219: Speed Rating
Warning! ing of the information given on a tire’s side and possibly resulting in an accident wall, any authorized smart center will be glad and/or personal injury and possible to assist you. death, for you and for others. -
Page 220: Standing Water
Indicated temperatures Any such damage is not covered by the smart just above the freezing point do not Limited Warranty. guarantee that the road surface is free of ice. -
Page 221: Passenger Compartment
Driving instructions Passenger compartment Control and operation of radio Telephones and two way radios transmitters Radio and telephone Warning! Warning! Never operate radio transmitters Warning! Always fasten items being carried as equipped with a built in or attached securely as possible. antenna (i.e. -
Page 222: Emission Control
Any adjustments to the engine should there coolant temperature over 248°F (120°C). (such as a garage) which are not properly fore be carried out only by qualified smart Doing so may cause serious engine damage ventilated. If you think that exhaust gas center authorized technicians. - Page 223 Driving instructions Warning! • Driving when your engine is over heated can cause some fluids, which may have leaked into the engine com partment, to catch fire. You could be seriously burned. • Steam from an overheated engine can cause serious burns which can occur just by opening the front compartment cover.
-
Page 224: Driving Abroad
Relevant information can be obtained at any authorized smart cen ter. >> Operation... -
Page 225: Vehicle
Always follow the instructions treatments regularly. on the particular container. Always open smart recommends that you care for the To avoid paint damage, you should your vehicle’s doors or windows when paintwork at least twice a year (e.g. in the immediately remove: cleaning the inside. - Page 226 Any reflect the latest technology. You can obtain damage should be repaired as soon as possi smart approved vehicle care products at an ble to prevent corrosion. authorized smart center. In doing so, do not neglect the underbody of the vehicle.
- Page 227 Vehicle care Vehicle care Warning! Contact an authorized smart center for rec ommended and approved care products. After washing the vehicle, the brakes may still be wet and thus their functionality Advice on caring for the soft top system, impaired. Therefore, when you start off, see ( page 230).
- Page 228 Vehicle care To avoid damage to exterior surfaces never do the following: Use aggressive paint cleaner, machine polish, abrasive cleanser, acidic, highly alkaline agents, abrasive sponges, high pressure or hot water cleaning equipment Exterior Special considerations Lightly soiled Heavily soiled Hand /Automatic car washes Hand /Automatic car washes tridion safety cell, black...
-
Page 229: Automatic Car Wash
Vehicle care Removing insects Vehicle washing Unscrew your vehicle’s antenna before Remove insect remains before you start to In the winter, thoroughly remove all traces of driving into an automatic car wash. wash the vehicle. road salt as soon as possible. >... -
Page 230: Paintwork Care
Recommended touch up paint pens can be ob Always keep the jet of water moving across the the following guideline values: tained in a smart center. surface. • Water temperature max. 176°F (80°C) • Minimum distance 11.81 in (30 cm) For any major paintwork damage, please •... -
Page 231: Soft Top System
Exterior Repair options Wet cleaning Plastic parts (body Clearcoat touch up smart recommends that you use an approved Regular care will protect the retractable soft panels) with paint pen car shampoo concentrate and soft top clean top and the rear soft top against external clearcoat influences, helping to preserve its value. - Page 232 >> Operation...
-
Page 234: Practical Hints
>> Practical hints. Where will I find ...?......234 Display messages ......236 What to do if ... -
Page 235: Where Will I Find
Where will I find ...? Tire repair kit Warning! The tire repair kit is located in the passen ger’s footwell under the carpet. The tire repair kit is a limited repair de vice. In case of a breakdown caused by a flat tire, read through the section flat tire ( page 265) carefully. -
Page 236: First Aid Kit
Where will I find ...? First aid kit* The first aid kit is located on the driver’s side in the cargo compartment. P68.20 3760 31 First aid kit Check expiration dates and contents for completeness at least once a year and replace missing/expired items. -
Page 237: Data Bus
• if there is a malfunction in the shifting > Have the system checked at an authorized system. Flashes: smart center immediately. • when the transmission is taught in • if the data bus has failed. ( page 134) > Have the system checked at an authorized >... -
Page 238: Indicator Lamp
> Have the ABS system checked at an autho General information: • if engine is running or after 10 seconds rized smart center immediately. If any of the following lamps in the instrument • together with the brake warning lamp... -
Page 239: What To Do If
Battery indicator lamp Brake warning lamp (USA only) vehicle. > Contact Roadside Assistance or an autho Illuminates: rized smart center. • when the ignition is switched on. The indicator lamp goes out if the engine is Among other possible causes, the running. -
Page 240: Brake System
> Contact Roadside Assistance or an autho fluid reservoir has fallen to the minimum mark maneuvers. Observe the traffic situation rized smart center. or below, have the brake system checked for around you brake pad thickness and leaks. -
Page 241: What To Do If
> Have the TPMS checked at an authorized ability. Please note that the TPMS is not a dicated on the Tire and Loading Informa smart center. substitute for proper tire maintenance, tion placard you should determine the and it is the driver’s responsibility to... -
Page 242: Coolant
This sequence will continue upon subse > Have the coolant system checked for leaks Coolant temperature warning lamp at an authorized smart center. quent vehicle start ups as long as the malfunction exists. When the malfunction Illuminates: Among other possible causes, the indicator is illuminated, the system may •... -
Page 243: Engine Malfunction
Extended driving with the indicator lamp illuminated could result in serious engine damage that is not covered by the smart Limited Warranty. Engine malfunction indicator lamp Engine oil pressure indicator lamp > Turn off the engine. -
Page 244: Warning Lamp
Have the system che Illuminates: Flashes: cked at a smart center. ® • when the ignition is switched on. • when the ESP is engaged. The warning lamp goes out after starting the engine. -
Page 245: High Beam Headlamps
It may be possible to clear a system failure lamps are switched on or when using the high checked at an authorized smart center. by restarting the engine. beam flasher, have the system checked at an authorized smart center. -
Page 246: Seat Belt
What to do if ... Warning! If the 57 indicator lamp Passenger front air bag off indicator lamp Seat belt telltale illuminates and remains illuminated with Illuminates when the passenger front air bag the weight of a typical adult or someone is deactivated: Illuminates constantly: larger than a small individual on the pas... -
Page 247: Srs Indicator Lamp
< stops flashing but continues to the air bags can be found in the "Safety" contact an authorized smart center im be illuminated section ( page 54). mediately to have the system checked; A malfunctioning SRS system may not de The seat belt telltale <... -
Page 248: Turn Signal Indicators
There is a malfunction in the supplemental not illuminate, have the turn signal indica restraint systems. The air bags or Emer tor lamp(s) checked at an authorized smart gency Tensioning Devices could deploy un center. expectedly or fail to deploy in an accident. - Page 249 • the transmission position indicator is on > If necessary have the mechanical lock replaced. Your authorized smart center will be glad to The engine does not start within 4 seconds: supply you with a replacement following an > Wait for a few seconds.
-
Page 250: Brake Pads
( page 250). braking, have the brake pads checked at an leave the key in the vehicle. authorized smart center. To cancel the alarm: > Insert the key in the starter switch. > Turn starter switch in Position 1 ( page 91). -
Page 251: Replacing The Transmitter Battery
Unlocking/locking manually Unlocking the vehicle Locking the vehicle P72.10 3348 31 You can unlock the driver’s door and the fuel If you can no longer lock the vehicle using the filler flap by unlocking the driver’s door using remote control and you do not have a spare the key. - Page 252 ± on the retractable soft top switch for 15 seconds twice. The rear soft top closes the locking hooks. > Close the retractable soft top completely. > Have the rear soft top checked at an autho rized smart center. >> Practical hints.
-
Page 253: Replacing Transmitter Battery
The remote control's transmitter battery is > Have the transmitter battery replaced at an almost spent when the turn signals flash smart center. Batteries contain poisonous and corro rapidly nine times in a row when locking the sive substances. Therefore keep the vehicle. - Page 254 Replacing transmitter battery Replacing transmitter battery > Insert a suitable object such as a coin into Check the polarity when inserting the new the slot at the eyelet of the key housing. transmitter battery. You could otherwise Replacement battery: CR 2016 button cell >...
-
Page 255: Replacing Bulbs
A bulb can explode if you: bulb has been replaced. Contact an autho • touch or move it when hot rized smart center for headlamp adjustment. • drop the bulb • scratch the bulb Wear eye and hand protection. -
Page 256: Back Up Lamp
Replacing bulbs Overview bulbs Front lamps Rear lamps Lamp Type Lamp Type Turn signal lamp PY 21 W High mounted brake W 16 W lamp Low beam headlamp H7 (55W) Brake, tail, turn 12 V 21/5 W Parking and side WY 5 W signal, and marker lamp... -
Page 257: Replacing Bulbs
> Insert bulb socket into the headlamp • Have the bulbs for the front fog lamps* housing. replaced at an authorized smart center. > Driver side: Turn bulb socket toward the inside. Passenger side: Turn bulb socket toward the inside. - Page 258 Replacing bulbs Low beam headlamp bulb High beam headlamp bulb Front turn signal lamp bulb > Removing: Take off low beam headlamp > Removing: Take off high beam headlamp > Removing: Turn bulb socket counter cover cover clockwise by a quarter of turn and pull it out >...
-
Page 259: Rear
Replacing bulbs Replacing bulbs for rear lamps Side turn signal lamp bulb > Installing: Insert the new bulb into the bulb socket. > Removing: Open the door on the corre > Insert the bulb socket into the side turn Before you start to replace a bulb for a rear sponding side. - Page 260 Replacing bulbs > Installing: Insert the new bulb into the bulb socket. > Press gently onto the bulb and turn it P82.10 4527 31 clockwise until it engages. > Insert the bulb carrier into the tail lamp housing. > Press gently onto the bulb carrier. Let retaining tab engage.
-
Page 261: Brake Lamp
Replacing bulbs High mounted brake lamp License plate lamps > Use a suitable tool to loosen the corre sponding license plate lamp unit at jacking point Warning! > Carefully unclip the license plate lamp unit. P82.10 4838 31 High outside temperature, stop and go traffic, driving on long uphill grades, or driving at high engine speed may increa se the temperature in the engine com... - Page 262 Replacing bulbs Replacing the interior lighting > Removing: Use a flat object to pry the lamp lens off from the passenger side. You need a 12 V 10 W bulb. > Detach electrical connector from the interior lamp. > Remove bulb from its mount P82.20 2955 31 >...
- Page 263 The windshield wipers could otherwise be To ensure proper visibility, set in motion and cause injury.
- Page 264 Replacing wiper blades Rear window wiper blade > Removing: Press on retaining springs > Installing: Push the new wiper blade onto both sides of the wiper blade. the wiper arm until you feel it engage. > Fold the wiper blade away from the wiper >...
-
Page 265: Replacing Wiper Blades
Replacing wiper blades Adjusting the washer jet nozzles P82.30 2608 31 Front washer jet nozzles Rear washer jet nozzles > Adjusting: Use a needle to move washer jet nozzles left, right, up, or down. Check the setting of the washer jet nozzles at regular intervals. -
Page 266: Flat Tire
The tire repair kit enables you to drive on the eyes or clothing. The tire sealant is > Park the vehicle at a safe distance from sealed tire to the nearest authorized smart harmful if inhaled, swallowed or absorbed moving traffic on a hard, flat surface when center. - Page 267 • Allow escaped tire sealant to dry, then peel the nearest smart center for assistance it off. or call Roadside Assistance. >> Practical hints.
- Page 268 Flat tire > Take the tire repair kit from the passen > Attach sticker where it will be easily Warning! ger’s footwell ( page 234). seen by the driver on the instrument > Open the tire repair kit lid. cluster. Please review the instructions below for using the tire repair kit.
- Page 269 > If the tire inflation pressure of at least Do not drive the vehicle. 26 psi (1.8 bar) is not attained, turn off the Contact the nearest smart center for as > Press I on electric air pump switch electric air pump by pressing 0 on electric sistance or call Roadside Assistance.
- Page 270 Park your vehicle safely away from the vehicle. 50 mph (80 km/h). A tire sealant repair is roadway and contact the nearest smart > Screw the valve cap onto the tire valve. not designed to operate at higher center or call Roadside Assistance.
- Page 271 Flat tire The manufacturer is unable to guarantee more likely to become punctured or > Drive to the nearest authorized smart cen that all tire punctures can be repaired with ter, to have the damaged tire replaced. damaged by road debris, potholes etc.
-
Page 272: Battery
If you do not intend to operate your vehicle for an extended period of time, consult an Wear suitable protective cloth authorized smart center about steps you need ing, especially gloves, apron to observe. and faceguard. -
Page 273: Battery
Battery Warning! Warning! Warning! Failure to follow these instructions can Do not place any metal objects on a bat Keep flames or sparks away from battery, result in severe injury or death. tery. You could otherwise cause a short avoid improper connection of jumper Observe all safety instructions and circuit and the battery’s highly flammable cables, smoking, etc. -
Page 274: Removing
P54.10 2831 31 authorized smart center. Refer to Maintenance Booklet for maintenance Warning! intervals or contact an authorized smart cen ter for further information. With a disconnected battery • you will no longer be able to turn the Never invert the terminal connections! key in the starter switch. -
Page 275: Charging
Battery > Disconnect the battery negative lead from Charging the battery negative terminal P54.10 2832 31 Make sure the negative lead does not come into contact with the positive lead. Warning! > Remove cover from the positive terminal. > Disconnect the battery positive lead. Avoid creating sparks when charging the battery as escaping gases are flammable. - Page 276 > Turn off all electrical accessories. > Remove the key from the starter switch. Never attempt to recharge a frozen bat tery. Have the battery checked at a smart center. The battery housing could be dam aged. >> Practical hints.
-
Page 277: Jump Starting
Let the battery thaw out first. Never lean over batteries while connect checked at the nearest authorized smart cen • Only jump start from batteries with the ing or jump starting, you might get in ter. -
Page 278: Jump Start Assistance
> Set the parking brake. > Move the gear selector lever to park > Have the battery checked at the nearest position P. authorized smart center. > Turn off all electrical accessories. > Turn off the engine. >> Practical hints. -
Page 279: Towing
If the vehicle is towed with the front axle raised, the gear selector lever must be in Warning! smart recommends that the vehicle be trans neutral position N and the engine must be shut ported with all wheels off the ground using off (key in starter switch position 0). - Page 280 Towing Towing eye bolt Covers Warning! Depending on whether you are towing a vehi The towing eye bolt is located in the passen cle or you are being towed, the towing eye bolt ger’s footwell under the carpet. can be screwed into threaded holes which are With the engine not running, there is no located behind covers on the front and rear power assistance for the brake and...
- Page 281 Towing Installing towing eye bolt Warning! P88.20 2930 31 > Screw towing eye bolt in clockwise to its stop and tighten with a suitable object. High outside temperature, stop and go traffic, driving on long uphill grades, or driving at high engine speed may increa Warning! se the temperature in the engine com partment.
- Page 282 Towing Towing the vehicle Towing with all wheels on the ground or front axle raised: The vehicle may only be towed when: • You are sure that no gear is engaged, • the engine is shut off, • the key is in starter switch position 0. >...
-
Page 283: Fuses
> Make sure the gear selector lever is in park secured by that fuse will stop operating. the amperage recommended in the fuse chart. position P. Any smart center will be glad to advise you on > Turn off all electrical accessories. this subject. > Turn off the engine. -
Page 284: Fuse Box
Fuses Replacing a fuse Fuse box The fuse box is located on the driver’s side below the dashboard. P54.15 2977 31 P54.15 2979 31 P54.15 2978 31 > From the fuse chart ( page 284), deter mine which fuse belongs to the malfunction ing accessory or componant. -
Page 285: Fuse Chart
Fuses Fuse chart Accessory/Componant Amperage Color Engine 25 A Neutral Windshield wipers 25 A Neutral Power window, left and right 20 A Yellow Blower 25 A Neutral Front fog lamps 10 A Right parking and lamp, instrument lighting, terminal 58R 7.5 A Brown Parking and lamp, left... - Page 286 Fuses >> Practical hints.
-
Page 288: Technical Data
>> Technical data. Parts service....... 288 Warranty coverage ......289 Engine electronics . -
Page 289: Parts Service
Parts service The "Technical data" section provides the Genuine smart Parts are subjected to strin The use of non genuine smart parts and necessary technical data for your vehicle. gent quality inspections. Each part has been accessories not authorized by smart could... -
Page 290: Service And Warranty Information Booklet
Your vehicle is covered under the terms of the Replacement parts and accessories are Information Booklet warranties printed in the Service and covered by the smart Parts and Accessories Warranty Information booklet. Your autho warranties, copies of which are available at rized smart center will exchange or repair any authorized smart center. -
Page 291: Engine Electronics
Warning! has the necessary knowledge and tools to ger vehicle operating safety. carry out the work required, e.g. at a smart Always have maintenance work on engine center. Otherwise there is a danger that vehi Damage or consequential damage due to... - Page 292 (band) ting power (Watts) smart center. In particular, work rele the operating safety of the vehicle and Short wave (<50 MHz) 100 vant to safety or on safety related sys...
-
Page 293: On Board Diagnostics Socket (Obd)
Engine electronics On board Diagnostics Socket (OBD) The on board diagnostics socket is located inside the vehicle on the right side of the left footwell. On board diagnostics socket >> Technical data. -
Page 294: Identification Labels
Identification labels Air bag information signs Signs and labels Certification label (sun visor) VIN (engine compartment) The certification label is located on the Emission control information label, driver’s door B pillar. includes both federal and California certification exhaust emission standards (engine compartment) Heat warning label (engine compartment) Certification label (driver’s door B pillar) -
Page 295: Identification Number (Vin)
Identification labels Vehicle Identification Number (VIN) The Vehicle Identification Number (VIN) can be found in the following locations: • on the certification label on the driver’s door B pillar ( page 293) • on the rear right on the cargo compartment floor ( page 295) •... -
Page 296: Identification Labels
Engine number P00.01 3349 31 The engine number is engraved into the engine block. For more information, contact any authorized smart center. When ordering parts, please specify vehicle identification and engine number. VIN (on the cargo compartment floor) > Open the cargo compartment. -
Page 297: Layout Of Poly V Belt
Layout of poly V belt All models For dimensions of the poly V belt, see "Engine" ( page 297). Vehicles with air conditioning with climate control* have two poly V belts. The additional poly V belt is shown in black. The standard poly V belt is shown in purple. -
Page 298: Technical Data
6400rpm Firing order 1 2 3 Poly V belt 802 mm 1 The quoted data apply only to the standard vehicle. Contact an authorized smart center for the corresponding data of all special bodies and special equipment. >> Technical data. -
Page 299: Rims And Tires
Using tires other than those approved by smart may, under load, exhibit dimensional regularly and should only be adjusted on cold smart may result in damage that is not variations and different tire deformation tires. Follow tire manufacturer’s maintenance covered by the smart Limited Warranty. -
Page 300: Rims
Rims and tires Rims and tires Model pure Model passion Front axle: Rims (steel) 4.5 J x 15 H2 Rims (light alloy) 4.5 J x 15 H2* 4.5 J x 15 H2 Wheel offset 0.93 in (23.5 mm) 0.93 in (23.5 mm) All season tires 155/60 R15 74 T M+S 155/60 R15 74 T M+S... -
Page 301: Electrical System
Electrical system Electrical system All models Generator (alternator) 14 V/90 A Starter motor 12 V/0.95 kW Battery 12 V/42 Ah Spark plugs DENSO XU22 HDR9 Electrode gap 0.035 in (0.9 mm) Tightening torque 11 15 lb ft (15 20 Nm) >>... -
Page 302: Weights
Weights Weights All models Cargo compartment load max. 110 lbs (50 kg) Roof load None 1 This vehicle is not intended to carry items on its roof. Thus roof rails and any roof mounted devices must not be used. Warning! No racks or loads may be secured to the roof of the vehicle, as: •... -
Page 303: Dimensions, Main
Main dimensions Main dimensions All models Overall vehicle length 106.1 in (2695 mm) Overall vehicle width (exterior rear view mirrors folded out) 69.0 in (1752 mm) Overall vehicle width (exterior rear view mirrors folded in) 61.4 in(1559 mm) Overall vehicle height 60.7 in (1542 mm) Wheelbase 73,5 in (1867 mm) -
Page 304: Lubricants
Therefore only use Warning! products tested and approved by smart. Comply with all valid regulations with Please contact an authorized smart center for respect to handling, storing and dispos products tested and approved by smart. ing of service fluids. Otherwise you could endanger persons or the environment. -
Page 305: Service Fluids And Capacities
Service fluids and capacities Components Model Capacity Fuels, coolants, lubricants, etc. Engine with oil filter All models approx. 3.5 US qt (3.3 l) Approved engine oils Transmission All models 2.4 US qt (2.3l) BOT328 Brake system All models 1.05 US qt (1.0 l) Brake fluid (DOT 4+) Cooling system All models... -
Page 306: Additives
Otherwise damage to the sys dations for scheduled oil changes. Failure to tem will occur. Only brake fluid approved by smart is recom do so will result in engine or emission control mended. Any authorized smart center will system damage not covered by the smart provide you with additional information. -
Page 307: Premium Unleaded Gasoline
Service fluids and capacities Premium unleaded gasoline Fuel requirements To maintain the engine’s durability and performance, premium unleaded gasoline must be used. If premium unleaded gasoline is Only use premium unleaded fuel: not available and low octane fuel is used, •... -
Page 308: Gasoline Additives
Follow directions fuel additives other than those tested and on product label. approved by us for use on smart vehicles are After an extended period of using fuels with not covered by the smart Limited Warranty. -
Page 309: Windshield/Rear Window Washer System
Service fluids and capacities Windshield/rear window washer Mixing ratios: system • above 32°F (0°C): 1 part windshield washer Warning! concentrate labeled for summer to During all seasons, 100 parts water Windshield washer concentrate is highly • use a windshield washer concentrate for •... -
Page 310: Coolants
35°F ( 37°C) and corrosion Anticorrosion/Antifreeze solution or other system checked for signs of leakage). Please protection. smart approved products of equal specifica make sure the mixture is in accordance with tion are used to renew the coolant concentra label instructions. -
Page 311: Anticorrosion/Antifreeze
Therefore, the following product is strongly checked each time you bring your vehicle to anticorrosion/antifreeze coolant used in such recommended for use in your vehicle: MB an authorized smart center for service. engines be specifically formulated to protect 325.0 Anticorrosion/Antifreeze agent. the aluminum parts. - Page 312 >> Technical data.
- Page 314 If you have questions about carrying out any type of service, turn to the advice of an authorized smart center.
Need help?
Do you have a question about the fortwo coupe and is the answer not in the manual?
Questions and answers