Table of Contents
Advertisement
Quick Links
USER
MANUAL
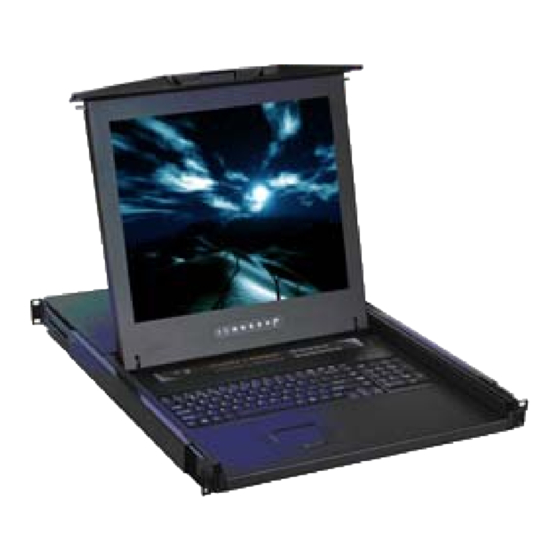
Sun Readable Solution
15", 17", 19", 22" Screen Size
Options: -BNC + S-Video
-Audio
SunReadable LCD Display
Models
HNP717 / 819
SunReadable Widescreen LCD Display
Models
HNPW719 /HNPW822
SunReadable LCD Display
Models
HNP117 / 119
SunReadable LCD Display
Models
HNVP117 / 119
- With KVM Options
- DVI
- Touchscreen
- Quad Display
- DC Power
Advertisement
Table of Contents

Related Manuals for I-Tech HNP819


Summary of Contents for I-Tech HNP819
- Page 1 USER MANUAL Sun Readable Solution 15”, 17”, 19”, 22” Screen Size SunReadable LCD Display Models HNP717 / 819 SunReadable Widescreen LCD Display Models HNPW719 /HNPW822 SunReadable LCD Display Models HNP117 / 119 SunReadable LCD Display Models HNVP117 / 119 - With KVM Options Options: -BNC + S-Video - DVI - Touchscreen...
-
Page 2: Table Of Contents
Before Installation..............3 Unpacking................3 Optional Accessories............3 Peripheral Products.............4 Part 1 HNP717 & HNP819 Chapter 2 Installation Package Contents...............5 Structure Diagram...............6 ............... . - Page 3 Front NEMA 4 / IP65 Options ................36 Chapter 11 Quad Display Option …..................37 Chapter 12 DC Power Options ....................38 Chapter 13 Dimensions ………....................39 Chapter 14 Troubleshooting ....................40 i-Tech Company LLC TOLL FREE: (888) 483-2418 • EMAIL: info@itechlcd.com • WEB: www.iTechLCD.com...
-
Page 4: Important Safeguards
□ Use of supplies or parts not meeting our specifications. □ Normal wear and tear. □ Any other causes which does not relate to a product defect. ■ Removal, installation, and set-up service charges. i-Tech Company LLC TOLL FREE: (888) 483-2418 • EMAIL: info@itechlcd.com • WEB:... -
Page 5: Regulatory Notice
■ Re-position or relocate the receiving antenna. ■ Increase the separation between the equipment and receiver. ■ Connect the equipment into an outlet on a circuit different from that to which the receiver is connected. i-Tech Company LLC TOLL FREE: (888) 483-2418 • EMAIL: info@itechlcd.com •... -
Page 6: Before Installation
1.1 IEC power cord 1.2 NEMA 5-15 power cord (US) 1.3 BS 1363 power cord (UK) 1.4 CEE 7/4 power cord (German) 1.5 AS 3112 power cord (Australia) i-Tech Company LLC TOLL FREE: (888) 483-2418 • EMAIL: info@itechlcd.com • WEB: www.iTechLCD.com... -
Page 7: User Manual
NV401A / NV801A / NV1601A 4 / 8 / 16 port PS/2 DB-15 KVM Rackmount keyboard drawer (with KVM options) Keyboard Drawer Rackmount keyboard drawer (short depth version) i-Tech Company LLC TOLL FREE: (888) 483-2418 • EMAIL: info@itechlcd.com • WEB: www.iTechLCD.com... -
Page 8: Part 1 Hnp717 & Hnp819
HNP717 / 819 / HNPW719 / 822 / HNP117 / 119 / HNVP117 / 119 User Manual 2.1 Package Contents Chapter 2 HNP717 & HNP819 1 Rackmount LCD display x 1 pc 2 6’ VGA cable (male to male) x 1pc 3 User manual x 1pc... -
Page 9: Chapter 2 Installation
HNP717 / 819 / HNPW719 / 822 / HNP117 / 119 / HNVP117 / 119 User Manual 2.2 Installation Chapter 2 HNP717 & HNP819 ■ Install each screws shown in Figure 1. Figure 1. ■ Fixed the LCD into the rack. -
Page 10: Connection
HNP717 / 819 / HNPW719 / 822 / HNP117 / 119 / HNVP117 / 119 User Manual 2.3 Structure Diagram Chapter 2 HNP717 & HNP819 1 LCD interchangeable module kit 2 LCD membrane 2.4 Connection HNP717 & HNP819 DB-15 VGA female connector... -
Page 11: Part 2 Hnpw719 & Hnpw822
1 Rackmount LCD display x 1 pc 2 6’ VGA cable (male to male) x 1pc 3 User manual x 1pc 4 Power cord x 1pc 5 Auto switch power adapter x 1pc i-Tech Company LLC TOLL FREE: (888) 483-2418 • EMAIL: info@itechlcd.com • WEB: www.iTechLCD.com... - Page 12 Apply power to connected devices again only after the Rackmount LCD Drawer is receiving power. The company is not responsible for damage caused in this way. i-Tech Company LLC TOLL FREE: (888) 483-2418 • EMAIL: info@itechlcd.com •...
-
Page 13: Chapter 3 Installation
Chapter 3 HNPW719 ■ Install each screws shown in Figure 3. Figure 1. ■ Fixed the LCD into the rack. * M6 screws are not provided. Figure 4. i-Tech Company LLC TOLL FREE: (888) 483-2418 • EMAIL: info@itechlcd.com • WEB: www.iTechLCD.com... -
Page 14: Chapter 4 Installation
* M6 screws are not provided. shown in Figure 4. Figure 7. Figure 8. ■ Push the lower part of the LCD into the rack. ■ Installation completed. i-Tech Company LLC TOLL FREE: (888) 483-2418 • EMAIL: info@itechlcd.com • WEB: www.iTechLCD.com... -
Page 15: Package Contents
5 Power cord x 1pc 6 Mounting bracket x 2 pcs 7 M6*15mm screw x 8 pcs 8 M6 cage nut x 8 pcs 9 Cup washer x 8 pcs i-Tech Company LLC TOLL FREE: (888) 483-2418 • EMAIL: info@itechlcd.com • WEB: www.iTechLCD.com... -
Page 16: Structure Diagram
Apply power to connected devices again only after the Rackmount LCD Drawer is receiving power. The company is not responsible for damage caused in this way. i-Tech Company LLC TOLL FREE: (888) 483-2418 • EMAIL: info@itechlcd.com •... -
Page 17: How To Install "One Man" Installation Slides
■ Insert the LCD keyboard drawer into the mounting bracket. ■ Pull and hold the left & right black arrow buttons on the rails. ■ Return the LCD keyboard drawer to park position. i-Tech Company LLC TOLL FREE: (888) 483-2418 • EMAIL: info@itechlcd.com • WEB: www.iTechLCD.com... - Page 18 ■ M6 screw and cup washer x 2 pcs included. Complete the installation ■ Tighten all 8 pcs of M6 screw to complete the installation. i-Tech Company LLC TOLL FREE: (888) 483-2418 • EMAIL: info@itechlcd.com • WEB:...
- Page 19 Figure 10 ■ Push the LCD keyboard drawer into the rack. (shown in Figure 11). Caution : Keep your fingers away from the slide top Figure 11 i-Tech Company LLC TOLL FREE: (888) 483-2418 • EMAIL: info@itechlcd.com • WEB: www.iTechLCD.com...
-
Page 20: Hnvp117 & Hnvp119
5 Auto switch power adapter ( for external power version) x 1pc 6 Mounting bracket x 2 pcs 7 M6*15mm screw x 8 pcs 8 M6 cage nut x 8 pcs 9 Cup washer x 8 pcs i-Tech Company LLC TOLL FREE: (888) 483-2418 • EMAIL: info@itechlcd.com • WEB: www.iTechLCD.com... -
Page 21: Optional Accessories
1 LCD interchangeable module kit 4 Micro-switch for LCD auto ON / OFF 2 LCD membrane 5 Membrane switch (KVM option) 3 “One Man” Installation Slides 6 Keyboard & mouse i-Tech Company LLC TOLL FREE: (888) 483-2418 • EMAIL: info@itechlcd.com • WEB: www.iTechLCD.com... -
Page 22: How To Install "One Man" Installation Slides
■ Insert the LCD keyboard drawer into the mounting bracket. ■ Pull and hold the left & right black arrow buttons on the rails. ■ Return the LCD keyboard drawer to park position. i-Tech Company LLC TOLL FREE: (888) 483-2418 • EMAIL: info@itechlcd.com • WEB: www.iTechLCD.com... - Page 23 ■ M6 screw and cup washer x 2 pcs included. Complete the installation ■ Tighten all 8 pcs of M6 screw to complete the installation. i-Tech Company LLC TOLL FREE: (888) 483-2418 • EMAIL: info@itechlcd.com • WEB:...
-
Page 24: How To Use The Slides
Figure 13 ■ Push the LCD keyboard drawer into the rack. (shown in Figure 14). Caution : Keep your fingers away from the slide top Figure 14 i-Tech Company LLC TOLL FREE: (888) 483-2418 • EMAIL: info@itechlcd.com • WEB: www.iTechLCD.com... -
Page 25: Use Ne-6 To Connect To Server Via Ps/2 Interface
Apply power to connected devices again only after the LCD keyboard is receiving power. The company is not responsible for damage caused in this way. i-Tech Company LLC TOLL FREE: (888) 483-2418 • EMAIL: info@itechlcd.com •... -
Page 26: Nvp117 / 119 Series (Single Console)
Apply power to connected devices again only after the LCD keyboard is receiving power The company is not responsible for damage caused in this way i-Tech Company LLC TOLL FREE: (888) 483-2418 • EMAIL: info@itechlcd.com •... -
Page 27: Keyboard & Mouse
HNP717 / 819 / HNPW719 / 822 / HNP117 / 119 / HNVP117 / 119 User Manual 5.10 Keyboard & Mouse Chapter 5 For HNVP117 / 119 Supporting layouts e keyboard integrated with touchpad b keyboard integrated with trackball i-Tech Company LLC TOLL FREE: (888) 483-2418 • EMAIL: info@itechlcd.com • WEB: www.iTechLCD.com... -
Page 28: On-Screen Display Operation
HNP717 / 819 / HNPW719 / 822 / HNP117 / 119 / HNVP117 / 119 User 6.1 On-screen display Operation Chapter 6 HNP717 & HNP819 HNPW719 & HNPW822 HNP117 & HNP119 HNVP117 & HNVP119 membrane Membrane Switch Function Power light... -
Page 29: On-Screen Menu
Audio: To enter into volume, bass, treble, balance, AVL and mute Misc: To enter into the language, OSD position, graphic mode, OSD time, ratio, reset and timer i-Tech Company LLC TOLL FREE: (888) 483-2418 • EMAIL: info@itechlcd.com • WEB: www.iTechLCD.com... -
Page 30: Lcd Specification
HNP717 / 819 / HNPW719 / 822 / HNP117 / 119 / HNVP117 / 119 User Manual 7.1 LCD Specifications Chapter 7 HNP717 & HNP819 HNVP117 &HNVP119 HNP117 & HNP119 Item Description LCD Grade Grade A industrial TFT LCD panel Diagonal Size 17"... - Page 31 Resistive & capacitive Environmental Operation 0˚ to 50˚C Degree Storage -5˚ to 60˚C Degree Relative Humidity 5~90%, non-condensing Shock 10G acceleration (11ms duration) Vibration 5~500Hz 1G RMS random vibration i-Tech Company LLC TOLL FREE: (888) 483-2418 • EMAIL: info@itechlcd.com • WEB: www.iTechLCD.com...
-
Page 32: Dvi-D Option
HNP717 / 819 / HNPW719 / 822 / HNP117 / 119 / HNVP117 / 119 User Manual 8.1 DVI-D Option Chapter 8 HNP717 & HNP819 HNPW719 & HNPW822 DVI-D Power Remarks: ■ Package includes 1 x 6ft DVI-D cable HNP117 & HNP119 HNVP117 &... -
Page 33: Bnc + S-Video Option
HNP717 / 819 / HNPW719 / 822 / HNP117 / 119 / HNVP117 / 119 User Manual 8.2 BNC + S-Video Option Chapter 8 HNP717 & HNP819 HNPW719 & HNPW822 S-Video Power HNP117 & HNP119 HNVP117 & HNVP119 Power S-Video Remarks: ■... -
Page 34: Audio Option
HNP717 / 819 / HNPW719 / 822 / HNP117 / 119 / HNVP117 / 119 User Manual 8.3 Audio Option Chapter 8 HNP717 & HNP819 HNPW719 & HNPW822 Audio Power Remarks: ■ Audio input is 35mm audio plug ■ The speaker is sharing the same power with LCD. - Page 35 8.3 Audio Option Chapter 8 HNP117 & HNP119 Power Audio Remarks: ■ Audio input is 35mm audio plug ■ The speaker is sharing the same power with LCD. i-Tech Company LLC TOLL FREE: (888) 483-2418 • EMAIL: info@itechlcd.com • WEB: www.iTechLCD.com...
- Page 36 8.3 Audio Option Chapter 8 HNVP117 & HNVP119 Power Audio Remarks: ■ Audio input is 35mm audio plug ■ The speaker is sharing the same power with LCD. i-Tech Company LLC TOLL FREE: (888) 483-2418 • EMAIL: info@itechlcd.com • WEB: www.iTechLCD.com...
-
Page 37: Touchscreen Options
HNP717 / 819 / HNPW719 / 822 / HNP117 / 119 / HNVP117 / 119 User Manual Chapter 9 9.1 Touchscreen Options HNP717 & HNP819 HNPW719 & HNPW822 USB interface Power Serial interface Serial Power HNP117 & HNP119 USB interface... - Page 38 ■ For detailed information, please refer to the attached CD disc ■ As the touchscreen unit is not made of toughened glass, please handle it carefully. ■ Touchscreen in other brands are available on request i-Tech Company LLC TOLL FREE: (888) 483-2418 • EMAIL: info@itechlcd.com •...
- Page 39 HNP717 / 819 / HNPW719 / 822 / HNP117 / 119 / HNVP117 / 119 User Manual 10.1 Front NEMA4 / IP65 Option Chapter 10 HNP717 & HNP819 HNPW719 & HNPW822 1 Rear case 2 LCD panel 3 4mm protective glass (Front NEMA 4 / IP65 protection)
-
Page 40: Quad Display Option
Built-in Buzzer Key Lock Remarks ■ For more details, please refer to Quad Display User Manual. ■ Quad display input is not applicable for HNVP117 / 119 series. i-Tech Company LLC TOLL FREE: (888) 483-2418 • EMAIL: info@itechlcd.com • WEB: www.iTechLCD.com... -
Page 41: Dc Power Options
HNP717 / 819 / HNPW719 / 822 / HNP117 / 119 / HNVP117 / 119 User Manual Chapter 12 12.1 DC Power Options HNP717 & HNP819 HNPW719 & HNPW822 DC Power input HNP117 & HNP119 DC Power input HNVP117 & HNVP119... -
Page 42: Dimensions
HNP717 / 819 / HNPW719 / 822 / HNP117 / 119 / HNVP117 / 119 User Manual 13.1 Dimensions Chapter 13 HNP717 & HNP819 HNPW719 & HNPW822 HNP117 & HNP119 HNVP117 & HNVP119 Product Dimension Packing Dimension Model Net Weight... -
Page 43: Troubleshooting
The company reserves the right to modify product specifications without prior notice and assumes no responsibility for any error which may appear in this publication. All brand names, logo and registered trademarks are properties of their respective owners. Copyright 2009 i-Tech Company LLC. All rights reserved. i-Tech Company LLC TOLL FREE: (888) 483-2418 • EMAIL: info@itechlcd.com...
Need help?
Do you have a question about the HNP819 and is the answer not in the manual?
Questions and answers