Advertisement
Available languages
Available languages
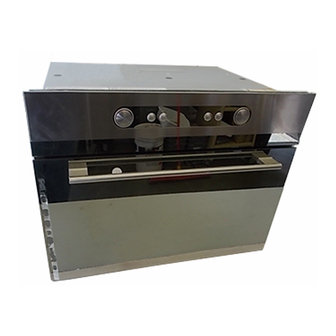
BUILT-INMICROWAVE OVEN
INSTALLATION INSTRUCTIONS
24" (61.0 cm) or 30" (76.2 cm)
This product is suitable for use above electric or gas built-in ovens, and below non-vented electric or gas cooktops. This product is not
suitable for use below downdraft
cooktops.
These installation instructions
cover different models. The appearance of your particular model may differ slightly from the illustrations
in these Installation Instructions.
INSTRUCTIONS D'INSTALLATIONDr) FOUR
MICRO-ONDES
ENCASTRE
24" (61,0 cm) ou 30" (76,2 cm)
Ce produit convient a une utilisation au-dessus de fours encastres electriques ou & gaz, et au-dessous de tables de cuisson
electriques ou & gaz sans decharge a I'exterieur. Ce produit ne convient pas a une utilisation au-dessous
de tables de cuisson avec
extraction par le bas.
Ces instructions
d'installation sont valables pour plusieurs modeles. II se peut que I'apparence de votre propre modele soit legerement
differente de celle illustree dans ces Instructions d'installation.
Table of Contents / Table des mati@res
BUILT-IN MICROWAVE OVEN SAFETY .................................
1
INSTALLATION
REQUIREMENTS
...........................................
2
Tools and Parts ......................................................................
2
Location Requirements ..........................................................
2
Minimum Dimensions .............................................................
2
Product Dimensions ...............................................................
4
Electrical Requirements
.........................................................
4
INSTALLATION
INSTRUCTIONS
.............................................
5
Install Spacer Strips ...............................................................
5
Install the Microwave Oven
(24" [61.0 cm] Installation Only) .............................................
5
Install the Microwave Oven
(30" [76.2 cm] Installation Only) .............................................
6
Complete Installation .............................................................
8
ASSISTANCE .............................................................................
8
SECURITE
DU FOUR A MICRO-ONDES
ENCASTRE ..................... 9
EXIGENCES D'INSTALLATION
..........................................................
9
Outillage et composants
..................................................................
9
Exigences d'emplacement
.............................................................
10
Dimensions minimales ...................................................................
10
Dimensions du produit ...................................................................
12
Specifications
elect riques ..............................................................
12
INSTRUCTIONS
D'INSTALLATION
.................................................
13
Installation des bandes d'espacement
..........................................
13
Installation du four & micro-ondes
(installation de 24" [61 cm] uniquement) ........................................
13
Installation du four & micro-ondes
(Installation de 30" [76,2 cm] uniquement) .....................................
14
Achever I'installation .......................................................................
16
ASSISTANCE .....................................................................................
16
BUILT-INMICROWAVE OVEN SAFETY
Your safety and the safety of others are very important.
We have provided many important safety messages in this manual and on your appliance. Always read and obey all safety
messages.
This is the safety alert symbol.
This symbol alerts you to potential hazards that can kill or hurt you and others.
All safety messages will follow the safety alert symbol and either the word "DANGER" or "WARNING."
These words mean:
You can be killed or seriously injured if you don't immediately
follow
instructions.
You can be killed or seriously injured if you don't follow
instructions.
All safety messages will tell you what the potential hazard is, tell you how to reduce the chance of injury, and tell you what can
happen if the instructions are not followed.
W10321811A
Advertisement
Table of Contents

Subscribe to Our Youtube Channel
Related Manuals for IKEA IBMS1455WW0

Summary of Contents for IKEA IBMS1455WW0
- Page 1 BUILT-INMICROWAVE OVEN INSTALLATION INSTRUCTIONS 24" (61.0 cm) or 30" (76.2 cm) This product is suitable for use above electric or gas built-in ovens, and below non-vented electric or gas cooktops. This product is not suitable for use below downdraft cooktops. These installation instructions cover different models.
-
Page 2: Installation Requirements
INSTALLATIONREQUIREMENTS t'O0_S 3_J The microwave oven may be located in a cabinet, and/or above a Tools Needed built-in oven, or below the counter and/or below a non-vented cooktop. Check the opening where the microwave oven will be Gather the required tools and parts before starting installation. installed. - Page 3 Minimum Installation C learances - continued Below Counter Installation Below Built-in Cooktop Installation ..f_,'Y (25rnm) f 3" (76 mm) See note bemow. f_,_jS_,_,H, 5/16" (8 ram) t 5/16" (8 mm) A. Cutout floor C. Countertop B. Cabinet, storage drawer, oven or warming drawer D.
-
Page 4: Grounding Instructions
17_%d ' (45.5crn)* Electrical Shock Hazard Plug into a grounded 3 prong outlet. Do not remove ground prong. Do not use an adapter. Do not use an extension cord. (59.5)cm*_ Failure to follow these instructions can result in death, fire, or electrical shock. -
Page 5: Installation Instructions
INSTALLATIONINSTRUCTIONS The provided self-adhesive spacer strips must be installed on the f'O,_" (6© ,,,+<rdt O_/yJ+' %6,+/"_' o,. %J_l l,#iJ cutout floor, as shown below. They are to be installed under the For 24" (61.0 cm) installation, the mounting brackets must be feet of the microwave oven. - Page 6 To Install Microwave Oven: Excessive Weight Hazard Use two or more people to move and install microwave oven. Excessive Weight Hazard Failure to do so can result in back or other injury. Use two or more people to move and install microwave oven.
- Page 7 8. Using 5/64" (2 mm) drill, drill pilot holes into the cabinet through the screw holes in the side brackets. 9. Install two 1" T-10 screws in the pilot holes to secure the microwave oven in place. NOTE: To ensure proper side trim panel fitting, do not overtighten screws.
- Page 8 Install the turntable in the microwave oven. 3. If the microwave oven does not operate: Check the operation of microwave oven by placing 1 cup • Check that a household fuse has not blown, or a circuit (250 mL) of water on the turntable and programming cook breaker tripped.
-
Page 9: Exigences D'installation
SECURITE DU FOURA MICRO-ONDES ENCASTRE Votre securite et celle des autres est tres importante. Nous donnons de nombreux messages de s_curit_ importants dans ce manuel et sur votre appareil m_nager. Assurez-vous toujours lire tousles messages de s_curit_ et de vous y conformer. Ce symbole d'alerte de s_curit_ vous signale les dangers potentiels de d_c_s et de blessures graves &... - Page 10 Lefour µ-ondes peut _ tre installe d ans unplacard e t/ou au- dessus d 'unfour encastre, oubien sous lecomptoir et/ou sous Distances de d_gagement minimales d'inst_llation une table decuisson sans decharge &I'exterieur. Inspecter I'ouverture dans laquelle lefour a micro-ondes sera install& Pour une installation correcte, les distances de degagement L'emplacement d'installation...
- Page 11 Distances de d_gagement minimales d'installation (suite) Installation sous table de cuisson encastr_e Installation sous comptoir 3" (76 ram) Voir la remarque ci-apr_s. 5/16" (8 ram) A. Plancher de I'ouverture a d#couper C. Comptoir B. Placard, tiroir de remisage, four ou tiroir-r#chaud D.
- Page 12 Un fusible temporise ou un disjoncteur temporis& Un circuit distinct exclusif & ce four a micro-ondes. INSTRUCTIONS DE LIAISON LA TERRE • Pour tout appareil m(_nager connect(_ par un cordon de courant (_lectrique : II faut que le four & micro-ondes soit reli_ & la terre. En cas de court-circuit _lectrique, la liaison &...
-
Page 13: Instructions D'installation
INSTRUCTIONSD'INSTALLATION Les bandes d'espacement autoadh@sives fournies doivent @tre install@es sur le plancher de I'ouverture d@coup@e,tel qu'indiqu@ Pour I'installation de 24" (61 am), les supports de montage doivent ci-dessous. Elles doivent atre install@es sous les pieds du four atre fix@s aux 2 bords lat@raux de I'ouverture d'encastrement. micro-ondes. - Page 14 Installation du four _ micro-ondes : _'IC+ H,><£ (@S ,_,.4 _,,; qu®m®n.t Risque du poids e×cessif Utiliser deux ou plus de personnes pour d_placer installer le four a micro=ondes. Risque du poids excessif Le non=respect de cette instruction peut causer Utliser deux ou plus de personnes pour d_placer et une blessure au dos ou d'autre biessure.
- Page 15 8. A I'aide d'un foret de 5/64" (2 mm), percer des avant-trous dans le placard, & travers les trous de vis des brides laterales. 9. Fixer deux vis T-10 de 1" dans les avant-trous pour maintenir le four & micro-ondes en place. REMARQUE •...
- Page 16 1. Installer le plateau rotatif dans le four & micro-ondes. Si le four a micro-ondes ne fonctionne pas : 2. Contr61er le fonctionnement du four & micro-ondes : placer • Determiner si un fusible est grille ou si un disjoncteur s'est sur le plateau rotatif 1 tasse (250 mL) d'eau et programmer ouvert.
Need help?
Do you have a question about the IBMS1455WW0 and is the answer not in the manual?
Questions and answers