Table of Contents
Advertisement
Quick Links
Advertisement
Table of Contents

Subscribe to Our Youtube Channel
Related Manuals for Sunways PT 30k


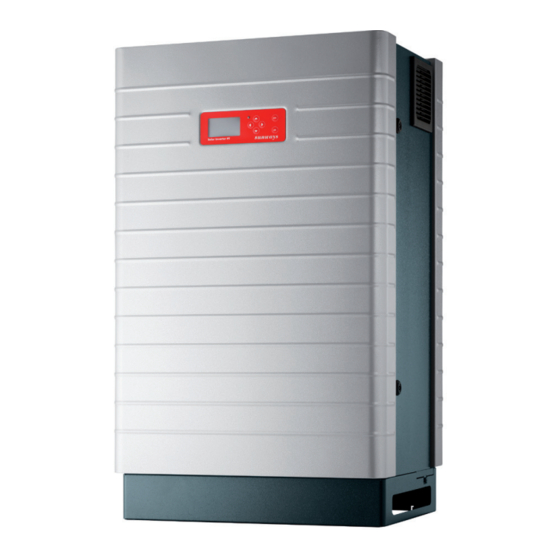
Summary of Contents for Sunways PT 30k
- Page 1 User Manual Sunways Solar Inverter PT 30k english...
- Page 2 This user manual may only be reprinted or copied in whole or in part with the express, written approval of Sunways AG. Any type of reproduction, distribution or storage on data carriers in any form and of any kind not authorised by Sunways AG represents a violation of the applicable copyright laws and will be prosecuted.
- Page 3 Introduction Thank you for purchasing a PT Series Sunways Solar This user manual contains explanations on using the Inverter, an innovative, high-quality product with Sunways Solar Inverter. You will learn to recognise unique features and a consistently high efficiency. the many possibilities of the Solar Inverter. Informa-...
-
Page 4: Table Of Contents
Content Product Description Proper use Function description Integration in solar system Solar generator configuration Standard components of a solar system Assembly description Scope of delivery Safety Precautions General safety precautions Warranty and liability Explanation of symbols and warnings Warnings and symbols used in this user manual Symbols used in this user manual Warnings and symbols on device... - Page 5 Content Commissioning Connecting and disconnecting the Solar Inverter Connecting Switching off Commissioning menu Commissioning a single device Commissioning several networked devices Operation Control elements Operator panel LCD display Keyboard Operating LED Standard screen (single device) Standard screen (system) Access rights Customer area Installer area Menu structure...
- Page 6 Content Connection via the Sunways Modem Dial-up connection from a PC to the Solar Inverter 6.10 Sunways Browser General information Access protection Overview – Menu Language selection Setting the date/time Software update 6.11 Internet dial-up via modem Modem settings E-Mail settings 6.12 Active alerting...
-
Page 7: Product Description
Proper use · Interface for connecting a irradiation and tem- perature sensor The Sunways Solar Inverter PT is the link between your solar generator and the public power grid. The energy from the connected solar generator is Data logging converted to grid-compliant AC current and fed into The PT Solar Inverter is equipped with internal data the grid. -
Page 8: Integration In Solar System
This can lead to major reductions in yield. The Sundim design program from Sunways can be used for this purpose. Sunways Sundim can be found on the enclosed CD-ROM or on our website at www.sunways.de. -
Page 9: Standard Components Of A Solar System
1 Product Description Standard components of a solar system Depending on the recommendations of your PV planning expert, your PV system consists of the fol- lowing components: 1 Solar generator 2 Generator connection box (string box) 3 Solar Inverter with integrated DC load break switch 4 Mains fuse and energy meter Options... -
Page 10: Assembly Description
1 Product Description Assembly description Scope of delivery The delivery consists of: · Sunways Solar Inverter of the PT series · CAN terminating resistor connector (connected) · Ethernet cable, 3 m (CAT 5e, 1:1) · Control cabinet key · Manual ·... -
Page 11: Safety Precautions
Safety Precautions Warranty and liability General safety precautions The Sunways AG „General Terms and Conditions of Sale and Delivery« always apply. Warranty and liabil- ity claims for personal injury or damage to property Follow the instructions in the operating manual. -
Page 12: Explanation Of Symbols And Warnings
2 Safety Precautions Explanation of symbols and warnings Warnings and symbols on device To help you quickly understand this manual and The following warnings on the housing of the Solar safely use the Solar Inverter, the following warnings Inverter point out dangers. Always observe the and symbols are used. -
Page 13: Basic Safety Measures
VDE regulations, national and other regulations. inverter controller: The Solar Inverter may only be opened by persons · DC overvoltage authorised by Sunways AG to do so. · Overvoltage L1, L2, L3 > 10% · Overvoltage L1, L2, L3 > 15% When circuit breakers are tripped, the fault cause ·... -
Page 14: Installation
Solar Inverters may not be stacked in order to prevent excessive warming. · If several PT Solar Inverters are operated in an enclosed space, adequate fresh air supply must be ensured. Larger systems should be configured in collaboration with Sunways at the design stage. -
Page 15: Installation
3 Installation Installation Electrical installation Proceed as follows to install the Solar Inverter: Cable installation 1. The Solar Inverter is attached to the pallet with retaining claws. Remove the retaining claws. Extreme danger from electric shock! · Touching live parts can result in death. ·... -
Page 16: Solar Generator Connection
3 Installation 2. Route the cable at the rear of the Solar Inverter Solar generator connection via the cable brackets. 3. Introduce the cable in the opening between the two bars. Extreme danger from electric shock! · Touching live parts can result in death. ·... - Page 17 3 Installation Overview The solar generator can be directly connected to the Solar Inverter with a string. Use the DC terminals accessible from inside for the connection. · Any kind of soiling (dust, moisture, etc.) has a negative effect on the terminals with regard to function over the intended period of use.
-
Page 18: String Box
3 Installation String box options The Sunways string box is available with the follow- ing options: CAUTION · for up to 8 or up to 12 PV strings Please avoid squeezing the cable insulation or the · with/without DC overvoltage protection end splice. -
Page 19: Grid Connection
· PT 30k: 3 x 63 A with slow-blow characteristic C (for terminal cross-sections >= 16 mm²) A three-pin circuit breaker or individual fuses can be If the voltage on the AC connection exceeds the per- used. - Page 20 3 Installation Installation The following sequence must be observed during assembly: 1. Strip the voltage-free line and the cable ends. Extreme danger from electric shock! · Touching live parts can result in death. with end splice 15 mm · All electrical work must be carried out by a quali- without end splice 20 mm fied electrician while observing the VDE regula- tions, national and other regulations.
-
Page 21: Installing The Communication System
3 Installation Installing the communication system Networking Solar Inverters via CAN bus Interface overview The Solar Inverters can be networked with each other via the CAN bus interface. The communication interfaces are located above the AC terminals. Device 1 Device 2 ... L3 L2 L1 N PE 1 Terminating resistor connector ·... -
Page 22: S0 Interface
Temperature and irradiance sensor The S0 pulse output enables, for example, the con- The optional addition of an irradiance sensor (model nection of a large display (Sunways Display) for Si-01TC-K from Ingenieurbüro Mencke & Tegtmeyer) displaying the momentary output, the energy yields... -
Page 23: Connecting The Alarm Relay
3 Installation Assignment of sensor connection Wiring diagram for a single device Sensor Sensor Solar Inverter connector pin connection connection assignment designation Pin 1 Plus signal Temp temperature Pin 2 Plus signal Solar irradiance Wiring diagram for several devices Pin 3 Reference earth Pin 4 Plus connection for... -
Page 24: Commissioning
Commissioning Connecting Connecting and disconnecting the Solar 1. Establish the grid connection via the external Inverter circuit breaker. 2. Switch on the solar generator voltage by closing the DC load break switch (switching position 1). The Solar Inverter starts operating when suffi- cient input voltage is available. -
Page 25: Commissioning Menu
4 Commissioning Commissioning menu Commissioning a single device The commissioning menu automatically opens the System with one Solar Inverter first time the Solar Inverter is connected. It guides you through the standard settings. Single device For a better understanding of keyboard operation, please also see the chapter Operation. -
Page 26: Commissioning Several Networked Devices
4 Commissioning Select date with . Change selected number Commissioning several networked devices with and jump to next number with System with several Solar Inverters master slaves Save the set date with then set the time accordingly. Save the set time with 5. - Page 27 4 Commissioning 3. Select «Master» with Devices = total number of devices found in CAN network, including master Confirm with In network = number of configured devices, including master After the master has found all connected slaves, The other devices in the CAN network are automati- these must be configured before commission- cally configured as slaves.
- Page 28 Confirm CAN ID with within 5 seconds. · The data for the individual slaves can be assigned in the Sunways Browser and in the menu of the master based on the IDs. · The CAN-ID 1 is automatically assigned to the master.
-
Page 29: Operation
Operation Keyboard Control elements The keyboard can be used to navigate in the menu, edit text fields, select entries from lists and enter numbers consecutively and digit by digit. User Operator panel entries can only be made if the value to be changed The Solar Inverter is controlled via the operator is selected. -
Page 30: Standard Screen (Single Device)
5 Operation Standard screen (single device) Standard screen (system) The standard screen is always shown when no This screen shows the system data for a CAN-net- keyboard entry is made for more than 1 minute. It worked system. can also be called up manually with the menu item «Solar Inverter –... -
Page 31: Access Rights
The password has 8 digits or characters. password from the Technical Hotline. These pass- The password can be entered in the menu item «Set- words are only relevant for the Sunways Browser. All tings – Login». commissioning procedures are accessible from the customer area. -
Page 32: Menu Structure
5 Operation Menu structure The menu provides access to all Solar Inverter screens. Open the main menu by pressing the left arrow key twice from the standard screen. START Standard screen Instantaneous value 1 Instantaneous value 2 Cooling system Yield for week Yield for 15 days Yield for month Total output... -
Page 33: Overview Of Screen Displays
5 Operation Overview of screen displays Display Description Menu selection Instantaneous values – Device Current feed-in power, daily energy The screen appears automatically it no yield and device status key is pressed within 1 minute. MPP: Feeding in MPP mode Solar Inverter –... - Page 34 5 Operation Display Description Menu selection Events – Device Select start data for event display Solar Inverter – Events Display event list Solar Inverter – Momentanwerte – The event list shows the last 100 sy- stem messages from the start date. The heading always refers to the se- lected event.
- Page 35 5 Operation Display Description Menu selection DC voltage (5-min. values) Solar Inverter – History – DC output DC current (5-min. values) Solar Inverter – History – DC values – AC current L1 (5-min. values) Solar Inverter – History – AC values AC current L2 (5-min.
- Page 36 5 Operation Display Description Menu selection Instantaneous values – Solar system (display only available on master) Current system feed-in power, daily The screen automatically appears on energy yield and system status the master if no key is pressed for several minutes. Solar system –...
- Page 37 5 Operation Display Description Menu selection History – Solar system (display only available on master) Solar system daily yield for 1 week Solar system – System history – Yield for week Solar system daily yield for 15 days Solar system – System history –...
- Page 38 5 Operation Display Description Menu selection Memory card Solar system – System info – Memory Device mode Solar system – System info – Mode Settings – General Display language Settings – General – Language LCD contrast Settings – General – LCD contrast Set date/time Settings –...
- Page 39 5 Operation Display Description Menu selection Settings – Login Password entry to access advanced set- Settings – Login tings (necessary for commissioning) Settings – Network (only possible with customer password) Setting of the irradiation and temper- Settings – Network – Interfaces ature sensor and configuration of the S0 pulse output Network settings (Screen 1): Activate...
-
Page 40: Fault Displays
Display message Description Cause and possible remedies Solar generator fault 101:U-DCmax Your PT 30k Solar Inverter is approved The maximum DC voltage was exceeded. for a maximum solar generator open- circuit voltage of 1000 V. All DC input · Check the dimensioning of your PV components are adequately dimensioned generator. -
Page 41: Ac Network Fault
>30 mA or an absolute fault insulation faults. current of >300 mA. 105:I-DC max. Your PT 30k Solar Inverter is approved The maximum solar generator current for a maximum DC current of 75 A. permitted for the inverter was reached. - Page 42 5 Operation Display message Description Cause and possible remedies 210:UAC1>10% AC overvoltage warning · Ask your power supply company (PSC) 211:UAC2>10% This warning appears if a voltage of about grid stability and design. 212:UAC3>10% more than 253 V (+10%) is measured (Warnings) on a mains phase.
-
Page 43: Inverter Fault
· Follow the installation notes in the manual. 304:Mains rel.. The PT 30k Solar Inverter checks the · Restart the Solar Inverter. operation of the mains relay prior to every switch-on. An error was detected If the error still occurs, please contact the during this check. -
Page 44: Interface/Communication Fault
5 Operation Display message Description Cause and possible remedies Interface/communication fault 401:SD Card The Solar Inverter cannot find an SD · Restart the Solar Inverter. card. If the error still occurs, please contact the Technical Hotline. The phone number is provided on the back of the manual. - Page 45 (Warning) · Check the connection to the sensor. If no sensor is connected: · Check the sensor input configuration via the LCD display or the Sunways Browser. 408:CAN comm. Communication malfunctions occur A malfunction occurs in the data trans- (Warning) repeatedly on the CAN bus.
- Page 46 Cause and possible remedies 413:DNS failed Warning: DNS has failed (413). Communication fault between the integrated web server and an Internet browser in conjunction with the Sunways 414:HTTP Con. Warning: HTTP client connection has Browser. failed (414). These warnings are non-critical and can be ignored if they only occur 415:HTTP Aut.
-
Page 47: Service Fault
5 Operation Display message Description Cause and possible remedies Service fault 9xx: Service A service fault has occurred. · Disconnect the Solar Inverter from fault the grid and from the solar generator 9xx: Service and reconnect it. warning If the error occurs again, please contact the Technical Hotline. -
Page 48: System Monitoring
Via the Sunways Portal connection the PT Solar 2000 DC voltage Inverter can send the operating data of your 2000 AC current L1 solar system to the Sunways Portal on a daily 2000 AC current L2 basis without additional hardware. This enables 2000 AC current L3 you to track your yields via the Internet. -
Page 49: Direct Ethernet Connection
6 System monitoring Direct Ethernet connection The Solar Inverters are equipped with an Ethernet interface as standard for system monitoring and configuration with a PC. Connect your PC and the Solar Inverter with a crossed or 1:1 Ethernet connection cable of the type CAT5 with RJ45 sockets (automatic detection) or with the Ethernet cable provided. -
Page 50: Network Settings On Solar Inverter
6 System monitoring Network settings on Solar Inverter After the network configuration is completed you can start the Sunways Browser by entering the IP address of the Solar Inverter in the address line of your web browser. · The Solar Inverter is supplied with the following, preset IP address: 192.168.30.50... -
Page 51: Network Settings On The Pc
6 System monitoring Network settings on the PC 5. Select «Internet Protocol (TCP/IP)» and click «Properties» again. To enable your PC to communicate with the Solar Inverter certain network settings are required. The procedure differs slightly depending on the operating system. A configuration example for Windows XP is shown below.. - Page 52 8. In the «Status» menu item you can check the After the network configuration is completed you correctness of your entries and the status of your can start the Sunways Browser by entering the IP connection address of the Solar Inverter in the address line of your web browser.
-
Page 53: Connection Via An Existing Ethernet
Ask your network administrator for suitable settings for IP address, net mask and gateway. After the network configuration is completed you can start the Sunways Browser by entering the IP address of the Solar Inverter in the address line of your web browser. -
Page 54: Access Via Dsl Router
Solar Inverter distances during system monitoring and configura- accessible via the Internet. tion. Connect the Sunways Modem with the Solar Inverter. The Sunways Modem is available as an Requirement: analog, ISDN and GSM type. -
Page 55: Dial-Up Connection From A Pc To The Solar Inverter
6 System monitoring Connecting a Sunways Modem Dial-up connection from a PC to the Solar Inverter To establish a connection between your Solar INVERTER Inverter and a PC via the modem you have to estab- lish a dial-up connection in Windows. The procedure under Windows XP is described below. - Page 56 (Alter- natively via the icon on your desktop or via Start – Settings – Network Connections). Further settings are required in the «Properties» section. 6. Specify the phone number for your Sunways Solar Inverter.
- Page 57 12. Click «Dial» to establish the connection. After Obtain DNS server address automatically the connection is established you can start the Sunways Browser by entering the IP address of the Solar Inverter in the address line of your web browser.
-
Page 58: 6.10 Sunways Browser
Sunways General information Browser) and the control software (control and monitoring) The Sunways Browser can be called up via a stand- ard Internet browser, e.g. Mozilla Firefox. One of the four possible connections between a PC and the Access protection... -
Page 59: Overview - Menu
The software update is used to extend the func- tionality of your Solar Inverter. The communication software (responsible for LCD display, interfaces, communication and Sunways Browser) and the control software or the monitoring software can be updated. 1. Select «Settings – Software Update». This func-... -
Page 60: 6.11 Internet Dial-Up Via Modem
If a new version is available on our website (www.sunways.de), you can Modem settings download the file and load it via the Sunways Browser. Select the file on your hard disk via the If you use a modem to connect to the Internet, the «Browse...»... -
Page 61: E-Mail Settings
To enable the Solar Inverter to send E-mails, the E-mail settings must be stored via the Sunways · If the configured SMTP server does not use a Browser. The settings can be accessed via «Settings –... -
Page 62: 6.12 Active Alerting
Activation or deactivation of the active alerting · Correct e-mail settings must be stored in the function. Sunways Browser (see «Email settings»). Email address In the «Email address» field enter the e-mail address to which messages should be sent. Function buttons Click «Send»... -
Page 63: 6.13 Sunways Portal Connection
Sunways Portal. After activation the operating data are e-mailed to the Sunways Portal on a daily basis before the master is switched off for the night. Alternatively a shorter interval can be selected. If a change is made to your solar system (e.g. - Page 64 Click «Send» to save the settings in the Solar Inverter. To view your system data in the Sunways Portal, you require a user account. This will be issued to you if you follow the link in the confirmation e-mail and fill out the registration form.
-
Page 65: Maintenance
Maintenance Servicing interval Servicing schedule The PT 30k Solar Inverter must be serviced annually. The first service should be carried out no later than Regular maintenance is required in order to ensure sound operation of the Solar Inverter. Maintenance 12 months after commissioning. -
Page 66: Maintenance Tasks
7 Maintenance Maintenance tasks Inverter 1. Clean the filters. If the filters are too dirty Wiring replace them. Visual inspection and measurement of all AC and DC cables between the module and the public grid of In each case two filter mats at the top (only for the energy supplier (terminals and transitions). -
Page 67: Appendix
Appendix Technical data Article no. SI330P11A IP42 protection class SI330P21A IP42 protection class, with DC overvoltage protection SI330P31A IP54 protection class SI330P41A IP54 protection class, with DC overvoltage protection DC Input Rated DC power 31000 W 75,0 A Maximum DC current 700 V Nominal DC voltage MPP voltage range... - Page 68 Display LCD, backlit, 128 x 64 pixels Plant supervision active alarm via e-mail, Sunways Browser, Sunways Portal Power supply unit protected on PCB T2A/250 V IP 42 / IP 54 (optional) IP degree of protection according to IEC 60529 Max.
-
Page 69: Derating Curves
The derating curves describe the relationship between the AC output power of the Solar Inverter and the ambient temperature. The AC output power decreases with increasing ambient temperature. Derating curves PT 30k 30 kW 500 V – IP54 29 kW 700 V –... -
Page 70: Installation Methods And Cable Cross-Sections
8 Appendix Installation methods and cable cross-sections This IS an overview of the content of DIN 0294-8/ EN60204-1. The information contained in the stand- ard is relevant and must be used. · The data are based on an ambient temperature of 30°C according to test conditions and a cable temperature of up to 70°C. - Page 71 8 Appendix Installation method Diagram Rated current for the LS switch 10 mm 16 mm 25 mm Installation method C 63 A* 80 A 100 A · Direct installation on or in walls/slabs or in cable troughs · Multi-core or sheathed cables Installation method E 63 A*...
-
Page 72: General Liability Disclaimer
Sunways AG and the Sunways licensors. Registered trademarks The Sunways logo is a registered trademark of Sun- ways AG, Konstanz. HERIC is a registered trademark of Fraunhofer ®... - Page 73 C&F | Werbung und Dokumentation, Villingen-Schwenningen · www.cundf.de...
- Page 74 Sunways AG Photovoltaic Technology Macairestraße 3 - 5 78467 Konstanz Germany Phone +49 (0)7531 996 77-0 Fax +49 (0)7531 996 77-444 email info@sunways.de www.sunways.de Technical Hotline Germany: +49 (0)7531 996 77-577 Spain: +34 93 665 20-40...
Need help?
Do you have a question about the PT 30k and is the answer not in the manual?
Questions and answers