
Related Manuals for Kaon KSF-A3200HR


Summary of Contents for Kaon KSF-A3200HR
- Page 1 A_ENG_110944 User’s Manual Digital Satellite Receiver Please read the entire manual thoroughly and retain it for future reference. ENG - 1...
-
Page 2: General Safety
General Safety Warning CAUTION RISK OF ELECTRIC SHOCK DO NOT OPEN CAUTION : To reduce the risk of electrical shock, do not remove the cover. No user serviceable parts inside. Refer any servicing to qualified Service personnel. • Always follow these instructions to avoid the risk of injury to yourself or damage to your equipment. •... -
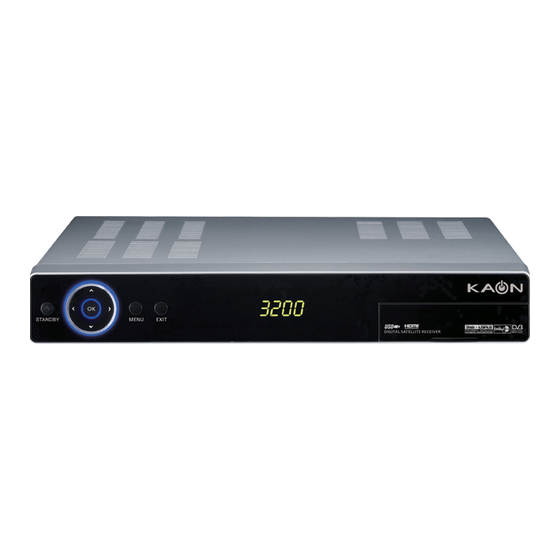
Page 3: Front Panel
Front Panel 1. STANDBY 5. MENU To see main menu. Switches the receiver to Standby Mode or Operation 6. EXIT Exit from parameter and cancel selected Mode function. 2. VOL ◄/ ► 7. SEG. DISP. Press to adjust the volume or select a menu item. 4-digit 7-segment display channel information. -
Page 4: Remote Control
Remote Control STAND BY MUTE NUMERIC BUTTON TV/STB TV/RADIO EXIT MULT VIEW RECORDED LIST MENU Left/Right/Up/Down CH Up/Down VOL Up/Down Pause Play Quick Replay Quick Forward Record Stop SUB-T(RED) INFO(BLUE) SORT(GREEN) TIMER(YELLOW) P.STD SLEEP RECALL AUDIO TEXT P.SIZE MUTE To enable or disable audio. STAND BY To switch between operation and stand by mode. -
Page 5: Menu Application
Connection 1. To Connect Satellite Antenna LNB cable (Diseqc 1.0 /Diseqc 1.2) Connect the Satellite antenna cable to LNB IN. 2. Loop Through Connect co-axial cable to the Loop Through on the STB to give signal to other STB. Made by Kaonmedia 3. - Page 6 Easy Installation Press the MENU button. Press the ▲/▼ buttons to select the desired item on the basic setting screen. 1. Satellite List Edit : Press the RED button, you can edit satellite name and satellite longitude. : Press the GREEN button, you can enter add satellite menu.
-
Page 7: Basic Function
Basic Function 1. Program Information Banner After the television channels have been programmed, you will see the information box each time you change the channels. Note In full screen, press BLUE button can open infomation banner and infomation box, in the windows shows the parameter of current channel. -
Page 8: System Setup
System Setup If you want to customize the system to suit you better, you can specify some settings from the submenus in the System Setting menu. Note At the System Menu list, press OK button and sub list will appear in a pop-up window. - Page 9 Tools Information Displays the system information: MODEL name, S/W, H/W, Loader version. Factory Reset Use this option only if you have to start the complete installation procedure from scratch. If you continue from here, all your previous settings and all channels will be cleared! The default data will be loaded.
- Page 10 PVR - Recording and Playing back You must connect external hard disk drive (HDD) to this receiver to record or play back programme Basic Function by PVR function. USB HDD 2.0 support Range of Time Shift/Recording (in external HDD) Disk free size Time shift size Recording size below 200MB...
- Page 11 Record Manager You can edit the recording list such as rename, lock, and delete. • To change file names. Characters such as Rename (Red button): 0~9 and A~Z can be used. • To delete a file. Delete (Blue button): • To set for entering a password when you Lock (Green button):...
-
Page 12: Troubleshooting
Game Game: Tetrix, Othello. Record Manager You can edit the recording list such as rename, lock, and delete. Reservation timer You can set a programme to be recorded at a specific time. HDD Information You can see external HDD information. HDD Format You can format the external HDD.
Need help?
Do you have a question about the KSF-A3200HR and is the answer not in the manual?
Questions and answers