Table of Contents
Advertisement
W
W
A
T
A
T
O
'
O
'
W
N
E
R
S
W
N
E
R
S
C
C
E
R
O
N
D
E
R
O
N
D
6
0
6
0
M
M
A
N
U
A
L
A
N
U
A
L
V
V
I
T
I
O
N
I
N
G
I
T
I
O
N
I
N
G
S
S
E
R
I
E
S
E
R
I
E
S
I
I
A
N
D
N
S
T
A
N
D
N
S
T
5
.
2
5
.
2
E
R
S
I
O
N
E
R
S
I
O
N
A
A
P
P
L
I
A
N
C
P
P
L
I
A
N
C
A
L
L
A
T
I
O
N
A
L
L
A
T
I
O
N
E
E
G
G
U
I
D
E
U
I
D
E
Advertisement
Table of Contents

Related Manuals for Hague Quality Water WATERMAX 60 SERIES


Summary of Contents for Hague Quality Water WATERMAX 60 SERIES
- Page 1 ’ ’...
-
Page 2: Year Limited Warranty
Hague dealer. THERE ARE NO WARRANTIES OTHER THAN THOSE DESCRIBED IN THIS WARRANTY INSTRUMENT. WaterMax 60 Series Owner’s Manual This warranty does not cover any service call or labor costs incurred with respect to the removal and replacement of any defective part or parts. -
Page 3: Table Of Contents
Iron Filter and Potassium Feeder Installation Guide ...25 Start-Up Procedures for 4-oz Potassium Permanganate Feeder ...26 Assembly and Parts ...27 Troubleshooting ...42 Reading Model Numbers ...44 Efficiency Statements...44 WaterMax ® Water Conditioner Specifications ...45 WaterMax ® Filter Specifications ...46 Certificates ...47 WaterMax 60 Series Owner’s Manual 11/10/2008... -
Page 4: Owner Information
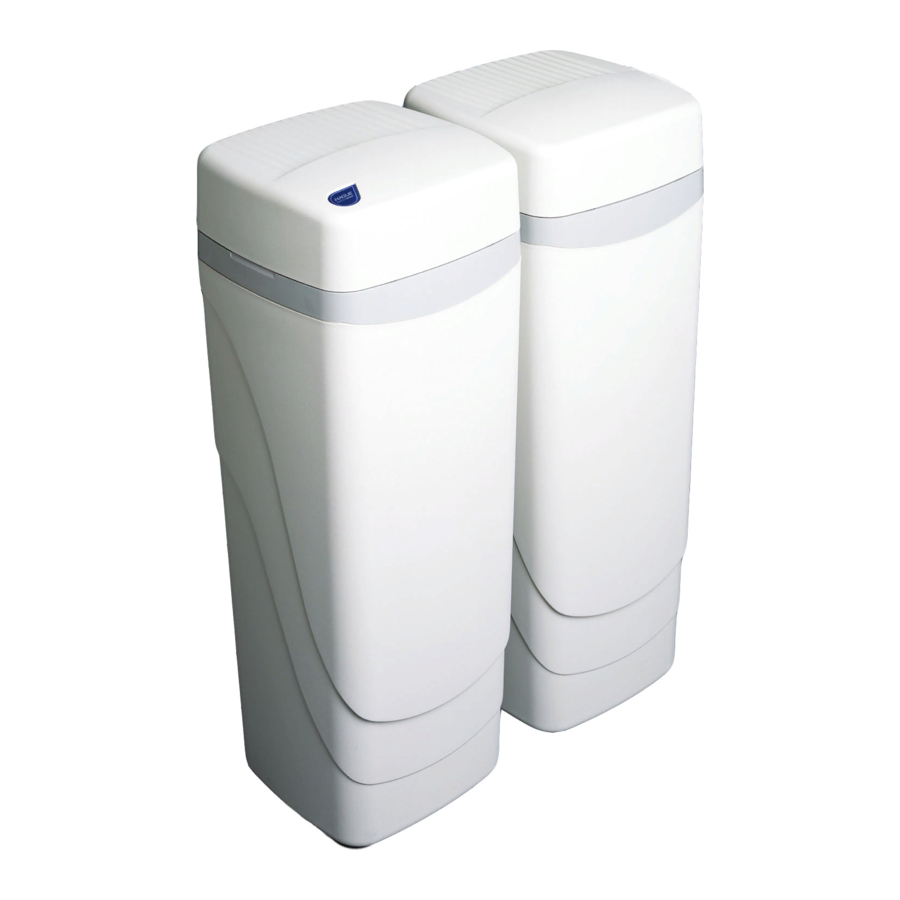
Returned Warranty Card Date: Hardness: Iron: Water Pressure: Water Temp: The serial number is located on the left front support panel. WaterMax 60 Series Owner’s Manual on choosing a superior Hague water treatment appliance! Soon you and 62AKQ 62AJQ 61AAN ®... -
Page 5: Getting Maximum Efficiency From The Appliance
An independent Hague dealer should set the Service Settings during installation of the appliance. WaterMax 60 Series Owner’s Manual The appliance may be disinfected with 5.25% sodium hypochlorite, which is the active ingredient in household chlorine bleach. To disinfect the appliance, add 4.0 fluid ounces of... - Page 6 Enters the Service Setting programming mode—for use by Hague dealer. See Service Settings Button Regenerate Button Used to start an immediate regeneration Customer Enters the Customer Setting programming mode. See Customer Settings Settings/Next Button WaterMax 60 Series Owner’s Manual Function 11/10/2008...
-
Page 7: Customer Settings
Press Change Digit repeatedly until the desired day is displayed. Press Next. The value is saved and the controller returns to Normal operating mode. Note: Whenever you experience an electrical outage, check your controller for the correct time and date. Make any necessary corrections. WaterMax 60 Series Owner’s Manual 11/10/2008... -
Page 8: Installation And Maintenance Information
See Installation Steps and Start-Up Procedures. ˆ Electricity—The transformer supplied is for a standard 115 volt, 60-cycle AC outlet for locations in North America or 220 volt, 50-cycle AC outlet for locations outside North America. WaterMax 60 Series Owner’s Manual AINTENANCE NFORMATION... -
Page 9: Precautions
Do not use to treat water that is microbiologically unsafe or of unknown quality without adequate disinfection before or after the appliance. Do not allow your appliance to freeze. Note: A bacteriostasis claim does not mean that these devices will make microbiologically unsafe water safe to consume or use. WaterMax 60 Series Owner’s Manual 11/10/2008... -
Page 10: Installation Steps And Start-Up Procedures
Ensure that the water heater has an adequately rated temperature and pressure safety relief valve. For outside installations, the appliance should be enclosed so it is protected from the weather. WaterMax 60 Series Owner’s Manual Softener Brine Tank Figure 2: Appliance Placement... -
Page 11: Turn Off Water Supply
Place the appliance in the bypass position and turn on the main water supply. Open the nearest cold water faucet to flush the plumbing of any excess soldering flux, air, or any other foreign material. WaterMax 60 Series Owner’s Manual 11/10/2008... -
Page 12: Set Up The Controller
After you add salt, including adding it after the tank has run out of salt, wait two hours for saturated brine before starting any regeneration. Caution: Use of potassium chloride when iron and/or manganese are present in the raw water supply is not recommended. WaterMax 60 Series Owner’s Manual 11/10/2008... -
Page 13: Complete The Installation
Ensure that the appliance is returned to service mode when the appliance is repaired or the use of untreated water is complete by turning the knob clockwise until it stops. Blending Valve WaterMax 60 Series Owner’s Manual Figure 3: Bypass Valve 11/10/2008 Bypass Knob... -
Page 14: Blending Valve
The cycle position will display (for example, Backwash 1). Each cycle can be advanced by pressing the Regenerate button. Always wait until the cycle position displays before advancing to the next cycle position. WaterMax 60 Series Owner’s Manual Figure 4: Regenerate Button 11/10/2008... -
Page 15: Service Settings
Model (Hist) Model number of the appliance Number 00AAA Save Saves history values History WaterMax 60 Series Owner’s Manual Meaning Possible Values Set Language English Entrer Langue Francais Entre La Lengua Español Sprache Entr. Deutsch Ambienti Lingua Italiano English... - Page 16 Compensated Compensated hardness using the Hardness 00040 hardness, iron, and manganese settings Capacity The desired capacity number Grains 28730 WaterMax 60 Series Owner’s Manual Meaning Possible Values Cannot be reset 00000–99999 Cannot be reset 00000000–99999999 Mode 1 Frequency Mode 1...
- Page 17 Used by qualified personnel for Normal diagnostic purposes Regenerate Sets the appliance to regenerate Tonight tonight WaterMax 60 Series Owner’s Manual Meaning Possible Values No (or Yes, for iron) No (or Yes if a distiller or reverse osmosis appliance is used) 00.0 to 99.9...
-
Page 18: Operating Modes
If this value is set to Yes, the appliance will be forced to regenerate every 96 hours unless a regeneration based on water usage occurs within the time interval. The value should always be set to Yes if iron is present in the water. WaterMax 60 Series Owner’s Manual Regen SMTWTFS... -
Page 19: Mode 1 (Timer Mode) Setting Chart
WQA. All other models are not tested or certified by WQA. Municipally supplied chlorinated water only. Must have a minimum of 2 ppm iron and a minimum of 200 ppm TDS. See Specifications. WaterMax 60 Series Owner’s Manual 63BEQ 63MXQ 63MDQ... -
Page 20: Mode 2 (Demand Delayed Mode) Setting Chart
NA, See Mode 1 Setting Chart. Model has no backwash flow control button or retainer. Must have a minimum of 7 gpm @ 30 psi available for proper backwash. See Mode 1 Setting Chart. WaterMax 60 Series Owner’s Manual 63BEQ 63MXQ 63MDQ 62AMQ —... -
Page 21: Salt Depths
Note: Bold numbers pertain to available settings listed under Mode 1 and 2 Service Settings. To maintain peak performance of the appliance, inspect and clean the brine tank and air check/draw tube assembly annually or when sediment is present in the brine tank. WaterMax 60 Series Owner’s Manual Mode 2 Depth (in.) -
Page 22: 62Ajq Replenishment Procedure
Measured freeboard Minus factory freeboard Adjusted freeboard Replenishment equals 5 lb media x 2" (adjusted freeboard) = 10 lb media. WaterMax 60 Series Owner’s Manual 1/2" siphon hose Funnel with 1" fill tube 12" wooden ruler or dowel rod 3/4" socket 6-3/4"... -
Page 23: Check For Leaks
Check for Leaks Step 7 Turn on the water to re-pressurize the appliance. Check for leaks. Fix any leaks. The following pages provide information about the WaterMax Feeder. WaterMax 60 Series Owner’s Manual ® Iron Filter and Potassium Permanganate 11/10/2008... -
Page 24: 61Aan Watermax ® Iron Filter Sizing Formula
÷ Frequency of regeneration = Regenerations per month x 4 oz per regeneration = oz KMnO per month ÷ 16 = lb per month Notes: WaterMax 60 Series Owner’s Manual ® Iron Filter Sizing Formula. Water ____ ppm 3.5 ppm x 1 = ____ ppm 0.2 ppm x 3 =... -
Page 25: Iron Filter And Potassium Feeder Installation Guide
Caution: Do not adjust the float assembly. This feeder is preset for a 4-ounce feed of potassium permanganate. Use care when working with potassium permanganate. Follow instructions printed on the cover of the feeder as well as the instructions on the potassium permanganate container. WaterMax 60 Series Owner’s Manual 11/10/2008... -
Page 26: Start-Up Procedures For 4-Oz Potassium Permanganate Feeder
Regenerate the iron filter immediately to charge the manganese greensand. To start a regeneration, push and hold the Regenerate button until the controller displays “Going to.” Complete the Installation Step 7 See Installation Steps and Start-Up Procedures—Step 13. WaterMax 60 Series Owner’s Manual ) to the feeder. Coarse granular 11/10/2008... -
Page 27: Assembly And Parts
PVC Adapter (optional) 90258 Copper Adapter, 1" (optional) 90251 Bypass Nut C0700A Cabinet Overflow 93245 12V Transformer/Power Cord 54500 6 Button Control Assembly 54003 Cabinet WaterMax 60 Series Owner’s Manual Figure 8: Controller Tab Lock Detail Description 11/10/2008 Incorrect Correct Quantity... -
Page 28: Brine Tank Assembly
Safety Shutoff Assembly (See Figure 17) 54007 Support Panel (BT) C0700A Cabinet Overflow 54008 Brine Well 54009 Grid Plate 54003 Cabinet 54509 Entire Assembly (all of the above parts) WaterMax 60 Series Owner’s Manual Figure 10: Potassium Permanganate Feeder (P/N PT1424) Description 11/10/2008 Quantity... -
Page 29: Cabinet And Assemblies
90615 93833 90828 95301T-JG 95302T-BWO 54003 93501 54508 54514 54516 54005 WaterMax 60 Series Owner’s Manual Figure 11: Cabinet and Assemblies Description Screw Screw Drain End Cap Assembly (See Figure 16) O-Ring Sleeve Fill Plug O-Ring O-Ring Bypass Assembly (See Figure 13) -
Page 30: Injector Assembly
93223 Injector Throat 93220 Injector Seal (Thick) 93221 Injector Nozzle 93232 Top Injector Seal (Thin) 93222 Injector Cap 90807 Screw 93501 Entire Assembly (all of the above parts) WaterMax 60 Series Owner’s Manual Figure 12: Injector Assembly Description 11/10/2008 Quantity... - Page 31 93222 Injector Cap Holds the injector assembly together and seals the assembly to the Main Valve Body. The four machine screws should be tightened evenly and be “snug.” WaterMax 60 Series Owner’s Manual 11/10/2008...
-
Page 32: Bypass Assembly
Test Port Valve 90812 Tubing 4.0" 90221 Bypass Piston Knob, blue 93860 Turbine Sensor Wire 90809 Screw 90522 Turbine Assembly 93838 O-Ring 90615 Entire Assembly (all of the above parts) WaterMax 60 Series Owner’s Manual Figure 13: Bypass Assembly Description 11/10/2008 Quantity... - Page 33 The turbine must have a 1/8" diameter Rare Earth magnet pressed into place adjacent to the axle Assembly opening. When assembled to the axle, the Turbine should spin freely. Do not use any lubricants. If the Turbine should become “jammed,” clean and flush the Turbine and Bypass Valve. WaterMax 60 Series Owner’s Manual 11/10/2008...
-
Page 34: Drive End Cap Assembly
53522 Drive Piston Assembly (includes 93839 Drain Gasket) 93839 Drain Gasket 95301T-JG Drive End Cap Assembly (all of the above parts except 1, 2, and 13) WaterMax 60 Series Owner’s Manual Figure 14: Drive End Cap Assembly Description 11/10/2008 Quantity... - Page 35 The Drive Piston attaches to the Piston Slide (54202) by placing the “slot” of the Piston onto the Piston Assembly matching flat of the Slide. To remove Piston, rotate Piston 90° counterclockwise. To replace Piston, rotate 90° clockwise until you hear an audible “click.” See reference drawings below. WaterMax 60 Series Owner’s Manual 11/10/2008...
-
Page 36: Brine Valve Housing Assembly
0.5 gpm Flow Control 93805 O-Ring 93247 Housing End Cap 90818 Screw 200199 3/8" Locking Clip 93601-JG Entire Assembly (all of the above parts) WaterMax 60 Series Owner’s Manual Concave side Figure 15: Brine Valve Housing Assembly Description 11/10/2008 Quantity... - Page 37 Cap and Housing. Place the O-Ring into the housing opening, lubricate with silicone grease and then using a twisting action, pressure insert the Cap. Caution: The 3/8" locking clip (200199) must be installed to prevent air from being drawn into the appliance during brine rinse. WaterMax 60 Series Owner’s Manual 11/10/2008...
-
Page 38: Drain End Cap Assembly
(90268), the retainer should be screwed in until it stops. If the retainer is not fully engaged, the Flow Control may not function properly. *Must specify drain line flow control size. XX Indicates the back wash flow rate in gpm. Example: 90614-2.4 WaterMax 60 Series Owner’s Manual Figure 16: Drain End Cap Assembly Description... -
Page 39: Safety Shutoff Assembly
Assembly and Parts, Cont. Safety Shutoff Assembly Part # 54226 Safety Shutoff (See Figure 18) 56018 Float 54225 Air Check/Draw Tube 54525 Entire Assembly (all of the above parts) WaterMax 60 Series Owner’s Manual Figure 17: Safety Shutoff Assembly Description 11/10/2008 Quantity... - Page 40 When connecting the 3/8" poly tube, first assemble the nut, gripper, and retainer sleeve on the tubing. Then insert the plastic insert. Screw the nut on the elbow body. With a wrench, tighten the nut securely to create a water-tight connection. WaterMax 60 Series Owner’s Manual 3/8" Plastic Gripper 3/8" Nut 3/8"...
-
Page 41: Fill Plug Assembly
Do not overtighten the Fill Plug when assembling. When the flange comes into contact with the Media Tank, stop tightening. A 3/4" socket is recommended for assembly. WaterMax 60 Series Owner’s Manual Figure 19: Fill Plug Assembly Description... -
Page 42: Troubleshooting
High ambient room temperature. If the temperature exceeds 120°F, the display will blank out. This does not affect the operation of the controller WaterMax 60 Series Owner’s Manual Possible Cause Add salt Remove air check/draw tube and flush with clean water. Clean injector assembly. Clean... - Page 43 Excessive amount of water in brine cabinet Insufficient rinse time Intermittent pressure drop from feed source Brine valve drips water back to brine tank WaterMax 60 Series Owner’s Manual Possible Cause Make sure the controller is pushed all the way onto the drive end cap...
-
Page 44: Reading Model Numbers
8 gpm: Model Rated Efficiency 63MAQ 63BEQ 63MXQ 62AMQ 62APQ WaterMax 60 Series Owner’s Manual Number of Type of Media in compartments in Compartment 1 appliance Letter Salt Dosage 5,600 grains/lb 1.1 lb... -
Page 45: Watermax ® Water Conditioner Specifications
Iron reduction to 0.3 ppm or less. (Not certified by WQA.) *Listed with the U.S. EPA as a Bacteriostatic Device U.S. EPA # 54369-OH-001. Not certified by WQA. WaterMax 60 Series Owner’s Manual 63MAQ 63BEQ 63MXQ 63MDQ 62AMQ 1.5 lb 2.0 lb... -
Page 46: Watermax ® Filter Specifications
The 61AAS-BWO will raise the pH of most, but not all low pH water. Some water requires chemical injection using a chemical feed pump. Caution: Follow the instructions on the KMnO For optimum water quality, do not exceed recommended service flow rate for filter media type. WaterMax 60 Series Owner’s Manual Purpose ®... -
Page 47: Certificates
Certificates WaterMax 60 Series Owner’s Manual 11/10/2008... - Page 48 Certificates, Cont. WaterMax 60 Series Owner’s Manual 11/10/2008...
- Page 49 Certificates, Cont. WaterMax 60 Series Owner’s Manual 11/10/2008...
- Page 50 Notes...
- Page 51 Notes...
- Page 52 has these third-party listings: The WQA Gold Seal assures that this product has been tested and validated by the Water Quality Association. This validation assures that all electrical components are UL or CSA listed and all components that are in contact with the treated water are FDA or NSF listed.
Need help?
Do you have a question about the WATERMAX 60 SERIES and is the answer not in the manual?
Questions and answers