
Subscribe to Our Youtube Channel
Related Manuals for Hague Quality Water 700MM


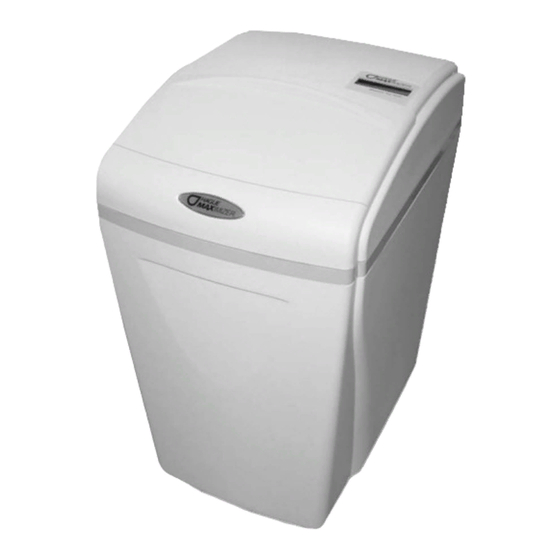
Summary of Contents for Hague Quality Water 700MM
- Page 1 INSTALLATION AND SERVICE MANUAL Model 700MM Water Softener Version 1 4343 S. Hamilton Road, Groveport, Ohio 43125...
-
Page 2: Table Of Contents
Table of Contents NOTES ..........................1 GETTING MAXIMUM EFFICIENCY FROM YOUR APPLIANCE ........2 CHECKLIST BEFORE INSTALLATION................3 DO'S AND DON’TS ......................4 REFERENCE ILLUSTRATIONS ..................5 CYCLES .......................... 10 INSTALLATION AND START-UP PROCEDURES ............11 SETTING THE 4 BUTTON CONTROLLER ..............13 CARE, MAINTENANCE AND PARTS ................ -
Page 3: Notes
Notes Date of Installation: __________________________________ Model Number: _____________________________________ Serial Number: ______________________________________ Returned Limited warranty Card Date: ___________________... -
Page 4: Getting Maximum Efficiency From Your Appliance
How To Get The Maximum Efficiency From Your Appliance 1. Fill salt cabinet when water level is above salt level. DO NOT MIX DIFFERENT TYPES OF SALT. If iron is present in your water, use a salt with an iron-cleaning additive to help keep resin clean. -
Page 5: Checklist Before Installation
2. Double check hardness - of water with test strips provided to verify that your appliance is right for the job. Model 700MM for up to 70 grains hardness per gallon. 3. Water Supply Flow Rate - 5 gallons per minute is recommended as minimum. -
Page 6: Do's And Don'ts
Do’s And Don’ts SOME DO'S 1. Do comply with all local plumbing and electrical codes. 2. Do install pressure-reducing valve if inlet pressure exceeds 90 psi. 3. Do install gravity drain on salt storage cabinet. See figure 7. 4. Do secure drain line on appliance and at drain outlet. See figure 3. 5. -
Page 7: Reference Illustrations
Reference Illustrations Figure 1 - Installation Guide Use this diagram as a location and installation guide for your Model 700MM , water conditioner. This diagram applies to all types of installations (i.e. basement, slab, crawl space, outside). Bypass Valves. To simplify installation and servicing, a one-piece or a three way bypass valve appliance is recommended when installing your appliance. - Page 8 Reference Illustrations Figure 3 Figure 2 CONNECTING DRAIN LINE PLUMBING CONNECTIONS CAUTION! The drain line must not be Teflon Tape ® kinked, crimped or restricted in any way. The drain line should be a minimum 1/2" inside diameter and cannot be reduced in size. INSTALLATION TIP FOR HARD PLUMBING THE APPLIANCE When preparing the male threaded fittings of the I/O adapter, follow the guidelines to avoid damage to the plastic pipe threads.
- Page 9 Reference Illustrations Figure 4 - Bypass Valve Optional Bypass Valve Part #93884 may be available through your local hardware store, plumber or call our HelpLine 1-800-437-8993 From 8 am to 5 pm EST. to order. Note: Do not plumb bypass valve in backward. Male pipe threads of bypass must interconnect with male threads of the I/O adapter.
- Page 10 Reference Illustrations Figure 7 OVERFLOW CONNECTION (1/2” I.D.) Figure 8 PLUGGING IN TRANSFORMER Do not plug transformer into an outlet that is controlled by on/off switch.
- Page 11 Reference Illustrations Figure 9 Figure 10 ADDING SALT TO THE BRINE CABINET 2 GALLONS WATER...
-
Page 12: Cycles
Cycles Water by-passes your appliance during regeneration to allow iron, sediment, hardness, etc. to be washed down the drain. After regeneration, the appliance returns to service, providing your home with treated water. Regeneration cycles: 1. First up-flow backwash. A rapid up-flow of water flushes out the resin bed and cleans the sediment filter. -
Page 13: Installation And Start-Up Procedures
Installation And Start-Up Procedures Each water conditioning appliance includes water test strips and 8' of drain line. CAUTION: Be sure the controller is firmly “locked” onto the drive end cap assembly. The four tabs on top of the drive end cap will allow the clips on the bottom of the controller case to lock onto the end cap tabs. - Page 14 2 hours then push the REGENERATE button and hold for 5 seconds. A regeneration cycle will begin and continue as follows: Model 700MM 33 minutes. After the first regeneration, your softener will automatically refill the correct amount of water in the brine cabinet.
-
Page 15: Setting The 4 Button Controller
Now, the water hardness setting number shown in the digital readout will increase 1 grain each time you push the "CHANGE" button. After 70 grains for Model 700MM the read-out will return to 03, and continue to count up until the display number matches the hardness number. Press the “SET”... - Page 16 Setting The Controller - Continued ADVANCED CUSTOMER SETTINGS: Your appliance can be programmed for High Capacity (HC) or High Efficiency (HE). High Capacity means the appliance will regenerate less often, but use more salt. High Efficiency will make the appliance regenerate more often and use less salt. See Specification/Capacity Chart, pg. 25. 1.
- Page 17 Setting The Controller - Continued 7. "Set Time" and "12" is now lit. To set the time, press and hold the CHANGE button to advance the numerical display, and switch from "PM" to "AM" if appropriate. Note: set the time to the nearest hour. Pressing and releasing the SET button will save the time displayed and advance to the next menu.
-
Page 18: Care, Maintenance And Parts
Care, Maintenance and Parts Figure 11 PART# DESCRIPTION QUANTITY 54306 Salt Port Lid 54324 Valve Cover Assembly 54540-700 Computer Control Assembly 93245 12V Transformer/Power Cord 54303 Cabinet 54305 Support Panel 93530 Media tank, empty, 700 only... - Page 19 Care, Maintenance and Parts Figure 12 - Cabinet and Assemblies PART# DESCRIPTION QUANTITY CO700A Cabinet Overflow 54510 I/O Adapte Assembly 93838 O-Ring 93808 O-Ring 54520 Drive End Cap c 93870 Screw 90828 O-Ring 93501 Injector Assembly 93835 Sleeve 90614-2.4 Drain End Cap Assembly 93809 Screw V185...
- Page 20 Care, Maintenance and Parts Figure 13 - Injector Assembly PART# DESCRIPTION QUANTITY 93810 Injector Screen 93223 Injector Throat 93220 Injector Seal 93221 Injector Nozzle 93232 Top Injector Seal (Thin) 93222 Injector Cap 90807 Screw 93501 includes all of the above.
- Page 21 Care, Maintenance and Parts Figure 14 - I/O Adapter Assembly PART# DESCRIPTION QUANTITY 54313 3/4" IO Adapter 90232 Turbine Sensor Cap 90809 Sensor Cap Screw 93858 Turbine Sensor Assembly 90522 Turbine Assembly 93229 Flow Director 93838 “O” Ring 54510 includes all of the above.
- Page 22 Care, Maintenance and Parts Figure 15 - Drive End Cap Assembly PART# DESCRIPTION QUANTITY 90802 Screw 90217 Drive Motor 93891 1/4” Hex Nut 93238 Drive Gear 90809 Screw, Cam Cover 93219 Piston Slide Cam Cover 93217 Piston Slide Cam 93583 Drive End Cap 93216 Piston Slide...
- Page 23 Care, Maintenance and Parts Figure 16 - Brine Valve Housing Assembly Concave Side PART# DESCRIPTION QUANTITY 93620 Piston Assembly (includes O-ring & Spring) 90821 O-ring 93260 Housing 90843 .5 pm Flow Control 93805 O-ring 54314 Brine Valve Cap 90807 Screw 54315 Elbow, Brine Valve Cap Float 90828...
- Page 24 Care, Maintenance and Parts Figure 17 - Safety Shutoff Assembly PART# DESCRIPTION QUANTITY 54226 Safety Shutoff 54227 Float 54228 Air Check...
- Page 25 Care, Maintenance and Parts Figure 18 - Brine Valve Elbow Assembly PART# DESCRIPTION QUANTITY 54112 1/2” Compression Assembly 54138 3/8” Compression Assembly 201120 3/8” Nylon Insert...
- Page 26 Care, Maintenance and Parts Figure 19 - Bottom Fill Plug Assembly PART# DESCRIPTION QUANTITY 90238 Fill Plug 90819 O-ring...
-
Page 27: Specifications/Capacity Chart
Specifications/Capacity Chart MODEL # 700MM Maximum compensated hardness (grains) Maximum ferrous iron reduction 10 ppm Minimum pH Media type and amounts Power Clean Filter Media Super Fine Mesh Resin - .7 cu. ft. 2.5 / 10,400 *Salt usage (lbs.) / Capacity (HE - High Efficiency) *Salt usage (lbs.) / Capacity (HC - High Capacity) -
Page 28: Troubleshooting
Troubleshooting Problem Cause Solution Add salt (refer to "Regenerate" No soft water after regeneration. No salt in brine cabinet. Page 13) Remove air check draw tube and Sediment in brine tank has plugged flush with clean water. Clean injec- the brine line and air check. tor assembly. - Page 29 Troubleshooting Problem Cause Solution With 12 VAC present at controller, Defective circuit board (fig. 9). Read-out lights do not glow. replace circuit board. Make sure computer control is pushed Computer control not attached properly. Unit stays in regeneration. Cycle all the way onto drive end cap. numbers remain flashing.
-
Page 30: Limited Warranty
Limited Warranty To Whom Warranty is Extended THIS WARRANTY DOES NOT COVER INCIDENTAL, CONSEQUENTIAL OR SECONDARY DAMAGES. This warranty is issued to the original owner at the original location site and is not transferable to other sites or to sub- sequent owners of the appliance. - Page 32 ® ® Maximizer ©1998 P.O. Box 298, Groveport, OH 43125 ® LITHO USA Form #70061 OR0504...
Need help?
Do you have a question about the 700MM and is the answer not in the manual?
Questions and answers