Advertisement
Advertisement
Table of Contents

Related Manuals for Hague Quality Water Maximizer


Summary of Contents for Hague Quality Water Maximizer
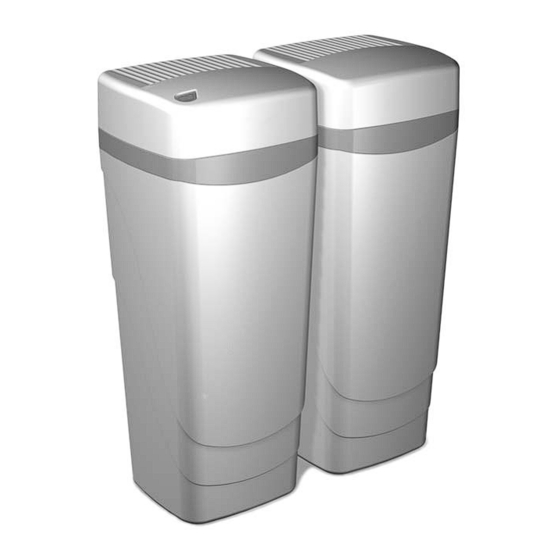
- Page 1 Series 96 Owner’s Manual REV. 2.0...
-
Page 2: Table Of Contents
Table of Contents Page INTRODUCTION ROUTINE CARE SERIES 96 AND YOUR WATER INSTALLATION PROGRAMMING THE SERIES 96 BLENDING VALVE ADJUSTMENTS/ HOW AND WHEN TO USE THE BYPASS TROUBLESHOOTING PARTS, DIAGRAMS Brine Valve Elbow Installation Brine Cabinet Data CYCLE SETTINGS EQUIPMENT SPECIFICATIONS WARRANTY Installation Record and Water Readings Date of Installation... -
Page 3: Introduction
Series 96 Owner’s Manual INTRODUCTION Congratulations on your decision to purchase a Hague Series 96 water treatment appliance. Recognized internationally for built-in quality, dependability, and ease of service, this appliance represents the state-of-the-art in home water treatment. While your appliance should be installed and serviced by a professional Hague dealer, important information is contained in this manual which will help you get the maximum benefit and enjoyment from your Series 96. -
Page 4: Routine Care
Series 96 Owner’s Manual ROUTINE CARE Salt A brine solution is used during regeneration to remove calcium and magnesium from the softening resin. Maintain salt level at least 1/3 full; do not let the brine tank run out of salt. Use solar or pellet salt; do not mix the two. -
Page 5: Control Panel
Series 96 Owner’s Manual Recommendations Water used for lawns and gardens does not require softening. To achieve maximum efficiency from your Series 96: 1. Protect your Series 96, including the drain line, from freezing. 2. If dirt, sand, or large particles are present in your water supply, consult your Hague dealer for filters that will eliminate this problem. -
Page 6: Series 96 And Your Water
Series 96 Owner’s Manual SERIES 96 AND YOUR WATER Water Testing The Series 96 like any other appliance, requires correct installation and setting for optimum performance. To ensure proper settings, you need to obtain an accurate water test. Your representative has probably already tested your water for you and determined that the Series 96 is the best water softener for your needs. -
Page 7: Installation
Series 96 Owner’s Manual INSTALLATION Pre-Installation Checklist Be sure to check the following items before installing a Series 96: • Water Pressure Not less than 20 psi (138 kPa) nor greater than 120 psi — NOTE: If your water pressure is greater (828 kPa). - Page 8 Series 96 Owner’s Manual Where to Locate The Series 96 Where you will locate the Series 96 depends on what other water treatment equipment you currently have installed. The Series 96 should be located: After: Before: Water Meter Water Heater Pressure Tank TYPICAL 96 SERIES INSTALLATION Figure 1...
- Page 9 Series 96 Owner’s Manual Connecting the Series 96 1. Place the Series 96 in the desired location. (See Figure 1.) 2. Turn off the electricity and/or water supply to the water heater. For gas heaters, turn gas cock to “PILOT”. 3.
-
Page 10: Programming The Series 96
Series 96 Owner’s Manual PROGRAMMING THE SERIES 96 NOTE: To ensure expected performance, The Series 96 allows a variety of programming options, from setting the time the controller will not allow you to enter of regeneration and the number of people to adjusting the hardness, capacity certain values for the number of people settings, and cycle settings*. - Page 11 Series 96 Owner’s Manual Figure 2 SERVICE SETTINGS This section is recommended for qualified service personnel only. The appliance control must be set correctly for proper performance. REGENERATE FUNCTION: Multi-purpose. 1.) Used to put the appliance Gal. Remain 00979 into an immediate regeneration. Press and hold (approximately 5 seconds) until display changes to “Going to 1”.
- Page 12 Series 96 Owner’s Manual Description Of The Two Series 96 Operating Modes CAUTION: Be sure the controller is firmly “locked” onto the drive end cap assembly.” The four tabs on top of the drive end cap will allow the clips on the bottom of the controller case to lock onto the end cap tabs. (See detail diagram on page 18; fig. MODE 1 TIMER MODE: Will regenerate based on frequency.
- Page 13 Series 96 Owner’s Manual Push the DISPLAY button to step to the next parameter. The display will show: Comp. Hard. 00025 7.00 This parameter is the calculated compensated hardness using the hardness, iron and manganese settings. The formula is (4 x each ppm iron) + (4 x each ppm manganese) + hardness = compensated hardness. This is not a parameter that can be set.
- Page 14 Series 96 Owner’s Manual Push the DISPLAY button to step to the next parameter. The display will show: Salt lbs. 06.0 13.00 This parameter sets the amount of salt to be used to achieve the capacity setting. 13.00a Push the SELECT and CHANGE buttons until the desired salt setting is displayed. In this example, set to: Salt lbs 06.0 Push the DISPLAY button to step to the next parameter.
- Page 15 Series 96 Owner’s Manual This is the normal operation display for OPERATING MODE 2. The 00979 represents the number of gallons of softening capacity between regenerations. This completes the SERVICE SETTINGS mode. Even though the SERVICE SETTING mode has been completed, the Series 96 is not ready for service until the CUSTOMER SETTINGS mode is completed.
-
Page 16: Blending Valve Adjustments
Series 96 Owner’s Manual Blending Valve Adjustment In some situations, a blending valve may be desired. The amount of hardness NOTE: Use of the blending valve is not blended back into the water line is determined by the hardness of the recommended where objectionable incoming water and the setting of the blending valve. -
Page 17: Troubleshooting
Series 96 Owner’s Manual TROUBLESHOOTING This section describes solutions to the most common problems that can occur. If you cannot solve the problem easily, call your Hague dealer for service. Problem Cause Action No soft water after No salt in brine tank. Add salt regeneration Sediment in brine tank has plugged the... - Page 18 Series 96 Owner’s Manual TROUBLESHOOTING Problem Cause Action Flow is indicated when There is a leak in your household Repair the leak. water is not being used. plumbing system (Fig. 2.) No read-out in display. Electric cord is unplugged. Plug in transformer. (Fig. 1.) No electric power at outlet.
-
Page 19: Parts, Diagrams
Series 96 Owner’s Manual SERIES 96 HOOK-UP/COVER ASSEMBLY Figure 3 ITEM NO QTY. PART NO. DESCRIPTION 54501 Media Cabinet Cover Assembly 90837 Bypass Nut Gasket 90254 1" or ¾" Copper Adapter 90256 PVC Adapter (optional) 90258 1" Copper Adapter (optional) 90251 Bypass Nut CO700A... - Page 20 Series 96 Owner’s Manual SERIES 96 BRINE TANK ASSEMBLY Figure 4 For brine tank information on water depth and salt usage, see page 34...
- Page 21 Series 96 Owner’s Manual SERIES 96 TANK/CABINET ASSEMBLY Figure 5 PART NO. DESCRIPTION 93809 Screw 93870 Screw 90614 Drain End Cap Assembly 93808 O-Ring 93835 Sleeve 93838 O-Ring 90615-94 Bypass Assembly 93833 Cord Clip 90828 O-Ring (not used) 95301T-JG Drive End Cap Assembly 54013 Support Panel 54003...
- Page 22 Series 96 Owner’s Manual SERIES 96 INJECTOR ASSEMBLY Part Number 93501 Figure 6 NO. PART NO. ITEM DESCRIPTION 93223 Injector Throat Creates the vacuum that draws the brine solution from the brine cabinet in conjunction with the Injector Nozzle (Part No. 93221). The center hole should be clear of debris, round, and undamaged.
- Page 23 Series 96 Owner’s Manual NO. PART NO. ITEM DESCRIPTION 93232 Top (Thin) Seals between the Injector Nozzle and the Injector Cap. The gasket must be Injector Seal free of defects such as tears or cuts and be free of debris. 93222 Injector Cap Holds the Injector Assembly together and seals the assembly to the Main Valve...
- Page 24 Series 96 Owner’s Manual SERIES 96 BYPASS ASSEMBLY Figure 7 QTY. PART NO. DESCRIPTION QTY. PART NO. DESCRIPTION 90807 Screw 90263 Bypass Endcap - right 90262 Bypass Endcap - left 90828 O-Ring 93808 O-Ring 90226 Test Port Valve 90802 Screw 90812 Tubing 4.0"...
- Page 25 Series 96 Owner’s Manual PART NO. ITEM DESCRIPTION 90246-94 Bypass Makes the connection between the plumbing and the Main Valve Body. Also, Housing contains the “Hard Water” Blending Valve and Bypass Piston. The recommended seal for the 1 ¼" male inlet-outlet threads is the nylon Hook-up Nut (Part No.
- Page 26 Series 96 Owner’s Manual PART NO. ITEM DESCRIPTION 90802 Bypass Handle and Sensor Housing Screw and Blending Valve Cap Screw 90522 Turbine Assembly The Turbine has a 1/8" diameter Rare Earth magnet pressed into place adjacent to the axle opening. When assembled to the axle, the Turbine should spin freely. Do not use any lubricants.
- Page 27 Series 96 Owner’s Manual SERIES 96 DRIVE END CAP ASSEMBLY Part Number 95301T-JG (Note: motor and magnet disc must be ordered separately.) Figure 8 QTY. PART NO. DESCRIPTION 90802 Screw 90217 Drive Motor 93891 ¼" Hex Nut 93238 Drive Gear 90809 Screw 93219...
- Page 28 Series 96 Owner’s Manual PART NO. ITEM DESCRIPTION 93583 Drive End Cap Seals the two openings on the Main Valve Body. The larger diameter opening is sealed with an O-ring used as an axial or "face" seal. The O-ring sits in a groove in the Drive End Cap.
- Page 29 Series 96 Owner’s Manual SERIES 96 BRINE VALVE HOUSING ASSEMBLY Part Number 93601-JG Figure 9 Concave side QTY. PART NO. DESCRIPTION 93620 Piston Assembly (includes O-Ring & Spring) 90821 O-Ring 93260 Housing 93254 Quad Ring Retainer 90843 .5 gpm Flow Control 93805 O-Ring 93243-JG...
- Page 30 Series 96 Owner’s Manual PART NO. ITEM DESCRIPTION 93260 Housing Should have a Quad-ring for the Piston seal. The Quad-ring (4) is held in place by the brine valve retainer(5). The brine valve housing has four retaining lugs that secure the brine valve retainer. Just inside the entrance hole for the Brine Piston (1) is a concave seat area that must be free of defects such as nicks, indentations or debris.
- Page 31 Series 96 Owner’s Manual FILL PLUG ASSEMBLY Part Number 90618 (1) 90238 Fill Plug: The Fill Plug seals the media access ports in the Media Tank. Care should be taken that the O-ring seal areas are kept clean and free of debris. Also, both O-rings should be in the proper locations, one under the flange and one in the groove.
- Page 32 Series 96 Owner’s Manual Series 96 DRAIN END CAP ASSEMBLY Figure 10 NO. PART NO. QTY ITEM DESCRIPTION 93808 End Cap O-ring 90268 Drain End Cap Seals the left opening on the Main Valve Body. The opening is sealed with an O-ring used as an axial or "face"...
- Page 33 Series 96 Owner’s Manual SERIES 96 SAFETY SHUTOFF ASSEMBLY Figure 11...
-
Page 34: Brine Valve Elbow Installation
Series 96 Owner’s Manual SAFETY BRINE VALVE ELBOW INSTALLATION Figure 12 The nut, gripper and retainer sleeve are a 3 piece assembly that can come apart if removed from the elbow body. Parts must be re-assembled exactly as shown to function properly. When connecting the 3/8"... -
Page 35: Brine Cabinet Data
Series 96 Owner’s Manual BRINE CABINET DATA Based on the water level measured from the bottom of the MAXIMIZER brine cabinet WITH GRID PLATE, the following depths correlate to the amount of salt used per regeneration: SALT (lbs.) DEPTH (inches) -
Page 36: Cycle Settings
Series 96 Owner’s Manual CYCLE SETTINGS 1 lb. Salt Setting 3 lb. Salt Setting Service Setting English Unit Service Setting English Unit Hardness Setting Number ______ (?) Hardness Setting Number ______ (?) Iron ppm (clear water)* Iron ppm (clear water)* Capacity in Grains 5,600 Capacity in Grains... -
Page 37: Equipment Specifications
Series 96 Owner’s Manual EQUIPMENT SPECIFICATIONS - MODEL 96MM Maximum compensated hardness* 90 gpg / 1,541 mg/l Maximum ferrous iron reduction* 10 ppm reduced to below 0.3 ppm Minimum pH “Ultra-fil” self-cleaning sediment filtration 20 microns nominal Salt use:Use clean, white pellet or solar salt. 1 lb* - 5,600 grain capacity - .45 kg at 362,880 mg 3 lb* - 15,400 grain capacity - 1.36 kg at 997,920 mg 6 lb - 24,500 grain capacity - 2.72 kg at 1,586,304 mg... -
Page 38: Warranty
Coverage Water International shall have no obligations under this warranty. This warranty covers the Hague Maximizer® System delivered to the original owner when the system is purchased for personal, family, or This warranty does not cover damage to a part or parts of the system household use. - Page 39 Series 96 Owner’s Manual...
- Page 40 System conforms to NSF/ANSI 44 softening performance, efficiency, barium reduction and radium 226/228 reduction as verified and substantiated by test data. Barium/Radium reduction occurs as long as the unit is softening the water. Test product water every 12 months with the hardness test strips to check for proper functioning.
Need help?
Do you have a question about the Maximizer and is the answer not in the manual?
Questions and answers