
Related Manuals for Westinghouse UL-ES-I56/WJ-WH05


Summary of Contents for Westinghouse UL-ES-I56/WJ-WH05
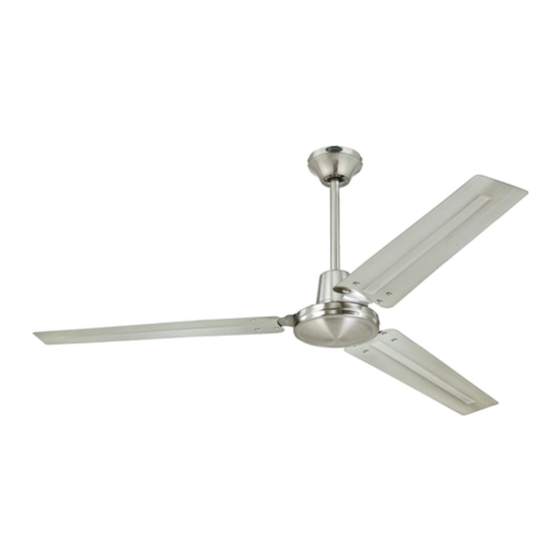
- Page 1 UL-ES-I56/WJ-WH05 OWNER'S MANUAL MANUAL DEL USUARIO Industrial Please write model number here for future reference: / Por favor, incluya el número del modelo aquí para futura referencia: N.W. : 6.2 KGS G.W. : 7.0 KGS...
-
Page 2: Safety Tips
UL-ES-I56/WJ-WH05 SAFETY TIPS OBSERVE THE FOLLOWING: READ AND SAVE THESE INSTRUCTIONS WARNING: TO REDUCE THE RISK OF FIRE, ELECTRIC SHOCK, OR PERSONAL INJURY, MOUNT TO OUTLET BOX MARKED "ACCEPTABLE FOR FAN SUPPORT", AND USE THE OUTLET SCREWS PROVIDED WITH THE OUTLET BOX. MOST OUTLET BOXES COMMONLY USED FOR THE SUPPORT OF LIGHTING FIXTURES ARE NOT ACCEPTABLE FOR FAN SUPPORT AND MAY NEED TO BE REPLACED. -
Page 3: Consejos De Seguridad
UL-ES-I56/WJ-WH05 CONSEJOS DE SEGURIDAD HAGA LO SIGUIENTE: LEA Y GUARDE ESTAS INSTRUCCIONES ADVERTENCIA: PARA REDUCIR EL RIESGO DE INCENDIO, DESCARGA ELÉCTRICA O LESIONES PERSONALES, MONTE EL VENTILADOR EN UNA CAJA DE EMBUTIR ROTULADA “ADECUADA PARA VENTILADORES”, Y UTILICE LOS TORNILLOS DE MONTAJE INCLUIDOS CON LA CAJA DE EMBUTIR. LA MAYORÍA DE LAS CAJAS DE EMBUTIR UTILIZADAS NORMALMENTE PARA ARTEFACTOS DE ILUMINACIÓN NO SON ADECUADAS PARA VENTILADORES Y DEBERÍAN SER REEMPLAZADAS. -
Page 4: Preparing For Installation
UL-ES-I56/WJ-WH05 PREPARING FOR INSTALLATION ANTES DE LA INSTALACIÓN Use metal outlet box suitable for fan support (must support 35 lbs). Before attaching fan to outlet box, ensure the outlet box is securely fastened by at least two points to a structural ceiling member (a loose box will cause the fan to wobble). -
Page 5: Mounting Bracket Installation
UL-ES-I56/WJ-WH05 MOUNTING BRACKET INSTALLATION INSTALACIÓN CON SOPORTE DE MONTAJE Install “J” hook mounting plate to outlet box in ceiling using the screws provided with the outlet box. Instale la placa de montaje del gancho “J” a la caja de embutir del Loosen set screws on both upper and lower canopies. - Page 6 UL-ES-I56/WJ-WH05 Thread leadwires through the downrod and install crosspin (1) through yoke (2) and downrod. Install lockwasher (3) and nut (4) and tighten. Loosen set screw in lower canopy and slide to within 1/4” of the motor. Install cotter pin (5).
- Page 7 UL-ES-I56/WJ-WH05 WALL CONTROL WIRING OPTION Follow diagram above to make wiring connections for wall control operation. Note: A professional electrician is recommended for this type of installation. OPCIÓN DE CABLEADO PARA CONTROL DE PARED Hang fan on “J” hook. With bracket holding fan assembly, make electrical connections using the following step for wiring instructions.
- Page 8 UL-ES-I56/WJ-WH05 After wiring is complete, gently push wires into junction box with wire nuts pointed upward. Slide top canopy up and tighten set screw(s). Una vez que el cableado esté completo, empuje con cuidado los cables dentro de la caja de empalmes con los conectores de tuerca mirando hacia Deslice el dosel superior y ajuste el(los) tornillo(s) de fijación.
- Page 9 UL-ES-I56/WJ-WH05 Install blades to top of motor using screws and washers . See above drawing for reference. Instale las paletas en la parte superior del motor con la tornillería. Utilice la ilustración anterior como referencia.
- Page 10 UL-ES-I56/WJ-WH05 INSTALLING AND WIRING THE WALL CONTROL INSTALACIÓN Y CABLEADO DEL CONTROL DE PARED Parts: Installing and wiring the wall control. 1. Outlet box 2. Cross Bar Screws A. Remove the cross bar screws (2) from the wall control and attach the cross bar(3) to 3.
- Page 11 UL-ES-I56/WJ-WH05 INSTALLING AND WIRING THE WALL CONTROL INSTALACIÓN Y CABLEADO DEL CONTROL DE PARED...
-
Page 12: Troubleshooting Guide
UL-ES-I56/WJ-WH05 If you have difficulty operating your new ceiling fan, it may be the result of incorrect assembly, installation, or wiring. In some cases, these TROUBLESHOOTING GUIDE installation errors may be mistaken for defects. If you experience any faults, please check this Trouble Shooting Chart. If a problem cannot be remedied, please consult with your authorized electrician and do not attempt any electrical repairs yourself. -
Page 13: Guía Para Solucionar Problemas
UL-ES-I56/WJ-WH05 Si tiene dificultades para hacer funcionar su nuevo ventilador, podría ser a causa del armado, instalación o GUÍA PARA SOLUCIONAR PROBLEMAS cableado incorrectos. En algunos casos, estos errores de instalación podrían ser confundidos con defectos. Si experimenta alguna falla, consulte esta guía para solucionar problemas. Si no puede solucionar el problema, consulte a un electricista autorizado y no intente reparar conexiones eléctricas. - Page 14 UL-ES-I56/WJ-WH05...
-
Page 15: Parts List
UL-ES-I56/WJ-WH05 PARTS LIST LISTA DE REPUESTOS Description 1 ....Mounting Bracket 2 ....Blade 3 . - Page 16 Philadelphia, PA 19154 U.S.A. Philadelphia, PA 19154 U.S.A. Westinghouse Lighting Corporation, Westinghouse Lighting Corporation, a Westinghouse Electric Corporation licensee titular de la licencia de Westinghouse Electric Corporation is a registered trademark of es una marca registrada de Westinghouse Electric Corporation Westinghouse Electric Corporation...
Need help?
Do you have a question about the UL-ES-I56/WJ-WH05 and is the answer not in the manual?
Questions and answers