
Related Manuals for Turtle Beach Earforce PX4


Summary of Contents for Turtle Beach Earforce PX4
- Page 1 Wireless For: PS4 I PS3 ™ ™ Xbox 360 I Mobile ® Wireless Dolby ® surrounD sounD GaminG HeaDset User GUide...
- Page 2 Congratulations on your purchase of the Ear Force PX4 headset from Turtle Beach. The PX4 works with your Xbox360, PS3, PS4 and all of your favorite mobile devices. Welcome to the Turtle Beach Audio Advantage! For our Knowledgebase and Technical Support Contact info please visit: http://www.turtlebeach.com/support...
-
Page 3: Table Of Contents
Table of Contents Package Contents Features PX4 Headset - Left View PX4 Headset - Right View PX4 Transmitter PS3™ Setup/System Settings Configuration Xbox 360® Setup/System Settings Configuration Xbox 360® E Setup/System Settings Configuration PS4™ Setup/System Settings Configuration Home Theater Setup Connecting a Digital Music Player Dolby®... -
Page 4: Package Contents P4
Package Contents PX4 Headset PX4 Wireless Detachable Xbox 360 Transmitter Boom Mic Talkback Cable Digital Optical Cable 2.5mm to 3.5mm Headset Charging Cable Mobile Adapter Cable/ PS4 Chat Cable Turtle Beach Sticker Go to Table of Contents... -
Page 5: Features P5
Features The Ear Force™ PX4 is a premium, Dolby surround sound headset designed for PS3™, PS4™ and Xbox360® gaming. To get the most from your PX4, please take a few minutes to review this introduction. Dolby® Surround Sound The PX4 transmitter processes Dolby Digital surround sound from your PS3™, PS4™ or Xbox360® and sends it to the headset via digital RF. -
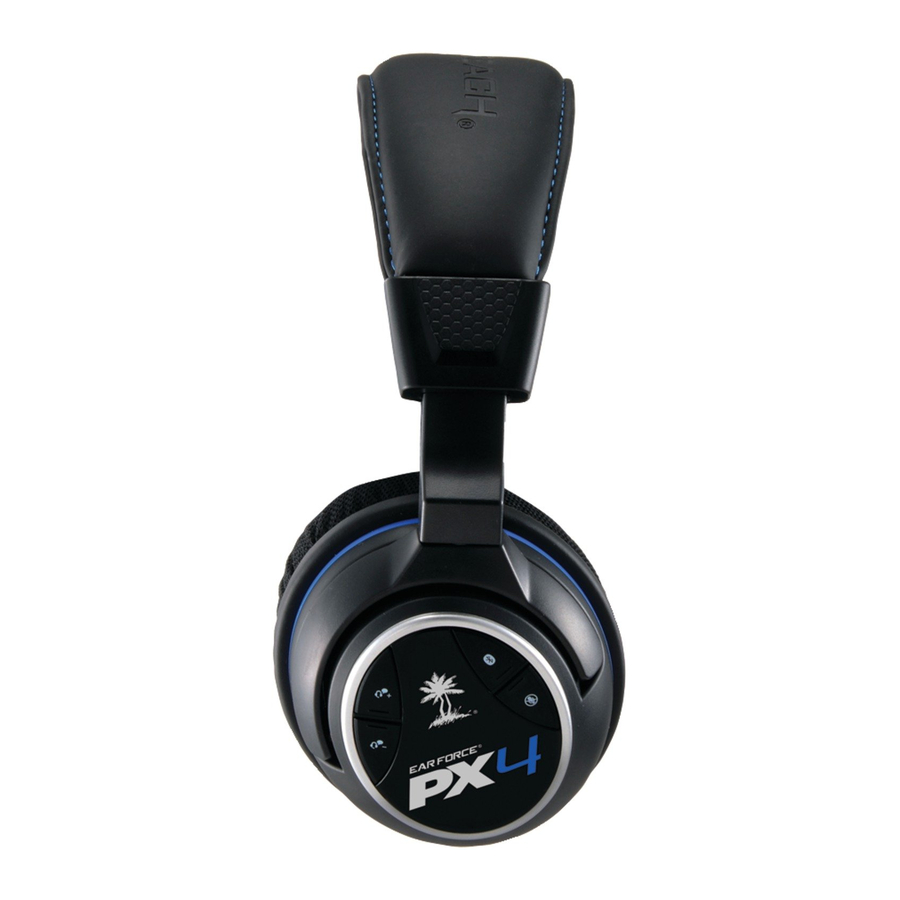
Page 6: Px4 Headset - Left View P6
PX4 Headset - Left View To turn on/off the headset: Press and hold the power button until you hear two rapid tones To enter pairing mode(Headset off): Press and hold the power button until the LED begins to blink rapidly and evenly(about 6 seconds). Tone Button: Press this button to activate the different EQ presets. -
Page 7: Px4 Headset - Right View P7
PX4 Headset - Right View Bluetooth Volume: Press Chat (+) or Chat (–) to ® adjust Bluetooth volume level. A tone will sound each time the volume level changes. Bluetooth Status LED: Paired: Flashing Blue once per second Unpaired: Flashing blue twice per second Pairing Mode: Flashing blue and red alternating Bluetooth Multi-Function Button (BT MFB): Powers on the Bluetooth and performs several other... -
Page 8: Px4 Transmitter
PX4 Transmitter Digital Input LED: This LED turns on when a digital input signal is detected. When this LED is ON, the analog input is turned off. Surround Sound LED: The LED will light whenever the digital input is being processed by the surround sound decoder. When this LED is off, the audio signal will be heard in stereo. -
Page 9: Ps3™ Setup/System Settings Configuration
PS3™ Setup/System Settings Configuration PS3 Hardware Setup DIGITAL OUT (OPTICAL) Note: Remove the clear plastic covers from both ends of your Digital Optical Cable before setting up your transmitter. Go to Table of Contents... -
Page 10: Ps3 Bluetooth Configuration
4. With PX4 powered ON, but Bluetooth OFF, hold BT MFB until Bluetooth LED flashes blue and red, then release. 5. On the PS3 select “Turtle Beach Bluetooth Chat”, then enter “0000” as the Pass Key. The Bluetooth LED on the headset will flash blue once per second, indicating that the PX4’s... - Page 11 1. In the PS3 Menu go to Settings > Accessory Settings > Audio Device Settings and set the “Input Device” and “Output Device” fields to “Turtle Beach Bluetooth Chat”. TurTle Beach BlueTooTh chaT TurTle Beach BlueTooTh chaT PS3 Audio Output Configuration 1.
-
Page 12: Xbox 360® Setup/System Settings Configuration P12
Xbox 360 Setup/System Settings Configuration ® Xbox 360 Setup - All models Note: Make sure the Talkback Cable is connected securely on both ends. Go to Table of Contents... - Page 13 Xbox 360 Setup/System Settings Configuration ® Xbox 360 Slim Setup Note: Remove the clear plastic covers from both ends of your Digital Optical Cable before setting up your transmitter. Go to Table of Contents...
- Page 14 *This setup should only be used on versions of the Xbox360 that do not have a Digital Optical Port. When us- ing this configuration you will need a Xbox 360 HD Audio Adapter Cable. Available from Turtle Beach here: http://www.turtlebeach.com/product-detail/cables-parts/ear-force-xaa/349 Note: Remove the clear plastic covers from both ends of your Digital Optical Cable before setting up your transmitter.
-
Page 15: Xbox 360® E Setup/System Settings Configuration P15
Xbox 360 E Setup ® to HDMI IN port FRONT Xbox 360 E Console *Ear Force HD Audio Converter BACK to OPTICAL to HDMI OUT port OUT jack HDMI Cable to DIGITAL IN jack Wall Plug Wall Outlet *Ear Force HD Audio Converter is available for purchase at Turtlebeach.com/HDAC Note: The Xbox360 E does not have an Digital Optical Output. - Page 16 Xbox 360 Setup/System Settings Configuration ® Xbox 360 System Settings 1. Settings > Preferences > Voice. 2. Set Voice Volume to “10”. 3. Set Game Volume to “10”. 4. Set Voice Output to “Play Through Headset”. 1. Settings > System Settings > Console Settings > Audio >...
-
Page 17: Ps4™ Setup/System Settings Configuration
PS4™ Setup/System Settings Configuration BACK FRONT Go to Table of Contents... - Page 18 PS4™ Setup/System Settings Configuration 1. Go to Settings >Sound and Screen > Audio Output Settings > Primary Output Port 2. Select “Digital Out” (OPTICAL) Go to Table of Contents...
- Page 19 PS4™ Setup/System Settings Configuration 4. Go to Settings > Sound and Screen > Audio Output Settings > Output to Headphones 5. Select “Chat Audio” 6. Go to Settings > Sound and Screen > Audio Output Settings > Audio Format (Priority) Go to Table of Contents...
- Page 20 PS4™ Setup/System Settings Configuration 7. Select “Bitstream (Dolby) If your chat volume is either too loud or too soft: 1. Go to Settings > Devices > Audio Devices > Headsets and Headphones > Volume Control (Headphones) and change the audio level to your liking. Go to Table of Contents...
-
Page 21: Home Theater Setup P21
Home Theater Setup Setting up the transmitter as illustrated below lets you listen to your console or TV with the PX4 headset. You can also hear your console on your home theater speakers without disconnecting the optical cable from the transmitter. Connecting the PX4 transmitter digital output to your home theater system will pass your console’s game audio from the transmitter’s digital input to the home theater A/V receiver digital input, so you can hear the game audio on your PX4 headset and your surround sound speakers at the same time. -
Page 22: Connecting A Digital Music Player P22
Connecting a Digital Music Player The PX4 features an analog input for connecting digital music players or other analog sources. The Analog Input volume can be adjusted directly from the digital music player or analog source. Analog Input* Digital Music Player 3.5mm Cable (sold separately) -
Page 23: Dolby® Digital Processing
Dolby Digital Processing ® The PX4 uses Dolby Digital 5.1 surround processing technology – the industry-standard format for encoding multi- channel game audio. Dolby Digital processing recreates 5.1 channel surround sound using the PX4 headset so you can hear the sound all around you, as if you were listening to a 5.1 speaker system. surround surround right... -
Page 24: Surround Sound P24
Surround Sound The PX4 allows you to alter the virtual positioning of the Front and Surround speakers for the best surround sound experience. Press the Surround Angles Button on the transmitter to cycle through 6 different presets, as illustrated below: Press to cycle through 6 different surround sound SurrouND... -
Page 25: Bluetooth Setup
On your phone, make sure Bluetooth is powered on and search for Bluetooth devices as described in its user manual. When your device is finished scanning, select “TURTLE BEACH Bluetooth Chat” from the list and follow the prompts to connect. -
Page 26: Receiving Calls
Bluetooth Functions Making Calls with iPhone Once the headset is successfully paired with your mobile phone, you can use it to make and receive calls. It can be used with voice dialing if your phone supports this function. If you want to… Then…... -
Page 27: Charging The Headset P27
Charging the Headset The PX4 features a rechargeable lithium polymer battery that provides more than 10 hours of continuous game play. When your headset battery power is low, a tone will begin to sound every 10 seconds until the headset powers off. -
Page 28: Adjusting Sound P28
Adjusting Sound Equalizer (EQ) Presets The PX4 features multiple Equalizer presets to enhance Tone Button your gaming audio experience. Press the TONE button on the PX4 headset to cycle through the EQ presets as illustrated: Equalizer (EQ) Presets: 1. Flat equalization, for the most accurate sound 2. -
Page 29: Chat Boost
Adjusting Sound Chat Boost™ Chat Boost is a dynamic talkback expander built into the PX4 headset that automatically increases chat volume during loud moments in your game, so you can always hear your teammates or other players, regardless of the game volume. -
Page 30: Pairing Instructions P30
Pairing Instructions Headset and Transmitter In order to play audio, the PX4 headset must be “paired” (linked) to its transmitter. The headset and transmitter are paired out of the box. The instructions below are only necessary if pairing appears to have been lost. 1. - Page 31 Specifications Headset · 50mm diameter speakers with neodymium magnets · Game audio frequency response: 20Hz - 20kHz, < 120dB SPL @ 1kHz · Condenser microphone frequency response: 50Hz - 15kHz · Game audio Dual Band WiFi Digital 2.4-2.495GHz/5.0-5.8GHz RF wireless reception ·...
- Page 32 Regulatory Compliance Statements for the PX4 Models Federal Communications Commission (FCC) Compliance Notices Class B Interference Statement This equipment has been tested and found to comply with the limits for a Class B digital device, pursuant to Part 15, Subpart B of the FCC Rules. These limits are designed to provide reasonable protection against harmful interference in a residential installation.
-
Page 33: Declaration Of Conformity
Declaration of Conformity Heading Marking by this symbol: indicates compliance with the Essential Requirements of the EMC Directive of the European Union (2004/108/EC). This equipment meets the following conformance standards: Safety: EN 60950-1: 2006 + A11 + A1 + A12 (T-Mark License) Also Licensed for Standards: EC 60950-1: 2005 + A1: 2009, (CB Scheme Report/Certificate), UL60950-1 (NRTL License), CSA22.2, 60950-1 (SCC License) - Page 34 WARRANTY SERVICE: In the USA and CANADA Warranty Service is provided by our Turtle Beach USA offices and in all other Countries it is provided by our local International Distributors when available. Refurbished/Recertified products are sold on an AS IS basis with a 90-day Warranty or less in accordance with each ven- dor’s policy.
- Page 35 EXCLUSIONS FROM LIMITED WARRANTY: This Limited Warranty shall not apply and VTB has no liability under this Limited Warranty if the Turtle Beach Product: - is used for commercial purposes such as “LAN, Call Centers” (including rental or lease); - is modified or tampered with;...
- Page 36 Copyright © 2013 Voyetra Turtle Beach, Inc. (VTB, Inc.) All rights reserved. Turtle Beach, the Turtle Beach Logo, Voyetra, and Ear Force are either trademarks or registered trademarks of VTB, Inc. Xbox, Xbox 360, and Xbox LIVE are registered trademarks of Microsoft Corporation. PlayStation is a registered trademark and PS3 is a trademark of Sony Computer Entertainment, Inc.
Need help?
Do you have a question about the Earforce PX4 and is the answer not in the manual?
Questions and answers