LevelOne FCS-1040 User Manual & Spare Parts Catalogue
P/t/z ip network camera
Hide thumbs
Also See for FCS-1040:
- User manual (97 pages) ,
- Brochure (86 pages) ,
- Quick installation manual (14 pages)
Table of Contents
Advertisement
Quick Links
Download this manual
See also:
User Manual
Advertisement
Table of Contents

Related Manuals for LevelOne FCS-1040


Summary of Contents for LevelOne FCS-1040
- Page 1 LevelOne FCS-1040/WCS-2040 P/T/Z IP Network Camera User Manual Ver 2.0.1-0609...
-
Page 2: Before You Use Thi Product
Before You Use This Product The use of surveillance devices may be prohibited in your country by law. The Network Camera is not only a high-performance web-ready camera but also can be part of a flexible surveillance system. It is the user’s responsibility to ensure that the operation of such devices is legal before installing this unit for its intended use. -
Page 3: Package Contents
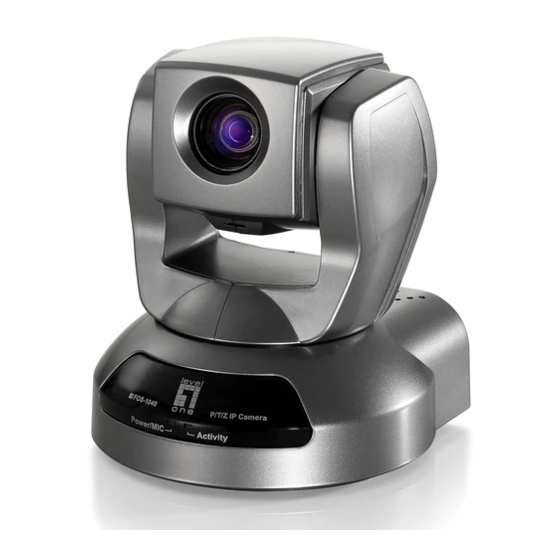
Package Contents Network Camera Camera stand Power adapter Software CD A/V Cable Antenna... -
Page 4: Table Of Contents
Table of Contents ..........................1 EFORE RODUCT ..............................2 ACKAGE ONTENTS ..............................1 ABLE OF ONTENTS ................................2 NSTALLATION Hardware Installation ..............................2 Software Installation..............................4 Initial Access to the Network Camera ........................8 ................................10 OW TO Authentication ................................10 Primary User’s Capabilities ........................... 11 Administrator’s Capabilities...........................15 ..........................24 EFINITIONS IN ONFIGURATION System Parameters ..............................25... -
Page 5: P Ackage C Ontents
Installation Hardware Installation Please verify that your product package contains all the accessories listed in the foregoing Package Contents. Depending on the user’s application, an Ethernet cable may be needed. The Ethernet cable should meet the specs of UTP Category 5 and not exceed 100 meters in length. - Page 6 in Ethernet to proceed with wireless LAN configuration. The Network Camera provides a general I/O terminal block with one digital input and one relay switch for device control. Pin 1 and Pin 2 can be connected to an external sensor device and the state of voltage can be monitored from the initial state 'LOW'.
-
Page 7: Software Installation
Software Installation In this manual, "User" refers to whoever has access to the FCS-1040/WCS-2040,IP Network Camera, and "Administrator" refers to the person who can configure the Network Camera and grant user access to the camera. At the end of the hardware installation, the Administrator must place the product software CD into the CD-ROM drive of the PC running in MS Windows. - Page 8 Cameras will be located by the Installation Wizard. There may be several entries shown in the window. The Administrator may differentiate the Network Cameras with the MAC address. For the MAC address of each FCS-1040/WCS-2040, please check the label on the bottom of the camera.
- Page 9 The IP addresses shown in the "Current IP Address" field reflect those on the local network. They may be from the DHCP server. If there is no DHCP server, the camera will try to find a free IP address (this takes from 15 second to 3 minutes, depending on the LAN status). The method of finding IP address is seeking from 192.168.0.99, to 192.168.0.254.
- Page 10 For more detailed usage of the Installation Wizard, please refer to the user’s manual of the Installation Wizard.
-
Page 11: Initial Access To The Network Camera
IT or networking supervisor for help. Check Network Settings FCS-1040/WCS-2040 IP Network Camera can be connected either before or immediately after software installation onto the Local Area Network. The Administrator should complete the network settings on the configuration page, including the correct subnet mask and IP address of gateway and DNS. -
Page 12: Change Password To Prevent Unauthorized Access
“Troubleshooting” chapter of the Appendix. Change Password to Prevent Unauthorized Access The default Administrator’s password is the “MAC Address” of your FCS-1040/WCS-2040. Please refer to the bottom label of your MAC address. The Administrator should immediately implement a new password as a matter of prudent security practice. Once the Administrator’s password is saved, the Network Camera will ask for the user’s name and password before each... -
Page 13: How To Use
The default user name is “root”. The default password is the MAC address of your own FCS-1040/WCS-2040, which marks at the bottom label of each device. Please enter the MAC address in capital letters. -
Page 14: Primary User's Capabilities
Primary User’s Capabilities Main Screen with Camera View The main page layout has three parts: Configuration functions: The camera can be configured using these user interfaces. Camera View: What the camera sees. Pan/Tilt/Zoom control buttons: These buttons provide a command interface to control the aim of the camera. - Page 15 Clicking on this button links you to the client setting page, please check the following session for more details. “Configuration” Only the Administrator can access camera configurations. The camera view The information bar at the top of the camera view shows the assigned caption and the current date/time.
- Page 16 original position. “Stop” This stops the “Auto Pan” command or “Auto Patrol” command. The CCD control buttons: The set of the buttons is for controlling focus, iris and zooming. Click to zoom telescopically Click to zoom widely and and see more clearly. see more.
-
Page 17: Client Settings
Client Settings There are four settings for the client side. Media Options - For the User to determine whether to receive video, audio or both. Protocol Options – Which allows choosing on connection protocol between client and server. There are two protocol choices to optimize your usage – UDP and HTTP. The UDP protocol allows for more real-time audio and video streams. -
Page 18: Administrator's Capabilities
Administrator’s Capabilities Fine-tuning for Best Performance There are a few choices the Administrator is allowed to maximize the capabilities of the Network Camera. Best performance generally equates to the fastest image refresh rate with the best video quality, and at the lowest network bandwidth as possible. The six factors, “Size”, “Maximum frame rate”, “Video codec type”, “Key frame interval”, “Fix bit rate”, and “Fix quality”... - Page 19 allows for better video quality and the human eyes cannot readily detect the differences between those of 20, 25, or 30 frames per second. If your network bandwidth is below 384 Kbps, set the “Fix bit rate” according to your bandwidth and try to get the best performance by fine-tuning with the “Maximum frame rate”.
-
Page 20: Opening Accounts For New Users
Opening Accounts for New Users Protect Network Camera by Passwords The Network Camera is shipped without any password by default. That means everyone can access the Network Camera including the configuration as long as the IP address is known. It is necessary to assign a password if the Network Camera is intended to be accessed by others. -
Page 21: Build A Multimedia Web Attraction Site
Build a Multimedia Web Attraction Site Demo on Multiple Sites – Mid-scale Service The Network Camera can allow ten visitors on-line simultaneously. After Installation, focus the Network Camera on any object you wish to share, and tell the visitors to type in the web browser address. - Page 22 1. Click on “Configuration” on the homepage, 2. Click on “Mail & FTP” in the left column, 3. Fill in the FTP related settings including server, server port, user name and password, as well as the upload path if it is specified by the web space, 4.
- Page 23 uploaded to the correct folder, 10. Prepare a homepage with the embedded image reference to the image file uploaded via FTP in advance. If the web space has no FTP service An auto-refresh homepage can be used to periodically poll the newest image from the Network Camera.
- Page 24 Example of an auto-refresh web page: <html> <head> <title>Example - auto refresh</title> </head> <body> <p align=left> <font size="7" face="Comic Sans MS" color="#FF0000"> MiniAVServer Demo </font> </p> <p align=left> <!-- Begin of scripts to auto refresh the image. Change the IP address in the image URL and refreshrate if necessary.
-
Page 25: Build A Security Application
Build a Security Application The Administrator can combine options on the application page to perform many useful security applications. There are two trigger sources coming from attached devices, such as for motion detection. There are also two kinds of actions responding to such events, including uploading snapshots over the Internet and driving other attached devices. - Page 26 11. Fine-tune using the “Sensitivity” and “Percentage” fields to best suit the camera’s environment. Higher ”Sensitivity” detects the slighter motion. Higher “Percentage” discriminates smaller objects, 12. Clicking on “Save” enables the activity display. Green means the motion in the window is under the watermark set by the Administrator and red means it is over the watermark, 13.
-
Page 27: Definitions In Configuration
Definitions in Configuration Only the Administrator can access system configuration. Each category in the left column will be explained in the following pages. The bold texts are the specific phrases on the Option pages. The Administrator may type the URL below the figure to directly enter the frame page of configuration. If the Administrator also wants to set certain options through the URL, read the reference appendix for details. -
Page 28: System Parameters
System Parameters "Host name" The text displays the title at the top of the main page. “Turn off the LED indicator” Check this option to shut off the LED on the rear. It can prevent the camera’s operation being noticed. “Automatically restore DO state”... -
Page 29: User Group Administration
User Group Administration “Root password” Change the Administrator’s password by typing in the new password identically in both text boxes. The typed entries will be displayed as asterisks for security purposes. After pressed , the web browser will ask the Administrator for the new password for access. -
Page 30: Edit User
Edit User Type the new password, change the privilege and press to modify the account. <url> http://<Network Camera>/setup/edituser.vspx <Network Camera> is the domain name or original IP address of the Network Camera. -
Page 31: Network Settings
Network Settings Any changes made on this page will need to restart the system in order to validate the changes. Make sure every field is entered correctly before clicking on "Get IP address automatically" & “Use fixed IP address” The default status is “Get IP address automatically”. This can be tedious having to perform software installation whenever the Network Camera starts. - Page 32 “UDP Video channel port” This can be something other than the default port 5003 in order to work with the port opened by the firewall. <url> http://<Network Camera>/setup/network.vspx <Network Camera> is the domain name or original IP address of the Network Camera.
-
Page 33: Wireless (Wcs-2040 Only)
Wireless (WCS-2040 Only) “SSID” (Service Set Identifier), it is a name that identifies a wireless network. Access Points and wireless clients attempting to connect to a specific WLAN (Wireless Local Area Network) must use the same SSID. The default setting is default. Note: The maximum length of SSID is 32 single-byte characters and SSID can’t be any of “, <, >... - Page 34 key length, acceptable input length is listed as following: 64 bits key length: 10 Hex digits or 5 characters. 128 bites key length: 26 Hex digits or 13 characters. Note: When 22(“), 3C(<) or 3E(>) are input in network key, the key format can’t be changed to ASCII format.
-
Page 35: Ddns & Upnp
DDNS & UPnP “Enable DDNS” This option turns on the DDNS function. “Provider” The provider list contains four hosts that provide DDNS services. Please connect to the service provider’s website to make sure the service charges. “Host Name” If the User wants to use DDNS service, this field must be filled. Please input the hostname that is registered in the DDNS server. -
Page 36: Mail & Ftp
Mail & FTP SMTP “1st SMTP (mail) server” The domain name or IP address of the external email server. “1st SMTP account name” Granted account name on the email server. “1st SMTP password” Granted password on the email server. “1st recipient email address” The email address of recipients for snapshots or log file. Multiple recipients must be separated by semicolon, ‘;’. - Page 37 “2nd FTP password” Granted password on the backup FTP server. “2nd FTP remote folder” Granted folder on the backup FTP server. “2nd FTP passive mode” Passive mode setting for the backup FTP server. <url> http://<Network Camera>/setup/mailftp.vspx <Network Camera> is the domain name or original IP address of the Network Camera.
-
Page 38: Video Codec Parameters
Video Codec Parameters “Text on video” The text will be displayed in the black bar above the video window with a timestamp. The timestamp is captured from date and time of the Network Camera that is maintained by a built-in real-time clock. “Color”... - Page 39 <url> http://<Network Camera>/setup/video.vspx <Network Camera> is the domain name or original IP address of the Network Camera.
-
Page 40: Image Settings
Image Settings Click on “Image Settings” to pop up another window for tuning "Brightness", “Contrast”, “Hue” and "Saturation" for video compensation. Each field has eleven levels ranged from -5 to +5. The User may press “Preview” to fine-tune the image. When the image is O.K., press “Save”... - Page 41 “Auto tracking white balance” is usually applied when the Network Camera is aiming outdoor. Adjusting the 9 levels of white levels can help the camera capturing video with correct colors. On the other hand, select “White balance control” will disable “Auto tracking white balance”. It is usually applied indoor to adjust the video colors.
- Page 42 The picture illustrates the corresponding areas of the selecting window in the real video. “Select All” will check all the areas in the windows and “Clear All” will do vice versa. “Save” button can set the selected areas for BLC. IN THE CCD SETTINGS WINDOW, CLICK ON “PREVIEW”...
-
Page 43: Audio
Audio “Transmission mode” There are five options to select. For all the modes, only one client can talk to the server at the same time. “Full-duplex (Talk and listen simultaneously)” In this mode, the User can talk to the server while listening sound from the server simultaneously. - Page 44 <url> http://<Network Camera>/setup/audio.vspx <Network Camera> is the domain name or original IP address of the Network Camera.
-
Page 45: Motion Detection
Motion Detection “Enable motion detection” Check this option to turn on motion detection. Click on this button to add a new window. At most three windows can exist simultaneously. Use the mouse to click, hold and drag the window frame to resize or the title bar to move. Clicking on the ‘x’... -
Page 46: Camera Control
Camera Control On the Camera Control page, there are two main function control areas: Camera control area The pan and tilt functions can be controlled with these buttons. The “Left” button aims the camera to the left; the “Right”, “Up”, and “Down” buttons aim the camera accordingly. The “Home” button aims the camera to the center. - Page 47 move the aim of the camera. To allow controls only through URL commands or web pages, leave this box unchecked. “Zoom times display” Checking this box allows the Administrator to display the zoom magnitude on the transmitted video. The information is described as the following table: Text displayed Meanings Zoom X3...
- Page 48 Camera control area Preset function area <url> http://<Network Camera>/setup/camctrl.vspx <Network Camera> is the domain name or original IP address of the Network Camera.
-
Page 49: Application Setup
Application Setup Weekly Schedule “Sun” ~ “Sat” Select the days of the week to perform the following operations. “Snapshots begin at” Set the time to start operations. “Snapshots stop at” Set the time to stop operations. Setting identical begin time and stop time means 24-hour operation. -
Page 50: Sequential Operation
Sequential Operation “Snapshot interval” The Network Camera will send snapshots at the specified intervals to the external server. “Send snapshots by email” This selects the uploading method following the intervals set above. The snapshot named “video.jpg” will be attached in the email with the subject title “Periodic snapshots”. - Page 51 <url> http://<Network Camera>/setup/app.vspx <Network Camera> is the domain name or original IP address of the Network Camera.
-
Page 52: Viewing System Log
Viewing System Log Click on the link on the configuration page to view the system log file. The content of the file provides useful information about configuration and connections after system boot-up. Viewing System Parameters Click on this link on the configuration page to view the entire system’s parameter set. The content is the same as those in CONFIG.INI. -
Page 53: Appendix
Appendix A. Troubleshooting Status LED After powering up, the Network Camera performs a self-diagnostic to detect any hardware defects. The following table lists the LED patterns in general. In case of any fatal error, the LED will blink in a pattern other than those below. Condition LED color During self-diagnostic after power on... - Page 54 B. Frequently Asked Questions Q What if I forget my password? A After the Administrator's password has been assigned, every access to the Network Camera needs authentication. If you are one of the managed users, you have to ask the Administrator for the password.
- Page 55 Also notice the power line frequency must match the local utility to synchronize and minimize the effect of flickering florescent lights. Q Why does the image not refresh regularly? A Some anti-virus programs filter the received web content. It takes time to perform data examination and affect the streaming application such as that of Network Camera.
- Page 56 The user authentication and special confirmation in installation can keep the Network Camera from unauthorized access. You may also change the HTTP port to a non-public number. The demo account is good to separate guests from normal users and thus you can easily block guests anytime.
-
Page 57: Cleaning The Lens
B. Cleaning the Lens The Network Camera with Pan/Tilt/Zoom is a network camera with high quality lens. When it is necessary to clean the lens, please follow these instructions: Prepare cotton swabs and alcohol. Moisten the cotton swab with alcohol. Slightly clean the lens. -
Page 58: Pan/Tilt/Zoom Data
C. Pan/Tilt/Zoom Data unit tilt angle: 0.918 degree The tile speeds of different auto pan/tile speeds. auto tile speed 1: 1.65 degree/sec auto tile speed 2: 6.59 degree/sec auto tile speed 3: 8.24 degree/sec auto tile speed 4: 10.98 degree/sec auto tile speed 5: 16.47 degree/sec auto tile speed 6: 32.95 degree/sec tilt speed... -
Page 59: Style Convention
Camera can be easily integrated through convenient URLs. This section lists the commands in URL format corresponding to the basic functions of the Network Camera. Overview This section specifies the external HTTP based application programming interface. The HTTP based camera interface provides the functionality to request a single image, to control camera functions (PTZ, output relay etc.) and to get and set internal parameter values. -
Page 60: General Cgi Url Syntax And Parameters
General CGI URL Syntax and Parameters CGI parameters are written in lower-case and as one word without any underscores or other separators. When the CGI request includes internal camera parameters, the internal parameters must be written exactly as they are named in the camera or video server. The CGIs are organized in function related directories under the cgi-bin directory. -
Page 61: Set Server Parameter Values
Example: request IP address and it’s response Request: http://192.168.0.123/cgi-bin/admin/getparam.cgi?network_ipaddress Response: HTTP/1.0 200 OK\r\n Content-Type: text/html\r\n Context-Length: 33\r\n \r\n network.ipaddress=192.168.0.123\r\n Set Server Parameter Values Note: This request require administrator access Method: GET/POST Syntax: http://<servername>/cgi-bin/admin/setparam.cgi? [nosync=<value>&]<parameter>=<value> [&<parameter>=<value>…][&return=<return page>] parameter value description nosync 0, 1 Specifies that there should be no sync (write) of the corresponding configuration file on flash. -
Page 62: Available Parameters On The Server
Example: Set the IP address of server to 192.168.0.123 http://myserver/cgi-bin/admin/setparam.cgi?Network_IPAddress=192.168.0.123 Available Parameters on the Server Group: System NAME VALUE DESCRIPTION hostname <text string shorter than 15 host name of server (r/w) characters> ledoff Do not turn of the led indicator (r/w) Turn off the led indicator resetdo... - Page 63 di<1~4> <state> H – NC connected with COMMON L – NO connected with COMMON supportscriptversion <text string shorter than 10 The version of supported script/webpage characers> scriptversion <text string shorter than 10 The maximum version of currently installed characers> script/webpage Group: Security NAME VALUE...
- Page 64 smtp1 <domain name or IP primary SMTP server, max 40 characters (r/w) address> mailto1 <Recipient email address> mail recipient address, max 80 characters (r/w) mailuser1 <user account name on 1 mail recipient address, max 63 characters (r/w) smtp server> mailpass1 <user password for mail recipient address, max 15 characters (r/w)
- Page 65 (r/w) characters ftpfolder2 <target folder on 2 upload folder in secondary FTP server, max 40 (r/w) server> characters ftppassmode2 Enable passive mode of primary FTP server (r/w) Disable passive mode of primary FTP server httpport <number less than 65535> HTTP port (r/w) (restart) videoport <number less than 65535>...
- Page 66 keylength (64, 128) for 802.11g Key length in bits (r/w) <64> keyformat Key1 ~ Key4 will be represented in HEX format (r/w) ASCII Key1 ~ Key4 will be represented in ASCII format keyselect 1 ~ 4 Default key number (r/w) <1>...
- Page 67 (r/w) color quality fix bit rate (r/w) fix quantization quant lowest quality of video (r/w) lower quality of video normal quality of video higher quality of video highest quality of video bitrate 64000 set bit rate to 64K bps (r/w) 128000 set bit rate to 128K bps 256000...
- Page 68 sendclientaudio Do not send audio from active client to all other (r/w) clients Send audio from active client to all other clients (only possible in Half-duplex) source (r/w) Use external microphone in Use build microphone lowbandwidth Disable low bandwidth environment support (r/w) Improve in low bandwidth environment enableaec (r/w)
- Page 69 win<1~3>_width 0 ~ 352 for CCD Width of motion detection window. (r/w) 0 ~ 320 for CMOS win<1~3>_height Height of motion detection window. 0 ~ 288 for PAL (r/w) 0 ~ 240 for NTSC & CMOS update Update the above motion detection settings to take effect Group: DDNS NAME...
- Page 70 autospeed -5 ~ 5 Auto pan speed (r/w) dwelling 0 ~ 9999 Time to dwelling when patrol (r/w) enableir 0, 1 Enable or disable the IR control (r/w) presetname_<0~9> Text string shorter than 30 The name of preset location (r/w) characters.
-
Page 71: Drive The Digital Output
enableblc 0 or 1 Disable or enable back light compensation. (r/w) blcsenslevel Set back light compensation level (r/w) blcarea(0) 0~255 First row in BLC area. 0 to indicate disabling (r/w) all sub windows. 255 to indicate enabling all sub windows. blcarea(1) 0~255 Second row in BLC area. -
Page 72: Query Status Of The Digital Input
this parameter, it will redirect to an empty page. Example: Drive the digital output 1 to high and redirect to an empty page http://myserver/cgi-bin/setdo.cgi?do1=H Query Status of the Digital Input Note: This request requires the privilege of I/O access control. Method: GET/POST Syntax: http://<servername>/cgi-bin/getdi.cgi?[di1][&di2][&di3][&di4]... -
Page 73: Capture Single Snapshot
Capture Single Snapshot Note: This request require normal user privilege Method: GET/POST Syntax: http://<servername>/cgi-bin/video.jpg Server will return the most up-to-date snapshot in JPEG format. The size and quality of image will be set according to the JPEG settings on the server. Return: HTTP/1.0 200 OK\r\n Content-Type: image/jpeg\r\n... -
Page 74: System Logs
edit Modify the account password and privilege. When using this method, “username” field is necessary, and other fields are optional. If not specified, it will keep original settings. username <name> The name of user to add, delete or edit userpass <value>... -
Page 75: Configuration File
Configuration File Note: This request requires administrator privilege Method: GET/POST Syntax: http://<servername>/cgi-bin/admin/configfile.cgi Server will return the up-to-date configuration file. Return: HTTP/1.0 200 OK\r\n Content-Type: text/plain\r\n Content-Length: <configuration file length>\r\n \r\n <configuration data>\r\n Upload File (firmware) Note: This request requires administrator privilege Method: POST Syntax: http://<servername>/cgi-bin/admin/upload.cgi... - Page 76 Method: GET/POST Syntax: http://<servername>/cgi-bin/camctrl.cgi? [move=<value>][&focus=<value>] [&iris=<value>][&speedpan=<value>][&speedtilt=<value>][&speedzoom=<value>] [&speedapp=<value>][&auto=<value>][&zoom=<value>][&return=<return page>] parameter value description move home Move to camera to home position Move camera up down Move camera down left Move camera left right Move camera right speedpan -5 ~ 5 Set the pan speed speedtilt -5 ~ 5 Set the tilt speed...
-
Page 77: System Information
Recall Note: This request requires camera control access privilege Method: GET Syntax: http://<servername>/cgi-bin/recall.cgi? recall=<value>[&return=<return page>] parameter value description recall Text string less than One of the present positions to recall. 30 characters return <return page> Redirect to the page <return page> after the parameter is assigned. -
Page 78: Preset Locations
[Preset<1>=<second preset location>\r\n] [...] PTZEnabled=<PTZ status>\r\n Where the <PTZ status> is a 32-bits integer, each bit can be set separately as follows: Bit 0 => Support camera control function 0(not support), 1(support) Bit 1 => Build-in or external camera. 0(external), 1(build-in) Bit 2 =>... -
Page 79: Technical Specifications
E. Technical Specifications - System Aperture F1.8~2.9 CPU: Trimedia PNX1300 10X optical zoom RAM: 16MB SDRAM 10X digital zoom ROM: 4MB FLASH ROM - Audio - Networking 32Kbps, 24Kbps, 8Kbps Protocol Acoustic echo cancellation TCP/IP, HTTP, SMTP, FTP, Telnet, NTP, DNS Full duplex audio communication UPnP, DDNS and DHCP Physical...
Need help?
Do you have a question about the FCS-1040 and is the answer not in the manual?
Questions and answers