Table of Contents
Advertisement
Advertisement
Table of Contents

Related Manuals for Sunrise Medical Quickie RX


Summary of Contents for Sunrise Medical Quickie RX
- Page 1 Owner’s Manual...
- Page 2 RX/RXS Issue 5...
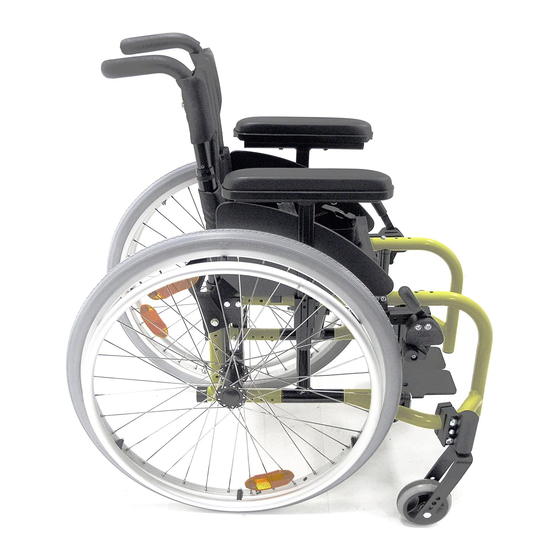
- Page 3 Height adjustable armrests illustrated How to use this manual We at Sunrise Medical want you to get the best out of your Quickie RX/RXS wheelchair. This Owner’s Manual will familiarise you with the chair and its features. It contains hints on everyday usage and general care in addition to information on the high quality standards which we adhere to and details about the guarantee.
-
Page 4: Table Of Contents
24 Chair adjustments page 25 - 34 Lap belt instructions page 35 - 37 Transportation page 38 Maintenance schedule page 39 Cleaning guidelines, accessories and tools page 40 Technical data page 41 Sunrise Medical page 42 RX/RXS Issue 5... -
Page 5: Introduction
This wheelchair is to be used to aid individuals with limited or no personal mobility. The Quickie RX/RXS are suitable for both indoor and outdoor use. The maximum user weight for these chairs is 113kg (250lb). -
Page 6: Guarantee
GOODS PRIOR TO INSPECTION BY THE approved Sunrise Medical service agent is fully DESIGNATED REPAIRER. trained by Sunrise Medical to carry out detailed 6 If the Customer is operating the Goods away from maintenance as and when required. Use only the locality of the designated repairer the Customer genuine Sunrise Medical replacement parts. -
Page 7: Features And Options
Features and options Height adjustable armrest 8a Axle bracket and threaded Push handle backrest tube axle (RX) Angle adjustable backrest Wheel lock Handrim 10 Crossbrace Full profile tyre 11 Swing-away release catch X spoked wheel 12 Castor fork/wheel assembly Quick-release axles 13 Flip up footplate Adjustable axle plate (RXS) 14 Swing-away hanger... -
Page 8: Safety Tips
Wheelies should only wheelchair prescriber/supplier. be performed by experienced Sunrise Medical recommends anti- users. Do not attempt to learn or tip tubes for first time and less practice this manoeuvre without the experienced wheelchair users. -
Page 9: Using Your Chair
Using your chair Opening Tilt the wheelchair towards you far enough to take the weight off the opposite wheel (Fig.1). Push down with the palm of the hand on the seat rail (1) closest to you until the wheelchair has completely opened. Allow the chair to return to an upright position on all four wheels. - Page 10 Using your chair Water, snow and ice 3. Always use good posture and proper body mechanics. When Contact with water, snow or ice you lift or support the rider or may affect the performance of your chair, bend your knees slightly wheelchair.
- Page 11 Using your chair Centre of balance (continued) Dressing and changing clothes 2. Changing the setup of this chair increases the risk of a fall or tip Warning: over. Be very careful if you make Your weight may shift if you dress a change to any of the following: or change clothes while seated in The position of the rear axles,...
- Page 12 Using your chair Wheelies Follow these steps when learning (rear wheel balance) to do a wheelie with help: A wheelie is performed by 1. The attendant should be at the balancing on the rear wheels of rear of the chair, and must be your chair, while the front castors able to move with the chair to are raised off the ground.
- Page 13 Using your chair Doorways and obstacles 1. Avoid reaching or leaning if you must shift your weight to do so. Warning: Moving forwards in your seat 1. As much as possible ensure that may cause the chair to tip the floor areas where you use forward.
- Page 14 Using your chair Slopes and hills Warning: Going up or down a slope (Fig. 3) or riding on the side of a hill (Fig. 4) will change the centre of balance of your chair. If you fail to heed these warnings you may suffer a severe injury from a tip over, fall or loss of control:...
- Page 15 Using your chair Transfers 7. Be careful of the footrests. To avoid a trip or fall when you Warning: transfer, you should: If you fail to heed these warnings, a Make sure that your feet do fall or tip over may occur and cause not hang up or get caught in the severe injury to you: space between the footrests.
- Page 16 Using your chair Kerbs and single steps Warning: If you fail to heed these warnings, a fall or tip over may occur and cause severe injury to you or others: 1. Never try to climb or descend a kerb or step alone unless you are a skilled rider and: you can safely do a wheelie;...
- Page 17 Using your chair Tips for descending a kerb or single step with help Read and follow the warnings for attendants. To help the rider descend a kerb or single step in a backward direction: 1. Check to make sure that push handle grips will not rotate or slip off.
- Page 18 Using your chair Tips for climbing a kerb or single step with help Read and follow the warnings for attendants. To help the rider mount a kerb or single step in a forward direction: 1. Always stay behind the wheelchair. 2.
- Page 19 Using your chair Moving a chair and rider up 2. The attendant at the rear is in or down stairs control. He or she tilts the chair back to its balance point Warning: (Fig. 12). Where possible, avoid carrying out 3.
- Page 20 Using your chair Tips for descending stairs with help Read and follow the warnings for attendants. Follow these steps when helping the rider descend stairs: 1. Move the chair and rider forward down the stairs (Fig. 13). 2. The attendant at the rear is in control.
-
Page 21: Footrests
Chair features Swing-away footrests Swing-away footrests (Fig. 14) enable easier forward transfers from your chair to be performed. Releasing and removing footrests To release the footrest, push the release latch (1) towards the frame (2), and rotate the footrest outward. To remove the footrest from the chair lift vertically from this position. -
Page 22: Armrests
Chair features Swing-away armrests Swing-away removable armrests (Fig. 16) are installed by simply sliding the armrest tube (1) into the receiver (2). To remove simply pull the armrest upwards until the tube clears the receiver. To swing-away pull the armrest upwards approximately 25mm (1") until it will swing freely away from the chair. -
Page 23: Armrests
Chair features Height-adjustable armrests To install armrests, slide the outer arm post (1) into the receiver (2). The armrest will automatically lock in place (Fig. 17). To adjust the armrest height, rotate the release lever (3) to the second stop (Fig. 17B). Slide the armrest pad (4) up or down to the desired height and return the lever to the locked position. -
Page 24: Wheel Locks
Chair features Wheel locks High mount push-to-lock wheel locks are shown in Fig. 18. The wheel lock mounts on a clamping system (1) and is correctly set prior to leaving the factory. To apply the wheel lock simply push the operating lever (2) forwards until you feel it go over centre, and the grip bar (3) grips the tyre (4). -
Page 25: Knee Lever Brakes
Chair features Knee lever brakes (RXS only) The knee lever brake (Fig. 20) mounts on a clamping system (1) and is correctly set prior to leaving the factory. To apply the knee lever brake simply push the operating lever (2) forwards until you feel it go over centre, and the grip bar (3) grips the tyre (4). -
Page 26: Backrests And Optima Upholstery
Chair features Backrest The backrest is available in three height ranges with 50mm (2") height adjustment in each range (Fig. 22). The upholstery comes with front and rear insert slots. The rear slot (with no opening) accommodates a standard back. The front slot (with top opening) is used for push handle backs. -
Page 27: Height Adjustable Push Handles
Chair features Optima upholstery (RXS only) Your RXS wheelchair can be supplied with Optima backrest upholstery and stabiliser bar ® (Fig. 24 and 25). Adjustable Velcro straps allow the backrest to be shaped to follow the exact profile of your back. This will enhance both the comfort and support that this chair will give you. -
Page 28: Quick-Release Axles
Chair features Quick-release axles To remove quick-release axles (Fig. 26) simply press the quick- release button (1) which is located in the wheel hub (2), and grip the wheel through the spokes (3) around the hub and pull the axle out of its sleeve (4). -
Page 29: Chair Adjustments
Chair adjustments Footplate height adjustment To adjust the footplate (1) height, loosen the screw (2), using a 4mm Allen key located as shown (Fig. 28), and set the footplate height to the required position. Tighten the screw to 5-8Nm torque. Fig. - Page 30 Chair adjustments Footplate angle adjustment Angle adjustable footplate To adjust the footplate angle (Fig. 30), loosen the screws (1) with a 4mm Allen key sufficiently to allow the footplate to be rotated to the required angle. When at the required angle tighten the Allen screws using a torque spanner to 8-10Nm torque setting.
- Page 31 Chair adjustments Adjusting optima upholstery (RXS only) To adjust the upholstery (Fig. 32) first lift up the back flap (1) covering the strips, with the user sitting in the chair, proceed to loosen or tighten each individual strap (2). It is necessary to follow the profile of the users back (In practice this will generally mean tightening the straps around the lumbar region,...
- Page 32 Chair adjustments Knee lever brake (RXS only) and wheel lock adjustment To adjust, loosen the two screws (1) on each clamp (2), and the screws (3 - Fig. 35) on the underside of each clamp (note the screws are shown removed for clarity).
- Page 33 Chair adjustments Seat height (RXS) Seat height can be adjusted by moving the axle sleeve (1) vertically (Fig. 36) in the axle plate slot (2). This allows a 114mm adjustment in 13mm increments. First loosen the 28mm A/F outer retaining nut (3) sufficiently to allow the sleeve and locating plate (4) to slide, and position the sleeve and plate at the required height, ensuring...
- Page 34 Chair adjustments Wheelbase (RXS) To adjust the rear wheelbase (Fig. 38), loosen the inner (1) and outer (2) axle sleeve retaining 28mm A/F nuts. Screw the nuts along the axle sleeve (3) until the desired wheelbase is found. Tighten the nuts with a torque wrench to a setting of 45Nm.
- Page 35 Chair adjustments Centre of gravity (RX) To adjust the centre of gravity (Fig. 40) remove the wheel, by unscrewing the 19mm A/F retaining nut (1, if quick release axles are not fitted), the wheel spacer (2, if fitted), the axle (3), the two bracket retaining bolts (4) and nuts (5) using 10mm A/F spanners.
- Page 36 Chair adjustments Castor angle adjustment For optimum performance, the castor housing should always be perpendicular to the floor (Fig. 42). This adjustment is made with eccentric (offset) bolts (1). To change the angle, place the chair on a flat surface (such as a table.) Remove the 10mm A/F bolt nuts (2) from the back side of the castor housing (3).
- Page 37 Chair adjustments Chair height adjustment Two-hole castor forks (Fig. 44) allow you to interchange 127mm (5"), 152mm (6") and 203mm (8") castor wheels and to adjust the seat height. To adjust, remove the 13mm A/F axle bolt (1) and nut (2) with 13mm A/F spanners and remove the castor wheel (3).
-
Page 38: Chair Adjustments
Chair adjustments Castor adjustment To remove play from the castor stem (Fig. 46), remove the dust cover (1) by prising it off. Tighten the nut (2) with a 19mm A/F socket spanner until all play is removed, yet still allows the castor fork assembly to rotate freely. -
Page 39: Lap Belt Instructions
Lap belt instructions Note: Lap belts are fitted as positional aids, and are not suitable as transportation restraints. Step 1 Step 1 Positioning belt kit. The Positioning belt kit contains, one positioning belt, three tri glide buckles and two cable ties. Step 2 Step 2 To assemble the positioning belt. - Page 40 Lap belt instructions Step 5 Step 5 To secure the positioning belt to the chair. Take one of the cable ties supplied and thread through the positioning belt strap. Then wrap around the frame and fasten together. DO NOT over tighten positioning belt.
- Page 41 Quickie 2 Millennium wheelchairs. Quickie RXS: Advice to client The positioning belt must only be fitted by an approved Sunrise Medical dealer / agent. The positioning belt should only be adjusted by a professional, or a Sunrise Medical approved dealer / agent.
-
Page 42: Transportation
This wheelchair has been crash tested vehicle luggage compartment during in its standard configuration. However, transportation. due to safety risks Sunrise Medical do not recommend the transportation of 9. The Tie down restraints should be people in their wheelchairs. fitted to the main frame of the wheelchair... -
Page 43: Maintenance Schedule
Maintenance schedule All Quickie RX / RXS wheelchairs leave the factory inspected and adjusted for immediate use. Continuous use will require routine maintenance and adjustments, especially if original settings are altered. Initial adjustment, carried out by your wheelchair prescriber/supplier, should accommodate your body structure and personal preference. -
Page 44: Cleaning Guidelines, Accessories And Tools
Cleaning guidelines, accessories and tools Cleaning guidelines Accessories In addition to the maintenance Anti-tip tubes checks on the previous page, Armrest pouch general cleaning of both the frame Backpack and upholstery should be Caddy undertaken. To maintain its Crutch holder appearance the upholstery should Leg strap be cleaned regularly. -
Page 45: Technical Data
Technical data Quickie RX Overall length with legrest 1021mm min.-1090mm max. Overall width 657mm Folded length 748mm min.-848mm max. Folded width 328mm Folded height 913mm Total mass 15kg - 11kg for the kids version Mass of heaviest part 13.5kg Static stability downhill 19.5... -
Page 46: Sunrise Medical
Sunrise Medical Your new Quickie RX/RXS is manufactured in the West Midlands by Sunrise Medical. With over 30 years experience, we are one of the longest established mobility equipment manufacturers in the UK. All our Wheelchairs, Powerchairs, Scootas and Stairlifts undergo rigorous tests to ensure that they meet our requirements of comfort, safety and durability. - Page 47 Sunrise Medical Limited High Street, Wollaston, West Midlands DY8 4PS England Tel +44 (0)1384 44 66 88 Fax +44 (0)1384 44 66 99 www.sunrisemedical.co.uk...
Need help?
Do you have a question about the Quickie RX and is the answer not in the manual?
Questions and answers
What is the function of the **** the leg rests ?