
Related Manuals for LevelOne WNC-0304USB


Summary of Contents for LevelOne WNC-0304USB
-
Page 1: User Manual
LevelOne WNC-0304USB 11g USB Adapter w/LCD WiFi Detector User Manual V 1 . 0 . 1 - 0 6 0 7... -
Page 2: Table Of Contents
CONTENTS INTRODUCTION......................... 1 1.1 F .......................... 1 EATURES 1.2 S ......................... 2 PECIFICATIONS 1.3 P ......................3 ACKAGE ONTENTS HOW TO CHARGE THE BATTERY OF WI-FI DETECTOR ..........4 HOW TO USE THE WI-FI DETECTOR................5 HOW TO INSTALL THE DRIVER AND UTILITY............. 8 4.1 I ................. -
Page 3: Introduction
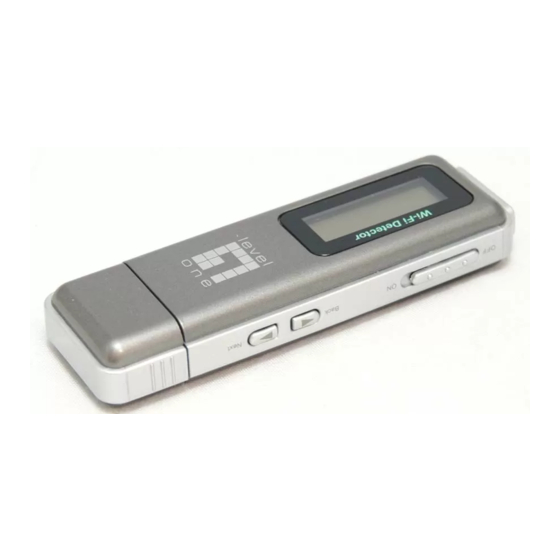
1 Introduction Thank you for purchasing LevelOne 11g USB adapter with Wi-Fi Detector. This convenient device instantly detects wireless hotspots anywhere. The backlight LCD display tells the user detailed information about any detected hotspot. There’s no need to purchase any battery because there is a rechargeable Li-Polymer battery which recharges whenever the detector is inserted into any USB port. -
Page 4: Specifications
• Suitable for Any Notebook or Desktop PC. 1.2 Specifications • Standard: IEEE 802.11g/b • LCD Size: 96x32 with EL backlight • Battery: 4.2V Rechargeable Li-Polymer Battery • Bus Type: USB 2.0 Type A • Frequency Band: 2.4000~2.4835GHz (Industrial Scientific Medical Band) •... -
Page 5: Package Contents
1.3 Package Contents Before you begin the installation, please check the items of your package. The package should include the following items: • WNC-0304USB • USB Cable • CD Manual/Driver/Utility • Quick Installation Guide If any of the above items is missing, contact your supplier as soon as possible. -
Page 6: How To Charge The Battery Of Wi-Fi Detector
2 How to charge the battery of Wi-Fi Detector 1. Remove the cap from the Wi-Fi Detector, slide the power switch to the “ON” position and carefully insert the USB connector into any available USB port on your computer. You will see the recharging screen. -
Page 7: How To Use The Wi-Fi Detector
3 How to use the Wi-Fi Detector 1. Slide the power switch to the “ON” position. 2. The Wi-Fi detector will automatically enter scanning mode to detect Wi-Fi signals. In scanning mode the display will display the total number of both non-encrypted and encrypted Wi-Fi signals detected. - Page 8 The Icons on the LCD display are displayed as follows: 1. Operating Channel: Indicates the current operating channel of the detected Wi-Fi signal. 2. Number of AP’s Detected: the left digit indicates which detected Wi-Fi signal is currently displayed and the right digit indicates the total amount of Wi-Fi signals detected.
- Page 9 In “lock mode” the detector constantly re-detects and refreshes the signal strength to this specific SSID so the user can move around to find the optimal spot with strongest signal. Press and hold the “Seek/Lock” button for 4 seconds to unlock the “lock mode”. Seek/Lock...
-
Page 10: How To Install The Driver And Utility
4.1 Install the Configuration Utility Insert the Installation CD to your CD-ROM Drive. The WNC-0304USB installation menu will start up automatically from the CD. Click “Install Driver”. If the CD does not startup automatically (this function may be disabled in the Windows operating system), simply browse the CD from Windows and click on the autorun.exe program to access... - Page 11 Please click “Next” to continue the installation. If you want to install the software program in another location, click “Browse” and select an alternative destination. Then, click “Next”.
- Page 12 The system will display “Software Installation” screen. Click “Continue Anyway” to continue. Click “Finish” to complete the installation.
-
Page 13: Install The Usb Adapter
4.2 Install the USB adapter Plug the USB adapter into the USB port of your computer. The “Found New Hardware Wizard” is displayed, select “Install the software automatically (Recommended)” and click “Next”. Click “Continue Anyway” and the system will start to install the USB adapter. - Page 14 Click “Finish” to complete the installation.
-
Page 15: Using The Configuration Utility
4.3 Using the Configuration Utility To setup the USB adapter, double-click the icon in the system tray. For Windows XP, there is a “Windows Zero Configuration Tool” by default for you to setup wireless clients. If you want to use the Utility of the USB adapter, please follow one of the ways as below. - Page 16 Second Way A. Double-click the icon. B. Click “Advance”. C. Uncheck “Use Windows to configure my wireless network settings”.
-
Page 17: How To Configure The Utility
5 How to configure the utility The Configuration Utility is a powerful application that helps you configure the 11g Wireless LAN USB adapter and monitor the link status during the communication process. The Configuration Utility appears as an icon on the system tray of Windows while the adapter is running. -
Page 18: Wireless Connection Status
5.1 Wireless Connection Status When you open the Configuration Utility, the system will scan all the channels to find all the access points/stations within the accessible range of your adapter and automatically connect to the wireless device with the highest signal strength. From the screen, you may know all the infomration about the wireless connection. - Page 19 connecting to. The information includes Channel, Type, SSID, TX Rate and Encrypt settings. Note: Please refer to Section 5.2 for the description of each item. More Setting For setting more functions including disable/enable WEP and Power Saving Mode, etc. Please refer to Section 5.2, 5.3 and 5.4 for more detail.
-
Page 20: General Connection Setting
5.2 General Connection Setting Click “More Setting”, users are allowed to setup the wireless connection setting, Encryption Setting of the USB adapter and other advanced functions. Parameter Description General Connection Setting Wireless Mode 802.11b+g Mix Mode, it will auto scan all available 802.11b and 802.11g wireless station. - Page 21 When the adapter works in 11b mode, the maximum data rate is 11Mbps so that there are only “Auto/1/2/5.5/11Mbps” options you can select. SSID The SSID (up to 32 printable ASCII characters) is the unique name identified in a WLAN. The ID prevents the unintentional merging of two co-located WLANs.
- Page 22 Parameter Description Authentication Mode This setting has to be consistent with the wireless networks that the adapter intends to connect. Open System – No authentication is needed among the wireless network. Shared Key – Only wireless stations using a shared key (WEP Key identified) are allowed to connect each other.
-
Page 23: Wep And Wpa Encryption
5.3 WEP and WPA Encryption WEP is an data encryption algorithm, which protects Wireless LAN data in the network against eavesdropping. WEP has been found that it has some security problems. The adapter supports WPA (Wi-Fi Protected Access) that combines IEEE 802.1x and TKIP (Temporal Key Integrity Protocol) technologies. - Page 24 Parameter Description Key Length You may select the 64-bit, 128-bit or 256-bit to encrypt transmitted data. Larger key length will provide higher level of security, but the throughput will be lower. Default Key ID Select one of the keys (1~4) as the encryption key. Key Format Hexdecimal –...
- Page 25 meantime, the button will change to “Apply“ for you to confirm your settings.
-
Page 26: Wpa/Wpa2 Setting
5.3.2 WPA/WPA2 Setting The adapter can automatically detect the WPA setting of the AP which the adapter intends to connect to. To connect to the AP, you should setup the same setting as the AP. There are two kinds of WPA mode: WPA and WPA-PSK. WPA is designed for enterprise which requires a RADIUS Server and Certificate Server for the authentication. - Page 27 In “More Setting“ clicks “WPA Encryption Setting“ to setup WPA security key...
- Page 28 Parameter Description Connect Information It is the setting for WPA mode. Protocol This adapter supports three kinds of protocol for authentication including TLS, TTLS and PEAP. These three protocols require a certificate which is provided by the Certificate Server. PEAP and TTLS require a set of user name and password in addition.
-
Page 29: Advanced Settings
5.4 Advanced Settings The “Advanced Setting” allows user to enable/disable country roaming and power consumption mode, setup the fragmentation threshold and RTS/CTS threshold of the adapter. Parameter Description User Interface Select the display language of the utility. Two languages are enabled: English and Chinese. - Page 30 saving mode when it is idle, but some components of the adapter is still alive. In this mode, the power consumption is larger than “Maximum Power-Saving“ mode. PSP XLink Mode XLink is an infrastructure tunneling program which allows you to play Ad- hoc PSP multiplayer games through the Internet.
-
Page 31: Software Ap Mode
5.5 Software AP Mode This adapter can run as a wireless AP. The relative configurations of the AP including channel, SSID, MAC Address Filtering, WEP encryption and so on are described as follows. 5.5.2 AP Connection Status Parameter Description Mode Station –... -
Page 32: Ap General Connection Setting
5.5.2 AP General Connection Setting Click “More Setting”, users are allowed to setup the AP connection setting, Encryption Setting and other advanced functions. Parameter Description General Connection Setting Channel Select the number of the radio channel used by the AP. The wireless adapters which connects to the AP should set up the same channel. - Page 33 Hide SSID If “Hide SSID“ check box is enabled, the AP will not appear in the site survey list of any wireless adapters. It means Only the wireless adapters set the same SSID can connect to the AP. It aviods the AP being connected by unauthorized users. Change/Apply Clcik “Change“...
- Page 34 should use the shorter preamble type. MAC Address Filter This AP can protect from the unauthorized users by MAC Address filtering. Please refer to Section 6.5.3. Bridge Adapter Wireless adapters connect to the AP can access to the wired network through the bridge adapter. You can select an Ethernet adapter in the list be the bridge between the wireless and wired networks.
-
Page 35: Mac Address Filter
5.5.3 MAC Address Filter Parameter Description Filter Type Disable – Disable the MAC Address filter function. Accept – Only the wireless adapters with the MAC Address setup in the table can connect to the AP. Reject – The wireless adapters with the MAC Address setup in the table will be rejected to connect to the AP. -
Page 36: Link Installation
6 X-Link Installation Clicks “Advanced Setting” and check the “PSP XLink Mode” & “WMM QoS Mode” 1) Open Control Panel -- Internet Connection Right Click “Wireless Network Connection” and select “Properties”... - Page 37 2) Under “General”, select “Internet Protocol (TCP/IP) and click “Properties”...
- Page 38 3) Select “Use the following IP address:” and enter “192.168.0.1” for IP address: “255.255.255.0” for Subnet mask then clicks “OK” 4) Under Wireless Internet Network Enable “Use Windows to configure my wireless network setting” Then select “Advanced”...
- Page 39 5) Select “Computer-to-computer (ad hoc) networks only” Enable “Automatically connect to non-preferred networks” Clicks “Close” back to previous page and clicks “OK” to confirm setting 6) Setting completed, please turn your PSP into online status 7) Please go to X-Link official site to download X-Link software and register to X-Link http://www.teamxlink.co.uk/ 8) Start the X-Link software after the installation...
- Page 40 9) Enter username and password when you registered to X-Link official site Clicks “OK” to start online gaming...
-
Page 41: Troubleshooting
Troubleshooting This chapter provides solutions to problems usually encountered during the installation and operation of the adapter. 1. What is the IEEE 802.11g standard? 802.11g is the new IEEE standard for high-speed wireless LAN communications that provides for up to 54 Mbps data rate in the 2.4 GHz band. 802.11g is quickly becoming the next mainstream wireless LAN technology for the home, office and public networks. - Page 42 5. What is Infrastructure? An integrated wireless and wireless and wired LAN is called an Infrastructure configuration. Infrastructure is applicable to enterprise scale for wireless access to central database, or wireless application for mobile workers. 6. What is BSS ID? A specific Ad hoc LAN is called a Basic Service Set (BSS).
- Page 43 12. What is DSSS?What is FHSS?And what are their differences? Frequency-hopping spread-spectrum (FHSS) uses a narrowband carrier that changes frequency in a pattern that is known to both transmitter and receiver. Properly synchronized, the net effect is to maintain a single logical channel. To an unintended receiver, FHSS appears to be short-duration impulse noise.
Need help?
Do you have a question about the WNC-0304USB and is the answer not in the manual?
Questions and answers