Table of Contents
Advertisement
Quick Links
Advertisement
Table of Contents

Related Manuals for LevelOne WPC-0301


Summary of Contents for LevelOne WPC-0301
-
Page 1: User Manual
LevelOne User Manual WNC-0301 WPC-0301 11g Wireless LAN Adapter Ver. 6.0.0-0712... -
Page 2: Fcc Warning
Council Directive 89/336/EEC on the approximation of the laws of the Member States relating to electromagnetic compatibility. CE Marking Warning Hereby, Digital Data Communications, declares that this (Model-no. WNC-0301/WPC-0301) is in compliance with the essential requirements and other relevant provisions of Directive 1999/5/EC. -
Page 3: Table Of Contents
Table of Content TABLE OF CONTENT.........................V INTRODUCTION ......................... 1 ......................1 ANUAL VERVIEW UNPACKING AND SETUP......................3 ..........................3 EATURES ........................3 ACKAGE ONTENTS ............................4 ETUP HARDWARE INSTALLATION ....................5 PCI..................... 5 NSTALLATION ROCEDURE FOR ..................7 NSTALLATION ROCEDURE FOR LED I PCI ...................... -
Page 4: Introduction
Introduction Congratulations on your purchase of LevelOne11g Wireless LAN Adapter. This manual helps to get familiar with the LevelOne 11g Wireless LAN Adapter. This manual contains detailed instructions in operation of this product. Please keep this manual for future reference. -
Page 5: Unpacking And Setup
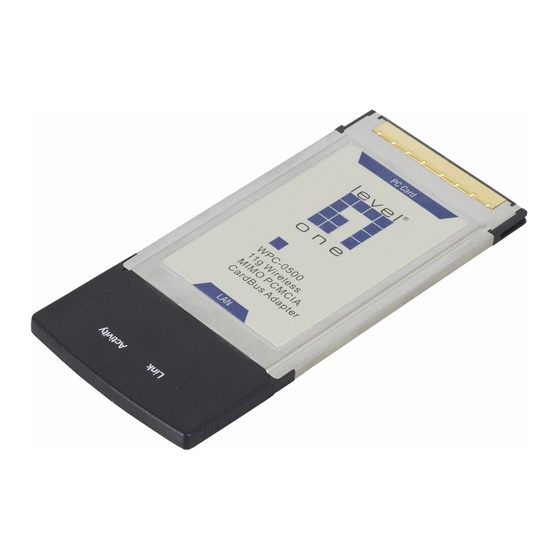
Open the box of the.11g Wireless LAN Adapter and carefully unpack it. The box should contain the following items: 11g Wireless LAN Adapter WNC-0301 11g Wireless PCI Card or WPC-0301 11g Wireless CardBus Adapter Antenna (WNC-0301 11g Wireless PCI Card Only) Quick Installation Guide CD Manual/Driver/Utility If any item is found missing or damaged, please contact your local reseller for replacement. -
Page 6: Setup
Setup The setup of the Wireless LAN Adapter can be performed using the following steps: Visually inspect the CardBus/PCI Adapter and make sure that it is fully plugged in to the CardBus/PCI slot. Make sure that there is a well environment that there is no much intrusion to have a better connection. -
Page 7: Hardware Installation
Hardware Installation Installation Procedure for PCI Please shut down your Computer and install the Wireless PCI Card BEFORE installs the supplied software. Note The following installation was operated under Windows XP. (Procedures are similar for Windows 2000.) Note If you have installed the Wireless PC Card driver & utility before, please uninstall the old version first. - Page 8 The Windows "New Hardware" wizard will then prompt. Please click Cancel...
-
Page 9: Installation Procedure For Cardbus
Installation Procedure for CardBus You should install the supplied software BEFORE inserting the Wireless Adapter when using Windows 2000 or XP. When using Windows Vista, please insert the card first, and then run the software utility. Note The following installation was operated under Windows XP. (Procedures are similar for Windows 2000.) Note If you have installed the Wireless PC Card driver &... -
Page 10: Check The Installation
Check the installation The LEDs of the Wireless LAN Adapter are clearly visible and the status of the network link can be seen instantly: 1. Once the device is plugged to the station’s CardBus/PCI slot, the LED of the Wireless LAN Adapter will light up indicating a normal status. -
Page 11: Software Installation
Software Installation This section will lead you to install the driver and utility of the Wireless LAN Adapter. Windows 2000/XP/Vista Utility Installation Insert the 11g Wireless LAN Adapter Utility CD into the computer and then the Auto-run screen will appear. Alternatively, open a file browser and double click on the autorun.exe file located in the CD directory. - Page 12 Follow the Install Shield Wizard Instructions. Click “Next” to continue and finish it. The installation program will help you to setup the Wireless LAN utility. Be noted that the Windows XP and Vista have its own Wireless Utility; you can either use the utility of Windows XP/Vista or the provided utility.
-
Page 13: Windows Vista Wireless Utility Setting
Windows Vista Wireless Utility Setting Link Information This is the default screen after launching the Utility program. Status: Shows the associated BSSID, which can be used to identify the wireless access point. SSID: Shows the current SSID, which must be the same on the wireless client and AP in order for communication to be established. -
Page 14: Configuration
Configuration This screen is where you set the basic wireless settings for the Wireless LAN Adapter. Profile Name: The default name is the same as the SSID of the platform which you connected and you can change the name you favor (the key length is limited 1~32 bits). SSID: Service Set Identifier, which is a unique name shared among all client in a wireless network. - Page 15 Authentication: The following options are available: Open System, Shared key, WPA-PSK, WPA2- PSK, WPA EAP-TLS and WPA2 EPA-TLS. Select Open System, Shared Key for WEP data encryption feature. Open System and Shared Key require the users to set a WEP key to exchange data with other wireless clients that have the same WEP key.
-
Page 16: Site Survey
Site Survey This screen allows the user to scan for available wireless networks (wireless clients and Access Points). It also allows the user to establish wireless communications with an available wireless network. Available Network – displays the wireless networks (wireless clients and Access Points) that are within range. -
Page 17: Profile
Profile Profile –The user can create and manage the created profiles for home, work or public areas. By double-clicking on one of the created profile, the setting will adjust to the specific setting such as SSID, channel, and encryption as saved by that particular profile. Add: Adds a profile. -
Page 18: About
About This screen displays information about the 11g Wireless LAN Adapter, such as the Driver and Utility version. When a new version of the utility becomes available for upgrade, users will be able to identify by version numbers. -
Page 19: Windows Xp/2000 Wireless Utility Setting
Windows XP/2000 Wireless Utility Setting Link Information The default page is as below after launching the Utility program. Status: Shows the associated BSSID, which can be used to identify the wireless network. SSID: Shows the current SSID, which must be the same on the wireless client and AP in order for communication to be established. -
Page 20: Configuration
Data Rate: Shows the statistics of data transfer, and the calculation is based on the number of packets transmitted and received. Configuration This screen is where changes the basic wireless settings for the wireless LAN adapter with the minimum amount of effort to implement a secure wireless network environment. SSID: Service Set Identifier, which is a unique name shared among all clients and nodes in a wireless network. - Page 21 WARNING: Country domain can't be choosing by end-user, because the incorrect region may be in violation of applicable laws. Power Mode: There are 3 modes to choose from. • Continuous Access Mode (default) – the wireless LAN adapter is constantly operating with full power.
-
Page 22: Advanced
Advanced This screen is where you configure the Security settings for the 11g Wireless LAN Adapter. Auth Mode: Select the authentication type from drop down list for Disable, Open System, Shared Key, WPA, WPA-PSK, WPA2 and WPA2-PSK. - Page 23 Open System / Shared Key WEP Key 1~4: choose the encryption way, either in HEX or ASCII formats, and enter the password in the blank space.
- Page 24 Key Length: select 64 or 128 bits as the length of the keys. If you select 64bit in Hex format, you must type 10 values in the following range (0~F, hexadecimal), or 64bit in ASCII format, you must type 5 values in the following range (0~9, A~Z and a~z Alphanumeric); If you select 128bit in Hex format, you must type 26 values (0~F, hexadecimal), or 128bit in ASCII format, you must type 13 values in the following range (0~9, A~Z and a~z Alphanumeric).
- Page 25 WPA / WPA2...
-
Page 26: Site Survey
If WPA or WPA2 is selected, the above screen is shown. Please select the encryption type from drop down menu and press Configuration button to configure parameters for the RADIUS server. : WARNING WPA, WPA2 don’t support In Windows 98/ME . Encryption: Select the encryption type for TKIP or AES encryption type. - Page 27 created profile, the setting will adjust to the specific setting such as SSID, channel, and WEP as saved by that particular profile. Add: Adds a profile. Then, the following screen would appear. User can enter the necessary information required for accessing Access Points or Wireless Router. Edit: To view and change its settings of the profile.
-
Page 28: About
About This screen displays information about the 11g Wireless LAN Adapter, such as the Driver and Utility version. Users are able to identify by version numbers when a new version of the utility for upgraded. -
Page 29: Technical Specifications
Radio Technology IEEE 802.11g Orthogonal Frequency Division Multiplexing (OFDM) Interface WNC-0301: 32-bit PCI bus; WPC-0301: 32-bit CardBus, Data Transfer Rate 1, 2, 5.5, 6, 9, 11, 12, 18, 24, 36, 48, 54Mbps 54Mbps: Typical -70dBm @ 10% PER (Packet Error Rate)
Need help?
Do you have a question about the WPC-0301 and is the answer not in the manual?
Questions and answers