Trek Ride+ Owner's Manual
Pedelecs and fast electric bikes
Hide thumbs
Also See for Ride+:
- Owner's manual (156 pages) ,
- Owner's manual (226 pages) ,
- Owner's manual (93 pages)
Table of Contents
Advertisement
Advertisement
Table of Contents

Related Manuals for Trek Ride+


Summary of Contents for Trek Ride+
- Page 1 Electric bicycle Owner’s Manual...
- Page 2 Additional manuals for using the Electric bicycle may be ordered as separate items from Trek Bicycle. Nevertheless, should you discover any errors, we would be grateful if you would bring them to our attention.
-
Page 3: Table Of Contents
Table of contents General Congratulations on your new electric bicycle! 1. Quick start 1.1. BionX G2 Controller 1.2. RIDE+ Pro Controller 1.3. RIDE+ EASY Controller 1.4. RIDE+ EASY II Controller 1.5. Charging 1.6. Rack Battery (RIDE+ R250, RIDE+R320) 1.7. Down tube Battery (RIDE+ C320, RIDE+ C420) 2. D escription 2.1. Specific parts for the electric bicycle 2.2. Assistance – Regeneration 2.3. Bontrager Satellite Elite ForkLight 3. 40 KM/H ‘Fast Electric Bike’ 3.1. Legal rules 3.2. Differences in equipment 3.3. Instruction for use 4. I nstructions for Use 4.1. BionX G2 controller 4.2. RIDE+ Pro controller... -
Page 4: Congratulations On Your New Electric Bicycle
Congratulations Congratulations on your new electric bicycle! Your electric bicycle is a bike with electric pedal assistance. This means that you can pedal it as a normal bike, or that the bike can assist you in your pedaling. The electric bicycle will assist you when you are pedaling. The amount of assistance depends on the force you exert on the pedals. -
Page 5: Quick Start
Quick start - BionX G2 Controller 1. Quick start This manual has all the information that you’ll need to get the best from your electric bicycle. We strongly recommend that you read it through. However, for quick use of the bike, please read the Quick Start guide for the type of controller and battery on your bicycle. -
Page 6: Ride+ Pro Controller
RIDE+ Pro Controller - Quick start 1.2 RIDE+ Pro Controller • Switching system On / Off Push any of the two upper buttons to switch the system ‘on’. Push button to switch the system off. When switched on, the bike is in cycle mode (zero assist). •... -
Page 7: Ride+ Easy Controller
Quick start - RIDE+ EASY Controller 1.3 RIDE+ EASY Controller • Switching system On / Off To switch the system on, push the ‘Side’ button once. To switch it off, push the ‘Side’ button again. After switching on, the bike is always in cycle mode (zero assist). Notice: It is strongly advised to ride away in a straight line when an assistance level is selected. -
Page 8: Ride+ Easy Ii Controller
RIDE+ EASY II Controller - Quick start 1.4 RIDE+ EASY II Controller • Switching system On / Off To switch the system on, push the ‘Side’ button once. To switch it off, push the ‘Side’ button again. After switching on, the bike is always in cycle mode (zero assist). To prevent loss of riding information, please make sure that the system is switched off before the controller is removed from the bike. -
Page 9: Charging
Quick start - Charging 1.5 Charging • Power supply The charging process is the same for rack batteries (39-cell and 30-cell) and batteries mounted on the down tube (39-cell and 52-cell). All batteries can be charged using the power supply. RIDE+ R250 RIDE+ R320 RIDE+ R320 RIDE+ C320 and RIDE+ C420... -
Page 10: Rack Battery (Ride+ R250, Ride+R320)
Rack Battery - Quick start 1.6. Rack Battery (RIDE+ R250, RIDE+R320) • Removing the battery-pack Insert the key in the lock, twist the key clockwise (1,2). Now slide the battery-pack rearwards out of the rear rack (3,4). After you remove the battery, don’t forget to take the keys out of the lock. -
Page 11: Down Tube Battery (Ride+ C320, Ride+ C420)
Quick start - Down Tube Battery 1.7 Down tube Battery (RIDE+ C320, RIDE+ C420) • Removing the battery-pack Insert the key in the lock, twist the key clockwise until the lock springs out (1,2). When the lock springs out, the lever of the battery will be released. Now take the key from the lock and pull the lever of the battery so that it slides upwards - parallel to the down tube - until it releases from the rail (3). -
Page 12: Description
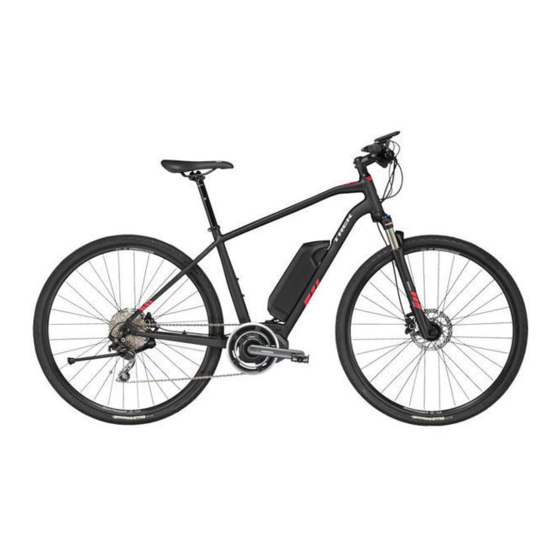
Description 2. Description 2.1. Specific parts for the electric bicycle There are several models of electric bicycles, with different equipment options. Find the options that are on your electric bicycle. In the pictures of the bikes you will see the battery-pack (1), the motor ‘front or rear’ (2), the controller (3), the brake switch (4), and the wiring harness (5). •... - Page 13 escription • Controllers 1 BionX G2 controller: controls all functions: on/off, the four assist levels, the four regenerative levels and lights on/off. It also functions as a bicycle computer, measuring speed and distance, and shows the battery level. 2 RIDE+ Pro controller: controls all functions: on/off, the four assist levels, the four regenerative levels and lights on/off.
-
Page 14: Assistance - Regeneration
Assistance – Regeneration 2.2 A ssistance – Regeneration The systems with the BionX G2 controller, RIDE+ Pro controller, RIDE+ EASY controller and RIDE+ EASYII controller have four levels of assistance. When the system is set to assistance, the electric motor drives the rear wheel and assists you in your pedaling. Additionally, the systems with the BionX G2 Controller and RIDE+ Pro Controller have four levels of regeneration. -
Page 15: Adjusting The Beams
Bontrager Satellite Elite ForkLight* 2.3 Bontrager Satellite Elite ForkLight* The Bontrager Satellite Elite ForkLight comes in different versions. The RIDE+ version can be operated via the controller on the handlebar. The energy that is needed to power the lights comes from the battery. Both lights always work simultaneously. Depending on model. -
Page 16: Km/H 'Fast Electric Bike
40 km/h ‘Fast Electric Bike’ 3. 40 ‘Fast Electric Bike’ km/h The ’40 km/h fast electric bike’ is an electric bicycle of which the assistance does not stop at 25 km/h but at 40 km/h. This higher assist speed makes it the perfect electric bicycle for people who like riding faster than 25 km/h. -
Page 17: Instructions For Use
Instructions for Use 4. Instructions for Use There are four types of controller: BionX G2, RIDE+ Pro, RIDE+ EASY and RIDE+ EASY II. 4.1 B ionX G2 controller 1• Speed indication 2• Distance, Odometer, Chronometer, Average speed 3• Current assistance level 4• Current generation level 5• On/Off button 6•... -
Page 18: Instructions For Use
Instructions for Use To increase assistance, press button ‘+’. For assistance level 1, press once. Press again for more assistance. For less assistance press button ‘-’. When there is no assistance level shown and the bicycle icon is visible on the screen, there is no assistance. Pedaling is then the same as on a normal bicycle. - Page 19 Instructions for Use • Switching lights On / Off Press button for 2 seconds to switch On / Off the Controller display light, and, if present, the front and rear lights. This switches on the front light, the rear light, and the backlight in the display.
-
Page 20: Ride+ Pro Controller
Instructions for Use 4.2 R IDE+ Pro controller 1• Speed indication 2• Battery level 3• ‘+’ button 4• ‘-’ button 5• Distance, Odometer, Chronometer, Average speed, Clock 6• Current assistance level 7• Current generation level 8• Mode-switch button 9• On/Off button 10• Light indicator, On or Off •... - Page 21 Instructions for Use • Regeneration When the bicycle regenerates electricity for the battery, the system is in generation mode. There are four levels of regeneration. The level of regeneration is shown by the arrows at the bottom of the screen. To increase the regeneration level, press button ‘-’. For regenerative level 1 press once. Press again to increase the regeneration level to a higher level.
- Page 22 Instructions for Use • Changing the language option of the controller The RIDE+ Pro controller allows you to change the language that is displayed on the screen. See the part ‘programming’ later in this manual to set the correct language. •...
-
Page 23: Ride+ Easy Controller
Instructions for Use 4.3 R IDE+ EASY Controller 1• Battery level 2• Light indicator, On or Off 3• Side button (On/Off, Light On/Off) 4• Front + (right hand) button 5• Front - (left hand) button 6• Level indicator • Switching system On / Off To switch the system on, push the Side button once. - Page 24 Instructions for Use Even when the battery-gauge shows ‘empty’, there is still enough energy remaining to run the lights for about two hours. If the battery-pack is fully drained, the lights will be powered by the system as it switches to generative mode automatically. •...
-
Page 25: Ride+ Easy Ii Controller
Instructions for Use 4.4 RIDE+ EASY II Controller 1• Level indicator 2• Side button (On/Off, Light On/Off) 3• Light indicator, On or Off 4• Battery level 5• Front +(right hand) button, Miles/Kilometer switch button 6• Front -(left hand) button, Mode switch button 7• Distance, Odometer 8• Speed indication •... - Page 26 Instructions for Use is still enough energy remaining to run the lights for about two hours. If the battery-pack is fully drained, the lights will be powered by the system as it switches to generative mode automatically. • Removing and installing the Controller The RIDE+ Easy II Controller can easily be removed from the bike: just slide it to the right.
-
Page 27: Rear Rack Battery-Pack
Instructions for Use 4.5 R ear Rack Battery-pack • Battery-pack size Depending on the model, your bike will be equipped with either a “RIDE+ R250 battery-pack” or a “RIDE+ R320 battery-pack” (2 different editions). Removal, putting back and charging are much the same for all three packs. -
Page 28: Downtube Battery-Pack
Instructions for Use 4.6 D owntube Battery-pack • Battery-pack size Depending on the model, your bike will be equipped with either a “RIDE+ C320 battery-pack” or a “RIDE+ C420 battery-pack”. Removal, putting back and charging are the same for the two packs. Both packs have the same exterior and are interchangeable. -
Page 29: Charging The Battery-Pack
Instructions for Use Contacts at the bottom side of the down tube • Replacing battery-pack Position the battery over the down tube (with some space between the seat tube and the lower end of the battery) (1). Now, slide the battery-pack down onto the rail (2). Use the lever to lower the battery carefully during the last phase of sliding, so that the connectors engage (3). - Page 30 Instructions for Use The battery-pack can both be charged in the bike or it can be removed from the bike for charging. Li-Ion batteries such as are used in the electric bicycle, have no ‘memory-effect’. This means that the battery capacity is not influenced if the battery is recharged before it is completely empty. You can recharge after every ride.
-
Page 31: Battery Care
Instructions for Use 4.8 Battery care • Storage of the battery-pack When the battery-pack is not in use, store it in a dry, cool place. Li-Ion batteries are best stored at 70% to 80% charge. Charge it every two months. The temperature should be between 5˚C and 25˚C, preferably 5-10˚C. -
Page 32: Programming (Bikes With 'Bionx G2' And 'Ride+ Pro' Controller Only)
Instructions for Use Range for a fully charged battery (‘RIDE+ R320’ and ‘RIDE+ C320’; 320 Wh) Terrain/ Assistance level 1 (25%) 2 (50%) 3 (100%) 4 (200%) Flat terrrain 55-90 km 50-70 km 45-55 km 30-40 km Hilly terrrain 45-75 km 35-60 km 30-45 km 20-30 km Mountainous terrrain 30-45 km 30-45 km 20-30 km 15-25 km Range for a fully charged battery (‘RIDE+ C420’; 420 Wh) -
Page 33: Maintenance
Maintenance To enter programming mode, press buttons ‘On/Off’ and ‘Mode-switch’ for two seconds. Four zeros will appear, with the first zero blinking. Enter the appropriate code by pressing button ‘+’ for a higher value, ‘-’ for a lower value. Press button ‘On/Off’... -
Page 34: Removal And Refitting Of Wheels For Bikes With A Front Wheel Motor
Maintenance 7. Slide the wheel forward in the dropouts until the wheel can be removed. 8. Remove the chain from the sprocket. 9. Remove the wheel. • Refitting the rear wheel 1 . Make sure that the system is switched ‘Off’. 2. - Page 35 Maintenance 4. Disconnect the front brake: - V-brakes, Magura brakes: release the front brake. - Rollerbrakes, unhook the cable and housing stop from the brake. 5. Loosen and remove the axle nuts and washers. 6. Lift the bike so that the wheel can be removed. Take care not to lose the two torque blockers. •...
-
Page 36: Technical Description
Technical description 6. T echnical description 6.1 Bike specifics Motor Brushless rear hub motor Maximum continuous power output 250W Maximum assisted speed 25km/h Wheel nut torque 40Nm 6.2 Battery packs RIDE+ R250 RIDE+ R320 RIDE+ C320 RIDE+ C420 Voltage 37 V 48 V 48 V 48 V Gapacity 6.6 Ah 6.6 Ah 6.6 Ah... -
Page 37: Problem Solving
Problem solving 7 P roblem solving 7.1 Drive problems • The system will not switch on (no beep from the battery), the LCD display remains blank First check the battery pack. It must be in place and the lock must be pushed in fully. Check all connectors and disconnect and reconnect if necessary. -
Page 38: Limited Warranty
Trek Bicycle Corporation is not responsible for incidental or consequential damages. Some states do not allow the exclusion of incidental or consequential damages, so the above exclusion may not apply to you. Claims under this warranty must be made through an authorized Trek dealer. Proof of purchase is required. - Page 39 Address Trek Bicycle: Basicweg 12a NL 3821 BR Amersfoort Nederland +31 (0)33 450 90 60 Diamant: Trek Fahrrad GmbH Stettbachstrasse 2 CH-8600 Dübendorf Für Deutschland: 0180-350 70 10 Für Österreich: 0820 820 121 Villiger: Trek Fahrrad GmbH Stettbachstrasse 2 CH-8600 Dübendorf +41 (0)44 824 85 00 Partnumber 321466, January 2012, First Edition.
Need help?
Do you have a question about the Ride+ and is the answer not in the manual?
Questions and answers