Advertisement
Advertisement
Table of Contents

Related Manuals for Trek MARLIN+ 6


Summary of Contents for Trek MARLIN+ 6
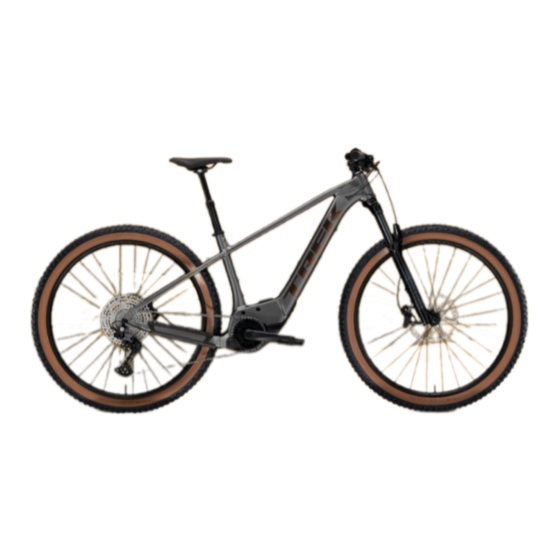
- Page 1 2024 MARLIN+ SERVICE MANUAL...
- Page 2 NOTICE: Measurements of actual tires may vary. Always verify there is sufficient clearance between the tire and Recommended the frame. Improper tire size could damage the bicycle Maximum frame. Trek recommends 6mm clearance above and on the sides of the tire. Recommended Maximum Seatpost...
-
Page 3: Additional Resources
It does not contain instructions for all components (such as brake callipers). Refer to the original manufacturer for more information. Additional resources • Bosch Purion remote quick start guide: trekbikes.com/manuals • Bosch E-bike Owner’s Manual: trekbikes.com/manuals • Trek’s YouTube channel: youtube.com/trekbikes... - Page 4 2024 Marlin+ Rear axle This bicycle frame is designed to use a Universal Derailleur Hanger (UDH). For additional information about the UDH, refer to the SRAM user manual at sram.com. 25 Nm Switch lever – W573860 Thru axle, 12 mm – W600321 Dérailleur hanger NOTICE: Do not apply grease.
- Page 5 2024 Marlin+ Brake and rear shift routing Zip ties Tip: Remove the non-driveside motor cover to easily route the brake hose and rear shift housing.
- Page 6 2024 Marlin+ Seat post dropper post routing Tip: Remove the non-driveside motor cover to easily route the housing up the seat tube. Tip: Remove the motor guard to easily route the housing under the motor. If routing the housing without the motor installed, be sure to leave extra slack in the housing to eventually route under the motor.
- Page 7 Non-drive side shown. Motor cover removed. Speed sensor cable: Fastener, M4x6 mm – W575056 Bosch part number – EB11.200.011 Trek part number (available in some markets) – 5318757 Speed sensor magnet – 599404 Speed sensor clip, Bosch part number 1270.016.038...
- Page 8 2024 Marlin+ Battery and remote routing Battery to charge port cable Remote cable Battery cable Non-drive side shown. Motor cover removed.
- Page 9 2024 Marlin+ Frame guards and covers Zip ties Align the front of the guard with the weld. 1.5 Nm M4x6 Non-drive side Chainstay guard – W5308950 Motor access cover – 5312747 Fasteners, M4x6 – W575056 Downtube guard – W5312189 NOTICE: Maximum fastener length is 6 mm.
- Page 10 2024 Marlin+ Charge port cover 0.8 Nm M3x6 Charge door assembly – W5312791 Fasteners, M3x6 – W5276241...
-
Page 11: Motor Guard
2024 Marlin+ Motor guard When re-installing the motor guard make sure the rubber seals are po- sitioned outside the bike frame. 4 Nm TIP: Install the motor guard Install the front spacer and fastener first, then install the rear spacers and fasteners. This will make it easier to align the front fastener with the threads in the battery. -
Page 12: Motor Parts
2024 Marlin+ Motor parts 25 Nm Motor mount bracket fasteners – Bosch part number. Refer to Bosch service information. Motor mount bracket – W561438 Motor fasteners, M8x60 – 5251047... - Page 13 2024 Marlin+ Lower the motor For access to routing and battery connections the motor can be lowered, rather than completely removed. 1. Remove the seat post dropper lever from the handlebar. This will create slack in the seat post dropper routing so the rout- ing can be repositioned to allow the motor to be lowered.
-
Page 14: Battery Parts
2024 Marlin+ Battery parts 4 Nm 4 Nm M5x12 M5x14 Fastener, M5x12 – W5314650 Washer – W5315181 Fastener, M5x14 – W5314651 Battery, horizontal fixed mount – Bosch part numbers: US – EB12.100.046 EU/AUS/NZ – EB12.100.048... -
Page 15: Remove The Battery
2024 Marlin+ Remove the battery NOTICE: Only professional bike mechanics should remove the battery. Tip: Before beginning this procedure remove the seat post dropper lever from the handlebar. This will create slack in the hosing that runs under the motor and make it easier to remove the motor. Rotate the bike in the stand so the headtube is lower than the motor cavity, This will prevent the battery... -
Page 16: Install The Battery
2024 Marlin+ Install the battery Rotate the bike in the stand so the headtube is lower than the motor cavity. The battery stop aligns the battery with the mounting hole in the frame. Loosely tighten the fastener. 4 Nm Loosely tighten the fas- tener to hold the battery in place. -
Page 17: Front Mudguard
2024 Marlin+ Front mudguard The front mudguard is sold separately. 27.5" wheel 29" wheel M5 x 12 M6 x 10 M5 x 10 M5 x 8 5 Nm 5.5 Nm 4 Nm 5 Nm Bolt, M6 x 10 mm, stainless steel Front mudguard and strut, 27.5”... - Page 18 2024 Marlin+ Rear rack – 29" wheel The rear rack is sold separately. Proper installation requires the mudguard to be installed with the lower portion of the rack. The upper portion of the rack is detachable. 5 Nm 5 Nm M5x14 Rear rack –...
- Page 19 2024 Marlin+ Rear mudguard – 29" wheel The rear mudguard is sold separately. Proper installation requires the mudguard to be installed with the lower portion of the rack. The upper portion of the rack is detachable. 5 Nm 5 Nm M5x14 M5x20 5 Nm...
- Page 20 2024 Marlin+ Rear rack – 27.5" wheel The rear rack is sold separately. Proper installation requires the mudguard to be installed with the lower portion of the rack. The upper portion of the rack is detachable. 5 Nm 5 Nm M5x12 Rear rack Fasteners, stainless steel , M5 x 14 mm...
- Page 21 2024 Marlin+ Rear mudguard – 27.5" wheel The rear mudguard is sold separately. Proper installation requires the mudguard to be installed with the lower portion of the rack. The upper portion of the rack is detachable. M5X20 M5x30 M5x14 5 Nm 5 Nm 5 Nm Rear mudguard, 27.5"...
- Page 22 2024 Marlin+ Rear light routing – through the mudguard The rear light is sold separately. Refer to the Bosch service manual for instructions on connecting a rear light to the motor,. W1047565 Light cable – Bosch part number EB12.120.00...
- Page 23 2024 Marlin+ Rear light routing – through the chainstay The rear light is sold separately. Refer to the Bosch service manual for instructions on connecting a rear light to the motor. W1047565 Light cable – Bosch part number EB12.120.00 ...
- Page 24 2024 Marlin+ Front light routing The Marlin+ does not feature dedicated routing for a battery-connected front light. However, a rider could choose to remove the dropper post and instead install an motor-connected front light. Refer to the Bosch service manual for voltage requirements and instructions for connecting a front light to the motor.
-
Page 25: Specifications
Maximum and the frame. Improper tyre size could damage the Recommended bicycle frame. Trek recommends 6 mm clearance above Maximum and on the sides of the tyre. M, L, XL Recommended...
Need help?
Do you have a question about the MARLIN+ 6 and is the answer not in the manual?
Questions and answers
How do I turn off the "Service Due" message