Table of Contents
Advertisement
Quick Links
Advertisement
Table of Contents

Related Manuals for Grizzly T21347


Summary of Contents for Grizzly T21347
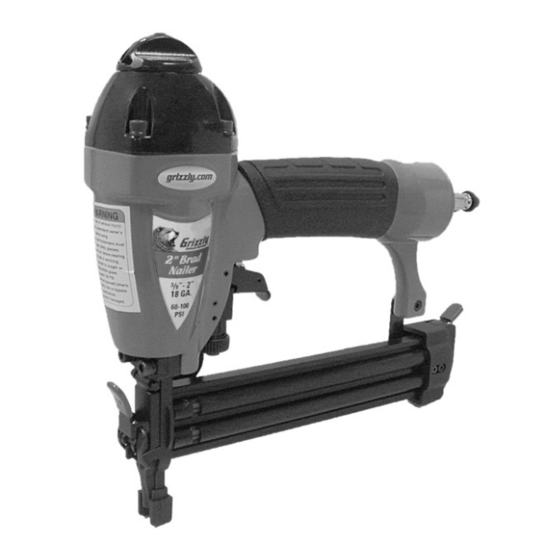
- Page 1 18 gauge 2" nailer Kit oWner's manual Copyright © MArCh, 2009 By grizzly industriAl, inC., rEVisEd noVEMBEr, 2009 (ts) Warning: no portion of this manual may be reproduced in any shape or form Without the Written approval of grizzly industrial, inc.
-
Page 2: Safety Instructions For Pneumatic Tools
for your own safety read instruction manual before operating this equipment the purpose of safety symbols is to attract your attention to possible hazard- ous conditions. this manual uses a series of symbols and signal words which are intended to convey the level of importance of the safety messages. the progression of symbols is described below. - Page 3 2" nailer Kit 17. disconnect tools before ser- vicing, changing accessories, or moving to another location. 18. do not overreach. Keep proper footing and balance at all times.
-
Page 4: Additional Safety Instructions For Nailers
4. checK valve: do not use a check valve or any other fitting that allows air to remain in the tool after it is dis- connected from the air source. t21347 2" nailer Kit... - Page 5 85-90 deci- bels. to protect your hearing, always wear ansi approved ear protection when operating this nailer. t21347 2" nailer Kit never point this nailer at yourself or another person! always pay attention to the direction this nailer is pointed.
-
Page 6: Contact Info
We are proud to offer the grizzly Model t21347 2" nailer Kit. this model is part of a growing grizzly family of fine pneu- matic tools. When used according to the guidelines set forth in this manual, you can expect years of trouble-free, enjoyable operation and proof of grizzly’s commit-... - Page 7 Model t21347 left our warehouse in a carefully packed box. if you discover the nailer is damaged after you have signed for delivery, please immediately call Customer Service at (570) 546-9663 for advice. save the containers and all packing mate- rials for possible inspection by the carrier or its agent.
-
Page 8: Compressed Air System
Model t21347 is designed to be oper- ated at 60–100 psi using clean, dry, regu- lated, compressed air. do not exceed the maximum operating pressure for your model. Before using your new nailer, regulate the air pressure on your air compressor to the minimum psi for your model. - Page 9 — if the nailer fires when the trigger is pulled, without the safety nose mechanism being depressed, then immediately disconnect the nailer from the air supply and call grizzly technical support at (570) 546- 9663 for help. — if you find that the safety nose...
- Page 10 When replacing nails in your Model t21347, follow these guidelines: gauge: length: ⁄ "–2" Capacity: 100 to load your nailer: 1. disConnECt nAilEr FroM thE Air supply! 2. sliding magazine pusher back, as shown in figure 3, to lock the catch lever in place.
-
Page 11: Adjusting Depth
— if the nail either went too far or not far enough, then go to the adjusting depth subsection on this page. t21347 2" nailer Kit adjusting depth A depth adjustment knob is attached to the nose for setting the nail depth. -
Page 12: Clearing Jammed Nails
2" nailer Kit nose tip... -
Page 13: Replacing Pistons & O-Rings
& o-ring repair Kit, part pt21347087, may be purchased for the Model t21347 from grizzly. always disconnect air from nailer whenever servicing! during mainte- nance, a nailer connected to air may... -
Page 14: Cleaning And Lubrication
Just make sure there is always oil in the lubricator. figure 8. lubricating nailer via air inlet. t21347 2" nailer Kit... -
Page 15: Troubleshooting
1. o-ring damaged or slipped of exhaust cap; out of groove on switch pis- nailer will not ton, inside the nailer. fire. t21347 2" nailer Kit solution 1. o-rings must be replaced & operation of safety nose must be checked. 1. tighten screws. -
Page 16: Main Breakdown
2" nailer Kit... -
Page 17: Main Parts List
O-RING 11.8 X 2.4 P12 PT21347042 TRIGGER SEAT PORP012 O-RING 11.8 X 2.4 P12 PT21347044 COMPRESSION SPRING PT21347045 FIXED PLATE t21347 2" nailer Kit REF PART # DESCRIPTION PSB38M CAP SCREW M5-.8 X 25 PT21347047 SHAFT RETAINER PT21347048 SHAFT PSB16M CAP SCREW M4-.7 X 16... -
Page 18: Warranty And Returns
Warranty and returns grizzly industrial, inc. warrants every product it sells for a period of 1 year to the original purchaser from the date of purchase. this warranty does not apply to defects due directly or indirectly to misuse, abuse, negligence, accidents, repairs or alterations or lack of maintenance. -
Page 19: Warranty Card
____20-29 ____50-59 how long have you been a woodworker/metalworker? ____0-2 years how many of your machines or tools are grizzly? ____0-2 do you think your machine represents a good value? ____yes Would you recommend grizzly industrial to a friend? ____yes Would you allow us to use your name as a reference for our customers in your area? note: We never use names more than 3 times. - Page 20 2069 bellingham, Wa 98227-2069 tape along edges--please do not staple place stamp here...
Need help?
Do you have a question about the T21347 and is the answer not in the manual?
Questions and answers