Table of Contents
Advertisement
Advertisement
Table of Contents

Related Manuals for Citizen GSX-190


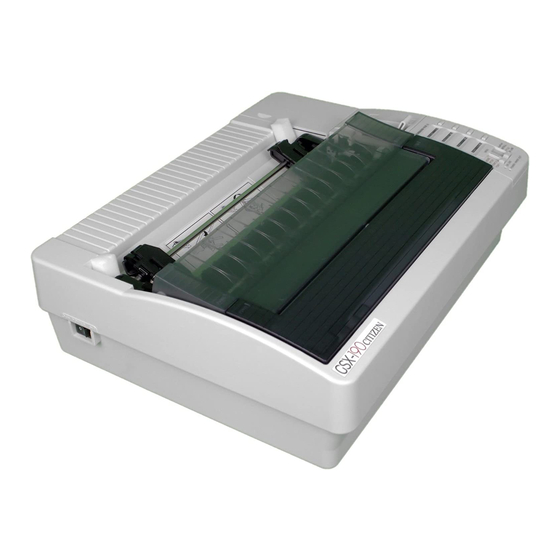
Summary of Contents for Citizen GSX-190
- Page 1 USER'S MANUAL 9-WIRE DOT MATRIX PRINTER...
- Page 2 User's Manual Citizen America Corporation 2102 Alton Parkway, Suite A Irvine, CA 92606-4907 Trademark Acknowledgement Citizen, Command-Vue, Color On Command, VuePrint: Citizen America Corporation Epson: Seiko Epson Corporation IBM, Proprinter: International Business Machines Corporation Windows: Microsoft Corporation Copyright © 2003 Citizen America Corporation All rights reserved.
-
Page 3: Important Safety Instructions
Important Safety Instructions Provided by Underwriters Laboratories, Inc. Read all of these instructions and save them for later reference. Follow all warnings and instructions marked on the product. Unplug this product from the wall outlet before cleaning. Do not use liquid or aerosol cleaners. -
Page 4: Table Of Contents
Table of Contents Introduction……………………………6 GSX-190 Features………………………6 About this Manual………………………8 Service and Support Information……….9 Chapter 1 Setup Unpacking and Setting Up the Printer Installing the Ribbon Connecting to a Power Outlet Connecting Your Computer Chapter 2 Command-Vue III Control Panel 18... - Page 5 Sheet Feeders Serial Interface Printer Stand Appendix B Maintenance Cleaning Alarms Troubleshooting Appendix C Specifications Printer Specifications FCC Compliance Statement EMI Compliance Statement Appendix D Command Reference Citizen Commands Epson FX-850 Emulation Commands IBM Proprinter Emulation Commands Index ________________________________________________________ 5...
-
Page 6: Introduction
Introduction Your new Citizen GSX-190 is a high-quality 9-wire printer well suited to the needs of your home or office. The GSX-190 blends sophisticated styling and Near Letter Quality output with versatile paper handling. With Citizen Acoustic Technology {C.A.T.}TM, GSX-190 is among the world's quietest printers. The Command~VueTM control panel gives you full control of the GSX-190's many powerful features, all in plain English. - Page 7 * Change print color, pitch, and font with easy-access menus available at the press of a key! Paper-handling Flexibility * The GSX-190's paper parking feature lets you quickly switch between continuous paper and single sheets feeding. * A top-of-form fine adjustment customizes the first printing...
-
Page 8: About This Manual
* Expand your printer's capabilities with an optional serial interface. Easy on the Environment Citizen, accepting our responsibility to protect the environment, strives to produce earth-friendly printers: * The cardboard container is made from 75% recycled materials and is 100% recyclable. -
Page 9: Service And Support Information
_______________________________________________________________________ Service, Support and Supplies It is our goal to make your GSX-190 ownership experience a satisfying one. Citizen’s support staff is available to respond to your needs for setup, operational and trouble-shooting assistance and to arrange for convenient repair service if needed. -
Page 10: Chapter 1 Setup
Chapter 1 Setup Before unpacking your printer any further, take a few moments to consider where you plan to put it. * Choose a flat, stable desk or printer stand that also accommodates your paper supply. Be sure there is enough room around the printer to allow the paper to flow easily in and out. - Page 11 Figure 1-1. If anything is missing, contact your dealer. Before continuing, remove all packing material from the printer. Figure 1-1. With the GSX-190 printer come these additional items: a. Users Manual (this book); b. ribbon cassette; c. paper guide; d. paper feed knob; and e.
-
Page 12: Identifying Printer Components
1-2. Identifying Printer Components Figures 1-1 and 1-2 highlight the main components of the GSX-190 printer. Installing the Paper Feed Knob To install the paper feed knob, simply insert the cylinder end of the knob with the four prongs into the knob opening on the printer as shown in Figure 1-3. -
Page 13: Opening The Top Cover
Chapter 1: Setup _______________________________________________________________ Figure 1-3. Installing the paper feed knob Opening the Top Cover The top cover is a two-part hinged cover with a tear bar at one edge. You must open it to install and change ribbons, and to make other adjustments to the printer. -
Page 14: Installing The Ribbon
Installing the Ribbon _________________________________________________________________ Replacing the Top Cover Installing the top cover is also a two-stage process. Each half of the cover should click into place separately to ensure complete closure. Begin by holding the cover folded open at the hinge. Grasp it with a hand at each end or with one hand in the middle. - Page 15 Chapter 1: Setup _________________________________________________________________ 4. Slide the ribbon down into position between the printhead and the metal ribbon mask. This is easy to do! Do not force the ribbon between the ribbon mask and the ribbon guide {the black plate closest to the platen}. See Figure 1-5. 5.
-
Page 16: Connecting To A Power Outlet
IBM-compatible computers use the same type of connector. Standard parallel printer cables are six feet long. Longer cables may cause problems. If you have the GSX-190 optional serial interface, see its manual for installation and computer connection instructions. ________________________________________________________ 16... - Page 17 The parallel and serial interface can each be connected to a computer if you have more than one computer you want to use with the GSX-190. The interfaces work on a "first come, first served" basis; the interface that receives data first becomes the active interface and remains active until you turn the printer off and on again.
-
Page 18: Command-Vue Tm Iii Control Panel
Control Panel The Command-Vue III control panel lets you easily control many of the GSX-190's features. To select a particular option, move one of the slide switches until the desired option is displayed in a window. Then activate the option by pressing its corresponding key. -
Page 19: Indicator Lights
Chapter 2: Command-Vue III Control Panel _________________________________________________________________ In most cases, a key acts like a toggle; pressing the key turns the displayed option on and off. On some menus, pressing the key performs a particular function {like advancing the paper}. Also note that a key may have dual functions. -
Page 20: On Line Menu Group
ON LINE Menu Group __________________________________________________________ ON LINE Menu Group Move the MENU slide switch to ON LINE to enter the ON LINE menu group. This menu group lets you select the paper handling and other functions most frequently used during printing. Table 2-1 shows the functions available in the group. -
Page 21: Font 1 Menu Group And Font 2
Chapter 2: Command-Vue Ill Control Panel _________________________________________________________________ On Line and Off Line Modes When the printer is "on line"—its normal operating mode—it can receive data from your computer and print. When the printer is "off line," it stops printing and responds only to control-panel instructions, such as moving the paper. -
Page 22: Pitch Menu Group
PITCH Menu Group _______________________________________________________________________ You can move the STYLE slide switch only when the MENU slide switch is at STYLE. The STYLE slide switch is locked out if the MENU slide switch is at ON LINE, INSTALL orVuePrint. With printer on Iine or off line DRAFT FONT 1: Draft FONT 1: High Speed... -
Page 23: Mode Menu Group
Chapter 2: Command-Vue III Control Panel _________________________________________________________________ Key. With printer on lIne oft line 1OCPI ABCDEfghij. 10 CPI I2CPI ABCDEfghij 12 CPI I5CPI ABCDEfghij 15 CPI PROPOR ABCDEfghij Proportional TIONAL MODE MENU GROUP The MODE menu group is selected when the MENU slide switch is at STYLE and the STYLE slide switch is set at MODE. -
Page 24: Install Menu Group
Table 2-5 shows the functions available in the group. VuePrint Menu Group The VuePrint Menu System is Citizen's unique feature for viewing and adjusting the printer's default settings. The settings you make on the other Command-Vue menus are temporary. They are lost whenever you turn the printer power off. - Page 25 Chapter 2: Command-Vue Ill Control Panel _______________________________________________________________________ that describes the entire printer default environment.} This macro remains in memory when you turn the power off, and is automatically restored to the current settings area whenever you turn the power on. If you send software commands that override the macro {default} settings, you can then send a command to reset the printer {or turn off the printer}, which causes the macro settings to be restored to the current settings area.
- Page 26 VuePrint Menu Group _______________________________________________________________________ ________________________________________________________ 26...
- Page 27 Chapter 2: Command-Vue III Control Panel _________________________________________________________________ To see a printout of the current default settings, press PRINT for three seconds. {See Figure 2-2.} The printer prints a default report, which lists all the VuePrint menus—one menu per line. The options in each menu are printed horizontally across the line, and the current default setting is underlined.
- Page 28 VuePrint Menu Group _________________________________________________________________ Default settings are normally read during initial power up. The old default settings remain in effect until you turn the power off. If you wish to print with the new default settings, you must load them by pressing the SELECT and MENU keys for three seconds.
- Page 29 Chapter 2: Command-Vue III Control Pane _________________________________________________________________ A few additional settings are available only through the VuePrint menu {or through software commands, which are explained in Appendix D}. These settings are explained in Table 2-7. Table 2-7. VuePrint menu options. Menu Description Emulation...
-
Page 30: Other Command-Vue Functions
DOS computers use to display and print foreign-language characters. Tear off Selects/cancels the feature where the GSX-190 advances continuous forms to the tear bar for easy removal after printing. Paper out Enables/disables the paper-out sensor. Auto CR {IBM... - Page 31 Chapter 2: Command-Vue III Control Panel _______________________________________________________________________ 2-8. Other Command-Vue Functions. (cont’d) Table Print demo page Switch to the VuePrint menu end press PRINT and SAVE for at least three seconds. The printer prints a test page that demonstrates its capabilities.
-
Page 32: Chapter 3 Paper Handling
Chapter 3 Paper Handling Your GSX-190 printer offers great versatility in the kinds of paper you can use and ways of loading and unloading them, This chapter discusses the detail of these features. Setting the Paper Thickness Lever Paper up to .007 inches thick will feed smoothly through this printer. - Page 33 Number of copies {including position original} Not used Not used 1 o r2 4 or envelope Envelope Envelope Envelope Envelope Table 3-1. Paper thickness settings. You'll find that thicker paper feeds best when you use the bottom-feeding feature of the GSX-190. ________________________________________________________ 33...
-
Page 34: Setting The Paper Select Lever
_______________________________________________________________________ Setting the Paper Select Lever The paper select lever {Figure 3-2 on page 28} sets the GSX-190 for either continuous or single sheet paper. If you look closely at the lever, you'll see what looks like a paper stack and single sheet of paper embossed next to the lever. - Page 35 Chapter 3: Paper Handling _______________________________________________________________________ Figure 3-2. Installing the paper guide. 4. Insert a piece of paper head in, face down, between the paper holders {as you would load paper in a typewriter}. See Figure 3-3. Push the paper down gently to be sure it is all the way in. 5.
-
Page 36: The Tractor Unit
The Tractor Unit _________________________________________________________________ Figure 3-3. Adjusting the paper holders. Loading single sheets repeatedly is faster and more efficient with the automatic sheet feeder or manual sheet feeder. Read more about them in Appendix A, "Options." The Tractor Unit The tractor unit can be mounted in either the push or the pull position. -
Page 37: Installing The Tractor In The Push Position
Chapter 3: Paper Handling _________________________________________________________________ Paper type Tractor Paper- Paper Paper position feed select thickness method lever lever Continuous Push Rear Front Single-sheet Push Back Multi-copy* Pull Bottom Front +1 or +2 Labels Pull Bottom Front Envelopes** Push Back +2 to +6 Table 3-2. -
Page 38: Installing The Tractor In The Pull Position
The Tractor Unit _________________________________________________________________ Figure 3-4. Removing and installing the the push position. tractor unit in Installing the Tractor in the Pull Position When the tractor is mounted in the pull position, it pulls the paper up from the bottom and sends it straight up past the platen. -
Page 39: Printing On Continuous Paper
4 to 10 inches wide. Standard continuous-feed paper can be fed from either the bottom or the rear. With rear-feeding you can take advantage of the GSX-190 special features of paper tear off, top- of-form fine adjustment and paper parking. You can stack the paper on the desk or table behind the printer. - Page 40 Printing on Continuous Paper _________________________________________________________________ Because of the advanced paper-handling features of the GSX-190 it is seldom necessary to turn the paper feed knob. Most times turning the paper feed knob simply causes misaligned forms. Use the control panel instead.
- Page 41 Chapter 3: Paper Handling _______________________________________________________________________ Figure 3-6. Adjusting the tractor feeders. Figure 3-7. Installing the paper guide/sheet separator. ________________________________________________________ 41...
-
Page 42: Paper Tear-Off
Paper Tear-Off _________________________________________________________________ Figure 3-8. Continuous paper feeding into the rear of the printer. 7. Move the paper holders from the sides into the middle of the paper guide. This prevents your printed output from becoming accidentally jammed in the paper guide on its way out of the printer. - Page 43 When your computer indicates the end of a print job {by sending a form feed command and no further data}, the GSX-190 automatically advances the continuous paper so the perforation is at the tear bar. To remove the paper, just pull it across the tear bar.
-
Page 44: Paper Parking
Paper Parking _________________________________________________________________ Occasionally, you may not want the paper to automatically advance to the paper tear-off. You can turn off this feature by changing TEAR OFF to OFF in the VuePrint menu. Paper Tear-Off Adjustment The paper tear-off position is adjusted at the factory for standard continuous paper. - Page 45 Chapter 3: Paper Handling _________________________________________________________________ To park your continuous paper: 1. After the current job finishes, tear off the paper after the last page. Press the ON LINE key to take the printer off line. 2. Press the PARK/LOAD ▲ key. The paper retracts to the parking position.
-
Page 46: Printing On Envelopes
Printing on Envelopes _________________________________________________________________ Printing on Envelopes Single sheet feeding allows you to print on #10, #6¾, #7¾, and DL size envelopes with a paper weight of 12 to 20 lb. Follow these steps: 1. Be sure the tractor is in the push position. {If not, follow the installation instructions earlier in this chapter.} If you already have continuous paper loaded, simply press the PARK/LOAD key to back the paper out of the way. - Page 47 Chapter 3: Paper Handling _________________________________________________________________ Figure 3-l0. Adjusting the paper holders for printing with envelopes. 8. Wait a brief time {approximately half a second}. The envelope automatically feeds into the printer and stops when it reaches the correct position for the starting line of print. 9.
- Page 48 Printing on Envelopes We recommend that you set the VTOP option to +144 when printing on envelopes. This starts your printing on the envelope— not the flap. See "Top-of-Form Fine Adjustment" in this chapter for more information on VTOP settings. Figure 3-11.
-
Page 49: Printing On Overhead Transparencies
Chapter 3: Paper Handling _________________________________________________________________ Printing on Overhead Transparencies Your printer can also print in color on overhead transparencies for outstanding presentations. It's best to use transparencies specifically designed for dot matrix printers, such as Arkwright Dot Matrix Film {P/N 312-21-01} which have a slightly rough surface rather than a smooth surface, To load transparencies, follow the instructions for "Printing on Single Sheets,"... - Page 50 Printing on Multi-part Forms and Labels _________________________________________________________________ Figure 3-12. Bottom paper feeding. Follow these steps to load multi-part forms or labels: 1. Be sure the tractor is in the pull position. If not, install it by following the instructions earlier in this chapter. 2.
- Page 51 Chapter 3: Paper Handling _________________________________________________________________ Figure 3-13. Feeding paper into the bottom of the printer 7. Open the tractor feeder covers, position the forms or labels on the sprockets and close the covers. Be sure the paper is straight. Adjust the distance between the tractor feeders, if necessary, by unlocking the lock levers and sliding the feeders until the paper is taut.
-
Page 52: Top-Of-Form Fine Adjustment
Top-of-Form Fine Adjustment _________________________________________________________________ 11. Replace the top cover. The transparent part of the cover rests against the tractor unit. 12. Turn on the printer. Top-of-Form Fine Adjustment You never need to use the paper feed knob for setting the top-of- form. - Page 53 You can set one variable top-of-form for single sheets and another for continuous paper and save both settings in one macro. The GSX-190 senses which variable top-of-form to use by the position of the paper select lever. This convenience eliminates the need to change the top-of-form each time you switch between continuous paper and single sheets.
- Page 54 Reduce the page height in your software to10" to compensate. A simple test of how your software and the GSX-190 work together is to create a document that's nothing but numbered lines from 1 to66. Print this document to see what fits on a page.
-
Page 55: Setting Up Commercial Software
The commands to control these features are different on nearly every brand of printer. Citizen chose to use the same commands as the Epson FX-series, and the IBM Proprinter Ill—and then enhanced these command sets with extra commands that permit additional print styles, such as reverse {white on black} printing. - Page 56 _________________________________________________________________ The printer models in Table 4-1 are listed in order of their similarity to {i.e., compatibility with} the GSX-190. Therefore, as you search your software for the appropriate driver, you should look first for the printer model listed first. If it's not available, look for the second model, and so on.
-
Page 57: Appendix A Options
Appendix A Options Figure A-1. Enhance your GSX-190 printer with any of these options. ________________________________________________________ 57... -
Page 58: Color-On Command Tm
Appendix A: Options _________________________________________________________________ Color On Command With Citizen's exclusive Color on Command, your GSX-190 prints in the four colors on the ribbon {red, blue, yellow, and black} plus three mixed colors {green, orange, and violet}. You can select one of these color by moving the MENU slide switch to the INSTALL position while the printer is on line. - Page 59 Color On Command _______________________________________________________________________ Figure A-2. Installing the color motor. Figure A-3. Connecting the color motor to the printer. ________________________________________________________ 59...
- Page 60 Appendix A: Options _______________________________________________________________________ Figure A-4. Installing the color ribbon cassette. Figure A-4. Installing the color ribbon cassette 7. Lower the cassette into the printer until the three locating pins {one on the left side of the cassette, 2 on the right} snap into their corresponding notches on the printer.
-
Page 61: Configuring The Printer
Settings you make this way are lost when you turn the printer off. If you plan to leave the color ribbon installed in the printer, use the VuePrint menu to store your change in the GSX-190's nonvolatile macro memory. Both methods are described below. - Page 62 Appendix A: Options _________________________________________________________________ There is a short cut for turning on color when the printer is on line. Simply move the MENU slide switch to the INSTALL position and hold the COLOR RIBBON key for 3 seconds. You can then select colors by pressing the COLOR RIBBON key additional times as described below.
- Page 63 Color On Command _________________________________________________________________ Table A-1. Key presses and indicator lights for selecting colors. Correcting Color Mixing When you select colors, the printer chooses the proper color band on the color ribbon. If the bottom part of letters pick up the color in the next band, fine-adjust the color band selection by moving the small adjustment lever on top of the color motor.
-
Page 64: Sheet Feeders
Appendix A: Options _______________________________________________________________________ Figure A-5. Adjusting to correct color mixing Sheet Feeders Two automatic sheet feeders {or A.S.F.s} and a manual sheet feeder can be used. One A.S.E permits continuous printing on cut sheets; the other allows continuous printing on cut sheets and envelopes. -
Page 65: Serial Interface
Serial Interface _________________________________________________________________ Serial Interface The serial interface permits your GSX-190 printer to communicate with a computer that requires an RS-232C serial interface. The serial interface supports speeds from 150 through 9600 baud, and it can use XON/XOFF and DTR protocols. -
Page 66: Printer Stand
Appendix A: Options _________________________________________________________________ Baud rate Switch 3-1 Switch 3-2 Switch 3-3 *9600 4800 2400 1200 Table A-2. Serial interface default switches 3-1, 3-2, 3-3. Default Switch *XON/XOFF DTR {Data Ready} *8 data bits 7 data bits *Parity check off Parity check on *Even parity Odd parity... -
Page 67: Appendix B Maintenance
It is a good idea to keep your printer covered when it's not being used. If the GSX-190 is used heavily or in a dusty environment, consult your service center for advice on periodic cleaning and lubrication. -
Page 68: Alarms
Appendix B: Maintenance _________________________________________________________________ Alarms When an alarm occurs, the indicator lights shown in Figure B-I will flash. The alarms you can receive, their probable causes, and remedies are listed below The position of the slide switches does not matter in this case. Figure B-I shows the MENU switch in the ON LINE position and we'll use those labels to identify the indicator lights. - Page 69 Alarms _________________________________________________________________ Alarm: LF/FF and QUIET alternately flash. Cause: This is a warning that the printhead is hot, which can occasionally happen during times of heavy printing. Remedy: No action is required. The printer automatically resumes printing when the printhead has cooled. Alarm: PARK/LOAD and LF/FF alternately flash.
-
Page 70: Troubleshooting
Appendix B: Maintenance _________________________________________________________________ Troubleshooting This section discusses some of the difficulties users sometimes encounter. All of the possible user actions are listed. If these suggestions do not solve the problem, contact your dealer or Authorized Service Center. Do not try to repair the printer yourself. Power Problem: Printer is turned on but the POWER light on the control panel... - Page 71 Troubleshooting _________________________________________________________________ Problem: Paper does not feed. √ Is your continuous paper set in the tractor feeders correctly? √ Be sure the paper select lever is in the correct position. Problem: Paper parking does not operate or paper doesn't advance to the tear- off position.
-
Page 72: Printing Operation
Appendix B: Maintenance _________________________________________________________________ Problem: Paper does not feed from the automatic sheet feed&. Is the paper select lever in the rear {single sheet} position? √ √ Be sure the A.S.F. {automatic sheet feeder} is enabled by setting the VuePrint menu or the INSTALL menu. √... - Page 73 Troubleshooting _________________________________________________________________ Printing Results Problem: Printer does not print at all. √ Is the ribbon cassette properly installed so that the ribbon feeds between the printhead and the ribbon mask {not between the ribbon mask and the black ribbon guide against the platen}? √...
-
Page 74: Color Printing
Appendix B: Maintenance _________________________________________________________________ Color Printing Problem: Printer will not print in color. √ Is the color ribbon installed correctly? √ Is the color motor installed correctly? √ Check that the color ribbon selected on the INSTALL menu. √ Be sure your software is set for a color printer. See Table 4-1. Problem: Colors mix. -
Page 75: Self Tests
Troubleshooting _______________________________________________________________ √ Your word processing software may be sending a reset command that cancels this control panel setting. Set FONT LOCK to on using the control panel to protect font settings from software override. See Chapter 2, "Command-Vue Control Panel." {FONT LOCK cannot protect a pitch setting. -
Page 76: Hex Dump
Appendix B: Maintenance ___________________________________________________ Hex Dump The hex dump is a useful tool for debugging programs. It shows the hexadecimal values of the codes actually sent by your computer, printing 16 codes on each line. In addition, the character each code represents is printed at the right side of the sheet. -
Page 77: Appendix C Specifications
Appendix C Specifications Printing Printing Speed Draft characters I5 CPI: 270 CPS I2 CPI: 216 CPS 10 CPI: 240 CPS {high speed} 10 CPI: 180 CPS Near Letter quality {NLQ} I5 CPI: 68 CPS I2 CPI: 54 CPS 10 CPI: 45 CPS Buffer Memory 8K bytes Emulations... -
Page 78: Parallel Interface
Appendix C: Specifications _________________________________________________________________ Bit Image Modes 60, 72, 80, 90, 120, 144, and 240 dots per inch (Horizontal) Paper Continuous Forms Width: 4-10 inches Weight: 14-27 lbs {single-part} Thickness: Up to 4 parts, maximum form thickness 0.2mm Single Sheets Width: 7.2-10 inches Weight: 14-27 lbs Printer... -
Page 79: Fcc Compliance Statement
FCC COMPLIANCE STATEMENT This equipment has been tested and found to comply with the limits for a Class B Digital device, pursuant to Part 15 of the FCC Rules. These limits are designed to provide reasonable protection against harmful interference in a residential installation. This equipment generates, uses and can radiate radio frequency energy and, if not installed and used in accordance with the instructions, may cause harmful interference to radio communications. - Page 80 C: Specifications Appendix _________________________________________________________________ ETAT DE CONFORMITE EMI A L'USAGE Cet équipment produit et utilise l'énergie à radiofréquences et s'il n'est pas installé et utilisé correctment, c'est à dire en accord strict avec les instructions du fabricant, il risque de provoquer des interférences avec la réception de la radio et de la télévision.
-
Page 81: Appendix D Command Reference
In the following tables, ESC indicates the Escape character. Braces around a number, for example 124}, indicates that you should use the character with that decimal value. Citizen Commands Citizen commands work in both emulations. Printer Control Commands High Speed Draft Mode... - Page 82 Appendix D: Command Reference _________________________________________________________________ Print Size Commands Pitch Pica Elite ESC ~ 13.3 pitch ESC ~3 5 ~ 3 6 Fifteen pitch 17 pitch 20 pitch ESC ~ Expanded print ESC ~1 3 ESC ~1 0 Quadruple width print ESC ~1 4 ESC~ 1 0 Double-high print...
-
Page 83: Epson Fx-850 Emulation Commands
Epson FX-850 Emulation Commands _________________________________________________________________ Epson FX-850 Emulation Commands Default switch is 1-1 off Printer Control Commands Master Reset Delete character {127} Cancel line {24} ESC U 1 Unidirectional print ESC U 0 One line ESC< ESC s 1 Half speed mode ESC s 0 ESC i 1 Immediate mode... -
Page 84: Print Style Commands
Appendix D: Command Reference _________________________________________________________________ Horizontal Motion Commands Move printhead To left margin {13} Backspace n columns to the right ESC f {10} n To next horizontal tab position Absolute position ESC $ n1 n2 Relative position ESC \ n1 n2 Margins Left ESC 1 n... - Page 85 Epson FX-850 Emulation Commands ___________________________________________________ Print Enhancement Commands Emphasized print ESC E ESC F Doublestrike print ESC G ESC H Italic print ESC 4 ESC 5 Underling ESC - 1 ESC - 0 Superscript/subscript Superscript ESC S 0 Subscript ESC S 1 ESC T Select color Black...
-
Page 86: Ibm Proprinter Emulation Commands
Appendix D: Command Reference ______________________________________________________________________________ Download Character Commands Download Character Commands Define character ESC & {0} data Copy ROM to RAM ESC : {0} n {0} Select download characters ESC % 1 Cancel download characters ESC % 0 Graphics Commands Bit image graphics Single-density ESC K n1 n2 data... - Page 87 IBM Proprinter III Emulation Commands _______________________________________________________________________ Skip-over performance n lines ESC N n Cancel ESC O Line spacing Start text line spacing ESC 2 1 / 8 inch ESC 0 7 / 72 inch ESC 1 n / 72 inch ESC A n n / 216 inch ESC 3 n...
- Page 88 Appendix D: Command Reference _______________________________________________________________________ Overscoring ESC _ 1 ESC _ 0 Superscript/subscript Superscript ESC S 0 Subscript ESC S 1 ESC T Select color Black ESC r 0 Magenta ESC r 1 Cyan ESC r 2 Violet ESC r 3 Yellow ESC r 4 Orange...
-
Page 89: Index
Index menu lights 18 menu windows 18 A.S.F. 64 MODE menu 23 Accessories, ordering 9 See also names of keys Alarms 68-70 ON LINE menu 20-21 ASF MODE key 24 PITCH menu 22 Auto CR 30 slide switches 18 AutoLF 30 VuePrint menu 24-31, 62 Automatic sheet feeder 24, 28, Command-Vue control panel... - Page 90 Fonts v, 21-22, 28 Foreign- language characters Off line mode 21 See Code page, International ON LINE indicator 19 characters ONLINE key 20 Form feed 20 ON LINE menu 20-21 Form length 29 On line mode 21 Optional accessories 5—58, 60-61, 63-65 ORATOR key 15 Graphic dir 29...
- Page 91 POWER/PAPER OUT Specifications 78 indicator 20, 36, 68 Speed 6, 77 STYLE slide switch 18, 22 PRESTIGE key 22 PRINT key 25 Printer drivers 55—56 Printer stand 49, 66 Tear bar 29 PROPORTIONAL key 23 Tear off 29 Push position 20 Tear-off adjustment 30 Tear-off position 42, 44.
- Page 92 Citizen America, Inc. Limited Warranty Citizen America, Inc. hereby warrants that it will repair or replace, at its option, any part of the Citizen product with which this warranty is enclosed which proves defective by reason of improper workmanship and/or material, without charge for parts or labor, for a period of 24 months.
Need help?
Do you have a question about the GSX-190 and is the answer not in the manual?
Questions and answers
citizen gsx-190 is 136 characters?