Omron E5EN User Manual
Hide thumbs
Also See for E5EN:
- Instruction manual (2 pages) ,
- User manual (355 pages) ,
- Communications manual (132 pages)
Table of Contents
Advertisement
Quick Links
Advertisement
Chapters
Table of Contents

Related Manuals for Omron E5EN


Summary of Contents for Omron E5EN
- Page 1 Cat. No. H111-E1-2 E5EN Temperature Controller USER MANUAL...
- Page 2 No patent liability is assumed with respect to the use of the information contained herein. Moreover, because OMRON is constantly striving to improve its high quality products, the information contained in this manual is subject to change without notice. Every precaution has been taken in the preparation of this manual. Neverthe less, OMRON assumes no responsibility for errors or omissions.
- Page 3 PRECAUTIONS When the product is used under the circumstances or environment described in this manual, always adhere to the limitations of the rating and functions. Also, for safety , take countermeasures such as fitting fail safe installations. DO NOT USE : In circumstances or environments that have not been described below in this manual.
-
Page 4: Safety Precautions
SAFETY PRECAUTIONS Safety Signal Words This manual uses the following signal words to mark safety precautions for the E5EN. These precautions provide important information for the safe application of the product. Y ou must be sure to follow the instructions provided in all safety precautions. - Page 5 NOTICE...
-
Page 6: Conventions Used In This Manual
Conventions Used in This Manual Meanings of Abbreviations Symbol Term How to Read Display Symbols A B C D E F G H I J K L M N O P Q R S T U V W X Y Z... - Page 7 How This Manual is Organized Purpose Related title Description Learning about the E5EN Setting up the E5EN Basic operations Applied operations Calibration Appendix...
- Page 8 Table of Contents...
- Page 11 CHAPTER 1 INTRODUCTION CHAPTER CHAPTER 1 INTRODUCTION...
-
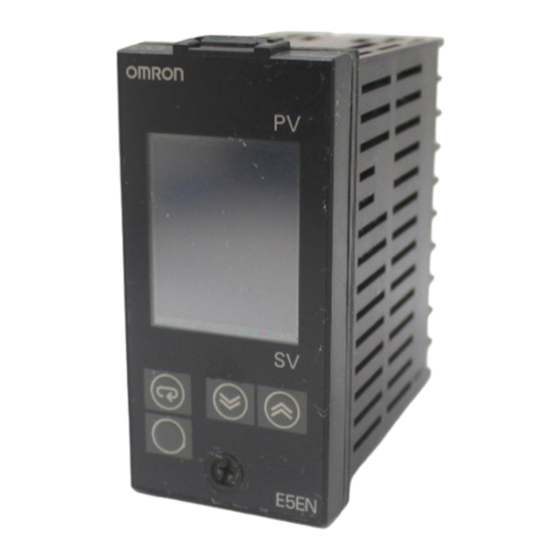
Page 12: Names Of Parts
CHAPTER 1 INTRODUCTION Names of Parts Front panel Temperature unit No.1 display Operation indicators No.2 display Mode key Up key Level key Down key Display No.1 display No.2 display Operation indicators... - Page 13 Each press of this key decreases values displayed on the No.2 display. Hold (down) key ing down this key speeds up the decrementation. This key combination sets the E5EN to the protect level." For details on the protect level, see Chapter 5 Parameters. combination...
- Page 14 CHAPTER 1 INTRODUCTION I/O Configuration and Main Functions I/O configuration OUT1 Control output 1 Control output 1 Temperature input/ analog input Control output 2 OUT2 Heating and CT input cooling Alarm output 3 Standard ALM3 Alarm 3 Event input 2ch ALM2 Controller Alarm 2...
- Page 15 1.2 I/O Configuration and Main Functions Main functions Input sensor types Control output j jjj Alarms Control adjustment Event input Communications function...
-
Page 16: How Setup Levels Are Configured And Operating
Parameters are divided into groups, each called a level". Each of the set values (setup items) in these levels are called a parameter." The parame ters on the E5EN are divided into the following seven levels: Control in Control Stopped Progress * : To activate the advanced function setting level, set the Protect level"... - Page 17 1.3 How Setup Levels Are Configured and Operating the Keys on the Front Panel Protect level Operation level Adjustment level Initial setting level Advanced function setting level Communications setting level Calibration level...
-
Page 18: Fixing Settings
CHAPTER 1 INTRODUCTION Selecting To select parameters in each level, press the key . Each press of the parameters key advances to the next parameter. For details on each parameter, see Chapter 5. Parameter Parameter Parameter Parameter Fixing settings If the key is pressed at the final parameter, the display returns to the top parameter for the current level. -
Page 19: Communications Function
1.4 Communications Function Communications Function VVV V VVV V Setting up communications data Displayed Parameter Set (monitor) Value Settings Default Unit Characters Communications unit No. 0 to 99 None Baud rate 1.2, 2.4, 4.8, 9.6, 19.2 kbps Data bit 7, 8 Stop bit 1, 2 Parity... -
Page 20: Table Of Contents
CHAPTER 2 PREPARATIONS CHAPTER CHAPTER 2 PREPARATIONS Installation ......Dimensions ......Panel cutout . -
Page 21: Installation
CHAPTER 2 PREPARATIONS Installation Dimensions (Unit: mm) 99.4 11.5 Panel cutout Unit: mm +1.0 number of units 2.5) +0.6 Several units cannot be group mounted close together vertically . (Observe the recommended mounting space limits.) When group mounting several controllers, ensure that the surrounding temperature does not exceed the allowable operating temperature listed in the specifications. -
Page 22: Mounting
2.1 Installation Mounting Adaptor Terminal cover How to attach the E5EN on the panel How to attach the terminal cover... -
Page 23: Draw Out
CHAPTER 2 PREPARATIONS Draw out The main unit can be drawn out to perform maintenance without remov ing the terminal compartment. Prepare a screwdriver that can be used on the lower front screw of the unit. (1) Loosen the lower front screw with a screwdriver (turning left) while pushing the hook on the upper surface of the front panel. -
Page 24: Wiring Terminals
Wiring Terminals Terminal arrangement Precautions when wiring Wiring Power supply Input power supply E5EN... - Page 25 Input Control output 1 Output type Specifications V VVV Alarm output/Control output 2...
- Page 26 Relay specifications are as follows: SPST NO 250VAC When the option unit E53 AK01, or E53 AK03 is mounted on the E5EN CT input and the heater burnout function is used, connect a current transformer (CT) across terminal Nos. 14 and 15.
- Page 27 Communications unit connection diagram Communications (RS-485) B(+) A(-) Communications unit connection diagram Cable reference diagram...
-
Page 28: Chapter 3 Basic Operation
CHAPTER 3 BASIC OPERATION CHAPTER CHAPTER 3 BASIC OPERATION... -
Page 29: Initial Setup Examples
CHAPTER 3 BASIC OPERATION Initial Setup Examples On previous controllers, sensor input type, alarm type and control period were set by the DIP switches. These hardware settings are now set in parameters in setup menus. The keys are used to switch between setup menus, and the amount of time that you hold the keys down for determines which setup menu you move to. - Page 30 3.1 Initial Setup Examples Typical example 2 Setup procedure Operation level Control stops. Initial setting level Initial setting level Operation level Adjustment level Adjustment level Control starts. Operation level Operation level...
-
Page 31: Setting The Input Type
Setting the Input Type The E5EN supports four input types: platinum resistance thermometer, thermocouple, non contact temperature sensor and analog inputs. Set the input type matched to the sensor used in the input type" parameter. The E5EN specifications support two types of inputs, platinum resistance thermometer input types and thermocouple input type, whose set values differ. - Page 32 3.3 Selecting Selecting Selecting Select either _ C" or _ F" as the temperature unit. Temperature unit Set the temperature unit in the temperature unit" parameter of initial setting level". Default is : _ C". Select _ C". Operation Procedure Operation level (1) Press the...
- Page 33 CHAPTER 3 BASIC OPERATION Selecting PID Control or ON/OFF Control The E5EN supports two control methods, 2 PID control and ON/OFF control. The control method is selected by the PID / ON/OFF" parameter in the initial setting level". When this parameter is set to ", 2 PID...
-
Page 34: Setting Output Specifications
3.5 Setting Output Specifications Setting Output Specifications Control period Control period (OUT1) Control period (OUT2) Direct/reverse operation Manipulated variable Manipulated variable 100% 100% High temperature High temperature Low temperature Set value Low temperature Set value Direct operation Reverse operation... -
Page 35: Temperature Unit
CHAPTER 3 BASIC OPERATION Operation Procedure Operation level Initial setting level Input type Temperature unit Control period (OUT1) Direct/reverse operation Operation level PV/SP... -
Page 36: Operation Level
3.6 Setting the SP Setting the SP Operation level Changing the SP Operation Procedure Operation level... - Page 37 CHAPTER 3 BASIC OPERATION Executing ON/OFF Control ON/OFF Control Hysteresis Hysteresis (OUT1) Set point 3 position control Revers operation Dead band Hysteresis (OUT2) Hysteresis (OUT1) Heating Cooling side side Set point 3-10...
- Page 38 3.7 Executing ON/OFF Control Parameters Symbol Parameter Name: Level Description Standard/heating and cooling: For specifying control method Initial setting level PID / ON/OFF: For specifying control method Initial setting level Direct/reverse operation: For specifying control method Initial setting level Dead band: Heating and cooling control Adjustment level Cooling coefficient:...
- Page 39 CHAPTER 3 BASIC OPERATION Determining PID Constants (AT, ST, manual setup) (auto tuning) Adjustment level Proportionalband Integratedtime Derivative time Description During AT execution During AT execution 3-12...
-
Page 40: Initial Setting Level
initial setting level". When the ST function is in operation, be sure to turn the power supply of the load connected to the control output ON simultaneously with or before starting operation of the E5EN. Execute self tuning (ST). Initial setting level... -
Page 41: St Stable Range
ST start conditions At Start of Program Execution When Set Point Is Changed Note: ST stable range Operation Procedure... -
Page 42: Manual Setup
3.8 Determining PID Constants (AT, ST, manual setup) Manual setup Operation Procedure Adjustment level AT execute/ cancel Proportional band Integrated time Derivative time Proportional Operation 3-15... -
Page 44: Alarm Outputs
Alarm Outputs Alarm output conditions are determined by the combination of alarm type" and alarm hysteresis." The following describes the alarm type", alarm value", upper limit alarm" and lower limit alarm" parameters. Alarm type Alarm Output Operation Alarm Type When alarm value When alarm value Value X is positive... -
Page 45: Alarm Value
CHAPTER 3 BASIC OPERATION Alarm value Lower limit alarm value Upper limit alarm value Alarm value Operation Procedure Initial setting level Input type Alarm 1 type Operation level PV/SP Alarm value 1 3-18... - Page 46 3.10 Heater Burnout Alarm (HBA) 3.10 Heater Burnout Alarm (HBA) HBA detection To CT terminal Heater lead VV VV Operating conditions jj j 3-19...
- Page 47 CHAPTER 3 BASIC OPERATION Setup Operation Procedure Moving to the advanced function setting level Operation level PV/SP Initial setting level Input type Move to advanced function setting level Advanced function setting level HBA used Setting heater burnout detection Operation level PV/SP Adjustment level AT execute/cancel...
- Page 48 3.10 Heater Burnout Alarm (HBA) How to calculate detection current values Example Control output Heater AC200V E5EN Control output Heater 1KWx3 AC200V E5EN Parameters Symbol Parameter : Level Description Heater current value monitor: For heater current value monitor Adjustment level...
- Page 49 CHAPTER 3 BASIC OPERATION 3.11 Requests during Operation 3-22...
-
Page 50: Applied Operation
CHAPTER 4 APPLIED OPERATION CHAPTER CHAPTER 4 APPLIED OPERATION... -
Page 51: Shifting Input Values
CHAPTER 4 APPLIED OPERATION Shifting Input Values Shifting input 1 point shift Temperature Upper limit value After shift Before shift Lower limit Input shift value value Input Operation Procedure Operation level Adjustment level Temperature input shift Operation level... - Page 52 When the non contact temperature sensor model ES1A is connected to the E5EN, an offset of several to several tens of a degree can occur. For this reason, offset the readout value by 1 point or 2 point shift as described in this item.
- Page 53 1 point shift (1) In the configuration shown in Figure 1, bring the set point to near the value at which the temperature of the control target is to be con method trolled. Assume that the control target temperature (C) and the con trol target temperature (B) are matching.
- Page 54 4.1 Shifting Input Values Example of 2 point temperature input shift Adjustment level Lower limittempera ture input shift value Upper limittempera ture input shift value...
-
Page 55: Alarm Hysteresis
CHAPTER 4 APPLIED OPERATION Alarm Hysteresis Upper limit Lower limit alarm alarm Alarm hysteresis Alarm hysteresis Alarm value Alarm value Standby sequence Restart Alarm latch... - Page 56 4.2 Alarm Hysteresis When the E5EN is set to close in alarm," the status of the alarm output Close in alarm/ is normally open. When set to open in alarm," the status of the alarm open in alarm output is output inverted or nomally closed.
-
Page 57: Analog Input
CHAPTER 4 APPLIED OPERATION Setting Scaling Upper and Lower Limits (analog input) When an analog input (voltage input) is selected, scaling matched to the Analog input Scaling control is possible. upper Scaling is set in the scaling upper limit", scaling lower limit" and dec limit imal point"... - Page 58 4.3 Setting Scaling Upper and Lower Limits (analog input) Operation Procedure Initial setting level Input type Scaling upper limit Scaling lower limit Decimal point...
-
Page 59: Executing Heating And Cooling Control
CHAPTER 4 APPLIED OPERATION Executing Heating and Cooling Control j jjj Heating and cooling control Setting Output Direct/reverse Control Method Control output 1 Control output 2 operation standard control Reverse operation Control output (heat) standard control Direct operation Control output (cool) Heating and cooling Reverse operation Control output (heat) -
Page 60: Press The Or
4.4 Executing Heating and Cooling Control Output Output Control output 1 side Control output 1 side Control output Control output 2 side P Control output Control output 2 side P 1 side P 1 side P Set point Set point Control output 1 side P Control output 1 side P Setup... -
Page 61: To Use Event Input
To Use Event Input Setting event input Number Setting Event Input Function Event input Event input Event input 1 Event input 2 Multi SP assignment 1 assignment 2 function function Uses How to use multi SP VVV V When multi SP is used by event input Event input 1... - Page 62 Setup To select set points (0/1/2/3) Operation Procedure Operation level PV/SP Initial setting level Input type Move to advanced function setting level Advanced function setting level Parameterinitialize E5EN Number of multi SP uses setting Number of multi SP uses 4-13...
- Page 63 CHAPTER 4 APPLIED OPERATION When event input assignment 1" or event input assignment 2" is set to Executing run/ run/stop", control is started when event input 1 or 2 becomes OFF". stop control Control is stopped when this becomes ON". While control is stopped, STOP lights.
-
Page 64: Setting The Sp Upper And Lower Limit Values
4.6 Setting the SP Upper and Lower Limit Values Setting the SP Upper and Lower Limit Values The setting range of the set point is limited by the set point limitter. The Set point limitter set point limitter is used to prevent the control target from reaching abnormal temperatures. - Page 65 CHAPTER 4 APPLIED OPERATION Setup To set the set point upper and lower limits, set in the set point upper limit" and set point lower limit" parameters in the initial setting level". This example describes how to set the set point limitter 200 to 1300 _ C" to input type K thermocouple.
- Page 66 4.7 Executing the SP Ramp Function (limiting the SP change rate) Executing the SP Ramp Function (limiting the SP change rate) With the SP ramp function, the controller operates according to the value SP ramp (set point during SP ramp) limited by a change rate. The interval in which the set point during SP ramp is limited is referred to as the SP ramp".
- Page 67 CHAPTER 4 APPLIED OPERATION Operation at start If the SP ramp function is enabled when the E5EN is turned ON, and when run" is switched to from stop," the process value may reach the set point after SP ramp in the same way as when the set point is changed. In this case, operation is carried out with the process value regarded as the set point before the change was made.
-
Page 68: To Move To The Advanced Function Setting Level
4.8 To Move to the Advanced Function Setting Level To Move to the Advanced Function Setting Level Protect level operation/adjustment protection" initialsetting/commu nications protection" Operation level PV/SP Initial setting level Input type Move to advanced function setting level Advanced function setting level 4-19... -
Page 69: Using The Key Protect Level
CHAPTER 4 APPLIED OPERATION Using the Key Protect Level To move to the protect level, press the keys simultaneously Key protect for at least three seconds. The protect level protects parameters that are not changed during con troller operation until operation is started to prevent them from being modified unintentionally. - Page 70 CHAPTER 5 PARAMETERS CHAPTER CHAPTER 5 PARAMETERS Conventions Used in this Chapter ... . Protect Level ....... Operation Level .
-
Page 71: Conventions Used In This Chapter
About the Order in Which Parameters Are Described in This Chapter Parameters are described level by level. The first page of each level lists the parameters available in that level. The parameter names in this list are listed in the order that they are displayed on the E5EN. -
Page 72: Protect Level
Protect Level Three levels of protection are provided on the E5EN, operation/adjustment protection", initial setting/communications protection" and setting change protection." These protect levels pre vent unwanted operation of the keys on the front panel in varying degrees. Power ON Protect level... -
Page 73: Operation Level
CHAPTER 5 PARAMETERS Operation Level Power ON Operation Adjustment level level less than 1 sec. 3 seconds min. 1 second No.1 display flashes. min. Control stops Commu Initial setting nications level setup level This level is displayed immediately after the less than 1 sec. - Page 74 Operation Level The additional PV display" parameter must be set to ON". The process value is displayed on the No.1 display, and nothing is displayed (blank) on the No.2 display. Function Monitor Range Unit Process Input indication range (See page A 10.) Value Monitor The decimal point position is dependent on the selected sensor.
- Page 75 CHAPTER 5 PARAMETERS Operation Level Set point during SP ramp The SP ramp set value" parameter must not be set to OFF". Function Monitor Range Unit SP: Set point lower limit to set point upper limit Monitor Heater current value The heater burnout"...
- Page 76 Operation Level The run/stop function must not be set to event Run/Stop input assignments 1 and 2. Function The alarm type must be set to either no alarm Alarm value 1 or a setting other than the upper and lower limit alarm.
- Page 77 CHAPTER 5 PARAMETERS Operation Level Upper limit alarm value 1 Alarm 1 type must be set to upper and lower limits, upper and lower limit range or upper Lower limit alarm value 1 and lower limit alarm with standby sequence. This parameter independently sets the upper and lower limit alarm values when the mode for setting the upper and lower limits is selected for alarm 1 type (initial setting level).
- Page 78 Operation Level The control must be standard control. Upper limit alarm value 3 Alarm 3 type must be set to upper and lower limits, upper and lower limit range or upper Lower limit alarm value 3 and lower limit alarm with standby sequence. This parameter independently sets the upper and lower limit alarm values when the mode for setting the upper and lower limits is selected for alarm 3 type (initial setting level).
- Page 79 CHAPTER 5 PARAMETERS Operation Level The control must be heating and cooling con MV monitor (OUT2) trol. Manipulated variable display must be set to ON". This parameter is for monitoring the manipulated variable on the control output 2 side during operation.
-
Page 80: Adjustment Level
Adjustment Level Power ON Operation Adjustment level level Less then 1 sec. Control in progress VV VV Adjustment level Page Page 5 12 5 15 5 16 5 12 5 13 5 16 5 16 5 13 5 17 5 14 5 14 5 17 5 14... - Page 81 CHAPTER 5 PARAMETERS Adjustment Level The E5EN must be in operation, and control AT execute/cancel must be 2 PID control. Function Example of use The communication unit must be mounted on Communications writing the E5EN. Function Comment 5-12...
- Page 82 Adjustment Level Heater current value The HBA used" parameter must be set to monitor ON". This parameter measures the current value of the heater from current transformer (CT) input to detect heater burnout. This parameter measures and displays the current value of the heater. Function Monitor Range Unit...
- Page 83 CHAPTER 5 PARAMETERS Adjustment Level Set point 0 The number of multi SP uses" parameter must be set to either 1" or 2", and the mul ti SP uses" parameter must be set to ON". Set point 1 Set point 2 Set point 3 Function Setting Range...
- Page 84 Adjustment Level Temperature input shift The input type" parameter must be set to temperature input excluding a non contact temperature sensor. Sometimes an error between the set point and the actual temperature occurs. To offset this, a value obtained by adding an input shift value to the input is displayed as the measurement value and used for control.
-
Page 85: Proportional Band
CHAPTER 5 PARAMETERS Adjustment Level Proportional band The control must be 2 PID control. Integral time Derivative time Function Parameter Setting Range Unit Default Proportional band 0.1 to 999.9 Integral time 0 to 3999 Second Comment Derivative time 0 to 3999 Second 5-16... - Page 86 Adjustment Level Cooling coefficient The control must be either heating and cool ing control and 2 PID control. If the heating and cooling characteristics of the control target greatly differ, preventing satisfac tory control characteristics from being obtained by the same PID parameters, adjust the propor tional band (P) at the control output 2 side by adding the cooling coefficient to balance control between the heating and cooling sides.
- Page 87 CHAPTER 5 PARAMETERS Adjustment Level The control must be standard control and Manual reset value 2 PID control. The integral time" parameter must be set to 0". Function Setting Range Unit Default 0.0 to 100.0 50.0 Comment Hysteresis (OUT1) The control must be ON/OFF control. Hysteresis (OUT2) Function Setting Range...
- Page 88 Initial Setting Level Power ON Operation level 3 seconds No.1 display flashes. min. 1 second min. Control stops Control in progress Initial setting level Control stopped Initial setting level Page Page 5 20 5 24 5 21 5 24 5 21 5 24 5 21 5 25...
- Page 89 Initial Setting Level Input type This parameter sets the sensor type by a corrensponding code. When this parameter is changed, the set point upper limit is changed to the default. If the set point limits must be changed, set the set point upper limit" and set point lower limit"...
-
Page 90: Initial Setting Level
Initial Setting Level Scaling upper limit The input type must be set to analog input. Scaling lower limit Decimal point These parameters can be used when voltage input is selected as the input type. When voltage input is selected as the input type, scaling is carried out. Set the upper limit in the scaling upper limit"... - Page 91 CHAPTER 5 PARAMETERS Initial Setting Level The input type must be set to temperature F selection input. Set the temperature input unit to either of _ C" or _ F". Function Setting Range Default C / : Comment Related parameter Input type"...
- Page 92 Initial Setting Level PID / ON/OFF Function Setting Range Default : 2 PID / : ON/OFF Comment The E5EN must support alarm 3 output. Standard/heating and cooling Function Setting Range Default : Standard / : Heating and cooling Comment 5-23...
- Page 93 Initial Setting Level ST self tuning Parameter Setting Range Unit Default Control period (OUT1) Control period (OUT2) Parameter Setting Range Unit Default...
- Page 94 Initial Setting Level Direct/reverse operation Direct operation" refers to control where the manipulated variable is increased according to the increase in the process value. Alternatively, reverse operation" refers to control where the manipulated variable is increased according to the Function decrease in the process value.
- Page 95 Initial Setting Level Alarm Output Operation Alarm Type Alarm Type Value When X is positive When X is negative...
-
Page 96: Advanced Function Setting Level
Advanced Function Setting Level Power ON Operation Adjustment level level 1 second Less than 1 second min. 3 seconds min. 1 second No.1 display flashes. min. Control stops. Commu nications Initial setting level Protect level setting level Less than 1 second Password input set value -169"... -
Page 97: Parameter Initialize
Uses Default : 1 Multi SP can be used when the option event input unit is mounted on the E5EN, and the number of multi SP uses" is set to 1" or 2". When the number of multi SP uses is set to 1"... - Page 98 Advanced Function Setting Level Event input 1 Event input 2 Selected Set Point Set point 0 Set point 1 Set point 2 Set point 3 Event input assignment 1 The number of multi SP uses must be set to 0" or 1". Event input assignment 2 Function Settings...
- Page 99 CHAPTER 5 PARAMETERS Advanced Function Setting Level Multi SP uses The number of multi SP uses" parameter must be set to 0" on models on which the option event input unit is not mounted. Function Comment SP ramp set value ST (self tuning) must be set to OFF".
- Page 100 Advanced Function Setting Level Standby sequence reset The alarm 1 to 3 type must be set to with method standby sequence." Function Condition A only SP change Alarm point (after change) Alarm hysteresis Condition A only : Standby sequence canceled point : Standby sequence reset point Alarm point Alarm output: Condition A...
- Page 101 CHAPTER 5 PARAMETERS Advanced Function Setting Level Alarm 1 open in alarm Alarm 1 function must be supported. Function Alarm Output Function Alarm Output Output LCDs Close in alarm Close in alarm Comment Open in alarm Open in alarm Setting Range Default : Close in alarm / : Open in alarm...
- Page 102 Advanced Function Setting Level Alarm 2 open in alarm Alarm 2 function must be supported. Function Alarm Output Function Alarm Output Output LCDs Close in alarm Close in alarm Comment Open in alarm Open in alarm Setting Range Default : Displayed / : Not displayed Alarm 2 hysteresis Alarm 2 function must be supported.
- Page 103 CHAPTER 5 PARAMETERS Advanced Function Setting Level Alarm 3 open in alarm Alarm 3 function must be supported. Control must be set to standard control. Function Alarm Output Function Alarm Output Output LCDs Close in alarm Close in alarm Comment Open in alarm Open in alarm Setting Range...
- Page 104 Advanced Function Setting Level HBA used The option unit E53-AK01 or E53-AK03 must be mounted on the E5EN. Function Setting Range Default : Enabled / : Disabled Comment Heater burnout latch The HBA used" parameter must be set to ON".
- Page 105 CHAPTER 5 PARAMETERS Advanced Function Setting Level ST stable range The control must be set to temperature input, standard control, PID control, and ST set to ON". This parameter sets the set value for determining the conditions under which ST (self tuning) occurs.
- Page 106 Advanced Function Setting Level MV upper limit The control must be 2 PID control, and the ST" parameter must be set to OFF". MV lower limit Function Comment Control Method Setting Range Unit Default Standard MV lower limit +0.1 to 105.0 105.0 Heating and cooling 0.0 to 105.0...
- Page 107 CHAPTER 5 PARAMETERS Advanced Function Setting Level Input digital filter Sets the time constant of the input digital filter . The following figure shows the effect on data after passing through the digital filter: Function PV before passing through filter PV after passing through filter 0.63A Time...
- Page 108 Advanced Function Setting Level Manipulated variable display This parameter displays the manipulated variable. The manipulated variable is displayed when the manipulated variable monitor (OUT1) and (OUT2)" parameters are set to ON", and not displayed when these Function parameters are set to OFF". Setting Range Default : Displayed /...
- Page 109 CHAPTER 5 PARAMETERS Advanced Function Setting Level Alarm 1 latch The alarm 1 function must be ON. Alarm 2 latch The alarm 2 function must be ON. Alarm 3 latch The alarm 3 function must be ON, and control must be standard control. Function Setting Range Default...
- Page 110 Advanced Function Setting Level Output input error Function Setting Range Default : ON / : OFF Comment Cold junction Input type must be thermocouple or non-con compensation method tact temperature sensor Function Setting Range Default : internally / : externally Comment 5-41...
- Page 111 CHAPTER 5 PARAMETERS Advanced Function Setting Level MB command logic Communications function must switching ported. Switches the logic of MB command (communications writing switching) in the Sys way communications procedures. The MB command (communications writing switching) is equivalent to the MB com Function mand (remote/local switching) on the E5 The hatched setting is the default (same logic as E5...
-
Page 112: Communications Setting Level
Communications stop Communications parity Each parameter is enabled when the power is reset. Match the communications specifications of the E5EN and the host computer. If a 1 : N connection is being used, ensure that the communications specifications for Function all devices in the system (except Communications unit No.") are the same. - Page 113 CHAPTER 6 CALIBRATION CHAPTER CHAPTER 6 CALIBRATION Parameter Structure ....User Calibration ..... . . Calibrating Thermocouples .
-
Page 114: Parameter Structure
CHAPTER 6 CALIBRATION Parameter Structure To calibrate the E5EN, enter the password 1201" at the move to cal ibration level" parameter in the advanced function setting level". " is displayed. However, note that the move to calibration level" parameter might not be displayed when, for example, the user is calibrating the E5EN for the first time. -
Page 115: User Calibration
6.2 User Calibration User Calibration The E5EN is correctly calibrated before it is shipped from the factory , and normally need not be calibrated by the user . If, however , it must be calibrated by the user , use the parameters for cali brating temperature input and analog input. -
Page 116: Calibrating Thermocouples
CHAPTER 6 CALIBRATION Calibrating Thermocouples Preparations E5EN Input power supply Cold junction compensator C/32 Compensating conductor Connecting the Cold Junction Compensator Cold junction compensator Cold junction compensator Short Open E5EN E5EN 0 _ C/32 _ F 0 _ C/32 _ F... -
Page 119: Calibrating Analog Input
6.4 Calibrating Analog Input Calibrating Analog Input Input power supply... -
Page 120: Calibrating Platinum Resistance
CHAPTER 6 CALIBRATION Calibrating Platinum Resistance Thermometers Input power supply E5EN 6 dials Input type 0 Input types 1, 3 Input types 2, 4 Input type 0 Input types 1, 3 Input types 2, 4... -
Page 121: Thermometers
Thermocouple or Preparation The following figure shows the required device connection. Make sure non contact that the E5EN and cold junction compensator are connected by a com temperature pensating conductor for the thermocouple that is to be used during sensor actual operation. - Page 122 APPENDIX APPENDIX SPECIFICATIONS ......Ratings ....... Characteristics .
-
Page 123: Specifications
SPECIFICATIONS Ratings " For the setting ranges for each sensor input, see page A 10. ± ± *1 When the control output ON time is less than 190 ms, heater burnout detection and heater current measurement are not carried out. -
Page 124: Characteristics
Characteristics ± ± ± ± ± ± ± ± ± ± *1 The indication of K thermocouples in the 200 to 1300 C range, T and N thermocouples at a temperature of 100 C or less, and U and L thermocouples at any temperature is ±2 C±1 digit maximum. -
Page 125: Current Transformer (Ct)
CURRENT TRANSFORMER (CT) Specifications Item Specifications *1 The maximum continuous current of the E5EN is 50 A. External dimensions... -
Page 126: Error Display
ERROR DISPLAY ERROR DISPLAY Input error Meaning Action Operation at error Memory error Meaning Action Operation at error RTD input RTD input (setting range: without 199.9 to 500.0( C) type) (setting range: 199.9 to 500.0( C) type) Themocuple input Themocuple input (setting range: without 199.9 to 400.0 ( C) type) (setting range: without 199.9 to 400.0 (... - Page 127 APPENDIX HB error Meaning Action Operation at error Display range over Meaning Action Current value exceeds Meaning Action...
-
Page 128: Parameter Operations List
PARAMETER OPERATIONS LIST Operation level Parameter Name Symbol Setting (monitor) Value Display Default Unit Value Adjustment level Parameter Name Symbol Setting (monitor) Value Display Default Unit Value... - Page 129 Initial Setting Level Parameter Name Symbol Setting (monitor) Value Display Default Unit Value...
- Page 130 Advanced function setting level Parameter Name Symbol Setting (monitor) Value Display Default Unit Value MV lower limit +0.1 to 105.0 (standard) 5.0 to MV upper limit 0.1 (standard) 105.0 to 0.0 (heating and cooling) Protect level Parameter Name Symbol Setting (monitor) Value Display Default Unit...
- Page 131 APPENDIX Communications Setting Level Parameter Name Symbol Setting (monitor) Value Display Default Unit Value Communication unit No. 0 to 99 None Baud rate 1.2, 2.4, 4.8, 9.6, 19.2 kbps Data bit 7, 8 Stop bit 1, 2 Parity None, Even, Odd Even None A-10...
-
Page 132: Sensor Input Setting And Indication Ranges
SENSOR INPUT SETTING AND INDICATION RANGES Specifica Input type Input Temperature Range Input Indication Range tions Value Specifica Input type Input Temperature Range Input Indication Range tions Value... -
Page 133: Setup Levels Diagram
APPENDIX SETUP LEVELS DIAGRAM The following diagram shows an overview of the setup levels on the E5EN. To move to the advanced function setting level and calibration level, you must enter passwords. Some parameters are not displayed depending on the protect level setting and the conditions of use. - Page 134 SETUP LEVELS DIAGRAM A-13...
-
Page 135: Parameter Flow
PARAMETER FLOW Advanced function setting level Control the manipulated variable according to the increase/decrease in the PV. - Page 136 Communications setting level...
- Page 137 NDEX Numbers...
- Page 138 NDEX...
- Page 139 NDEX...
-
Page 140: Revision History
Revision History A manual revision code appears as a suffix to the catalog number on the front cover of the manual. Cat. No. H111 E1 2 Revision code The following table outlines the changes made to the manual during each revision. Page numbers refer to previous version. - Page 141 Commerce Drive 60173 Schaumburg, IL 800.55.OMRON (66766) OMRON CANADA, INC. Milner Avenue Scarborough, Ontario M 416.286.6465 OMRON ON-LINE Global - http://www.omron.com USA - http://www.omron.com/oei Canada - http://www.omron.com/oci H112-E1-2 Printed in U.S.A. ©2002 OMRON ELECTRONICS LLC Specifications subject to change without notice.
Need help?
Do you have a question about the E5EN and is the answer not in the manual?
Questions and answers