Table of Contents

Related Manuals for Gree Split Air Conditioner


Summary of Contents for Gree Split Air Conditioner
- Page 1 G R E E A I R C O N D I T I O N E R S Thank you for choosing GREE air conditioner for correct operation, please read this owner's manual carefully before operating the unit and keep...
- Page 2 CONTENTS...
-
Page 3: Operation And Maintenance-Notices For Operation
Operation and maintenance-notices for operation Earth: The ground be con- Be sure to pull out the power plug Select the most appropriate tem- perature. nected! when not using the air conditiiner for a long time. Keep room cool- er than outside about 5 degree. -
Page 4: Notices For Operation
Notices for operation To adjust the airflow direction Please don't cut off or damage the power cords and control cords. appropriately. When operating the unit, to adjust the vertical air flow dire- If they are damaged, please ask the qualified ction by use of remote controller.And then, personnel to change them. -
Page 5: Notices For Use
Notices for use Working principle and special functions for cooling Principle: Air conditioner absorbs heat in the room and transmit to outdoor and discharged, so that indoor ambient temperature decreased, its cooling capacity will increase or decrease by outdoor ambient temperature. Anti-freezing function If the unit is running in COOL mode and in low termperature, there will be frost formed on the heat exchanger, when indoor heat exchanger temperature decreased below 32 , the... -
Page 6: Names And Functions Of Each Part
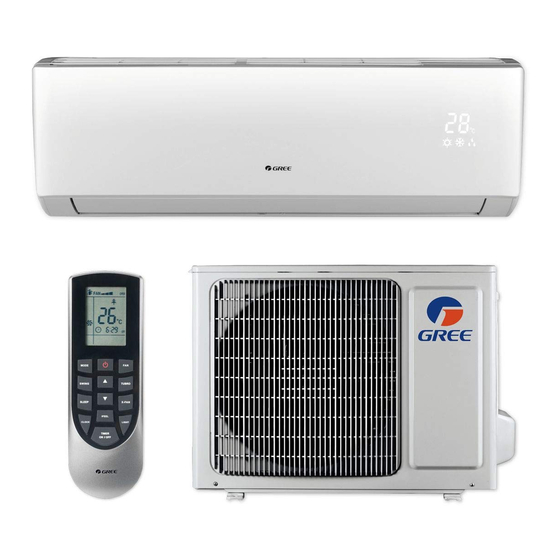
Names and functions of each part Indoor unit Air in Air out Front panel Filter Guide louver Wall pipe Bind tape Outdoor unit Connection wire Drainage pipe Remote control Air in Air out... -
Page 7: Operation Of Remote Control
Operation of remote control Names and functions of remote control buttons Note: Be sure that there are no obstructions between receiver and remote control; Don't drop or throw the remote control; Don't let any liquid in the remote control and put the remote control directly under the sunlight or any place where is very hot. -
Page 8: Timer Button
Operation of remote control Names and functions of remote control buttons NOTE: This Remote control is universal, it c o uld be used formany units, some buttons of this control which are not availabl e to this unit will not be described below. TIMER AUTO Timer button... - Page 9 Operation of remote control Names and functions of remote control buttons NOTE: This remote control is universal, it could be used formany units, some buttons of this control which are not available to this unit will not be described below. X-FAN X-FAN button Set X-FAN on (the characters of X-FAN will...
-
Page 10: Introduction For Special Function
Operation of remote control Guide for operation-general operation 1.Press ON/OFF button to start the unit after powering the main unit on.(Note: Power the unit on every time, the big -guide louver and small-guide louver will be ON/OFF MODE closed firstly. 2.Press MODE button to select desired running mode. -
Page 11: Charging Batteries
Operation of remote control When AUTO RUN mode is selected, the setting temperature will not be displayed on the LCD, the unit will be in accordance with the room temp. automatically to select the suitable running method and to make ambient comfortable. If start this function, the unit will run at super-high fan speed to cool or heat quickly so that the ambient temp. -
Page 12: Displayer Indicator Light Control Of Unit
Emergency Operation Displayer indicator light control of indoor unit It's a special selective button for the users ,who are not accustomed to the light at sleeping. Get the displayer indicator light on: When setting the light function,the mark will display on the remote controller screen by pressing this button. - Page 13 Clean with a soft brush, water and neutral dete- rgent and then dry it.(Note: Before cleaning the unit, please take down the displayer box firstly, then to wash the panel, if the unit has displayer on the front panel. Never use the water above to wash the panel, or it could cause deformation or discoloration.)
-
Page 14: Clean And Care
Clean and care Take down the air filter At the slot of surface panel to open an angle, pull the air filter downward and take it out. Cleaning To clean the dust adhering to the filters, you can either use a vacuum cleaner, or wash them with warm water (the water with the neutral detergent should below 113 When the filters are very dirty (such as oil stain), and dry it in the shade. - Page 15 immediate microcomputer controller the unit for 3 minutes before conditioner will run.
-
Page 16: Troubleshooting
Troubleshooting Phenomenon Troubleshooting Has the power been shut down? The unit can not run. Does power plug come loose from the socket? Is the circuit protection device tripped off or not? Is voltage higher or lower? (Tested by professionals) Break off Is the Timer correctly used? Is Temp. - Page 18 rules 2. If the air conditioner has not plug, directly connect it into the fixed circuit, a breaker should be installed in the fixed circuit. all pole of this breaker should be switching off and the distance of the contact should be at least 0.12 in. 3.28ft.
- Page 19 the power cable 4.9 ft. Make sure that the Live wire or Zero line as well as the earth wire in the family power socket can not be wrong connected, there should be reliable and no short circuit in the diagram.
-
Page 20: Installation Dimension Diagram
Installation dimension diagram Installation dimension diagram Installation dimension diagram Space to the ceiling 5.9 in Above 5.9 in Above 5.9 in Above Space to the wall Space to the wall 118.1 Above Air outlet side The dimensions of the space necessary for correct installation of the appliance including the minimum permissible distances to adjacent structures Space to the obstruction... - Page 21 adjusting the rear high. 5.9 in 5.9 in 132.3lb...
- Page 22 parts Leakage circuit-breaker and air switch of correct capacity must be installed. (or 1,2,3) the nut to the following.
-
Page 23: Install Outdoor Unit
Install outdoor unit Electric Wiring 1. Disassemble handle of right side plate or front side plate of outdoor unit. 2. Take off wire clamp, connect and fix power connect cord and power cord to terminal of line bank.Wiring should fit that of indoor unit. 3. - Page 24 Indoor unit check point Leak hunting Use soap water or leak hunting meter to check whether the joints is leak. Outdoor unit check point 1 in...
-
Page 25: Check After Installation And Test Operation
Check after installation and test operation Check after installation Items to be checked Possible malfunction The unit may drop, shake or emit noise. Has it been fixed firmly? It may cause insufficient cooling(heating) Have you done the refrigerant leakage test? capacity. -
Page 26: Installation And Maintenance Of Healthy Filter
Installation and Maintenance of Healthy Filter Installation Instructions 1. Forcibly pull the panel for a specific angle from the two ends of the front panel according to the arrow direction. Then pull the air filter downwards to remove it. (See Fig.a) Fig. - Page 27 GREE 66162658 V1.0 GREE ELECTRIC APPLIANCES I NC OF ZHUHAI Website: http://www.gree.com...
Need help?
Do you have a question about the Split Air Conditioner and is the answer not in the manual?
Questions and answers
How to turn timer off?