Advertisement
Table of Contents
- 1 Important Safety Instructions
- 2 General Battery Safety
- 3 Ac Power Cord Connection
- 4 Introduction and Features
- 5 Battery Status Display
- 6 Preparing to Charge
- 7 Charger Location
- 8 DC Connection Precautions
- 9 Operation
- 10 Charging Times
- 11 Care and Maintenance
- 12 Troubleshooting
- 13 Replacement Parts
- 14 Emergency Area Light
- Download this manual
VEC012B
™
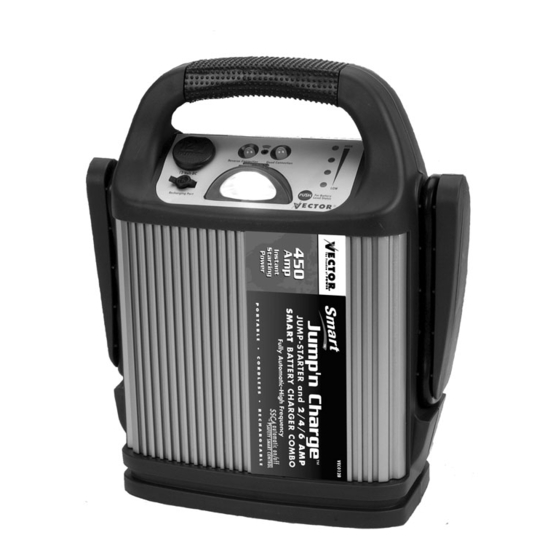
Jump 'n Charge
12V Battery Charger and Jump Start System
IF YOU SHOULD EXPERIENCE A PROBLEM WITH YOUR VECTOR
PURCHASE CALL TOLL FREE (866) 584-5504. IN MOST CASES A
VECTOR SERVICE REPRESENTATIVE CAN RESOLVE YOUR PROBLEM
OVER THE PHONE.
KEY INFORMATION YOU SHOULD KNOW:
• BUILT-IN 12V BATTERY CHARGER
• PORTABLE, CORDLESS, RECHARGEABLE
• SAFETY WARNING ALARM SYSTEM
• ULTRA BRIGHT LED AREA LIGHT
BEFORE RETURNING THIS PRODUCT FOR ANY REASON,
PLEASE CALL TOLL FREE (866) 584-5504
OWNER'S MANUAL AND
WARRANTY INFORMATION
THIS MANUAL CONTAINS IMPORTANT INFORMATION REGARDING SAFETY,
OPERATION, MAINTENANCE AND STORAGE OF THIS PRODUCT. READ
CAREFULLY BEFORE USE, AND RETAIN FOR FUTURE REFERENCE.
4140 S.W. 28th Way, Ft. Lauderdale, FL 33312
Toll Free: (866) 584-5504
Advertisement
Table of Contents

Related Manuals for Vector Jump ‘n Charge VEC12B


Summary of Contents for Vector Jump ‘n Charge VEC12B
- Page 1 ™ Jump ‘n Charge 12V Battery Charger and Jump Start System IF YOU SHOULD EXPERIENCE A PROBLEM WITH YOUR VECTOR PURCHASE CALL TOLL FREE (866) 584-5504. IN MOST CASES A VECTOR SERVICE REPRESENTATIVE CAN RESOLVE YOUR PROBLEM OVER THE PHONE.
-
Page 2: Important Safety Instructions
IMPORTANT SAFETY INSTRUCTIONS WARNING - RISK OF EXPLOSIVE GASES 1. WORKING IN VICINITY OF A LEAD-ACID BATTERY IS DANGEROUS. BATTERIES GENERATE EXPLOSIVE GASES DURING NORMAL BATTERY OPERATION. FOR THIS REASON, IT IS OF UTMOST IMPORTANCE THAT EACH TIME BEFORE USING YOUR CHARGER, YOU READ THIS MANUAL AND FOLLOW THE INSTRUCTIONS EXACTLY. - Page 3 7. Do not disassemble charger; take it to a qualified service technician when serv- ice or repair is required. Incorrect reassembly may result in a risk of electric shock or fire and will void warranty. 8. To reduce risk of electric shock, unplug charger from outlet before attempting any maintenance or cleaning.
-
Page 4: Ac Power Cord Connection
AC POWER CORD CONNECTION This charger is equipped for use with an extension cord. The extension cord must be first connected to the charger’s polarized plug. Only then should the extension cord be plugged into a properly installed 110/120VAC outlet in accordance with all local codes and ordinances. -
Page 5: Battery Status Display
SMART BATTERY CHARGER The charger portion of the system is microprocessor-based and has three charge rate set- tings, controlled by one switch. (See Figure 1). 1. Stage One- Rapid Start Charge- delivers maximum charging amperage to “wake up” any serviceable 12 volt battery. When battery reaches a maximum safe prede- termined voltage, the charger will automatically move into Stage 2 of the charging process. -
Page 6: Preparing To Charge
PREPARING TO CHARGE 1. Determine voltage of battery by referring to car owner's manual. 2. If it is necessary to remove battery from vehicle to charge, or to clean terminals, always remove grounded terminal from battery first. Make sure all accessories in the vehicle are off, so as not to cause an arc. - Page 7 5. For negative grounded vehicle, connect POSITIVE (RED) clamp from battery charger to POSITIVE (POS, P, +) post of battery. Connect NEGATIVE (BLACK) clamp to vehicle chassis or engine block away from the battery. Do not connect clip to carburetor, fuel lines, or sheet metal body parts. Connect to heavy gauge metal part of frame or engine block.
-
Page 8: Operation
Carefully connect Negative (BLACK) charger clamp to the free end of the bat- tery cable connected to the negative terminal. Connect the charger's power cord to a grounded 110/120VAC power outlet. Set charger's charge rate to appropriate setting according to battery size. When charging is complete, disconnect cables and clamps in reverse order from which they were connected. -
Page 9: Charging Times
• Do not use charger if cords or clamps have been damaged in any way - call Vector Technical Support Department toll-free: (866) 584-5504 for replacement cords/clamps. TROUBLESHOOTING NOTE: Charger will NOT operate on batteries below 4.0 volts. If a 12 volt battery is below 4.0 volts, it is probably shorted, open or sulfated. - Page 10 Try charging another battery, if the FAULT LED does not light, then one of the above problems exists with the initial battery. Charger will not charge and the fan will not operate if there is a fault. Call Vector Technical Support toll free: (866) 584-5504. SULFATED BATTERY Batteries left in a discharged state for a long period of time are likely to become "sul-...
-
Page 11: Replacement Parts
For replacement parts (bulbs, batteries, fuses, etc.), contact Vector Customer Service: (954) 584-4446 or toll-free (866) 584-5504. Battery Replacement It is recommended that the unit be returned to Vector Customer Service for battery replacement: Contact (954) 584-4446 or toll-free (866) 584-5504. - Page 12 WARNING • Do not dispose of the battery in fire as this may result in an explosion • Before disposing of the battery, protect exposed terminals with heavy-duty electrical tape to prevent shorting (shorting can result in injury or fire) •...
- Page 13 READ AND OBSERVE ALL CAUTIONS AND WARNINGS STEP-BY-STEP JUMP-STARTING INSTRUCTIONS This Jump ‘n Charge system is equipped with an automatic ON/OFF function that only allows Jump ‘n Charge energy to flow when proper connections are made to the battery and frame. The automatic ON/OFF function works in conjunction with an audible reverse polarity alarm and a large red LED light.
- Page 14 WARNING: Always disconnect the engine or frame jumper clamp first; followed by the battery • jumper clamp. There is a risk of explosive gases being released when batteries are charged or • discharged. Failure to follow instructions may cause property damage, explo- sive hazard, and/or personal injury.
-
Page 15: Emergency Area Light
OPERATION AS A 12 VOLT DC PORTABLE POWER SUPPLY The 12 volt DC outlet provides 15 amps maximum current for 12 volt DC operat- ed appliances. 1. Lift up the cover of the unit’s 12 volt DC accessory outlet (See Figure 2). 2. - Page 16 Vector Manufacturing, Ltd., regarding this product. There is no other warranty, other than those described herein. This Vector Manufacturing, Ltd. product is warranted, to the original purchaser only, to be free of defects in materials and workmanship for two years from the date of purchase without additional charge.
Need help?
Do you have a question about the Jump ‘n Charge VEC12B and is the answer not in the manual?
Questions and answers