Advertisement
Available languages
Available languages
Quick Links
Advertisement

Subscribe to Our Youtube Channel
Related Manuals for Vector VECJ1C


Summary of Contents for Vector VECJ1C
- Page 2 VECJ1C 1000A JUMP STARTER INSTRUCTION MANUAL SAVE THIS INSTRUCTION MANUAL FOR FUTURE REFERENCE. © 2024 Baccus Global LLC Boca Raton, FL 33432 (877) 571-2391...
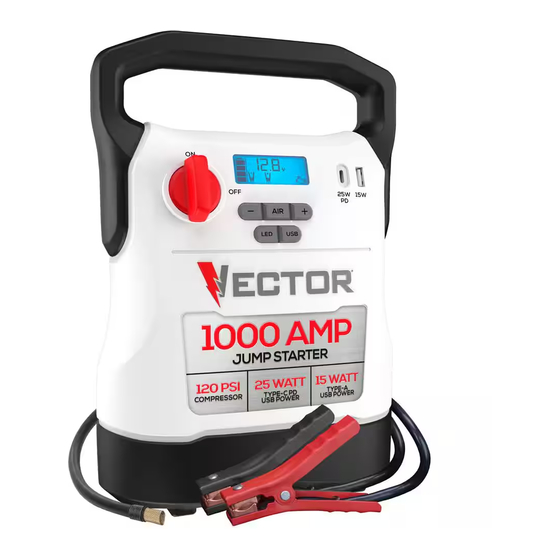
- Page 3 FEATURES FEATURES 10. USB Power Button 1. Handle 11. LED Area Lights 2. Jump-Starter Power Switch 12. 12 Volt DC Charging Port (for Use with 120 Volt AC Charger) 3. LCD Screen 13. Positive (+) Red Clamp 4. USB-C Port 14.
- Page 4 LCD DISPLAY DETAIL...
-
Page 5: Important Safety Instructions
SAFETY GUIDELINES / • Never submerge this unit in water; do not expose it to rain, snow or use when wet. DEFINITIONS • To reduce risk of electric shock, disconnect the unit from any power source before cleaning. Turning off controls without disconnecting will not reduce this risk. -
Page 6: First Aid
CAUTION – • Do not attach USB hubs or more than one personal electronic device to To reduce the risk of injury or property damage: the USB Ports. • NEVER ATTEMPT TO JUMP-START OR CHARGE A FROZEN BATTERY. • Some household USB-powered electronics will not operate with this unit. •... -
Page 7: Viewing Battery Status
CAUTION – Risk of property damage: Failure to keep the battery Press the Compressor A beep will sound and the backlit LCD charged will cause permanent damage and result in poor jump starting Power Button. Screen will display the Battery Status and the performance. -
Page 8: Usb Charging Ports
and”–” signs. The Alarm Icon and the Jump Starter Icon will flash. The read the vehicle manual to confirm that external-starting assistance is backlit LCD Screen will display the following: advised. • Excessive engine cranking can damage the vehicle’s starter motor. If the engine fails to start after the recommended number of attempts, discontinue jump-start procedure and look for other problems that need to be corrected. -
Page 9: Care And Maintenance
Periodically check the unit’s Battery Status on the backlit LCD Screen. current pressure value (which will light solid) to indicate the compressor Four solid bars in the Battery Icon indicates a full battery. When the battery is activated. Monitor the pressure on the LCD Screen. level is nearly empty with only one solid bar or empty Battery Status Icon, Important Note: To interrupt during inflation, press the Compressor the unit must be recharged at this time or the unit’s built-in low voltage... -
Page 10: Specifications
SPECIFICATIONS • Check that unit has a full charge. Recharge unit if necessary. Boost Ampere: 1,000A peak battery USB Power Port will not power appliance Battery type: Maintenance-free, sealed lead acid, 12V DC • Make sure that the USB device plugged into the USB-A Port does not AC input: 14.5VDC, 800mA exceed 15W;... - Page 11 VECJ1C ARRANCADOR AUXILIAR 1000A MANUAL DE INSTRUCCIONES GUARDE ESTE MANUAL DE INSTRUCCIONES PARA FUTURAS CONSULTAS. © 2024 Baccus Global LLC Boca Raton, FL 33432 (877) 571-2391...
- Page 12 CARACTERÍSTICAS CARACTERÍSTICAS 10. Botón de Encendido USB 1. Asa 11. Luces LED de Área 2. Interruptor de Encendido del Arranque Auxiliar 12. Puerto de Carga de 12 Voltios CC (para uso con cargador de 3. Pantalla LCD 120 voltios de CA) 4.
- Page 13 DETALLES DE LA PANALLA LCD...
-
Page 14: Cables De Extensión
DIRECTRICES DE SEGURIDAD / GFCI incorporada y pueden usarse para cumplir con esta medida de seguridad. DEFINICIONES • Uso de accesorios y aditamentos. El uso de cualquier accesorio o aditamento no recomendado para este aparato podría ser peligroso. Consulte la sección de accesorios de este manual para obtener más PELIGRO: Indica una situación de peligro inminente que, si no se evita, detalles. - Page 15 INSTRUCCIONES DE SEGURIDAD ESPECÍFICAS PARA hasta que se desconecten las abrazaderas. Desconecte las abrazaderas y vuelva a conectarlas a la batería con la polaridad correcta. ARRANCADORES AUXILIARES • Siempre desconecte primero el cable negativo (negro), seguido del cable positivo (rojo), excepto en los sistemas con conexión a tierra positiva. ADVERTENCIA: Peligro de explosión •...
-
Page 16: Primeros Auxilios
PRIMEROS AUXILIOS Siempre que las …sonará un pitido y la Pantalla LCD abrazaderas estén retroiluminada mostrará el Ícono de Estado Cuando trabaje con baterías de plomo-ácido, asegúrese siempre de que correctamente de la Batería, el Indicador de Voltaje de la haya asistencia inmediata disponible en caso de accidente o emergencia. -
Page 17: Arrancador Auxiliar
Asegúrese de que todas las demás funciones de la unidad estén apagadas Abrazadera, los Íconos de Flecha y el Ícono de Alarma parpadearán. La Pantalla LCD retroiluminada mostrará lo siguiente: durante la recarga, ya que esto puede ralentizar el proceso de recarga. PRECAUCIÓN –... -
Page 18: Notas Importantes
El Ícono de Estado de la Batería, el Indicador de Voltaje de la Batería, El Ícono de Estado de la Batería y el Indicador de Voltaje de la Batería los Íconos de Abrazadera y los signos “+” y “–” se iluminan de se iluminarán de manera fija, así... -
Page 19: Cuidado Y Mantenimiento
Inflar Otros Inflables sin Vástagos de Válvula Antes de continuar, verifique el Estado de la Batería de la unidad en la Pantalla LCD. Cuatro barras sólidas en el Ícono de la Batería indican que El inflado de otros artículos requiere el uso del adaptador de boquilla. la batería está... -
Page 20: Especificaciones
los 25W PD; o la potencia total consumida del Puerto USB-A y el Puerto Las fotografías de este manual pueden diferir de la unidad real. USB-C no supera los 15W cuando se utilizan simultáneamente. • Asegúrese de que se haya presionado el Botón de Encendido USB para ESPECIFICACIONES encender los Puertos USB.
Need help?
Do you have a question about the VECJ1C and is the answer not in the manual?
Questions and answers