Robertshaw RS4110 Installation Manual
Single stage thermostat
Hide thumbs
Also See for RS4110:
- User manual (33 pages) ,
- Installation manual (33 pages) ,
- Specifications (2 pages)
Advertisement
Table of Contents
- 1 Installation Manual
- 2 Replacing Existing Thermostat
- 3 Maintaining the Batteries
- 4 Connecting the Wires
- 5 Terminal Function
- 6 Wiring Diagrams
- 7 Applying Power
- 8 Security Lockout to Protect Settings
- 9 Emergency Heat
- 10 Automatic Changeover
- 11 Setting the Mode
- 12 Troubleshooting
- 13 Thermostat Specifications
- 14 Five Year Limited Warranty
- Download this manual
INSTALLATION MANUAL
RS4000 Series
Thank you for purchasing a Robertshaw
describe how to install and test the Robertshaw single stage thermostats
RS4110, RS5110, RS6110, and two stage RS4220, RS5220, RS6220
thermostats. For complete operation instructions, refer to the Robertshaw
User Manual.
Use the model number to identify your thermostat.
4 = Non-Programmable
Value Series
5 = Programmable Value Series
with 5-2 Day Schedule
6 = Programmable Value Series
with 7 Day Schedule and
Copy Feature
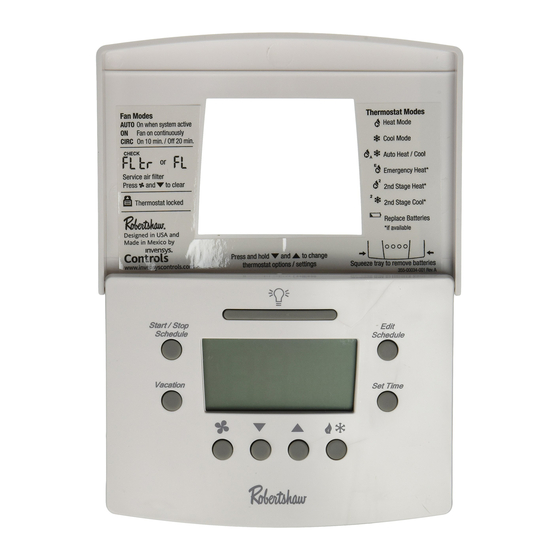
These thermostats have three main parts:
A. The backplate – mounts to the wall and has wire connections.
B. The body – snaps to the backplate and contains the electronics and
programming buttons.
C. The cover – snaps to the top of the body and swings up to give access
to the programming buttons.
Recycling Thermostat
If this thermostat is replacing a thermostat that contains mercury in a sealed
tube, do not place your old thermostat in the garbage. Contact your local
waste management authority for instructions regarding proper disposal of the
thermostat. If you have any questions, call Robertshaw technical support at
1-800-445-8299.
4110
RS
5110
RS
6 110
RS
RS5000 Series
®
thermostat. This manual will
R S X 1 1 0
Number of Cooling Stages
Number of Heating Stages
1
RS
RS
RS
352-00060-001 Rev. A
RS6000 Series
Application
0 = Standard Thermostat
4220
5220
6 220
Advertisement
Table of Contents

Related Manuals for Robertshaw RS4110


Summary of Contents for Robertshaw RS4110
-
Page 1: Installation Manual
Thank you for purchasing a Robertshaw ® thermostat. This manual will describe how to install and test the Robertshaw single stage thermostats RS4110, RS5110, RS6110, and two stage RS4220, RS5220, RS6220 thermostats. For complete operation instructions, refer to the Robertshaw User Manual. -
Page 2: Replacing Existing Thermostat
IMPORTANT SAFETY INFORMATION WARNING: • Always turn off power at main fuse or circuit breaker panel before installing, removing, cleaning, or servicing thermostat. • Read all the information in this manual before installing this thermostat. • This is a 24 VAC low-voltage thermostat. Do not install on voltages higher than 30 VAC. -
Page 3: Maintaining The Batteries
Installing the Robertshaw Thermostat Base NOTE: For new installations, mount the thermostat on an inside wall, five feet above the floor. Do not install behind a door, in a corner, near air vents, in direct sunlight, or near any heat or steam generating fixtures. -
Page 4: Connecting The Wires
System Switch Selection The body of the thermostat has two switches on the backside. They are accessible by removing the backplate from the body. The installer should set these to match the system. If the thermostat is controlling a heat pump system, set the first switch to Heat Pump. -
Page 5: Terminal Function
Terminal Function One Stage Models RS4110, RS5110 and RS6110 EQUIPMENT TO TERMINAL DESCRIPTION CONNECT 24V AC For input of 24V AC common side of transformer. Common Connection Connect to provide always-on backlight/nightlight. 24V AC RH/R For input of 24V AC hot side of transformer. -
Page 6: Wiring Diagrams
Transformer 24 Vac 120 Vac Remove jumper if RH/R separate cooling Relay transformer is Reversing present. Valve Not used Compressor for RS4110, Compressor Fault Output RS5110 and Contactor (24VAC) RS6110 Second Not used Stage Cool for RS4110, Second RS5110 and... - Page 7 Non-Heat Pump With Battery Backup Transformer 24 Vac 120 Vac Remove jumper if separate cooling RH/R Relay transformer is present. Not used for RS4110, Compressor RS5110 and Contactor RS6110 First Stage Heat Second Not used Stage Cool for RS4110, Second...
-
Page 8: Applying Power
Applying Power Before applying power, fill in the chart in the Pop-Up Wizard section of this manual. When 24V AC power or battery power is first applied to the thermostat, the display will show the model number followed by the Pop-Up Wizard. The thermostat will start normal operation following the Pop-Up Wizard. - Page 9 Factory settings that have not been changed will use the default settings for operation. Additional Default Settings for RS4000 The RS4110 and RS4220 are single setpoint non-programmable (no clock) thermostats and do not have a schedule. Default settings that are not set in the Pop-Up Wizard are: The fan setting is auto.
- Page 10 Default EnergyStar™ Settings for RS5000 and RS6000 The RS5110, RS5220, RS6110 and RS6220 are programmable thermostats and are preprogrammed with a schedule that is recommended by EnergyStar™. The schedule is designed to lower energy costs year-round. EnergyStar™ Temperature Settings Winter (Heating) Summer (Cooling) Morning (6:00 am) 70°F (21°C)
- Page 11 One Stage Models RS4110, RS5110, and RS6110 Conventional (Non-HP) Heat Pump (HP) Demand Terminal Display Terminal Display First Stage Cool Y1 + G Y1 + G + O First Stage Heat W1 + G* Y1 + G* * G, will be off (not displayed) for Non-HP with Gas.
-
Page 12: Security Lockout To Protect Settings
1. Press the buttons at the same time and hold them in for 5 seconds. You will be asked for a 4 digit password (the RS4110 and RS4220 thermostats use 2 digits). 2. Each digit is set using the buttons. Press the move to the next digit. -
Page 13: Troubleshooting
2. Enter the digits for the password by pressing the buttons. Press the to move to the next digit. Press to move back. If the wrong password is entered the display will flash NO for 5 seconds then return to normal. 3. -
Page 14: Five Year Limited Warranty
Five Year Limited Warranty Invensys Controls warrants to the original contractor installer, or to the original consumer user, each new Robertshaw thermostat to be free from defects in materials and workmanship under normal use and service for a period of five (5) years from date of purchase.
Need help?
Do you have a question about the RS4110 and is the answer not in the manual?
Questions and answers