Table of Contents
Advertisement
Quick Links
Advertisement
Table of Contents

Summary of Contents for GE UVD-XP3DNR
- Page 1 Security UVD-XP3DNR Camera User Manual REV 01.00 • ISS 02SEP09...
- Page 2 Disclaimer The information in this document is subject to change without notice. GE Security, Inc. (“GE Security”) assumes no responsibility for inaccuracies or omissions and specifically disclaims any liabilities, losses, or risks, personal or otherwise, incurred as a consequence, directly or indirectly, of the use or application of any of the contents of this document.
-
Page 3: Table Of Contents
Focus adjustment 8 Connect the monitor 8 Programming 9 Navigation 9 Main menu 9 Presets menu 10 Setup menu 10 Viewing menu 14 Exposure menu 15 White balance menu 15 Save/restore menu 16 Menu Map 18 UVD-XP3DNR Camera User Manual... -
Page 5: Preface
Preface This is the UVD-XP3DNR Camera. This document includes an overview of the product and detailed instructions explaining: • how to connect the camera; and • how to program the camera. • how to adjust the camera angle and focus... -
Page 6: Product Description
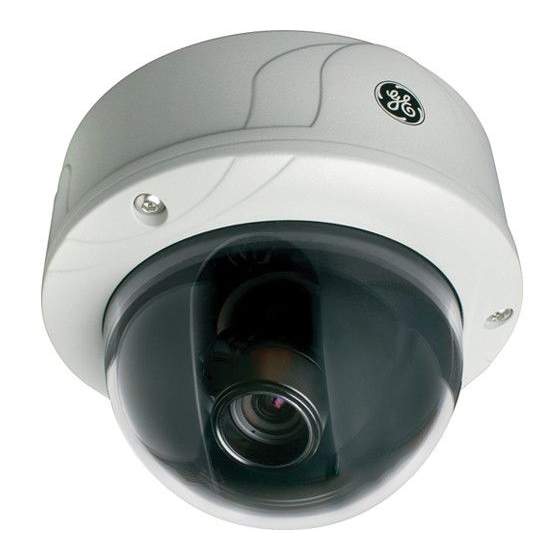
Product description The UVD-XP3DNR (rugged dome) color video cameras is a 24 VAC/12 VDC model. The cameras are equipped with a digital signal processor (DSP) for processing the video signal. Features Camera features include: • Next-generation XPosure technology. • Improved low-light performance and color balance. -
Page 7: Components
Figure 3 shows the monitor output components. Figure 2: Monitor output cable A. Monitor output BNC B. Monitor output RCA Plug the monitor output RCA into the video monitor output and connect the monitor output BNC to the TV monitor. UVD-XP3DNR Camera User Manual... -
Page 8: Osd Control Pad
Press the center of the control pad to display the Setup menu. If the selected item has its own menu, press the control pad to enter a submenu. Press the control pad for 2 seconds to save all settings and exit the Setup menu. UVD-XP3DNR Camera User Manual... -
Page 9: Installation
To adjust the horizontal angle of the rotor up to 350 degrees, turn the rotor on the platform (Figure 4 on page 8). To adjust the vertical angle of the platform up to 90 degrees, turn the platform (Figure 4 on page 8). UVD-XP3DNR Camera User Manual... -
Page 10: Focus Adjustment
Program the cameras by attaching a standard video monitor to the system. To connect the monitor, do the following: 1. Plug the monitor output cable (Figure 2 on page 5) to the video monitor output connector (Figure 1 on page 5). UVD-XP3DNR Camera User Manual... -
Page 11: Programming
• “Exposure menu” en page 15. • “White balance menu” en page 15. • “Save/restore menu” en page 16. • Exit menu (exits the menu system). There is a menu map provided on the back page of the manual. UVD-XP3DNR Camera User Manual... -
Page 12: Presets Menu
The Setup menu (Figure 8) provides the following options: • “Camera ID setup menu” en page 11. • “Sync menu” en page 11. • “Motion detection setup” on page 12. • WDR setup (safe area, center spot, lower 1/3, or full screen). UVD-XP3DNR Camera User Manual... - Page 13 INT. Internal sync. Used with DC power input to reduce the phase roll of fluorescent lights. LL. Line lock. Used to sync video for AC power input so that the sync matches the frequency of the power input to eliminate the roll caused by fluorescent lights. (Figure UVD-XP3DNR Camera User Manual...
- Page 14 (Figure 11 on page 13) to change the settings (see “Motion detection menu” on page 13). When motion is detected, the word “Alarm” is displayed on the top left of the screen, and the image is zoomed, tilted, and panned to the area setup in Setup alarm zone. UVD-XP3DNR Camera User Manual...
- Page 15 The camera will monitor for motion in the area defined in the boxes defined in this submenu (Figure 12 below). When motion is detected in this area, the camera issues an alarm and zooms in. Figure 12: Motion zone setup UVD-XP3DNR Camera User Manual...
-
Page 16: Viewing Menu
The Viewing menu (Figure 14 below) provides the following options: • Flip. (OFF, HORIZ, VERT, BOTH) Turn horizontal flip off or on. • Resolution. (HIGH, NORMAL) High or normal. The High option over-sharpens the image for higher resolution. Figure 14: Viewing menu UVD-XP3DNR Camera User Manual... -
Page 17: Exposure Menu
The White balance menu (Figure 16 below) provides the following options: • Mode (ATW or PTL). ATW mode is automatic trace white balance. In PTL mode you can set a specific white balance. Figure 16: White balance menu UVD-XP3DNR Camera User Manual... -
Page 18: Save/Restore Menu
• Save user settings. Saves all current changes. • Restore user settings. Discards all current changes. • Restore factory settings. Resets all settings to factory levels. • Reset camera. Resets the camera. Figure 17: Save/restore menu UVD-XP3DNR Camera User Manual... -
Page 20: Menu Map
Menu Map...


Need help?
Do you have a question about the UVD-XP3DNR and is the answer not in the manual?
Questions and answers