Table of Contents
Advertisement
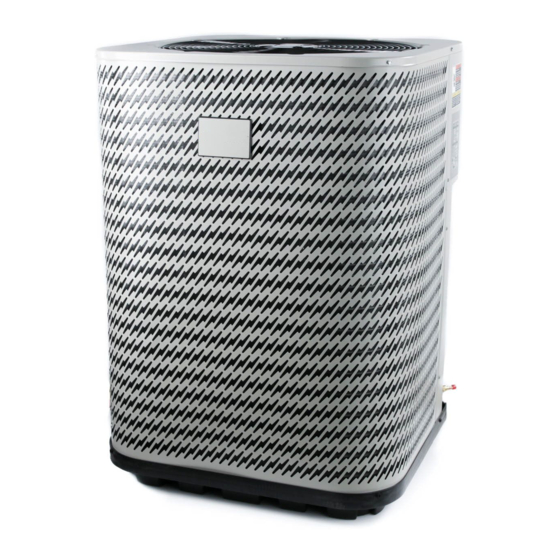
JT5BD Series
USER'S MANUAL / INSTALLATION INSTRUCTIONS
SPLIT SYSTEM HEAT PUMP - R-22
Please read this information thoroughly and become familiar with the capabilities and
use of your appliance before attempting to operate or maintain this unit. Keep this
literature where you have easy access to it in the future. If a problem occurs, check the
instructions and follow recommendations given. If these suggestions don't eliminate
the problem, call your servicing contractor.
The Installation Instructions are primarily intended to assist qualifi ed individuals
experienced in the proper installation of this appliance. Some local codes require licensed
installation/service personnel for this type of equipment. Please read all instructions
carefully before starting the installation.
IMPORTANT
DO NOT DESTROY. PLEASE READ CAREFULLY AND
KEEP IN A SAFE PLACE FOR FUTURE REFERENCE.
13 SEER
Advertisement
Table of Contents

Subscribe to Our Youtube Channel
Related Manuals for Nordyne JT5BD Series


Summary of Contents for Nordyne JT5BD Series
- Page 1 13 SEER JT5BD Series USER’S MANUAL / INSTALLATION INSTRUCTIONS SPLIT SYSTEM HEAT PUMP - R-22 IMPORTANT Please read this information thoroughly and become familiar with the capabilities and use of your appliance before attempting to operate or maintain this unit. Keep this literature where you have easy access to it in the future.
-
Page 2: Table Of Contents
USER INFORMATION WARRANTY INFORMATION Important Safety Information ........3 About the Heat Pump ..........3 A warranty certifi cate with full details is included with the Heat Pump. Carefully review these responsibilities with Operating Instructions ..........3 your dealer or service company. The manufacturer will not Cooling Operation .............3 be responsible for any costs found necessary to correct Heating Operation .............3... -
Page 3: Important Safety Information
USER INFORMATION IMPORTANT SAFETY INFORMATION OPERATING INSTRUCTIONS Safety markings are used frequently throughout this Please refer to the thermostat manufacturer’s User manual manual to designate a degree or level of seriousness and for detailed programming instructions. should not be ignored. WARNING indicates a potentially Cooling Operation hazardous situation that if not avoided, could result in 1. -
Page 4: Operating The Heat Pump For Automatic Cooling & Heating
USER INFORMATION At the beginning of the defrost cycle, both the outdoor HEAT PUMP MAINTENANCE condenser fan and compressor will turn off. After approximately 30 seconds, the compressor will turn on CAUTION: and begin to heat the outdoor coil causing the ice and snow to melt. -
Page 5: Important Safety Information
INSTALLER INFORMATION IMPORTANT SAFETY INFORMATION CAUTION: INSTALLER: Please read all instructions before servicing this equipment. Pay attention to all safety warnings and This unit uses refrigerant R-22. DO NOT use any other special notes highlighted in the manual. Safety any other refrigerant in this unit. Use of another markings are used frequently throughout this manual to refrigerant will damage the unit. -
Page 6: Heat Pump Installation
• Survey the job site to determine the best location for General Information mounting the outdoor unit. See Figure 5 (page 11) for The JT5BD series Heat Pump is designed only for outdoor unit dimensions. rooftop or ground level installations. This unit has been •... -
Page 7: Connecting Refrigerant Tubing Between The Indoor & Outdoor Unit
Connecting Refrigerant Tubing Between the Indoor • To maintain the unit's warranty, it is required that a & Outdoor Unit fi lter drier be installed when the system is open to the atmosphere. This includes, but is not limited to, CAUTION: replacing the evaporator and/or condenser of a system. -
Page 8: Grounding
protection must be in compliance with information listed on the outdoor unit data label. Any other wiring methods Thermostat must be acceptable to authority having jurisdiction. G R W 2 C E O Y • The outdoor unit requires both power and control circuit NOTE: Jumper electrical connections. -
Page 9: Startup & Adjustments
Recommended wire gauge and wire lengths for typical System Cooling thermostat connections are listed in Table 2. 1. Set the thermostat’s system mode to COOL and the • The thermostat should be mounted about 5 feet fan mode to AUTO. Gradually lower the thermostat above the fl... -
Page 10: Charging R-22 Units In Ac Mode With Outdoor Temperatures Above 55° F
REPLACEMENT PARTS Step 3, there is too little charge in the system. Add Replacement parts are available through all Nordyne distributors. refrigerant and repeat Steps 1 through 3 until the Please have the complete model and serial number of the unit system is correctly charged. -
Page 11: Figures & Tables
FIGURES & TABLES DO NOT OBSTRUCT TOP OF UNIT Allow adequate clearance for airflow Model Number JT5BD- Height -H- Width -W- Depth -D- 018K 27" 30 3/4" 30 3/4" 024KA 27" 30 3/4" 30 3/4" 030KA 39" 30 3/4" 30 3/4" 036K 43"... - Page 12 JT5BD-024KA Charging Chart Remove refrigerant when above curve Add refrigerant when below curve Liquid Temperature (F) Figure 7. Charging Chart for 2 Ton Units JT5BD-030KA Charging Chart Remove refrigerant when above curve Add refrigerant when below curve Liquid Temperature (F) Figure 8.
- Page 13 JT5BD-036K Charging Chart Remove refrigerant when above curve Add refrigerant when below curve Liquid Temperature (F) Figure 9. Charging Chart for 3 Ton Units JT5BD-042K Charging Chart Remove refrigerant when above curve Add refrigerant when below curve Liquid Temperature (F) Figure 10.
- Page 14 JT5BD-048K Charging Chart Remove refrigerant when above curve Add refrigerant when below curve Liquid Temperature (F) Figure 11. Charging Chart for 4 Ton Units JT5BD-060K Charging Chart Remove refrigerant when above curve Add refrigerant when below curve Liquid Temperature (F) Figure 12.
-
Page 15: Refrigerant Charging Tables - Cooling Mode
REFRIGERANT CHARGING TABLES - COOLING MODE Shaded boxes indicate fl ooded conditions. Rated design values. The suction pressure will vary from design value if indoor air fl ow, entering dry bulb, or entering wet bulb temperatures are lower than design. 1. - Page 16 REFRIGERANT CHARGING TABLES - COOLING MODE Shaded boxes indicate fl ooded conditions. Rated design values. The suction pressure will vary from design value if indoor air fl ow, entering dry bulb, or entering wet bulb temperatures are lower than design. 1.
- Page 17 REFRIGERANT CHARGING TABLES - COOLING MODE Shaded boxes indicate fl ooded conditions. Rated design values. The suction pressure will vary from design value if indoor air fl ow, entering dry bulb, or entering wet bulb temperatures are lower than design. 1.
- Page 18 REFRIGERANT CHARGING TABLES - COOLING MODE Shaded boxes indicate fl ooded conditions. Rated design values. The suction pressure will vary from design value if indoor air fl ow, entering dry bulb, or entering wet bulb temperatures are lower than design. 1.
-
Page 23: Electrical Information
ELECTRICAL INFORMATION BLACK BLACK BLACK BLUE Figure 13. JT5BD Wiring Diagram... - Page 24 Model Number JT5BD- 018K 024KA 030KA 036K 042K 048K 060K Volts-Cycles-Phase (1) 208/230-60-1 Total Amps 11.8 14.6 15.7 17.5 19.7 26.4 Electrical Data Delay Fuse Max. (2) Min. Circuit Ampacity 12.1 14.5 18.0 19.4 21.6 24.3 32.6 Area 15.17 15.17 22.88 25.42 22.88...
Need help?
Do you have a question about the JT5BD Series and is the answer not in the manual?
Questions and answers