Table of Contents
Advertisement
Quick Links
Advertisement
Table of Contents

Subscribe to Our Youtube Channel
Related Manuals for Avocent AutoView 200


Summary of Contents for Avocent AutoView 200
- Page 1 AutoView 200/400 ® Installer/User Guide...
- Page 2 INSTRUCTIONS This symbol is intended to alert the user to the presence of important operating and maintenance (servicing) instructions in the literature accompanying the appliance. DANGEROUS VOLTAGE This symbol is intended to alert the user to the presence of uninsulated dangerous voltage within the product’s enclosure that may be of sufficient magnitude to constitute a risk of electric shock to persons.
- Page 3 AutoView 200/400 Installer/User Guide Avocent, the Avocent logo and The Power of Being There are trademarks of Avocent Corporation. AutoView and LongView are registered trademarks of Cybex Computer Products Corporation. All other marks are the property of their respective owners.
- Page 4 USA Notification Warning: Changes or modifications to this unit not expressly approved by the party responsible for compliance could void the user's authority to operate the equipment. Note: This equipment has been tested and found to comply with the limits for a Class A digital device, pursuant to Part 15 of the FCC Rules.
-
Page 5: Table Of Contents
Table of Contents Chapter 1: Product Overview Features and Benefits ......3 Compatibility ....... 6 Safety Precautions . - Page 7 Product Overview Contents Features and Benefits ......3 Compatibility ....... 6 Safety Precautions .
-
Page 9: Chapter 1: Product Overview
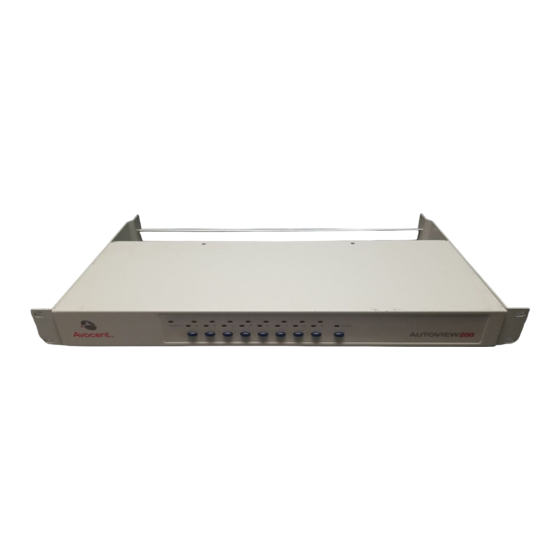
Chapter 1: Product Overview Features and Benefits The AutoView 200 and 400 series KVM switches allow you to control multiple computers from one keyboard, monitor and mouse. The AutoView 200 allows you to control up to 64 PCs, while the AutoView 400 enables control of up to 64 PC, Sun or USB computers. - Page 10 FLASH upgrade capability The AutoView 200/400 switches are FLASH upgradable. This allows you to update your firmware at any time through a simple serial connection to insure that your AutoView is always running at its best.
- Page 11 Chapter 1: Product Overview OSD Configuration Utility The OSD Configuration Utility allows the administrator to easily configure and download a channel list with defined users and access privileges to the entire system. This utility will also read and save your current configuration for extra security. Expansion for up to 64 computers Your AutoView unit will support from one to eight attached computers, or channels.
-
Page 12: Compatibility
To avoid potentially fatal shock hazard and possible damage to equipment, please observe the following precautions: • Do not use a 2-wire extension cord in any Avocent product confi guration. Test AC outlets at the computer and monitor for proper polarity and grounding. •... - Page 13 Installation Contents Getting Started ......9 Rack Mounting your AutoView Unit ... . 9 Installing an AutoView Switch .
-
Page 15: Chapter 2: Installation
You can either place your AutoView appliance on your desktop or rack mount your unit into an EIA standard rack. Obtain a Rack Mounting Bracket Kit (1U) from Avocent to rack mount your AutoView. Before installing the switch and other components in the rack, stabilize the rack in a permanent location. - Page 16 AutoView 200/400 Installer/User Guide To install the rack mounting bracket: Remove the side screws that secure the cover on your AutoView unit. Line up the holes in the side brackets with the screw holes in the sides of the AutoView unit.
-
Page 17: Installing An Autoview Switch
Installing an AutoView Switch Installing your AutoView 200 The diagram below illustrates one possible configuration for your AutoView 200 switch. Follow the step-by-step procedure To install an AutoView 200/400 switch to properly install your new switch. Extended Access User Local... - Page 18 AutoView 200/400 Installer/User Guide Installing your AutoView 400 The diagram below illustrates one possible configuration for your AutoView 400 switch. Follow the step-by-step procedure To install an AutoView 200/400 switch to properly install your new switch. Extended Access User Local...
- Page 19 Plug a standard CAT 5 cable (up to 500 feet) into the RJ-45 modular jack on the rear of the AutoView. Avocent C5T or P5T cable is strongly recommended to achieve best performance and maximum distance. If you use a different CAT 5 cable, ensure it is terminated to the EIA (TIA) 568 B standard.
- Page 20 Plug a standard CAT 5 cable (up to 500 feet) into the RJ-45 modular jack on the rear of the AutoView. Avocent C5T or P5T cable is strongly recommended to achieve best performance and maximum distance. If you use a different CAT 5 cable, ensure it is terminated to the EIA (TIA) 568 B standard.
- Page 21 Chapter 2: Installation If your extended access location utilizes Sun peripherals, you will need to set the AutoView 400 to recognize them before they can be used. To do this: Activate the OSD by pressing Control twice within one second. Press Control twice more to access Administrator Commands.
-
Page 22: Installing A Multiple Switch System
AutoView 200/400 Installer/User Guide Installing a Multiple Switch System The following diagram illustrates one possible cascading configuration using your AutoView switch. Perform this installation if you want to add another switch to your existing system. Follow the step-by-step instructions to properly cascade your new AutoView switch. -
Page 23: Powering Up The Autoview Switch System
To add a secondary switch to an AutoView switch system: NOTE: Cascading can only be done with CUFC, CIFC or CIFCA cables. Follow the steps in the procedure To install an AutoView 200/400 switch for each cascaded unit. Plug the 25-pin D connector of your CIFCM input cable into any available channel port on the rear of your primary AutoView unit. - Page 24 AutoView 200/400 Installer/User Guide...
- Page 25 Basic Operations Contents Viewing and Selecting Channels and Servers ..21 Setting up the On-Screen Display ....23 Setting User Station Security ....28 Scanning your AutoView System .
-
Page 27: Chapter 3: Basic Operations
From here, you can you can select servers and access OSD configuration options. NOTE: The OSD interface colors differ slightly between the AutoView 200 and 400 models. We have used AutoView 400 screen shots for the User Guide. The few feature differences are noted in the text. -
Page 28: Selecting Channels
AutoView 200/400 Installer/User Guide and press Enter. The Administrator Channel List appears. -or- In secure mode, if you are the system administrator, log in as Admin, Root or Administrator. Type your password and press Enter. The Administrator Channel List appears. -
Page 29: Setting Up The On-Screen Display
Command menu. Add Channel, Edit Channel, Delete Channel and Administrator Functions are all covered in separate sections in this chapter. Avocent Control Panel Administrator Commands Add Channel... - Page 30 AutoView 200/400 Installer/User Guide Administrator Commands Features List Command Description Add Channel Set up the channel name, address, ID and scan dwell times. Edit Channel Edit the channel name, address, ID and scan dwell times. Delete Channel Delete a channel from the Administrator Channel List.
- Page 31 Chapter 3: Basic Operations Press the keyboard Control key twice within one second again. The Administrator Commands menu appears. Highlight Add Channel and press Enter. The Add Channel menu appears. Avocent Control Panel Add Channel Name Marketing Address ID Dwell Time...
- Page 32 AutoView 200/400 Installer/User Guide Avocent Control Panel Edit Channel Name Marketing Address ID Dwell Time Scan Dwell Time ID Setup Save Changes ENTER = next ESC = exit Figure 3.5: Edit Channel Menu Type the new channel name, address, ID and scan dwell times.
- Page 33 Chapter 3: Basic Operations Highlight Edit Channel and press Enter. Highlight ID Setup and press Enter. The ID window will appear. Follow the procedures outlined in the table below to confi gure your ID window. ID Window Settings To … Procedure Move the ID window Use the Arrow keys or mouse to move the ID window's...
-
Page 34: Setting User Station Security
AutoView 200/400 Installer/User Guide Setting User Station Security The Administrator Functions menu allows you to set up the administrator and user accounts, enable and disable the setup port and utilize the AutoView FLASH upgrade feature. The following table discusses the security features. - Page 35 Chapter 3: Basic Operations To access the Administrator Functions menu: Press the Control key twice to access the Administrator Channel List. Press Control twice more to access the Administrator Commands menu. Highlight Administrator Functions and press Enter. The Administrator Functions menu appears. To create the administrator account: Press the Control key twice to access the Administrator Channel List.
-
Page 36: Scanning Your Autoview System
AutoView 200/400 Installer/User Guide Highlight one of the fi rst three options and then press Enter to save your selections. Repeat steps 3-7 for each remaining user. To assign the extended access user peripheral type (AutoView 400 only): Press the Control key twice to access the Administrator Channel List. - Page 37 Press and hold the Scan push-button on the front of the AutoView unit until the Scan LED lights green. Scanning will be halted if a channel is selected, or if the Scan push-button is pressed again. Avocent Control Panel Administrator Commands Add Channel Edit Channel...
- Page 38 AutoView 200/400 Installer/User Guide To scan using a keyboard hotkey sequence: See Keyboard Switching later in this chapter. To scan using the OSD menu: Press the Control key twice to access the Administrator Channel List. Press Control twice more to access the Administrator Commands menu.
-
Page 39: Resetting Your Mouse
Chapter 3: Basic Operations confi guration screen. Press Enter to save the new entry. To remove a channel from the Scan List: Use the Arrow keys to highlight the channel you wish to delete. Press the F3 key. Press Enter to confi rm the deletion. Resetting your Mouse If your mouse locks up during normal use with the AutoView, you may be able to re-establish operation by issuing a reset command. - Page 40 AutoView 200/400 Installer/User Guide commands that can be activated via the keyboard without having to access the OSD. The following procedures and tables describe your options. NOTE: Hotkey switching is only available in the default non-secure state. For more information on security, see Setting User Station Security in this chapter.
- Page 41 Chapter 3: Basic Operations Example Keyboard Switching Sequence Key Sequence Action 1. <CM>E<Enter> Selects channel E on the base unit as the active channel. 2. <CM>CF<Enter> Selects the AutoView attached to channel C on the base unit, then selects channel F on the cascaded unit. 3.
- Page 42 AutoView 200/400 Installer/User Guide...
-
Page 43: Advanced Operations
Advanced Operations Contents Multiuser Operation ......39 Keyboard Translation (AutoView 400 only) ..40... -
Page 45: Chapter 4: Advanced Operations
Chapter 4: Advanced Operations Multiuser Operation The AutoView 200/400 switches provide advanced features that go beyond those available in the AutoView Commander. Primarily, they offer the benefit of adding a LongView receiver to provide for an extended access user that may be located up to 500 feet away from the AutoView. -
Page 46: Keyboard Translation (Autoview 400 Only)
AutoView 200/400 Installer/User Guide Multiuser operation in a multiple switch system In a multiple switch system, users will operate in independent access mode. Both users can simultaneously and independently access any computer attached to the primary AutoView unit. Similarly, independent access is possible across the cascaded units as long as each user is accessing a different secondary unit. - Page 47 Chapter 4: Advanced Operations PS/2 Keyboard to Sun Computer Stop Find Again Props Power Undo Command Front keypad * Compose Copy NUMLOCK Help Open keypad / Mute Paste keypad - Vol - keypad + Vol + Sun keyboards have a Power key used to power the workstation up and down. PS/2 keyboards may have a Sleep key to place the computer in a stand-by or power saving mode.
- Page 48 AutoView 200/400 Installer/User Guide...
- Page 49 Appendices Contents Appendix A: FLASH Upgrades ....45 Appendix B: Technical Specifications ..46 Appendix C: Technical Support ....47 Appendix D: Troubleshooting .
-
Page 51: Appendices
AutoView system. To upgrade your AutoView fi rmware: Download the latest FLASH fi rmware revision from the Avocent web site. Connect a serial cable from the serial port of your computer to your setup port on the back of your AutoView. -
Page 52: Appendix B: Technical Specifications
Supported Hardware AutoView 400: Computer: IBM PC/AT, PS/2, Sun workstations, USB computers and 100% compatibles AutoView 200: Computer: IBM PC/AT, PS/2 and 100% compatibles Video Modes: VGA, SVGA, (XGA, XGA-II with adaptor) Maximum Resolution: 1600 x 1200 @ 85 Hz... -
Page 53: Appendix C: Technical Support
Appendix C: Technical Support Our Technical Support staff is ready to assist you with any installation or operating issues you encounter with your Avocent product. If an issue should develop, follow the steps below for the fastest possible service: Check the Troubleshooting section of this manual to see if the issue can be resolved by following the procedures outlined (see Appendix D). -
Page 54: Appendix D: Troubleshooting
Red status LED lit Internal unit failure. Contact Avocent Technical Support. Red status LED blinking Bad FLASH memory on power up. Contact Avocent Technical Support. Green channel LED not lit Verify that the computer is powered on. Check the cabling between your computer and the AutoView. - Page 55 Characters on screen do not match keyboard input Try changing the keyboard scan set for that channel by using the keyboard command sequence <Kn>. (For more information on Command Mode, see Keyboard Switching in Chapter 3.) If the problem persists, call Avocent Technical Support.
- Page 56 Use only Avocent-supplied cable. Avocent warranties do not apply to damage resulting from user-supplied cable. Do not use a 2-wire extension cord in any Avocent product confi guration. Test the AC outlets at the computer, AutoView and monitor for proper polarity and grounding.
- Page 57 Appendices...
- Page 58 AutoView 200/400 Installer/User Guide...
- Page 59 LIMITED WARRANTY Avocent Corporation warrants to the original retail purchaser that this product is and will be free from defects in materials and workmanship for a period of 24 months from the date of purchase. Additionally, all Avocent products carry an unconditional thirty-day satisfaction guarantee. If, for any reason, you are dissatisfi...
- Page 60 For Technical Support: Email: support@avocent.com www.avocent.com Avocent Corporation Avocent International Ltd. 4991 Corporate Drive Avocent House, Shannon Free Zone Huntsville, Alabama 35805-6201 USA Shannon, County Clare, Ireland Tel: +1 256 430 4000 Tel: +353 61 715 292 Fax: +1 256 430 4031...
Need help?
Do you have a question about the AutoView 200 and is the answer not in the manual?
Questions and answers