Table of Contents
Advertisement
Quick Links
Advertisement
Table of Contents

Related Manuals for Grundig RRCD 1350 MP3


Summary of Contents for Grundig RRCD 1350 MP3
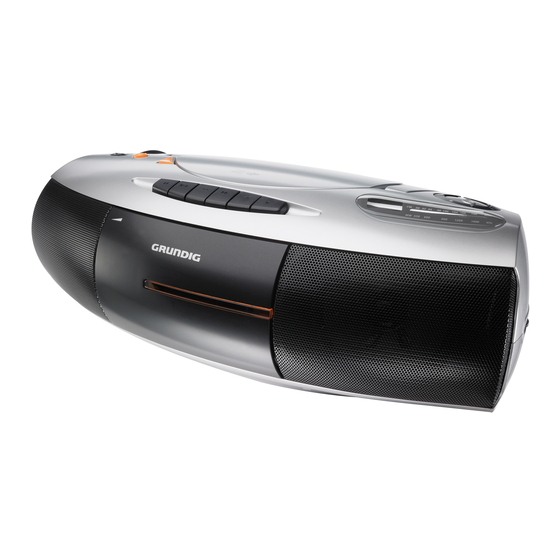
- Page 1 RADIO RECORDER WITH CD RRCD 1350 MP3...
-
Page 2: Table Of Contents
CONTENTS ------------------------------------------------------------------------------------------------ SET-UP AND SAFETY OVERVIEW Controls Display for the CD-DA and MP3/WMA mode CONNECTION AND PREPARATION Power supply GENERAL FUNCTIONS Switching on and off Selecting the input source Adjusting the volume Switching the Ultra Bass System on and off Listening with headphones or earphones RADIO MODE Antennas... -
Page 3: Set-Up And Safety
SET-UP AND SAFETY ------------------------------------------------------------ Please note the following instructions when setting up the system: This device is designed for the playback of audio signals. Any other use is expressly prohibited. If you want to set up the device on wall shelves or in cupboards, please ensure that the device is adequately ventilated. -
Page 4: Overview
OVERVIEW ---------------------------------------------------------------------------------------------- Controls CD TAPE/OFF Selects the CD, TAPE and RADIO input sources. RADIO Switches the device on and off. – Adjust the volume. ß Switches the Ultra Bass System on and off. OPEN Opens the CD compartment. PLAY/PAUSE Starts and pauses CD playback. STOP Ends CD playback, deletes a playlist. - Page 5 OVERVIEW ---------------------------------------------------------------------------------------------- In tape mode: pauses playback and recording. In tape mode: ends playback/recording of the tape and opens the tape compartment. § In tape mode: fast forwards the tape to the end. In tape mode: rewinds the tape to the beginning. In tape mode: starts playback.
- Page 6 OVERVIEW ---------------------------------------------------------------------------------------------- Headphone jack for connecting a stereo headphone set with a jack plug (ø 3.5 mm) on the left side of the device. This automatically switches off the loudspeakers. Antenne Telescopic antenna for FM (VHF) reception on the back of the device. BEAT CUT In MW radio mode: suppresses interference when recording onto tape.
-
Page 7: Display For The Cd-Da And Mp3/Wma Mode
OVERVIEW ---------------------------------------------------------------------------------------------- Display for the CD-DA and MP3/WMA mode ALL MP3 WMA RANDOM PROG In CD mode: displays the total number of tracks and the number of the current track. In MP3/WMA mode: also when stopped, displays the & number of the current album, if » «... -
Page 8: Connection And Preparation
CONNECTION AND PREPARATION ---- Power supply Mains operation Check that the mains voltage on the type plate (on the bottom of the device) corresponds to your local mains supply. If this is not the case, contact your specialist dealer. Plug the power cord supplied into the »AC ∼«... -
Page 9: General Functions
GENERAL FUNCTIONS ---------------------------------------------------- Switching on and off Switch on the device with the input source by moving the »CD TAPE/OFF RADIO« switch to the required position. Move the »CD TAPE/OFF RADIO« switch to the »TAPE/OFF« position to switch off the device. Selecting the input source Select the input source (CD, TAPE or RADIO) using »CD TAPE/... -
Page 10: Selecting Radio Stations
RADIO MODE ------------------------------------------------------------------------------------ Selecting radio stations MW« on the Select the frequency band (FM or MW) with »FM right side of the device. Select the radio station using »TUNING« on the right side of the device. – The frequency is displayed on the frequency scale. Stereo/mono reception If the device receives an FM stereo station, »FM. -
Page 11: Selecting The Cd Input Source
CD MODE ---------------------------------------------------------------------------------------------------- Selecting the CD input source »CD TAPE/OFF RADIO« switch to the »CD« position. Move the Press »OPEN« to open the CD compartment. Insert a CD in the compartment with its label facing upwards. – – – Close the lid of the CD compartment. –... -
Page 12: Selecting Albums And Tracks (Mp3/Wma Only)
CD MODE ---------------------------------------------------------------------------------------------------- Selecting albums and tracks (MP3/WMA only) Press »STOP « to end playback. & Select the album with » « or » «. Start playback with »PLAY/PAUSE «. –Playback starts with the first track of the selected album. Select the track by pressing »... -
Page 13: Playing Back Tracks In Random Order
CD MODE ---------------------------------------------------------------------------------------------------- Playing back tracks in random order RANDOM During playback, press »MODE« repeatedly until » « RANDOM appears in the display. – Random playback starts automatically. – All tracks on the CD are played back once in random order. To quit this function, press »MODE«. - Page 14 CD MODE ---------------------------------------------------------------------------------------------------- Repeating the playlist During playback, press »MODE« repeatedly until » « appears in the display. – The current track is played repeatedly. PROG during playback, press »MODE« repeatedly until » « ALL MP3 appears in the display. –...
-
Page 15: Tape Mode
TAPE MODE -------------------------------------------------------------------------------------------- Selecting the TAPE input source »CD TAPE/OFF RADIO« switch to the »TAPE/OFF« Move the position. Press » « to open the tape compartment. Put a tape in the compartment with the open side facing upwards and the full reel on the right side. Close the tape compartment. -
Page 16: Recording From The Radio
TAPE MODE -------------------------------------------------------------------------------------------- Recording from the radio Insert a tape without deletion protection and search for the tape position with » § « or » «. Move the »CD TAPE/OFF RADIO« switch to the »RADIO« position. Select the station you want to listen to. Press »... -
Page 17: Information
INFORMATION ------------------------------------------------------------------------------ Technical data This device is noise-suppressed according to the applicable EU directives. This product fulfils the European directives 2006/95/EC and 2004/ 108/EC. This device conforms to the safety regulation DIN EN 60065 (VDE 0860) and therefore the international safety regulation IEC 60065. The type plate is located on the bottom of the device. -
Page 18: Cleaning The Cd And Cd Unit
INFORMATION ------------------------------------------------------------------------------ Cleaning the CD and CD unit If the device is unable to scan CDs properly, use a standard, com- mercially available cleaning CD to clean the laser optics. Other cleaning methods may damage the laser optics. Use a lint-free cloth for cleaning the CD and always wipe it from the inside out in a straight line. - Page 19 Grundig Multimedia B.V. Atrium, Strawinskylaan 3105 • NL-1077 ZX Amsterdam • http://www.grundig.com...