Table of Contents
Advertisement
Quick Links
Advertisement
Table of Contents

Subscribe to Our Youtube Channel
Related Manuals for Doro COMFORT 3005


Summary of Contents for Doro COMFORT 3005
- Page 1 Doro Comfort 3005 English...
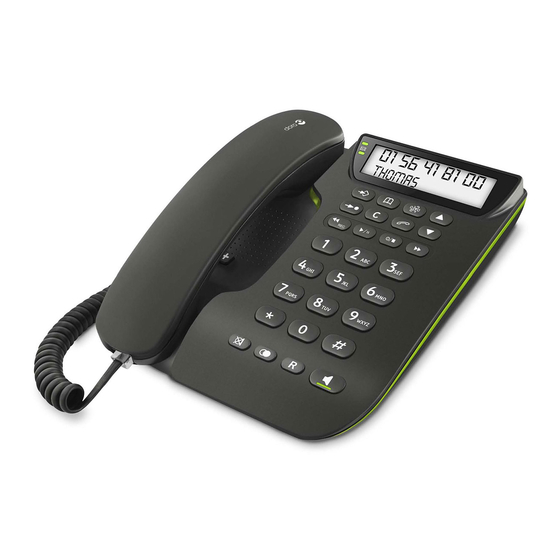
- Page 2 English Extra amplification (boost) 10. Clear 11. Menu Handset/Speaker volume control 12. UP/DOWN Service access keys 13. OK/Call key MEMO 14. Answering machine functions Hanging peg for handset 15. Speaker/Headset Store 16. Microphone Message waiting indicator 17. Recall New call and answering machine on/off indicator 18.
-
Page 3: Table Of Contents
English Contents Installation ......................1 Connection ....................1 Setup ......................1 Wall mounting....................2 Operation ......................2 The display ....................2 Making a call ....................2 Mute ......................3 Timer ......................3 Volume control ..................... 3 Service access ..................... 3 Phonebook ...................... -
Page 4: Installation
English Installation This device is intended for the analogue telephone network lines in AT, BE, BG, CH, CY, CZ, DE, DK, EE, ES, FI, FR, GB, GR, HU, IE, IS, IT, LV, LT, LU, MT, NL, NO, PL, PT, RO, SI, SK, SE. -
Page 5: Wall Mounting
English Wall mounting The phone can be wall mounted. WARNING Make sure that no cables, water pipes or gas pipes are located inside the wall before drilling into it. Drill two holes in the wall, vertically 102 mm mm apart. Insert the screws, allowing them to project ~5 mm out from the wall. -
Page 6: Mute
English Press to terminate the call. Note! If you wish, you can switch between handset and handsfree mode by simply pressing lifting the handset. Please remember that in handsfree mode it is only possible for one person at a time to talk. The switch-over between speaker and microphone is automatic. It is therefore essential that there are no loud noises, e.g. -
Page 7: Storing Contacts
English Letters/symbols [Space character] + & - / X 1 A B C Å Ä Æ æ å ä ß 2 D E F ë 3 G H I ï 4 J K L 5 M N O Ñ ñ Ö ö 6 P Q R S 7 T U V Ü... -
Page 8: Deleting Contacts
English Select required memory location using v/V. Press and hold p until EDIT CONTACT? is displayed. Press p. Change displayed phone number with c and v/V. Press p. Changes to displayed name can be made using c and v/V. Press p to confirm the changes. Deleting contacts Press b / to select phonebook mode. -
Page 9: Deleting Numbers
English OUT OF AREA No information received, e.g. an international call PRIVATE The call comes from a withheld number or a PBX Number not previously seen A call is received while using the Call Waiting function Message Waiting indication. Deleting numbers to select CALL LIST mode. -
Page 10: Ogm (Outgoing Message)
English Once these incoming messages have been erased or read this cycle will be repeated. This is useful when remotely accessing your unit. If there is no answer after three rings, no incoming messages have been recorded and you can terminate the call before you are charged. Pin code The PIN CODE (default=0000) is needed in order to gain access to the remote control functions of the answering machine. -
Page 11: Icm (Incoming Message)
English Record your outgoing message. Speak clearly towards the machine from a distance of 15-20 cm. Release to stop recording. The outgoing message will be repeated after a few seconds. Repeat this procedure if you want to change the message, any old outgoing message will automatically be erased when a new one is recorded. -
Page 12: Call Monitoring
English Delete incoming message If you want to delete a single incoming message press c while the message is playing. To erase all messages after playback, press and hold c until unit beeps. Note! New messages cannot be deleted until they have been played. With PRIVACY MODE activated you need to enter the PIN CODE (default=0000) and then press 0. -
Page 13: Out Of Memory
English Remote control commands Command Function Play new messages Play all messages During playback: Erase single message during playback Skip to previous message Stop playback Skip to next message After playback: Switching the answering machine on and off Record a new outgoing message, to stop recording press 5# Record a MEMO, to stop recording press 5# Room monitoring (active for 2 minutes and 30 seconds, press 0# to continue) -
Page 14: Other
The volume in the headset can be adjusted during a call using v/V. A neck loop/extra handset can be connected to this socket instead of a headset. DORO original headsets are tested and adapted for this model. Other types and makes of headsets may be used, though the function and sound quality cannot be guaranteed. -
Page 15: Troubleshooting
English Troubleshooting Check that the telephone cord is undamaged and properly plugged in. Disconnect any additional equipment, extension cords and other phones. If the problem is resolved, the fault is with some other equipment. Test the equipment on a known working line (e.g. at a neighbour’s house). If the equipment works there the fault is probably with your telephone line. -
Page 16: Declaration Of Conformity
English Declaration of Conformity Doro hereby declares that Doro Comfort 3005 conforms to the essential requirements and other relevant regulations contained in the Directives 1999/5/EC (R&TTE) and 2002/95/EC (RoHS). A copy of the Declaration of Conformity is available at www.doro.com/dofc Warranty This product is guaranteed for a period of 12 months from the date of purchase. - Page 17 English...
- Page 20 LAST PAGE English Version 1.0 © Doro AB. All rights reserved. www.doro.com REV 3672 — STR 111025...
Need help?
Do you have a question about the COMFORT 3005 and is the answer not in the manual?
Questions and answers