
Subscribe to Our Youtube Channel
Related Manuals for Blaupunkt TravelPilot Amsterdam NAV 35E


Summary of Contents for Blaupunkt TravelPilot Amsterdam NAV 35E
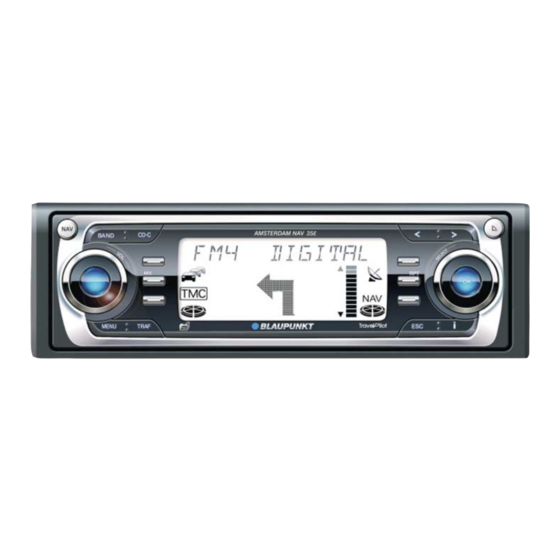
- Page 1 Navigation Radio CD TravelPilot Amsterdam NAV 35E Travel P ilot Operating and installation instructions www.blaupunkt.com...
-
Page 2: Device Overview
Device overview... - Page 3 NAV button OK button Short press: Activates navigation mode and the four mem- Short press: Confirms menu items ory banks. Long press: Starts the scan function Long press: Opens the selection menu for traffic-jam Radio: Opens the menu to select a waveband ahead and route options.
- Page 4 You can view the guarantee conditions at load, errors or missing information on the For instance, it includes the corridor and www.blaupunkt.de or ask for them directly navigation data media or general compu- surrounding-area functions that allow you ter and position-fixing errors. Blaupunkt...
-
Page 5: Quick Guide To Navigation
Quick guide to navigation N1 NAVi =OWN =OWN LAST 1O BERLIN BERLIN [D] DEST INP. Press the NAV button 1 once to switch Now use the menu knob : to select the The selected place name will then be dis- from the radio or CD-changer (optional) next character. - Page 6 INTRODUCTION NAVIGATION RADIO CD / MP3 CD CHANGER SETUP APPENDIX SELEC= NDR 2 NDR 2 B1, KAISER 10 16 16mi STREET STRASSE TOWN CENTR B6, WESTSC HNELLWEG In the subsequent selection, choose be- Note: You now have the option of stor- If you are driving straight on, the name of tween STREET, TOWN CENTRe or POI (point ing the destination using buttons 1 - 6...
-
Page 7: Safety Notices
Safety notices The TravelPilot has been designed for use in passenger cars. Special information such as height restrictions or maximum permitted road load, which is required for navigating lorries, trucks and buses, is not included on the navigation CDs. Inserting/removing a CD •... -
Page 8: Table Of Contents
INTRODUCTION NAVIGATION RADIO CD / MP3 CD CHANGER SETUP APPENDIX Device overview ........2 Navigation ..........21 Bypassing a traffic jam during navigation ..........46 How navigation works ......21 Quick guide to navigation ....5 Defining route options ......47 Inserting the navigation CD .... - Page 9 MP3 mode ..........61 Steering wheel remote control Installation ........... 90 (not part of the scope of delivery) .... 74 Preparing an MP3-CD ......61 Switching the speed signal on/off ..90 Selecting an audio source ..... 74 Switching to MP3-/WMA mode ..... 63 Installation test ........
-
Page 10: Compatible Navigation Cd-Roms
APPENDIX Compatible navigation CD-ROMs The TravelPilot Amsterdam NAV 35E can only be used with navigation CD- ROMs that are labelled with an “E”. If there is no CD-ROM inserted in the device, a message informing you of this appears in the display as soon as you try to enter a destination. -
Page 11: About These Instructions
About these instructions The aim of these instructions is to familiarize you with the functions of your TravelPilot and to ensure that you can safely and successfully operate the device. Before starting to use your TravelPilot, please read these instructions carefully and keep them in a safe place in your vehicle. -
Page 12: Detachable Control Panel (Flip-Release Panel)
INTRODUCTION NAVIGATION RADIO CD / MP3 CD CHANGER SETUP APPENDIX Detachable control panel (flip-release panel) Theft protection To provide protection against theft, your device is equipped with a detachable control panel (flip-release panel) and a 4-digit device code. The device is worth- less to a thief without this control panel. -
Page 13: Attaching The Release Panel
Attaching the release panel 1 Slide the control panel straight into the device’s bracket. 2 Close the control panel. Note: When attaching the control panel, make sure you do not press the display. INTRODUCTION NAVIGATION RADIO CD / MP3 CD CHANGER SETUP APPENDIX... -
Page 14: Switching The Device On/Off
INTRODUCTION NAVIGATION RADIO CD / MP3 CD CHANGER SETUP APPENDIX Switching the device on/off 1 To switch on your TravelPilot, press button 3. The device plays the last active audio source at the volume level that was set when the device was last switched off. You can limit the power-on vol- ume to a maximum value. -
Page 15: Selecting The Operating Mode
Selecting the operating mode N1 NAVi To switch to navigation mode, LAST 1O 1 press the NAV button 1. DEST INP. The main navigation menu appears or, if a navigation session is already active, the navigation (route guidance) display will appear instead. To switch to radio mode, 1 press the BAND button 4. -
Page 16: Adjusting The Volume
INTRODUCTION NAVIGATION RADIO CD / MP3 CD CHANGER SETUP APPENDIX Adjusting the volume volume 20 To increase the system volume, NDR2 1 turn the volume control 2 clockwise. NJOY Ante To decrease the system volume, 1 turn the volume control 2 anticlockwise. RAD2 JUMP The currently set value appears in the top line of the display whilst you are... -
Page 17: Putting Through Telephone Calls Automatically
Putting through telephone calls automatically =ELEPHONE If the device is properly connected to a car telephone, telephone calls will be outputted over the loudspeakers of the TravelPilot. TELEPHONE appears in the display. The call will be put through even if the TravelPilot is switched off. The TravelPilot will then switch on for the duration of the telephone call. -
Page 18: Display
INTRODUCTION NAVIGATION RADIO CD / MP3 CD CHANGER SETUP APPENDIX Display The TravelPilot’s display contains all the navigation information (e.g. visual driving recommendations), menus and lists, as well as the radio, CD and CD-changer (optional) audio sources. The display’s brightness and readability can be optimised to suit the viewing angle in your vehicle. -
Page 19: Switching On A Coded Device After Disconnection From The Battery Power Supply
Switching on a coded device after disconnection from the battery power supply If you switch on a coded device after having disconnected it from the battery power supply (e.g. after carrying out repairs to the vehicle), the system will dis- play a message asking you to enter the code. -
Page 20: Entering The Wrong Numerical Code
INTRODUCTION NAVIGATION RADIO CD / MP3 CD CHANGER SETUP APPENDIX Once you have finished entering the whole numerical code and it is shown in the display, 4 press and hold down the OK button ; for longer than 2 seconds. The device switches on. -
Page 21: Navigation
Navigation The navigation system in the TravelPilot helps you find your way to destinations quickly and safely without first having to spend time studying a roadmap. When navigation (route guidance) is active, you will be guided by the device’s voice output feature. -
Page 22: Downloading The Navigation Software
INTRODUCTION NAVIGATION RADIO CD / MP3 CD CHANGER SETUP APPENDIX Note: If you do not take out the ejected CD, the drive will draw it back in again automatically after approx. 10 seconds. Downloading the navigation software The system automatically loads the navigation software into memory from the NAVI SW CD. -
Page 23: Starting Navigation
Note: Any memory available after the corridor has been loaded will be used to store the data for the surrounding area function. The CD symbol at the bottom right of the display indicates when data are being loaded. Data are loaded even if there is no navigation session currently active. -
Page 24: Entering A Destination
INTRODUCTION NAVIGATION RADIO CD / MP3 CD CHANGER SETUP APPENDIX To switch between the navigation system’s memory banks, N2 NAVi 1 press the NAV button 1 repeatedly until the memory bank that you want appears in the top line of the display. Before navigation can begin, you must first insert a TravelPilot type “E”... -
Page 25: Entering Destinations Using The Text Input Line
Entering destinations using the text input line You can use the text input line to enter data such as town names and road names into the navigation system. The text input line is equipped with an intelli- gent text-input feature, which only allows you to enter characters that can logi- =OWN cally follow on from the ones you have already entered. - Page 26 INTRODUCTION NAVIGATION RADIO CD / MP3 CD CHANGER SETUP APPENDIX If the characters you have entered so far allow the system to find a name =OWN match, it will automatically complete the name for you. 4 Repeat steps 1 - 3 as many times as are necessary until the name that you want is displayed in the text input line.
-
Page 27: Entering A Destination - Country
Entering a destination – Country N1 NAVi When you enter a destination for the first time, the system will ask you to select a country. Generally this will be the country in which you are currently staying. 1 Mark and confirm the DESTination INPut menu item in the main navigation menu and then mark and confirm the COUNTRY menu item. - Page 28 INTRODUCTION NAVIGATION RADIO CD / MP3 CD CHANGER SETUP APPENDIX In smaller municipalities, it is possible that a postcode will cover several small SELEC= towns and villages. In this case you must select the appropriate place name after entering the postcode. In general, entering the first letter of the place name that you want will be sufficient.
-
Page 29: Entering A Destination - Special Destination At Your Final Destination
Note: If there are several instances of the place name that you se- COUN=X lected, the system will display another menu containing the text in- put line so that you can define the county. Enter some more letters in order to define the place more precisely. The system displays the distance as the crow flies and the destination direction in order to assist you. -
Page 30: Entering A Destination - Street, House Number And Crossroads
INTRODUCTION NAVIGATION RADIO CD / MP3 CD CHANGER SETUP APPENDIX 3 Enter the special destination name in the same way as you would enter a SELEC= destination name. 4 Switch to the list. The available special destinations are displayed alphabetically. 5 Mark and confirm the destination that you want. - Page 31 JUNCTION: You can additionally select a road junction or a crossroads on the selected street in order to define your destination more precisely. Note: If you enter a new destination without the navigation CD-ROM (corridor function) being present in the device, you will not be able to select the house number and junction.
-
Page 32: Entering A Destination - Centre
INTRODUCTION NAVIGATION RADIO CD / MP3 CD CHANGER SETUP APPENDIX Crossroads SELEC= If you selected the JUNCTION menu item, a list of road junctions and crossroads that are available on the destination street will be displayed. Note: If a crossroads or junction appears twice, the system will also display the compass direction. -
Page 33: Entering A Destination - Special Destinations
3 You can now start navigation using the OK button ;. Plus Point: After you have finished entering the destination and before start- ing navigation, you have the option of storing the destination in the destina- tion memory. For further information, read the section entitled “Destination memory”. - Page 34 INTRODUCTION NAVIGATION RADIO CD / MP3 CD CHANGER SETUP APPENDIX The destination input menu appears. SELEC= 3 Select and confirm the SUPRAREGional Destinations menu item. A list of special destinations categories is displayed. 4 Select and confirm the category that you want. The available destinations are displayed alphabetically.
- Page 35 The available destinations are displayed sorted according to their distance from your position. Note: If available, the text input line is opened first of all. Use it to enter the required name or the first letter and then open the list. 5 Select and confirm the destination that you want.
-
Page 36: Entering A Destination - Last 10 Destinations
INTRODUCTION NAVIGATION RADIO CD / MP3 CD CHANGER SETUP APPENDIX Note: If available, the text input line is opened first of all. Use it to enter the required name or the first letter and then open the list. 5 Select and confirm the destination that you want. As soon as you have selected and confirmed the special destination that you want, you can start navigation. -
Page 37: Entering A Destination - From The Destination Memory
Entering a destination – From the destination memory You can store destinations in the destination memory that you drive to regularly so you can access them easily for other navigation sessions. For further infor- mation, read the section entitled “Destination memory”. The navigation system has four memory banks at its disposal (N1, N2, N3 and N4). -
Page 38: Destination Memory
INTRODUCTION NAVIGATION RADIO CD / MP3 CD CHANGER SETUP APPENDIX Destination memory In the destination memory you can store destinations that you want to navigate to later on. You can also set your current position as a position marker and then access it from memory at some other point in time to use it as your destination. - Page 39 You will hear a confirmation beep when the destination has been stored. The navigation display will then appear again. Storing your current position as a destination You have the option of storing your vehicle’s current position as a destination in the destination memory.
-
Page 40: Navigation
INTRODUCTION NAVIGATION RADIO CD / MP3 CD CHANGER SETUP APPENDIX Navigation N1 DES=N Starting navigation Once you have entered a destination, the destination address appears in the display. If you want to start a navigation session in order to be guided to this destination, 1 press the OK button ;. - Page 41 Plus Point: If you deviate from the recommended route, the system automat- ically calculates a new route from the current vehicle position to the already entered destination. The system might ask you to insert the navigation CD. Driving recommendations NDR 2 The visual driving recommendations are shown in the middle display area.
- Page 42 INTRODUCTION NAVIGATION RADIO CD / MP3 CD CHANGER SETUP APPENDIX Switching audio sources You can switch to a different audio source at any time during navigation. 1 Press the BAND 4 button or the CD•C button 5 during the active naviga- tion session to switch between radio mode and CD-changer mode.
-
Page 43: Dynamic Navigation
Dynamic navigation NAVI During dynamic navigation, the TravelPilot analyses digital traffic information messages and uses this information when planning the route. The system receives the traffic messages from TMC (Traffic Message Channel) stations. These are RDS stations that additionally broadcast their traffic messages in digital form. -
Page 44: Setup Appendix
INTRODUCTION NAVIGATION RADIO CD / MP3 CD CHANGER SETUP APPENDIX Recalculating the route If the TravelPilot receives a traffic message from the TMC that is relevant to the route, it will automatically recalculate the route. The system outputs a voice announcement informing you that the route is being recalculated. - Page 45 3 Mark and confirm the TMC AUTO menu item. radio 4 Mark the ON menu item and press the OK button ;. 5 Press the ESC button = twice to return to navigation mode. Tuning into TMC stations manually To tune into a TMC station manually, proceed as follows: button 7 or the button 8.
-
Page 46: Bypassing A Traffic Jam During Navigation
INTRODUCTION NAVIGATION RADIO CD / MP3 CD CHANGER SETUP APPENDIX Bypassing a traffic jam during navigation NAVI Alongside the ability to automatically bypass traffic jams with the aid of the dy- namic navigation feature, the TravelPilot also gives you the option of manually entering traffic jams or blocked sections of road during an active navigation ses- sion. -
Page 47: Defining Route Options
Defining route options You can customise the route to suit your requirements at any time, even during an active navigation session. The configurable parameters are: DYNAMIC: Dynamic navigation with TMC. FAST: The system calculates a time-optimised route. SHORT: The system calculates a distance-optimised route. OPTIMUM: The system calculates a route that is both time and distance opti- mised. - Page 48 INTRODUCTION NAVIGATION RADIO CD / MP3 CD CHANGER SETUP APPENDIX To define the route options, NAVI 1 press and hold down the NAV button 1 for longer than 2 seconds. A selection menu appears in the display. 2 Mark and confirm the ROUTE OPTIions menu item. The menu for setting the route options appears.
-
Page 49: Displaying The Route List
Displaying the route list 0/177 MI You can display the route list that was calculated by the navigation system. The route list is updated during the journey, and the route sections that you have not yet driven down are displayed. button <... -
Page 50: Radio Mode
INTRODUCTION NAVIGATION RADIO CD / MP3 CD CHANGER SETUP APPENDIX Radio mode The TravelPilot is equipped with an RDS radio receiver. Many of the receivable FM stations transmit a signal that not only carries the programme but also additional information such as the station name. The station name appears in the display as soon as it is received. - Page 51 5 Press the OK button ; or the ESC button = to accept the setting. The selection menu appears again. 6 Press the ESC button = twice to close the selection menu. Switching the REG RDS function on or off 1 Press the MENU button @.
-
Page 52: Switching To Radio Mode
INTRODUCTION NAVIGATION RADIO CD / MP3 CD CHANGER SETUP APPENDIX Switching to radio mode NDR 2 To switch to radio mode, NDR2 1 briefly press the FM•AM button 4. NJOY Ante The radio will play the station that it received last. RAD2 JUMP Selecting the waveband / memory bank... -
Page 53: Tuning Into A Station
Tuning into a station There are various ways of tuning into a station. Automatic station seek tuning button 7 or the button 8. 1 Press the The radio tunes into the next receivable station. Note: You can adjust the sensitivity of station seek tuning. For fur- ther information, read the section entitled “Configuring the radio functions”... -
Page 54: Storing Stations
INTRODUCTION NAVIGATION RADIO CD / MP3 CD CHANGER SETUP APPENDIX Storing stations Storing stations manually 1 Select the memory bank (i.e. FM1, FM2, FMT) that you want or one of the wavebands (MW or LW). 2 Tune into the station that you want. 3 Press and hold down one of the station buttons 1 - 6 >... -
Page 55: Scanning Receivable Stations (Scan)
Scanning receivable stations (SCAN) You can briefly play (scan) all the receivable stations. The scanning time is 10 seconds. SCAN Starting SCAN 1 Press and hold down the OK button ; for longer than 2 seconds. NDR2 Scanning begins. SCAN appears briefly in the display followed by the current NJOY Ante station name or frequency. - Page 56 INTRODUCTION NAVIGATION RADIO CD / MP3 CD CHANGER SETUP APPENDIX Switching traffic information priority on or off NDR 2 1 Press the TRAF button ?. NDR2 Priority for traffic announcements is active when the symbol lights up in the display. NJOY Ante Note: The...
-
Page 57: Cd Mode
CD drive. CD-Rs (CDs that you have “burned” yourself) can generally also be played. Due to the varying quality of CDs, Blaupunkt cannot guarantee that this will work properly. To ensure the system functions properly, only use CDs labelled with the com- pact disc logo. - Page 58 INTRODUCTION NAVIGATION RADIO CD / MP3 CD CHANGER SETUP APPENDIX Inserting a CD button 9 to open the release panel. 1 Press the 2 Any CD that might already be in the device is ejected automatically. 3 Carefully insert the CD with the printed side uppermost into the device’s CD compartment.
-
Page 59: Selecting Tracks
If you want to activate the internal CD drive, 1 press the CD•C button 5 again. The CD starts playing. Selecting tracks You can select tracks directly whilst a CD is playing. To select the next track, button 8. 1 press the button 8, If the last track on the CD has been reached and you press the the system will then switch to the first track. -
Page 60: Scanning All The Tracks On A Cd (Scan)
INTRODUCTION NAVIGATION RADIO CD / MP3 CD CHANGER SETUP APPENDIX To cancel the MIX function, 1 press the 2 MIX station button > again. The MIX function is automatically cancelled if you activate the SCAN function. Scanning all the tracks on a CD (SCAN) scan CD If you briefly want to play (scan) all the tracks on a CD, proceed as follows: 1 Press and hold down the OK button ;... -
Page 61: Mp3 Mode
MP3 mode You can also use the TravelPilot to play CD-Rs and CD-RWs that contain MP3 music files. You can also play WMA files. The operation for playing MP3 and WMA files is identical. Notes: WMA files with Digital Rights Management (DRM) from online music shops cannot be played with this device. - Page 62 INTRODUCTION NAVIGATION RADIO CD / MP3 CD CHANGER SETUP APPENDIX Each directory can be named using a PC. The device can display the directory name if there are no ID tags available. You should name the directories and tracks/files using the method provided by your CD burner software. The soft- ware’s instruction manual will provide details on how to do this.
-
Page 63: Switching To Mp3-/Wma Mode
Switching to MP3-/WMA mode MP3-/WMA mode is activated in the same way as normal CD mode. For further information, please read the section entitled “Playing a CD” in the “CD mode” chapter. Once the device has checked the CD, it begins playing the first track in the first directory that it finds. - Page 64 INTRODUCTION NAVIGATION RADIO CD / MP3 CD CHANGER SETUP APPENDIX Selecting a directory in browse mode You can display the current directory and the three subsequent directories on the four lines of the display. The directories are displayed with the names that you created when burning the CD.
-
Page 65: Selecting Tracks
Selecting tracks Selecting tracks/files using the arrow buttons To move up to another track/file in the current directory, button 8 once or several times. 1 press the To move down to another track/file in the current directory, button 7 once or several times. 1 press the button 7 once, the current track will be played again from If you press the... -
Page 66: Fast Seeking
INTRODUCTION NAVIGATION RADIO CD / MP3 CD CHANGER SETUP APPENDIX Fast seeking To start fast forward seeking, button 8 until fast seeking begins. 1 press and hold down the To start fast reverse seeking, button 7 until fast seeking begins. 1 press and hold down the Random play (MIX) You can play all the tracks contained in a directory and all the tracks on a CD in... -
Page 67: Scanning All The Tracks In A Directory (Scan)
Scanning all the tracks in a directory (SCAN) If you briefly want to play (scan) all the tracks in the current directory, proceed as follows: 1 Press and hold down the OK button ; for longer than 2 seconds. All the tracks in the directory are scanned in ascending order. The scanning time is 10 seconds. -
Page 68: Selecting Mp3 Info
INTRODUCTION NAVIGATION RADIO CD / MP3 CD CHANGER SETUP APPENDIX Selecting MP3 info SE==INGS Whilst MP3 mode is activated, the track name appears as scrolling text on the SOUND first line of the display and the name of the artist appears on the second and VOLUME third lines (only if the ID tags are available in the MP3 files). -
Page 69: Cd-Changer Mode
As an alternative to a CD-changer, you can connect the Compact Drive MP3 (it might be necessary to update the software of the Compact Drive. See www.blaupunkt.de). You can operate the Compact Drive MP3 in the same way as a CD changer. Most of the CD-changer functions can also be used with the Compact Drive MP3 (an exception is the mix feature, whose functionality is lim- ited). -
Page 70: Selecting Cds
INTRODUCTION NAVIGATION RADIO CD / MP3 CD CHANGER SETUP APPENDIX If the audio CD in the internal CD player is active, then 2 press the CD•C button 5 again. CD O1 The CD changer display appears. CDC appears in the top line of the display. TRACK 7 Beneath it you will see the number of the CD in the CD changer, the track currently being played and the playing time. -
Page 71: Selecting Tracks
Selecting tracks To select the next track, button 8. 1 press the button 8, If the last track on the CD has been reached and you press the the system will then switch to the first track. To replay the current track or select a previous track, button 7. -
Page 72: Scanning All Tracks On All Cds (Scan)
INTRODUCTION NAVIGATION RADIO CD / MP3 CD CHANGER SETUP APPENDIX Randomly playing all the tracks on all the CDs mix magAZINE To play the tracks on all the CDs at random, CD O2 1 press the 2 MIX station button > repeatedly until MIX MAGAZINE appears in TRACK 2 the top line of the display. -
Page 73: Repeating Tracks (Repeat)
Repeating tracks (REPEAT) RP= =rack To repeat a track, activate the repeat function. CD O2 1 Select the track that you want, TRACK 2 2 press the 5 RPT station button >. 2:33 The track is repeated until you cancel the repeat function. If you want to cancel the repeat function, 1 press the 5 RPT station button >... -
Page 74: Steering Wheel Remote Control (Not Part Of The Scope Of Delivery)
INTRODUCTION NAVIGATION RADIO CD / MP3 REMOTE CONTROL CD CHANGER SETUP APPENDIX Steering wheel remote control (not part of the scope of delivery) The RC 10 steering wheel remote control allows you to safely and conveniently operate some of the TravelPilot’s primary functions from your steering wheel. buttons have the same function as the menu knob :. -
Page 75: Muting
Muting You can mute the device’s volume using the remote control. 1 Press the button. Cancelling mute If you want to cancel mute, 1 press the button again or 1 press the V+ or V- button. INTRODUCTION NAVIGATION RADIO CD / MP3 REMOTE CONTROL CD CHANGER SETUP... -
Page 76: Setup - Basic Settings
INTRODUCTION NAVIGATION RADIO CD / MP3 CD CHANGER SETUP APPENDIX Setup – basic settings SE==INGS The setup menu allows you to adjust the TravelPilot’s basic functions to suit SOUND your needs. VOLUME You can change the following device functions: RADIO SOUND - Adjust the sound distribution and equalizer VOLUME - Set the default volume levels RADIO - Configure the settings for the main radio functions... -
Page 77: Equalizer
2 Press the MENU button @. SOUND The setup menu appears in the display. BASS 3 Mark and confirm the SOUND menu item. TREBLE The sound menu appears in the display. LOUDNESS 4 Mark and confirm the menu item (BASS, TREBLE, LOUDNESS, BALANCE or BALANCE FADER) whose setting you want to adjust. - Page 78 INTRODUCTION NAVIGATION RADIO CD / MP3 CD CHANGER SETUP APPENDIX Notes on adjusting the settings We recommend you use a CD that you are familiar with for making changes to the settings. Before adjusting the equalizer, set the sound settings and sound distribution settings to zero.
- Page 79 Adjusting the equalizer SOUND 1 Press the MENU button @. FADER The setup menu appears in the display. DIGITAL EQ 2 Mark and confirm the SOUND menu item. The sound menu appears in the display. 3 Mark and confirm the DIGITAL EQ menu item. The equalizer menu appears in the display.
-
Page 80: Configuring The Power-On / Navigation / Traffic Announcement / Telephone Volume And Gala Settings
INTRODUCTION NAVIGATION RADIO CD / MP3 CD CHANGER SETUP APPENDIX Configuring the power-on / navigation / traffic announce- ment / telephone volume and GALA settings You can adjust the device’s power-on volume (ON MAX), the amount by which the audio volume level is decreased during a navigation announcement (NAV DIFF), the minimum volume level for traffic announcements (TA MIN), the min- imum volume level for telephone calls (TEL MIN) and the setting for the speed- dependent automatic volume adjustment feature (GALA). -
Page 81: Configuring The Radio Functions
The volume menu appears in the display. VOLUME 3 Mark and confirm the menu item whose setting you want to change. ON MAX The scale for adjusting the setting is displayed. NAV DIFF 4 Set the volume level that you want using the menu knob :. TA MIN To help you configure the setting more easily, the system will increase/ TEL MIN... - Page 82 INTRODUCTION NAVIGATION RADIO CD / MP3 CD CHANGER SETUP APPENDIX REGIONAL - At certain times, some radio stations divide their programme into regional programmes providing different regional content. You can use the REG function to prevent the device from switching to alternative frequen- cies that are transmitting different programme content.
-
Page 83: Setting The Day/Night Display Brightness And Contrast
3 Mark and confirm the menu item that you want to adjust. radio The selection menu or the scale for adjusting the setting is displayed. 4 Select the setting using the menu knob :. RDS NAME 5 Press the OK button ; or the ESC button = to accept the setting. REGIONAL The radio menu appears in the display again. -
Page 84: Configuring The Language And Speech Options
INTRODUCTION NAVIGATION RADIO CD / MP3 CD CHANGER SETUP APPENDIX 4 Adjust the value that you want using the menu knob :. DimmIng 5 Press the OK button ; or the ESC button = to accept the setting. The display menu appears in the display again. 6 Press the ESC button = twice to close the display menu. - Page 85 Setting the language SE==INGS To set the language, NAVI 1 press the MENU button @. DISPLAY The setup menu appears in the display. LANGUAGE 2 Mark and confirm the LANGUAGE menu item. CLOCK The available languages are displayed alphabetically. 3 Mark and confirm the language that you want. The language that you selected is loaded and then the menu is displayed in that language.
- Page 86 INTRODUCTION NAVIGATION RADIO CD / MP3 CD CHANGER SETUP APPENDIX Configuring the speech options SE==INGS To switch between the speech output of road numbers (A-roads and motor- ways) during route guidance and the detailed speech output of traffic jam an- NAVI nouncements during route guidance, DISPLAY...
-
Page 87: Configuring The Optimum Route
Configuring the optimum route SE==INGS The TravelPilot allows you to configure the optimum route yourself. To do so, NAVI you must adjust the relationship between “fast route” and “short route”. The DISPLAY factory default setting is 40 to 60. LANGUAGE To set the optimum route, 1 press the MENU button @. -
Page 88: Adjusting The Clock
INTRODUCTION NAVIGATION RADIO CD / MP3 CD CHANGER SETUP APPENDIX Adjusting the clock SE==INGS The system normally sets the clock using the GPS signal. You will only have to NAVI set the current local time to the nearest five minutes once. DISPLAY Note: You can also set the local time here when switching from sum- LANGUAGE... -
Page 89: Device Code
Device code SE==INGS If you switch on a code-enabled device after it was disconnected from the vehi- CODE cle’s power supply, you will have to enter the device code. You can also disable this code request feature. Activating / deactivating the code request feature 1 Press the MENU button @. -
Page 90: Installation
INTRODUCTION NAVIGATION RADIO CD / MP3 CD CHANGER SETUP APPENDIX Installation The installation menu contains all the necessary items for testing the TravelPilot and preparing it for operation. Switching the speed signal on/off ins=all The TravelPilot give you the option of navigating with or without a speed signal. INST. - Page 91 The installation menu appears in the display. ins=all 3 Mark and confirm the INSTallation TEST menu item. INST. TEST The installation test menu appears in the display. AUTO CALIB Note: The installation test does not need to be carried out in order to MAN.
-
Page 92: Automatic Device Calibration
INTRODUCTION NAVIGATION RADIO CD / MP3 CD CHANGER SETUP APPENDIX Automatic device calibration ins=all (only TravelPilot and speed signal “ON”) INST. TEST The TravelPilot must be calibrated after it is installed. AUTO CALIB Note: The navigation CD-ROM must already be inserted in the drive MAN. -
Page 93: (Only Travelpilot And Speed Signal "On")
Manual device calibration ins=all (only TravelPilot and speed signal “ON”) INST. TEST You can also manually calibrate the device. You will be required to drive a route AUTO CALIB of at least 110 yards (100 metres) to 550 yards (500 metres) at a maximum MAN. -
Page 94: Glossary
INTRODUCTION NAVIGATION RADIO CD / MP3 CD CHANGER SETUP APPENDIX TMC - Traffic Message Channel Glossary TMC is an RDS data service that provides regional traffic news. Corridor function New traffic reports can be updated without delay. The corridor function allows the TravelPilot to provide driving The TravelPilot is capable of continuously receiving digital traffic instructions even when the navigation CD is not present in the reports free of charge from TMC stations. -
Page 95: Specifications
Specifications Frequency response: 20 - 20,000 Hz Voltage supply Operating voltage: 10.8 - 14.4 V Pre-amp out Current consumption: max. 10 A 4 channels: Power consumption for 30 minutes after switching off: 550 mA typical Input sensitivity Standby current consumption: 12 mA CDC input: 2 V / 6 k Standby current consumption... -
Page 96: Installation Instructions
If these instructions are not suitable for 1. Electrical connection your particular installation, please con- 1.1 Electrical connection to the tact your Blaupunkt dealer, your vehi- Safety notices vehicle-specific plugs cle manufacturer or our telephone hot- Please observe the following safety line. -
Page 97: Antenna Installation
Caution! Before inserting the Travel- For vehicles that do not have a DIN antenna installation instructions. Pilot completely, you must first level out compartment: Blaupunkt supplies the gyro (see Fig. 6). You must take the following into ac- vehicle-specific installation kits (for... -
Page 98: Connection Diagrams
Slide the device 1/3 of its length into Note: The clipped in stirrups can only Caution! This connection should be the installation compartment. be detached after the TravelPilot has carried out by one of the vehicle man- been pulled out. ufacturer’s authorized workshops. - Page 99 GPS antenna 7 607 621 … Reversing light signal (only TravelPilot with speed signal) Radio antenna Speedometer signal Fig. 3 Fig. 1 4 Ohm 4 ohms 4 Ohm 4 ohms 4 ohms 4 Ohm 4 Ohm 4 ohms Fig. 2...
- Page 100 Fig. 4 Fig. 4a O.K. Fig. 5 Fig. 6 8 601 910 003...
- Page 101 7 10 13 16 19 9 12 15 18 Gala/speedometer Loudspeaker RR+ 8 11 14 17 20 Telephone mute (active low) Loudspeaker RR- Reversing light signal Loudspeaker RF+ Continuous positive (terminal 30) 4 Loudspeaker RF- Autom. antenna* Loudspeaker LF+ Illumination Loudspeaker LF- Ignition (terminal 15) Loudspeaker LR+...
- Page 102 Control cable (power antenna +) The control cable is the switched positive output for ex- ternal components, e.g. electric antenna (maximum load < 150 mA). Caution! You must not connect the control cable to termi- nal 15 (positive switched) or terminal 30 (continuous posi- Relais tive).
- Page 103 08-7501810 Switzerland (CH) 01-8471644 01-8471650 Czech. Rep. (CZ) 02-6130 0446 02-6130 0514 Hungary 76 511 803 76 511 809 Poland (PL) 0800-118922 022-8771260 Turkey (TR) 0212-335 06 71 0212-346 00 40 Blaupunkt GmbH, Robert-Bosch-Straße 200, D-31139 Hildesheim Printed in Germany...
- Page 104 TravelPilot An overview! Amsterdam NAV 35E Short press: Navigation Radio/CD: Search downwards / Skip to the previ- Long press: Traffic jam and route options ous track Navigation: Delete characters Short press: Radio mode, wavebands FM, MW and LW Radio/CD: Search upwards / Skip to the next track Long press: Travelstore function Navigation: Jump to the selection list CD mode, CD-changer mode...
Need help?
Do you have a question about the TravelPilot Amsterdam NAV 35E and is the answer not in the manual?
Questions and answers