AEG HD634170NB User Manual
Aeg cooking surface
Hide thumbs
Also See for HD634170NB:
- User manual (56 pages) ,
- User manual (56 pages) ,
- User manual (28 pages)
Table of Contents
Advertisement
Available languages
Available languages
Advertisement
Chapters
Table of Contents

Related Manuals for AEG HD634170NB


Summary of Contents for AEG HD634170NB
- Page 1 EN User manual HD634170NB IT Istruzioni per l’uso...
-
Page 2: Table Of Contents
9. TECHNICAL INFORMATION ..........20 FOR PERFECT RESULTS Thank you for choosing this AEG product. We have created it to give you impeccable performance for many years, with innovative technologies that help make life simpler –... -
Page 3: Safety Information
ENGLISH 1. SAFETY INFORMATION Before the installation and use of the appliance, careful- ly read the supplied instructions. The manufacturer is not responsible if an incorrect installation and use cau- ses injuries and damages. Always keep the instructions with the appliance for future reference. 1.1 Children and vulnerable people safety WARNING! Risk of suffocation, injury or permanent disability. -
Page 4: Safety Instructions
• Never try to extinguish a fire with water, but switch off the appliance and then cover flame e.g. with a lid or a fire blanket. • Do not store items on the cooking surfaces. • Do not use a steam cleaner to clean the appliance. -
Page 5: Gas Connection
ENGLISH • Make sure the mains cable or plug (if • Do not use an external timer or a sep- applicable) does not touch the hot ap- arate remote-control system to oper- pliance or hot cookware, when you ate the appliance. connect the appliance to the near •... -
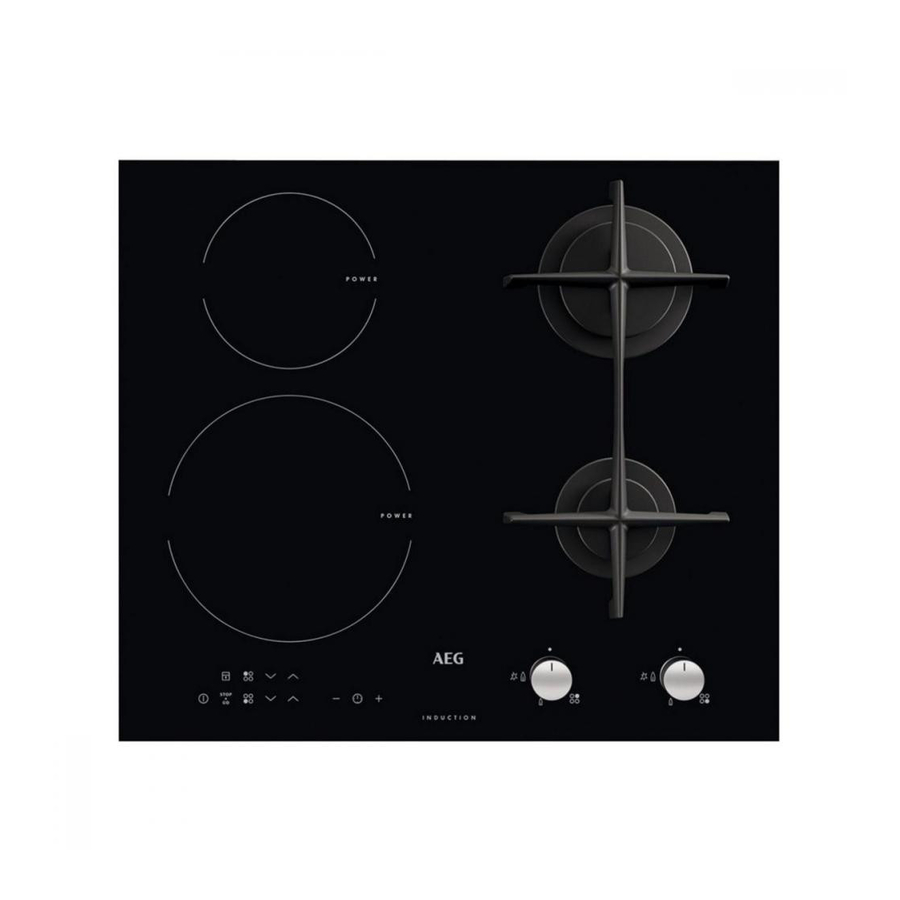
Page 6: Product Description
• Do not activate the cooking zones 2.3 Care and Cleaning with empty cookware or without cook- WARNING! ware. Risk of damage to the appliance. • Do not put aluminium foil on the ap- pliance. • Clean regularly the appliance to pre- •... -
Page 7: Control Knobs
ENGLISH 3.2 Control knobs 3.3 Touch Controls The hob is supplied with special Touch Symbol Description Controls. To operate your hob, simply no gas supply / off po- touch the required control with a finger- sition tip. Ensure to only touch one control at a ignition position / time during use. -
Page 8: Daily Use
Display Description The cooking zone operates Automatic heat up function is active The induction cooking zone does not sense the cook- ware There is a malfunction A cooking zone is still hot (residual heat) Lock/Child safety device is on... -
Page 9: The Heat Setting
ENGLISH In the absence of electricity you • You use incorrect cookware. The sym- can ignite the burner without comes on and the cooking electrical device; in this case ap- zone deactivates automatically after 2 proach the burner with a flame, minutes. -
Page 10: Power Function
10 www.aeg.com minutes). When the indicator of the cooking zone flashes slower, the time counts down. • Checking the remaining time: select the cooking zone with . The indica- tor of the cooking zone flashes faster. The display shows the remaining time of the zone that will stop first. -
Page 11: Helpful Hints And Tips
ENGLISH The Timer stays on. Switching off the Child Safety Device To stop this function touch . The heat • Start the hob with .Do not set the setting that you set before comes on. heat setting. Touch for 4 seconds. When you stop the appliance, you also The symbol comes on. -
Page 12: Cookware For Induction
12 www.aeg.com 5.2 Cookware for induction Cookware dimensions: induction cook- ing zones adapt to the dimension of the cooking zones bottom of the cookware automatically to some limit. But the minimum diameter of In induction cooking a powerful the magnetic part of the bottom of the... -
Page 13: Care And Cleaning
ENGLISH Heat Use to: Time Hints set- ting Boil large quantities of water, cook pasta, sear meat (goulash, pot roast), deep fry chips The Power function is suitable for heat- • clicking: electric switching occurs. ing large quantities of water. •... -
Page 14: Troubleshooting
14 www.aeg.com special cleaner applicable for sur- 6.1 Cleaning of the spark plug face of hob.. This feature is obtained through a ce- Clean the appliance with a damp ramic ignition candle with a metal elec- cloth and some detergent. - Page 15 ENGLISH Problem Possible cause and remedy • The automatic switch-off operates. Stop the ap- comes on pliance and start it again. • Overheating protection for the cooking zone op- erates. Switch off the cooking zone. Switch on the cooking zone again. •...
-
Page 16: Installation
16 www.aeg.com These data are necessary to help you 7.1 Labels supplied with the quickly and correctly. These data are accessories bag available on the supplied rating plate. Stick the adhesive labels as indicated • Model description ....below: • Product number (PNC) .... -
Page 17: Electrical Connection
ENGLISH Make sure that the gas supply type of gas you use (see table in pressure of the appliance obeys "Technical Information" chapter). the recommended values. If the Assemble the parts, follow the same supplied pressure has not the procedure backwards. specified value, it is necessary to Replace the rating plate (it is near assemble a proper pressure reg-... - Page 18 18 www.aeg.com • This appliance is supplied with a mains cable. It has to be supplied with a cor- rect plug which can hold the load that the rating plate rates. Make sure that you install the plug in a correct socket.
-
Page 19: Possibilities For Insertion
ENGLISH min. 38 mm min. 2 mm min. 12 mm min. 2 mm If you install the hob under a Space for connections hood, please see the installation instructions of the hood for the Kitchen unit with oven minimum distance between the appliances. -
Page 20: Technical Information
20 www.aeg.com 9. TECHNICAL INFORMATION Hob dimensions Hob recess dimensions Width: 590 mm Width: 560 mm 0/+1 Length: 520 mm Length: 490 mm 0/+1 Heat input Semi-rapid burner: 1.9 kW Rapid burner: 2.9 kW Rear cooking zone: 1.4 kW (2.5 kW in P setting) Front cooking zone: 2.3 kW (3.3 kW in P setting) -
Page 21: Environment Concerns
ENGLISH 10. ENVIRONMENT CONCERNS Recycle the materials with the appliances. Do not dispose symbol . Put the packaging in appliances marked with the symbol applicable containers to recycle it. with the household waste. Return the Help protect the environment and product to your local recycling human health and to recycle waste facility or contact your municipal... - Page 22 9. DATI TECNICI ............. 42 PER RISULTATI PERFETTI Grazie per aver scelto di acquistare questo prodotto AEG. Lo abbiamo creato per fornirvi prestazioni impeccabili per molti anni, grazie a tecnologie innovative che vi semplificheranno la vita - funzioni che non troverete sui normali elettrodomestici.
-
Page 23: Informazioni Per La Sicurezza
ITALIANO 1. INFORMAZIONI PER LA SICUREZZA Leggere attentamente le istruzioni fornite prima di in- stallare e utilizzare l'apparecchiatura. Il produttore non è responsabile se un'installazione ed un uso non corret- to dell'apparecchiatura provocano lesioni e danni. Te- nere sempre le istruzioni a portata di mano in caso di necessità... -
Page 24: Istruzioni Di Sicurezza
24 www.aeg.com • Non utilizzare un timer esterno o un sistema di con- trollo remoto distinto per mettere in funzione l'appa- recchiatura. • Non lasciare mai il piano di cottura incustodito duran- te la preparazione di cibi in quanto olio e grassi po- trebbero provocare un incendio. -
Page 25: Collegamento Elettrico
ITALIANO • Non installare l'apparecchiatura ac- • Accertarsi di non danneggiare la spina canto ad una porta o sotto una fine- e il cavo (ove previsti). Contattare il stra, per evitare che pentole calde ca- Centro di Assistenza o un elettricista dano dall'apparecchiatura quando la qualificato per sostituire un cavo dan- porta o la finestra sono aperte. -
Page 26: Pulizia E Manutenzione
26 www.aeg.com • Non accendere l'apparecchiatura con • Fare attenzione a non lasciar cadere le mani bagnate o se entra a contatto oggetti o pentole sull'apparecchiatu- con dell'acqua. ra. La superficie si potrebbe danneg- giare. • Non appoggiare posate o coperchi sulle zone di cottura. -
Page 27: Descrizione Del Prodotto
ITALIANO 2.4 Smaltimento • Staccare la spina dall'alimentazione elettrica. AVVERTENZA! • Tagliare il cavo di rete e smaltirlo. Rischio di lesioni o soffocamento. • Appiattire i tubi del gas esterni. • Contattare le autorità locali per riceve- re informazioni su come smaltire cor- rettamente l'apparecchiatura. - Page 28 28 www.aeg.com 3.4 Disposizione del pannello dei comandi Utilizzare i tasti sensore per mettere in funzione l'apparecchiatura. I display, gli indicatori e i segnali acustici mostrano quali funzioni sono attive. tasto sensore funzione Accende e spegne il piano di cottura...
-
Page 29: Utilizzo Quotidiano
ITALIANO Display Descrizione Lo spegnimento automatico è attivo 3.6 Indicatore di calore Le zone di cottura a induzione generano il calore direttamente sul fondo della residuo pentola. Il piano in vetroceramica viene riscaldato dal calore residuo della pento- AVVERTENZA! Il calore residuo può essere causa di ustioni! 4. - Page 30 30 www.aeg.com Nel caso in cui il bruciatore si do- • Sono state utilizzate pentole non ido- vesse spegnere, ruotare la mano- nee. Il simbolo si accende e la zona pola di controllo in posizione Off di cottura si spegne automaticamente per cercare di riaccendere il bru- dopo 2 minuti.
- Page 31 ITALIANO de la spia della zona di cottura deside- rata. • Avviamento del timer per il conto alla rovescia: sfiorare il tasto del ti- mer per impostare il tempo ( minuti). Quando il display della zona di cottura lampeggia più lentamente, viene effettuato il conto alla rovescia del tempo.
-
Page 32: Consigli E Suggerimenti Utili
32 www.aeg.com • Sfiorare il tasto non interrompe la funzione timer. per 4 secondi. Il La funzione blocca l'intero pannello simbolo si accende. comandi, escluso il tasto sensore • Spegnere il piano cottura con Disinserimento della sicurezza bambini 4.10 Blocco/Sblocco del •... - Page 33 ITALIANO AVVERTENZA! Materiale delle pentole Assicurarsi che i fondi delle pen- • corretto: ghisa, acciaio, acciaio smal- tole non poggino sulle manopole tato, acciaio inox e con fondo multiplo di regolazione. Se le manopole (indicate come idonee dal costrutto- di regolazione si trovano al di re).
- Page 34 34 www.aeg.com Livel- Usare per: Tem- Suggerimenti lo di tenza Rassodare: omelette, uova stra- 10-40 Coprire con un coperchio pazzate Cuocere riso e pietanze a base 25-50 Aggiungere una quantità di di latte, riscaldare pietanze liquido almeno doppia a pronte...
-
Page 35: Pulizia E Cura
ITALIANO 6. PULIZIA E CURA AVVERTENZA! Come eliminare lo sporco: Fare riferimento ai capitoli sulla – Togliere immediatamente: plasti- sicurezza. ca fondente, pellicola in plastica, e alimenti contenenti zucchero. Usa- Pulire l'apparecchio dopo ogni utilizzo. re un raschiatore a lama speciale Usare sempre pentole con il fondo puli- per vetroceramica. -
Page 36: Risoluzione Dei Problemi
36 www.aeg.com 7. RISOLUZIONE DEI PROBLEMI Problema Possibili cause e rimedi Non è possibile accen- • Sono stati sfiorati 2 o più tasti sensore contempo- dere l'apparecchio o raneamente. Sfiorare un tasto sensore alla volta. metterlo in funzione. • Il pannello dei comandi è bagnato o presenta macchie di unto. - Page 37 ITALIANO Problema Possibili cause e rimedi L'apparecchio presenta un errore dovuto all'esauri- si accende mento dell'acqua in ebollizione nelle pentole o al- l'uso di pentole non idonee. È attiva la protezione da surriscaldamento della zona di cottura. Lo spe- gnimento automatico è attivo. Spegnere l'apparecchiatura.
-
Page 38: Installazione
38 www.aeg.com MOD. MOD. MOD. TYPE PROD.NO. 230V-50Hz PROD.NO. PROD.NO. 0049 SER.NO. IP20 SER.NO SER.NO 03 IT DATA DATA MADE IN ITALY MODEL MODEL Attaccarla sul Foglietto di garanzia Attaccarla sul libretto istruzioni ed inviare questa parte Attaccarla sul Foglietto di garanzia e conservare questa parte 8. - Page 39 ITALIANO Accertarsi che la pressione del quelli richiesti per il tipo di gas utiliz- gas di alimentazione dell'appa- zato (vedere la tabella della sezione recchiatura sia conforme ai valori "Dati tecnici"). consigliati. Se la pressione fornita Rimontare i componenti, seguendo non ha il valore specificato, è...
- Page 40 40 www.aeg.com 8.4 Collegamento elettrico • Non lasciar surriscaldare il cavo di ali- mentazione oltre i 90°C. • Verificare che la tensione nominale e il Per evitare il contatto tra il cavo e l'appa- tipo di corrente della rete di distribu-...
- Page 41 ITALIANO min. 38 mm min. 2 mm min. 12 mm min. 2 mm Se si installa il piano di cottura Spazio per gli allacciamenti sotto a una cappa da cucina, fare riferimento alle istruzioni per l'in- Mobile da incasso con forno stallazione della cappa per la di- stanza minima tra le apparecchia- Le dimensioni del piano cottura devono...
-
Page 42: Dati Tecnici
42 www.aeg.com 9. DATI TECNICI Dimensioni del piano cottura Dimensioni del piano cottura Larghezza: 590 mm Larghezza: 560 mm 0/+1 Lunghezza: 520 mm Lunghezza: 490 mm 0/+1 Ingresso calore Bruciatore semi rapido: 1,9 kW Bruciatore rapido: 2,9 kW Zona di cottura posteriore:... - Page 43 ITALIANO NORMALE 28-30 ini. 37 mbar BRUCIATORE POTENZA mbar 1/100 mm Rapido 10. CONSIDERAZIONI AMBIENTALI smaltire le apparecchiature che Riciclare i materiali con il simbolo Buttare l'imballaggio negli appositi riportano il simbolo insieme ai contenitori per il riciclaggio. normali rifiuti domestici. Portare il Aiutare a proteggere l’ambiente e la prodotto al punto di riciclaggio più...
- Page 44 www.aeg.com/shop...
Need help?
Do you have a question about the HD634170NB and is the answer not in the manual?
Questions and answers