Table of Contents
Advertisement
Quick Links
Advertisement
Table of Contents

Related Manuals for AEG HD955100NB2


Summary of Contents for AEG HD955100NB2
- Page 1 HD955100NB User Manual USER MANUAL...
-
Page 2: Table Of Contents
10. ENERGY EFFICIENCY..................... 27 FOR PERFECT RESULTS Thank you for choosing this AEG product. We have created it to give you impeccable performance for many years, with innovative technologies that help make life simpler features you might not find on ordinary appliances. Please spend a few minutes reading to get the very best from it. - Page 3 ENGLISH usage. Always keep the instructions in a safe and accessible location for future reference. 1.1 Children and vulnerable people safety This appliance can be used by children aged from 8 • years and above and persons with reduced physical, sensory or mental capabilities or lack of experience and knowledge if they have been given supervision or instruction concerning the use of the appliance in a...
- Page 4 CAUTION: The cooking process has to be supervised. • A short term cooking process has to be supervised continuously. WARNING: Danger of fire: Do not store items on the • cooking surfaces. Metallic objects such as knives, forks, spoons and lids •...
-
Page 5: Safety Instructions
ENGLISH WARNING: Use only hob guards designed by the • manufacturer of the cooking appliance or indicated by the manufacturer of the appliance in the instructions for use as suitable or hob guards incorporated in the appliance. The use of inappropriate guards can cause accidents. - Page 6 • Make sure not to cause damage to • The information about the gas supply the mains plug (if applicable) or to the is on the rating plate. mains cable. Contact our Authorised • This appliance is not connected to a...
- Page 7 ENGLISH • The vapours that very hot oil releases • This appliance is for cooking can cause spontaneous combustion. purposes only. It must not be used for • Used oil, that can contain food other purposes, for example room remnants, can cause fire at a lower heating.
-
Page 8: Installation
• Flat the external gas pipes. 3. INSTALLATION However, if the room has a door which WARNING! opens directly to the outside no air vent Refer to Safety chapters. is required even if the volume is between 5 m³ and 11 m³. - Page 9 ENGLISH The manufacturer will not accept liability, CAUTION! should the above instructions or any of Make sure that the gas the other safety instructions incorporated supply pressure of the in this instruction booklet be ignored. appliance obeys the On the end of the shaft, which includes recommended values.
- Page 10 If the supply gas pressure is changeable of clamps fixed to the side of the or different from the necessary pressure, cabinet, in order to avoid any contact you must fit an applicable pressure with the equipment beneath the adjuster on the gas supply pipe.
- Page 11 ENGLISH 3.10 Assembly WARNING! A cut off plug inserted into a 13 amp socket is a serious shock hazard. Ensure that the cut off plug is disposed of safely. min. 650mm min. 3.8 Replacement of the 450mm connection cable The replacement of electric min.
- Page 12 CAUTION! Install the appliance only on a worktop with a flat surface. 3.11 Possibilities for insertion R 5 mm 600 mm Kitchen unit with oven The electrical connection of the hob and 490 mm 830 mm min. the oven must be installed separately for...
-
Page 13: Product Description
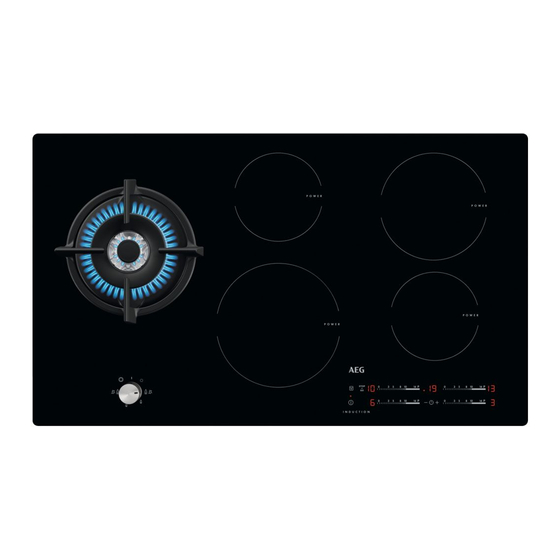
ENGLISH 4. PRODUCT DESCRIPTION 4.1 Cooking surface layout Dual burner Induction cooking zones 145 mm 180 mm Control panel Control knob 145 mm 210 mm 4.2 Control knob Symbol Description Symbol Description minimum gas supply no gas supply / off posi- internal crown tion ignition position / maxi-... - Page 14 Sensor Function Comment field STOP+GO To activate and deactivate the function. Heat setting display To show the heat setting. Timer indicators of cook- To show for which zone you set the time. ing zones Timer display To show the time in minutes.
-
Page 15: Daily Use
ENGLISH 4.5 OptiHeat Control (3 step The induction cooking zones produce the heat necessary for the cooking Residual heat indicator) process directly in the bottom of the cookware. The glass ceramic is heated by WARNING! the heat of the cookware. There is a risk of burns from residual heat. - Page 16 CAUTION! When you refit the grate of In the absence of electricity the Dual burner, make sure you can ignite the burner to match the hollow part of without electrical device; in the grate with the reference this case approach the...
- Page 17 ENGLISH The heat setting First set the heat setting for the cooking zone then set the function. To set or change the heat setting: To set the cooking zone: touch Touch the control bar at the correct heat again and again until the indicator of a setting or move your finger along the necessary cooking zone comes on.
- Page 18 To activate the function: activate the . The indicator of the cooking zone goes out. hob with . Do not set the heat setting. Touch for 4 seconds. comes on. Minute Minder You can use this function as a Minute...
-
Page 19: Hints And Tips
ENGLISH • The function activates when the total electricity loading of the cooking zones connected to a single phase exceeds 3700 W. • The function decreases the power to the other cooking zones connected to the same phase. • The heat setting display of the reduced zones changes between two levels. - Page 20 • crack noise: cookware is made of CAUTION! different materials (sandwich Liquids spilt during cooking construction). can cause the glass to break. • whistle sound: you the cooking zone with high power level and the 6.2 Diameters of cookware cookware is made of different materials (sandwich construction).
-
Page 21: Care And Cleaning
ENGLISH Heat setting Use to: Time Hints (min) 7 - 9 Cook larger quantities of food, 60 - 150 Up to 3 l liquid plus ingredi- stews and soups. ents. 9 - 12 Gentle fry: escalope, veal cor- as nec- Turn halfway through. -
Page 22: Troubleshooting
7.4 Cleaning the spark plug 7.5 Periodic maintenance This feature is obtained through a Speak to your local Authorised Service ceramic ignition candle with a metal Centre periodically to check the electrode. Keep these components well conditions of the gas supply pipe and clean to prevent difficult lighting and the pressure adjuster, if fitted. - Page 23 ENGLISH Problem Possible cause Remedy Automatic Heat Up function The zone is hot. Let the zone become suffi- does not operate. ciently cool. The highest heat setting is The highest heat setting has set. the same power as the func- tion.
- Page 24 Problem Possible cause Remedy There is an error in the hob Deactivate the hob. Remove comes on. because a cookware boiled the hot cookware. After ap- dry. Automatic Switch Off proximately 30 seconds, acti- and the overheating protec- vate the zone again. If the tion for the zones operate.
-
Page 25: Technical Data
ENGLISH 8.3 Labels supplied with the accessories bag Stick the adhesive labels as indicated below: MOD. MOD. MOD. TYPE PROD.NO. IP20 PROD.NO. PROD.NO. SER.NO. 0049 SER.NO SER.NO 03 IT DATA DATA MADE IN ITALY A. Stick it on Guarantee Card and send C. - Page 26 The power of the cooking zones can be For optimal cooking results use different in some small range from the cookware no larger than the diameter in data in the table. It changes with the the table. material and dimensions of the cookware.
-
Page 27: Energy Efficiency
ENGLISH 9.6 Gas burners for LPG G30/G31 28-30/37 mbar BURNER NORMAL MINIMUM INJECTOR NOMINAL GAS FLOW g/h POWER kW POWER kW MARK G30 28-30 G31 37 mbar mbar Dual 1,42 46 / 72 Dual (inter- 0,33 nal crown) Data in the table is specified for Malta. - Page 28 EN 60350-2 - Household electric cooking appliances - Part 2: Hobs - Methods for measuring performance 10.2 Energy saving • Before use, make sure that the burners and pan supports are assembled correctly. • Use cookware with diameters applicable to the size of burners.
- Page 29 ENGLISH...
- Page 30 www.aeg.com...
- Page 31 ENGLISH...
- Page 32 www.aeg.com/shop...
Need help?
Do you have a question about the HD955100NB2 and is the answer not in the manual?
Questions and answers